Board and Batten
There are many different styles of board and batten from simple to ornate and in between. Let me show you how we installed a more decorative board and batten in our dining room giving the space some elevated design.
Adding board and batten to walls is not a new design trend but I love seeing it used in the modern home. Board and batten has been around for a long time and I always love adding home decor from past historical, timeless designs into our home today. If you stick with timeless elements then your home will never feel dated.
Board and batten is a great way to upgrade any room in your home because it adds immediate architectural interest and keeps it interesting and fresh. Why have boring walls when you can create something truly unique for your home? You can have this installed by a professional but with a little knowledge and some tools you can DIY board and batten yourself and be pleased with the results.
Affiliate links are provided below. Please see my full disclosure.

What is Board and Batten
Board and batten is both an exterior siding treatment and an interior wall paneling treatment that uses narrow strips of wood placed over the joints of wide boards for a layered effect. This was used in the past to make a home warmer in the winter months. We would use the term today as more energy efficient.
For interior board and batten you are not placing the boards over joints, but instead using it more as a decorative wall treatment in the modern home since we have finished walls, as a rule.
In historical terms, this was also referred to as “barn siding” due to its informal charm.

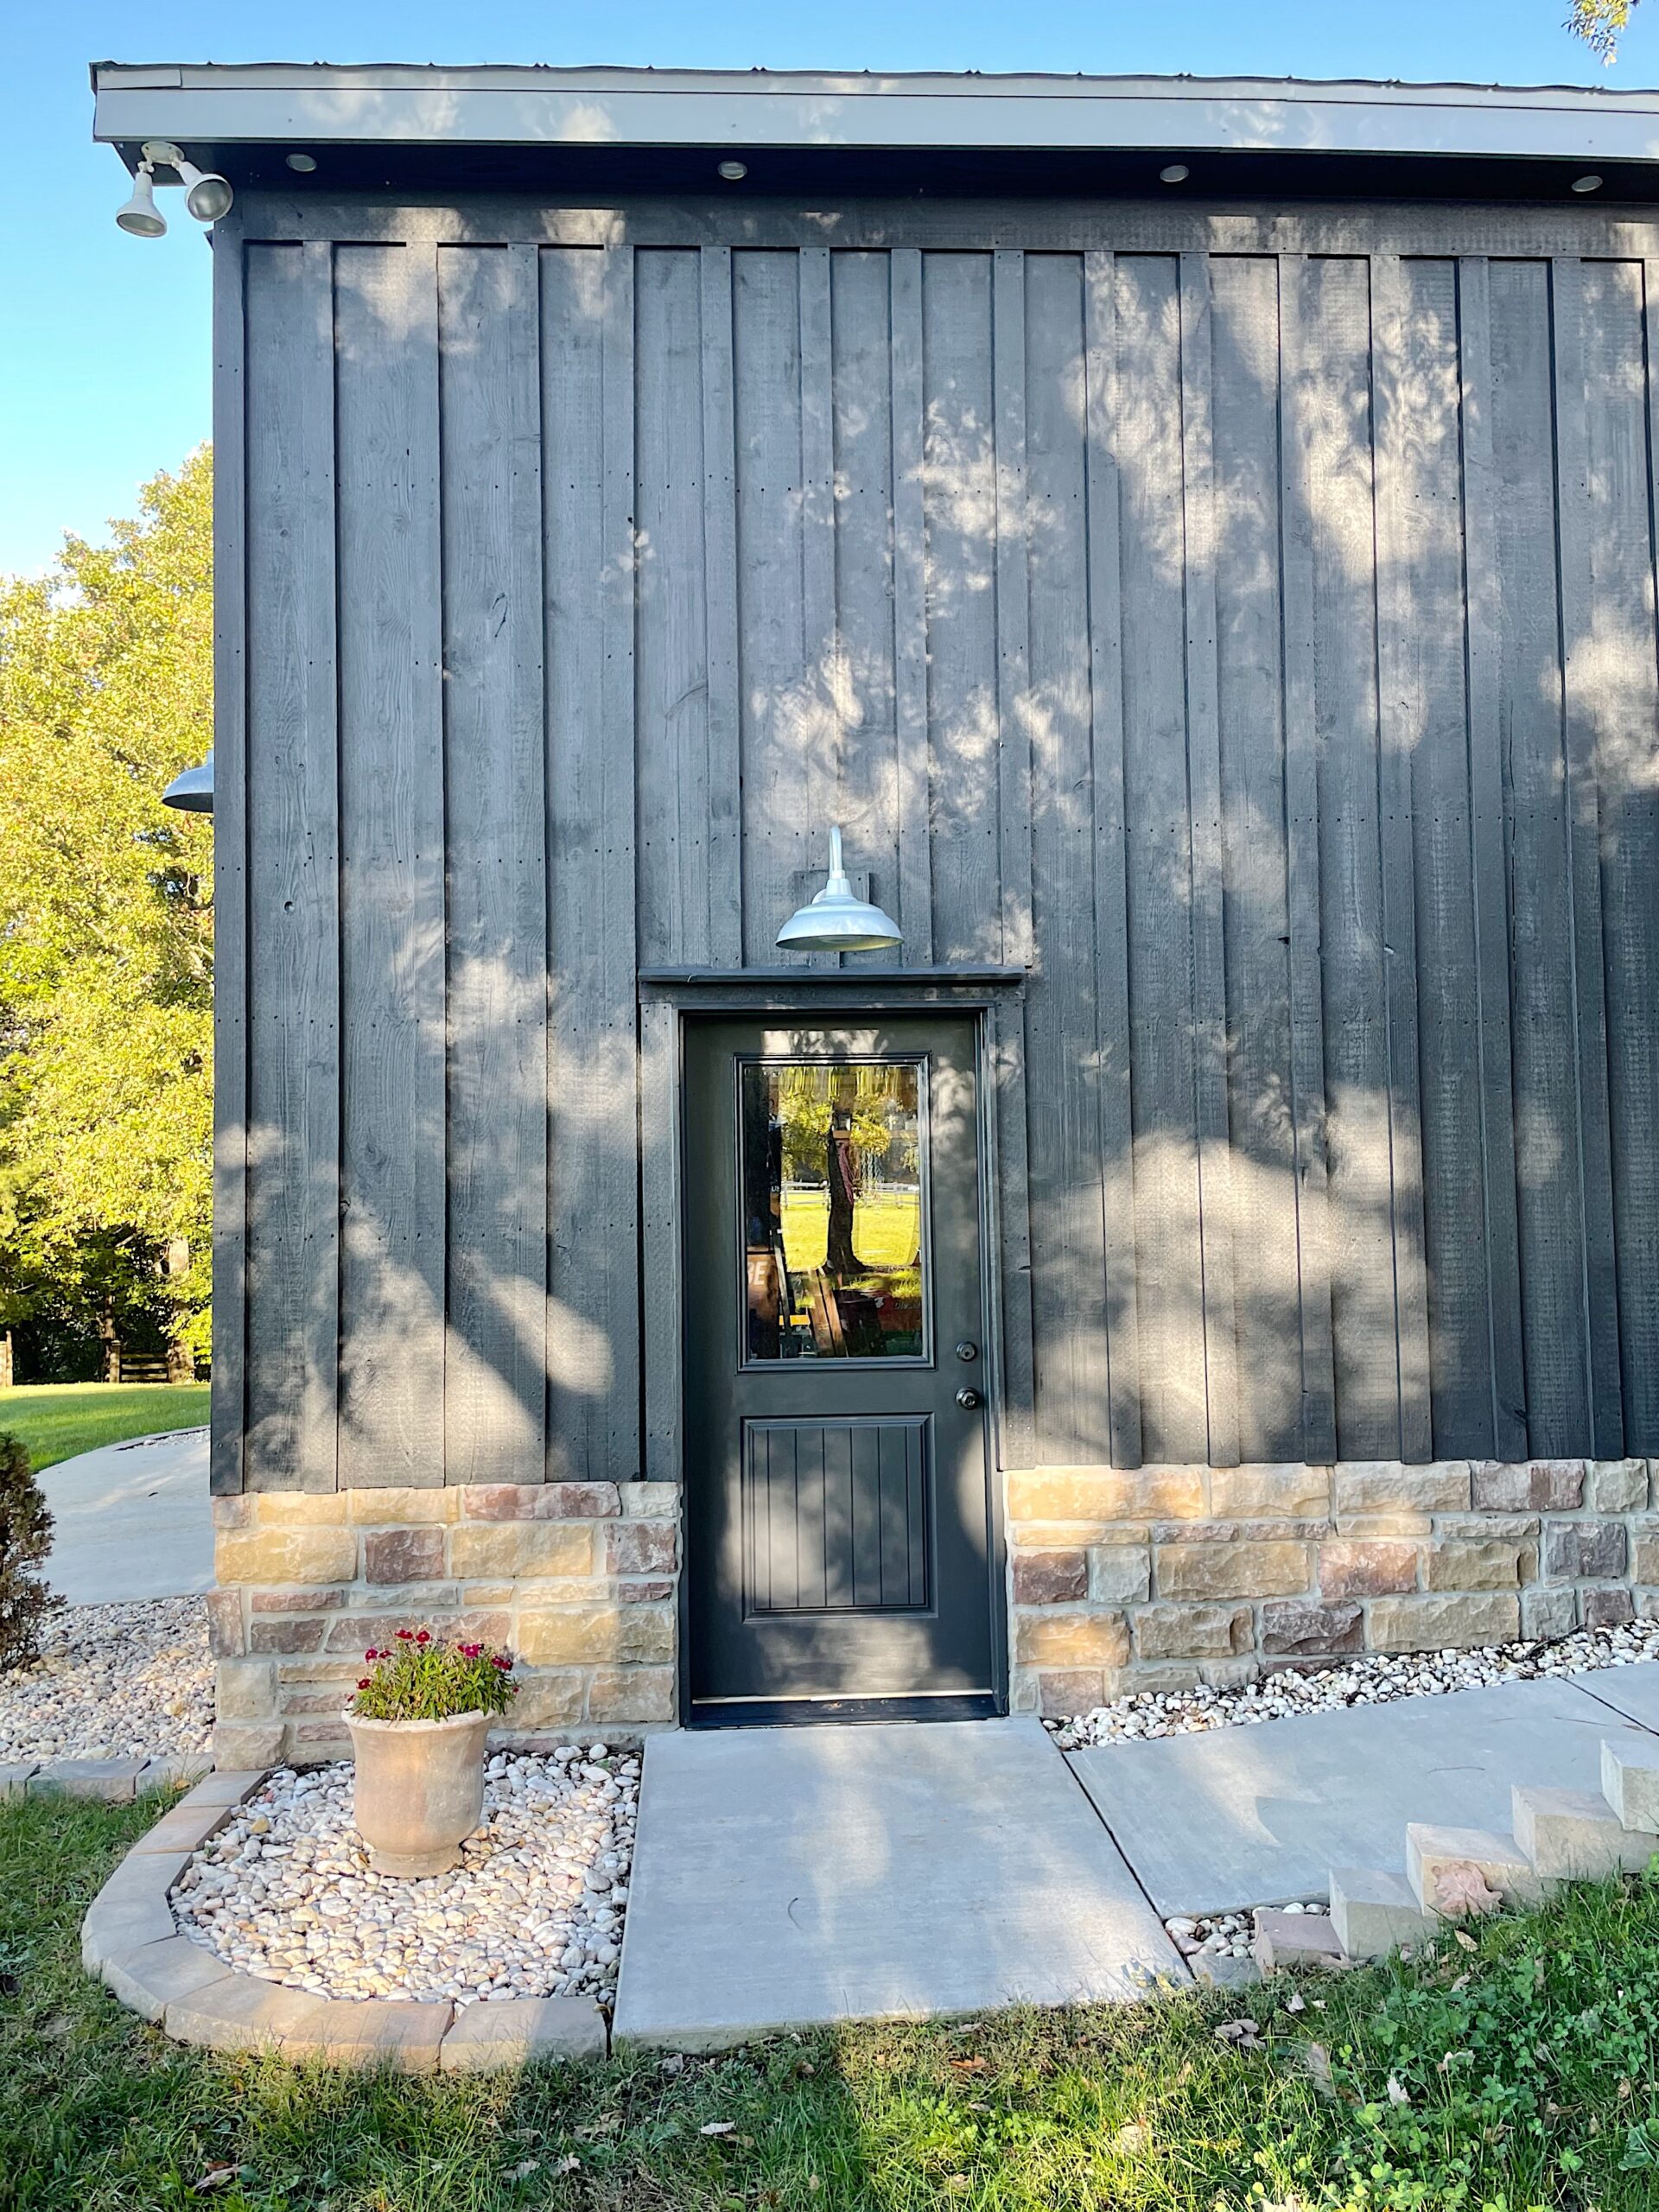
Exterior Board and Batten
Board and batten can also be used as exterior siding. A lot of modern farm houses being built today are using a board and batten siding finish and it’s gorgeous. Our barndominium has a wood board and batten exterior and I love it! We painted it this lovely shade of charcoal gray paint and we couldn’t be happier.
Interior Board and Batten
Using this wall treatment inside your home is also gorgeous and adds so much character to a room. You can use board and batten in a variety of spaces to make a room really stand out. Board and batten can be simple or more ornate. The batten strips can be wide or narrow; the design is really up to you.
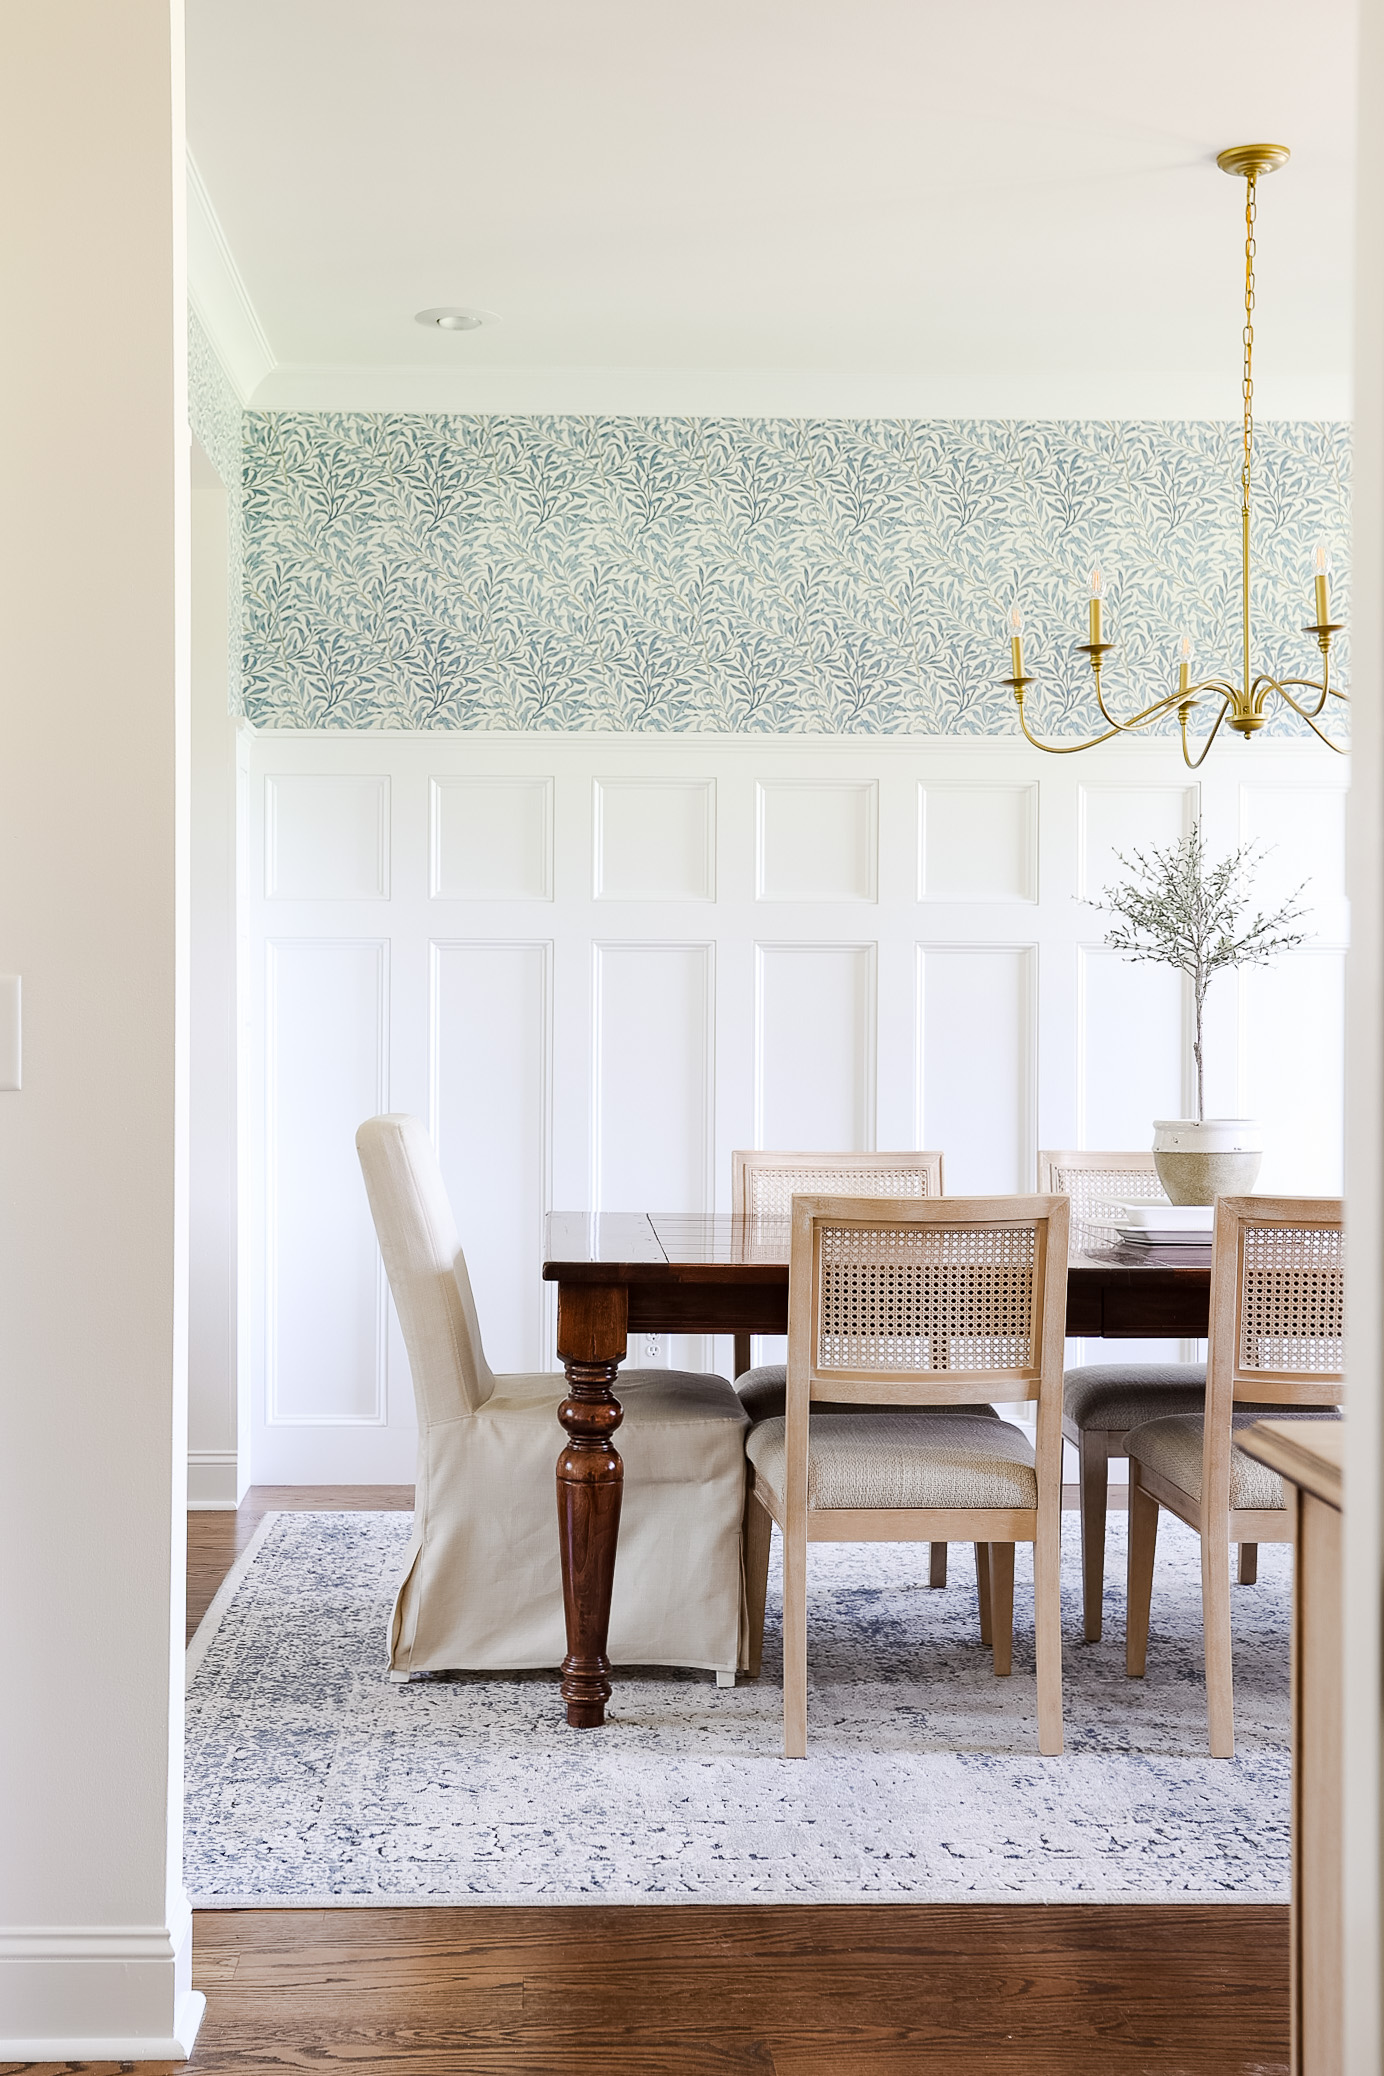
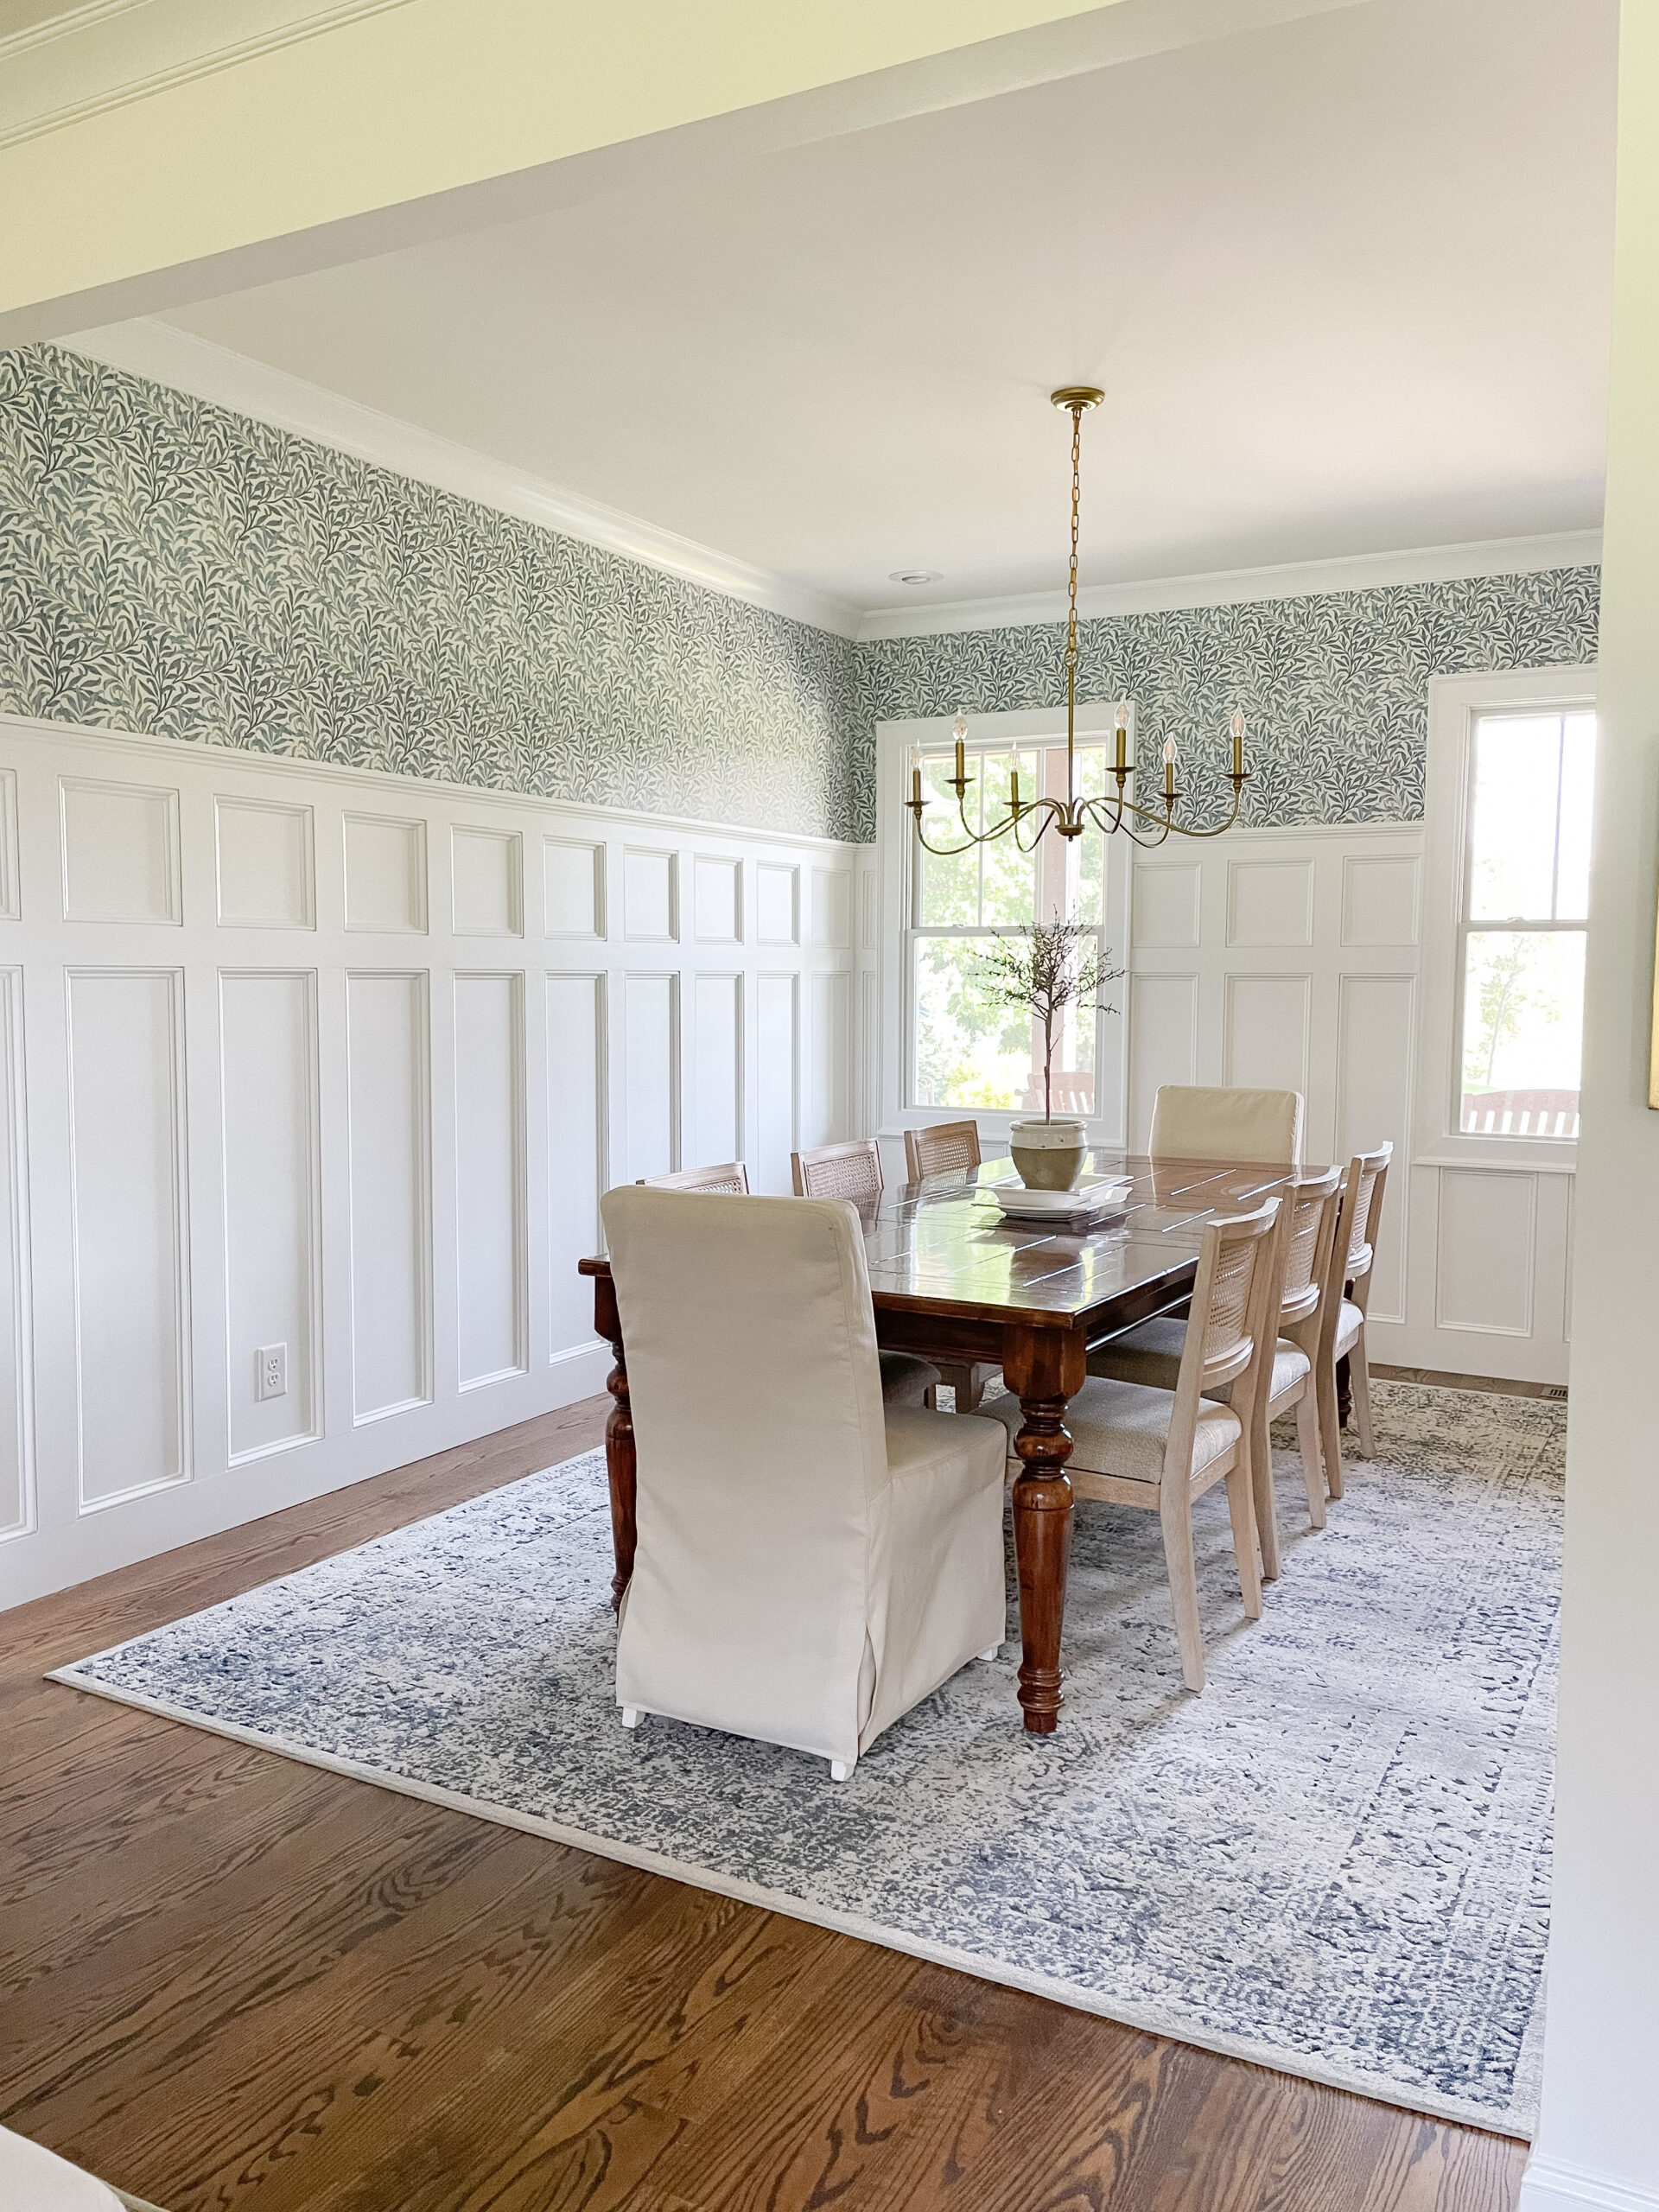
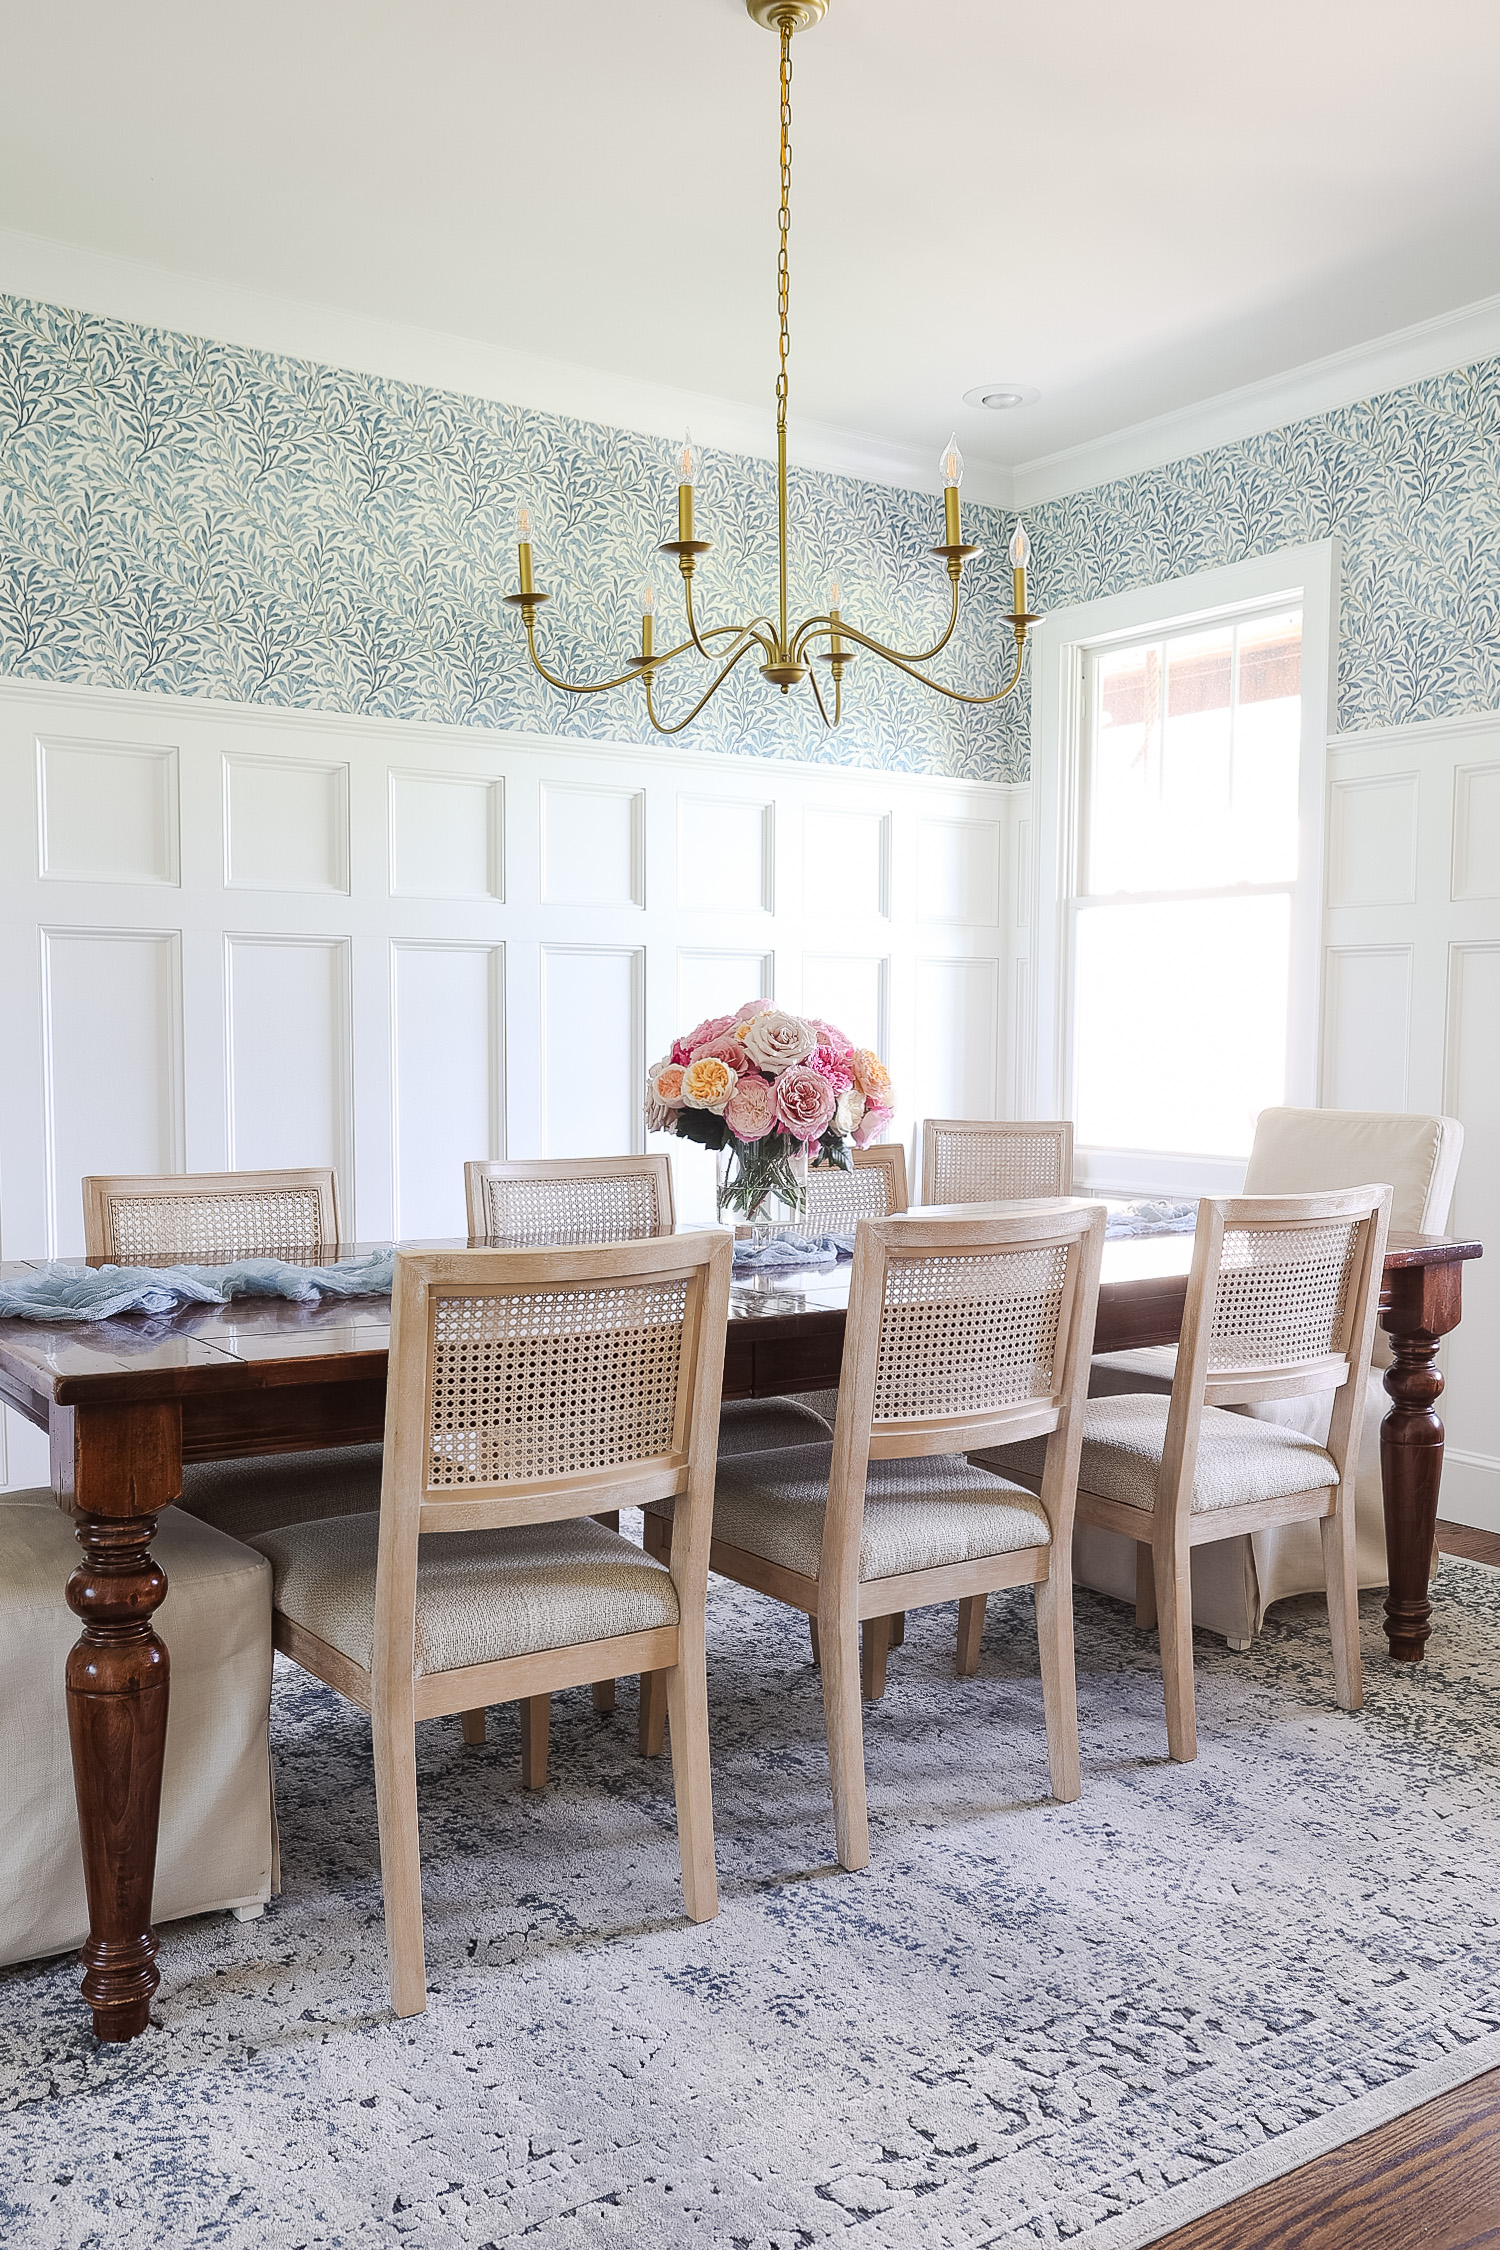
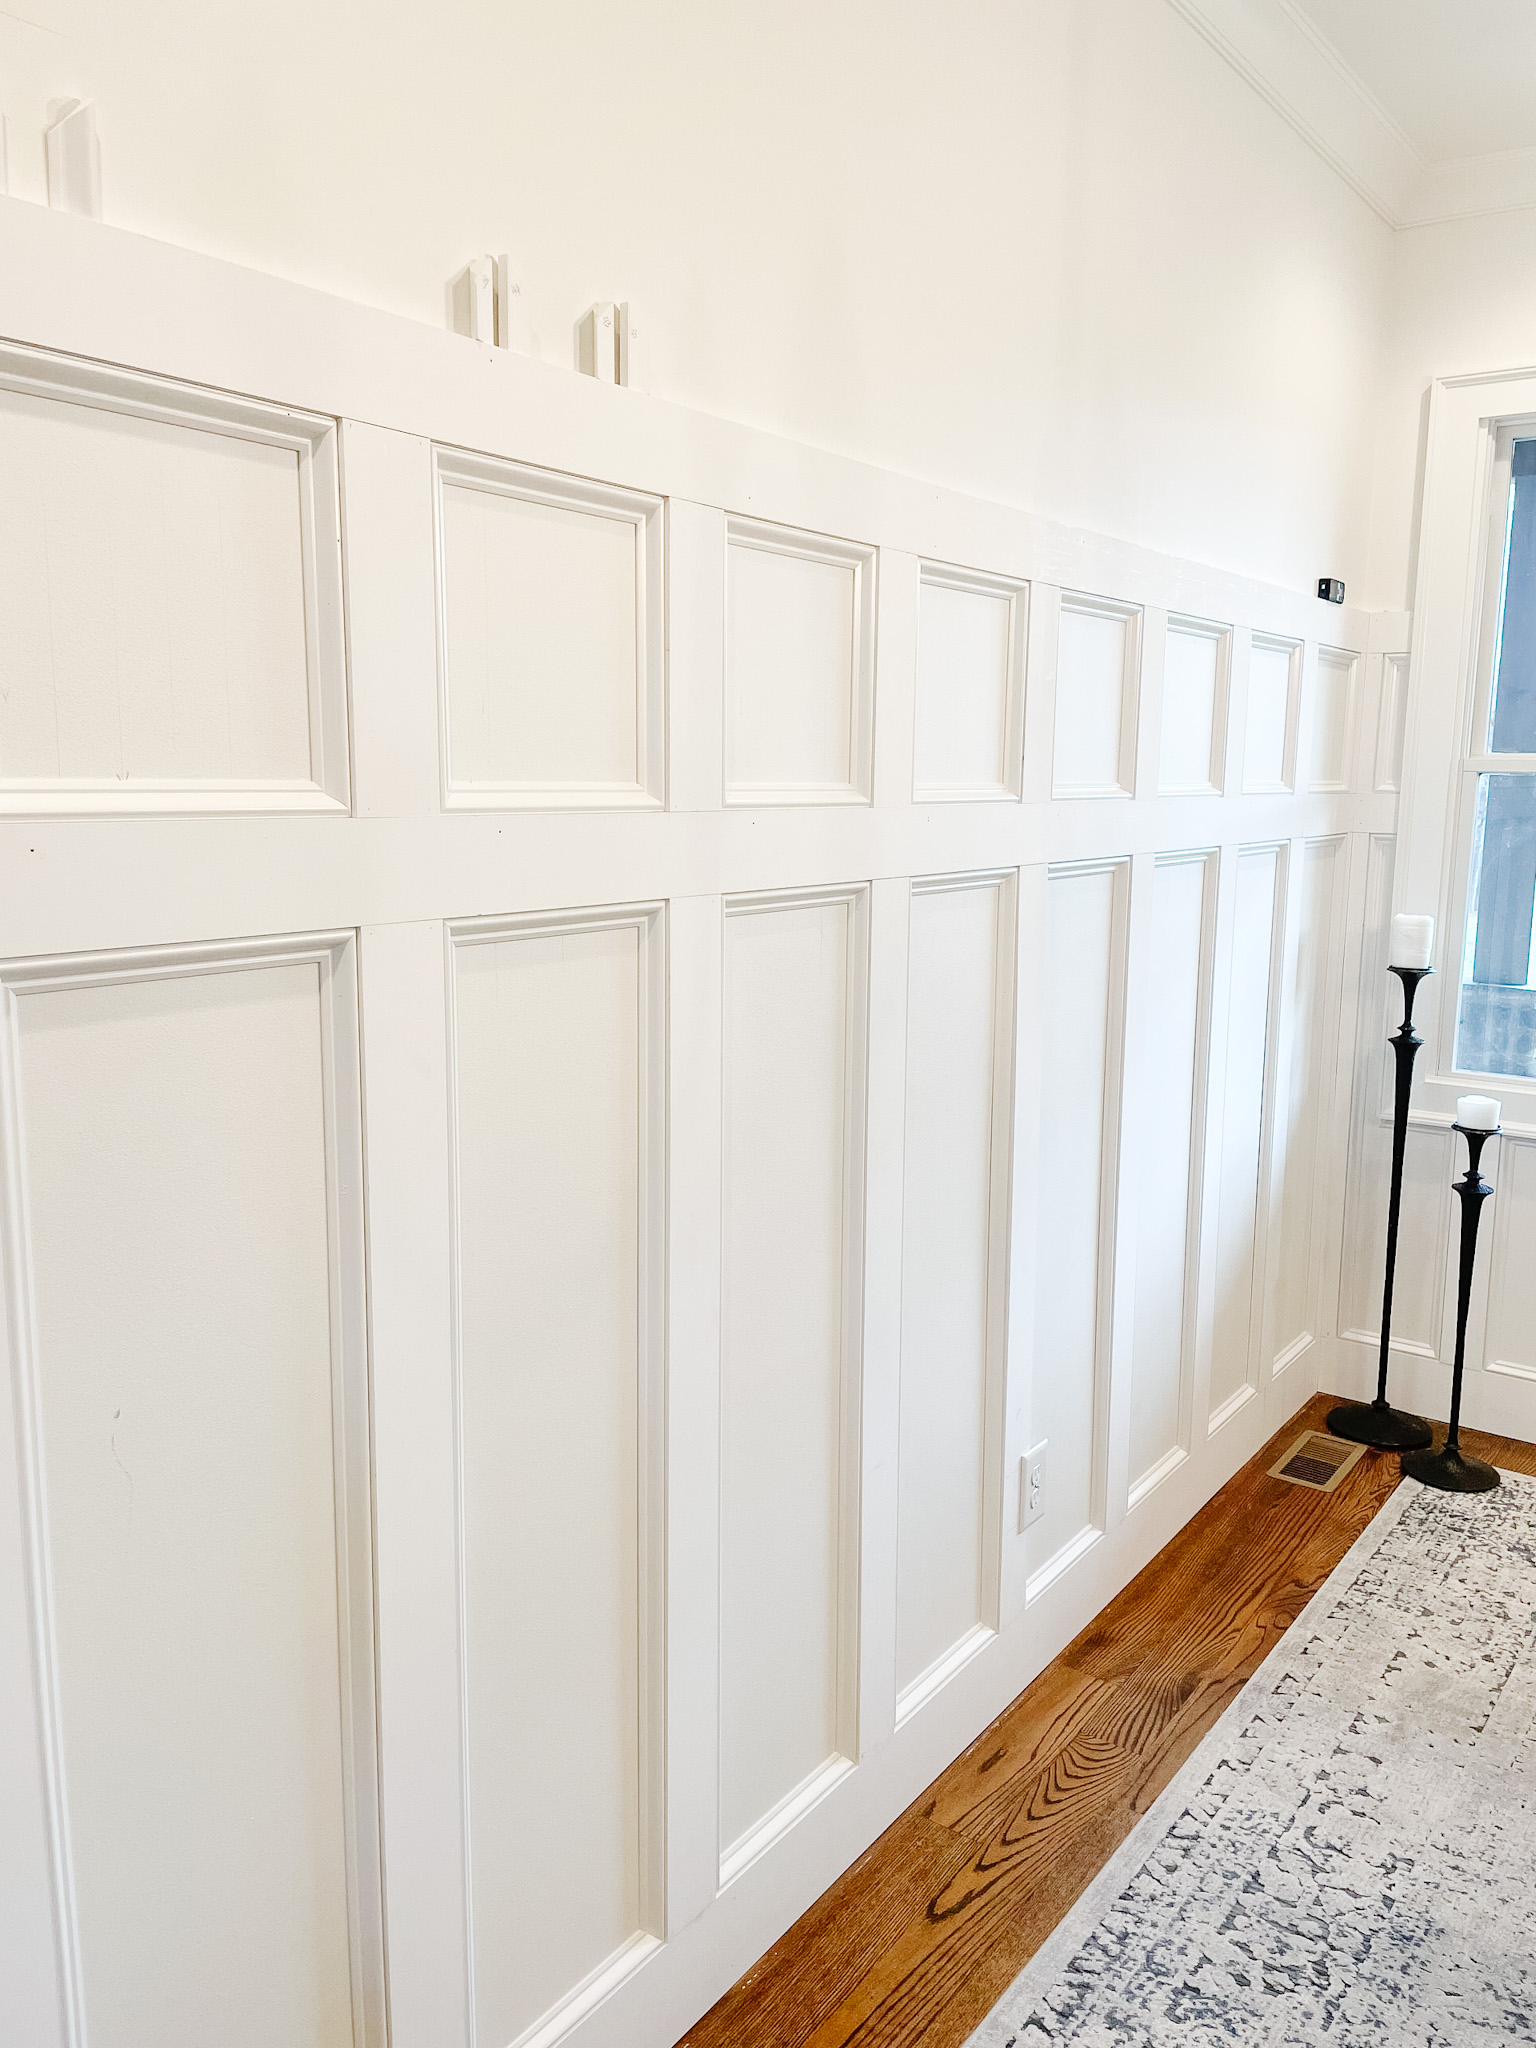
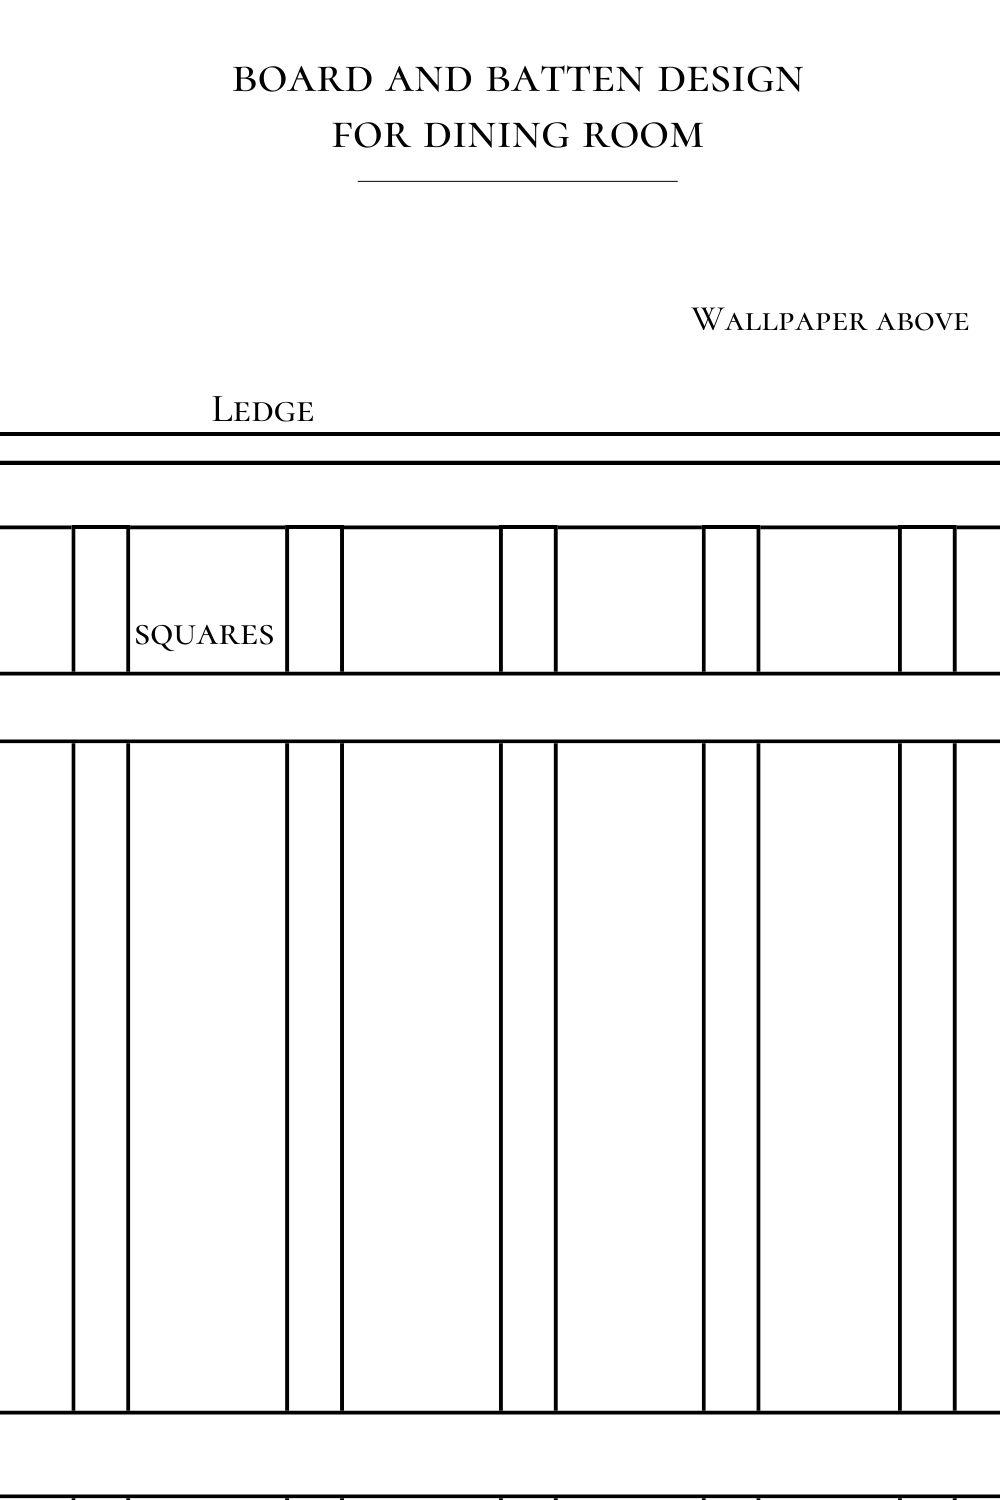
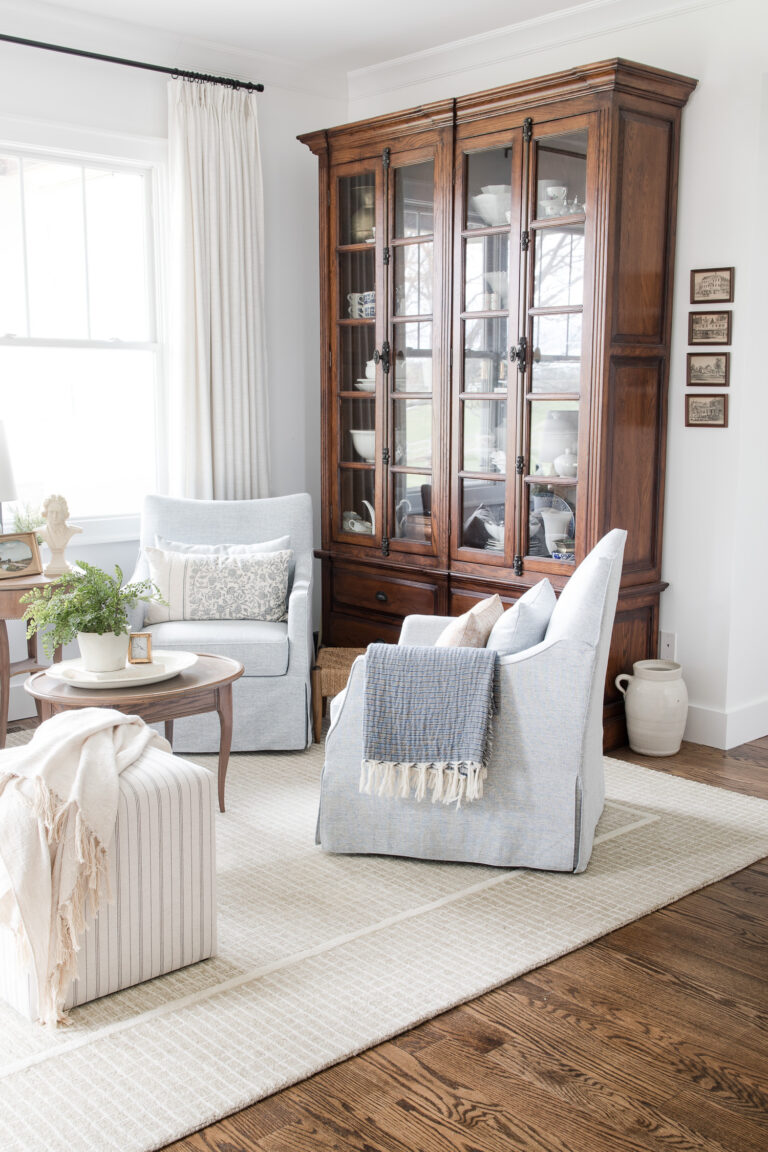
For our dining room, I wanted something a little more ornate with a double layer of board and batten stacked on top of one another to create a separate box above with room for wallpaper above. I have seen this style in historic homes and love it and it was a perfect fit for our dining room. The style was a little more tedious because I wanted boxes above and not rectangles so determining the spacing got tricky. But more on that in a moment.
Where to Use Board and Batten
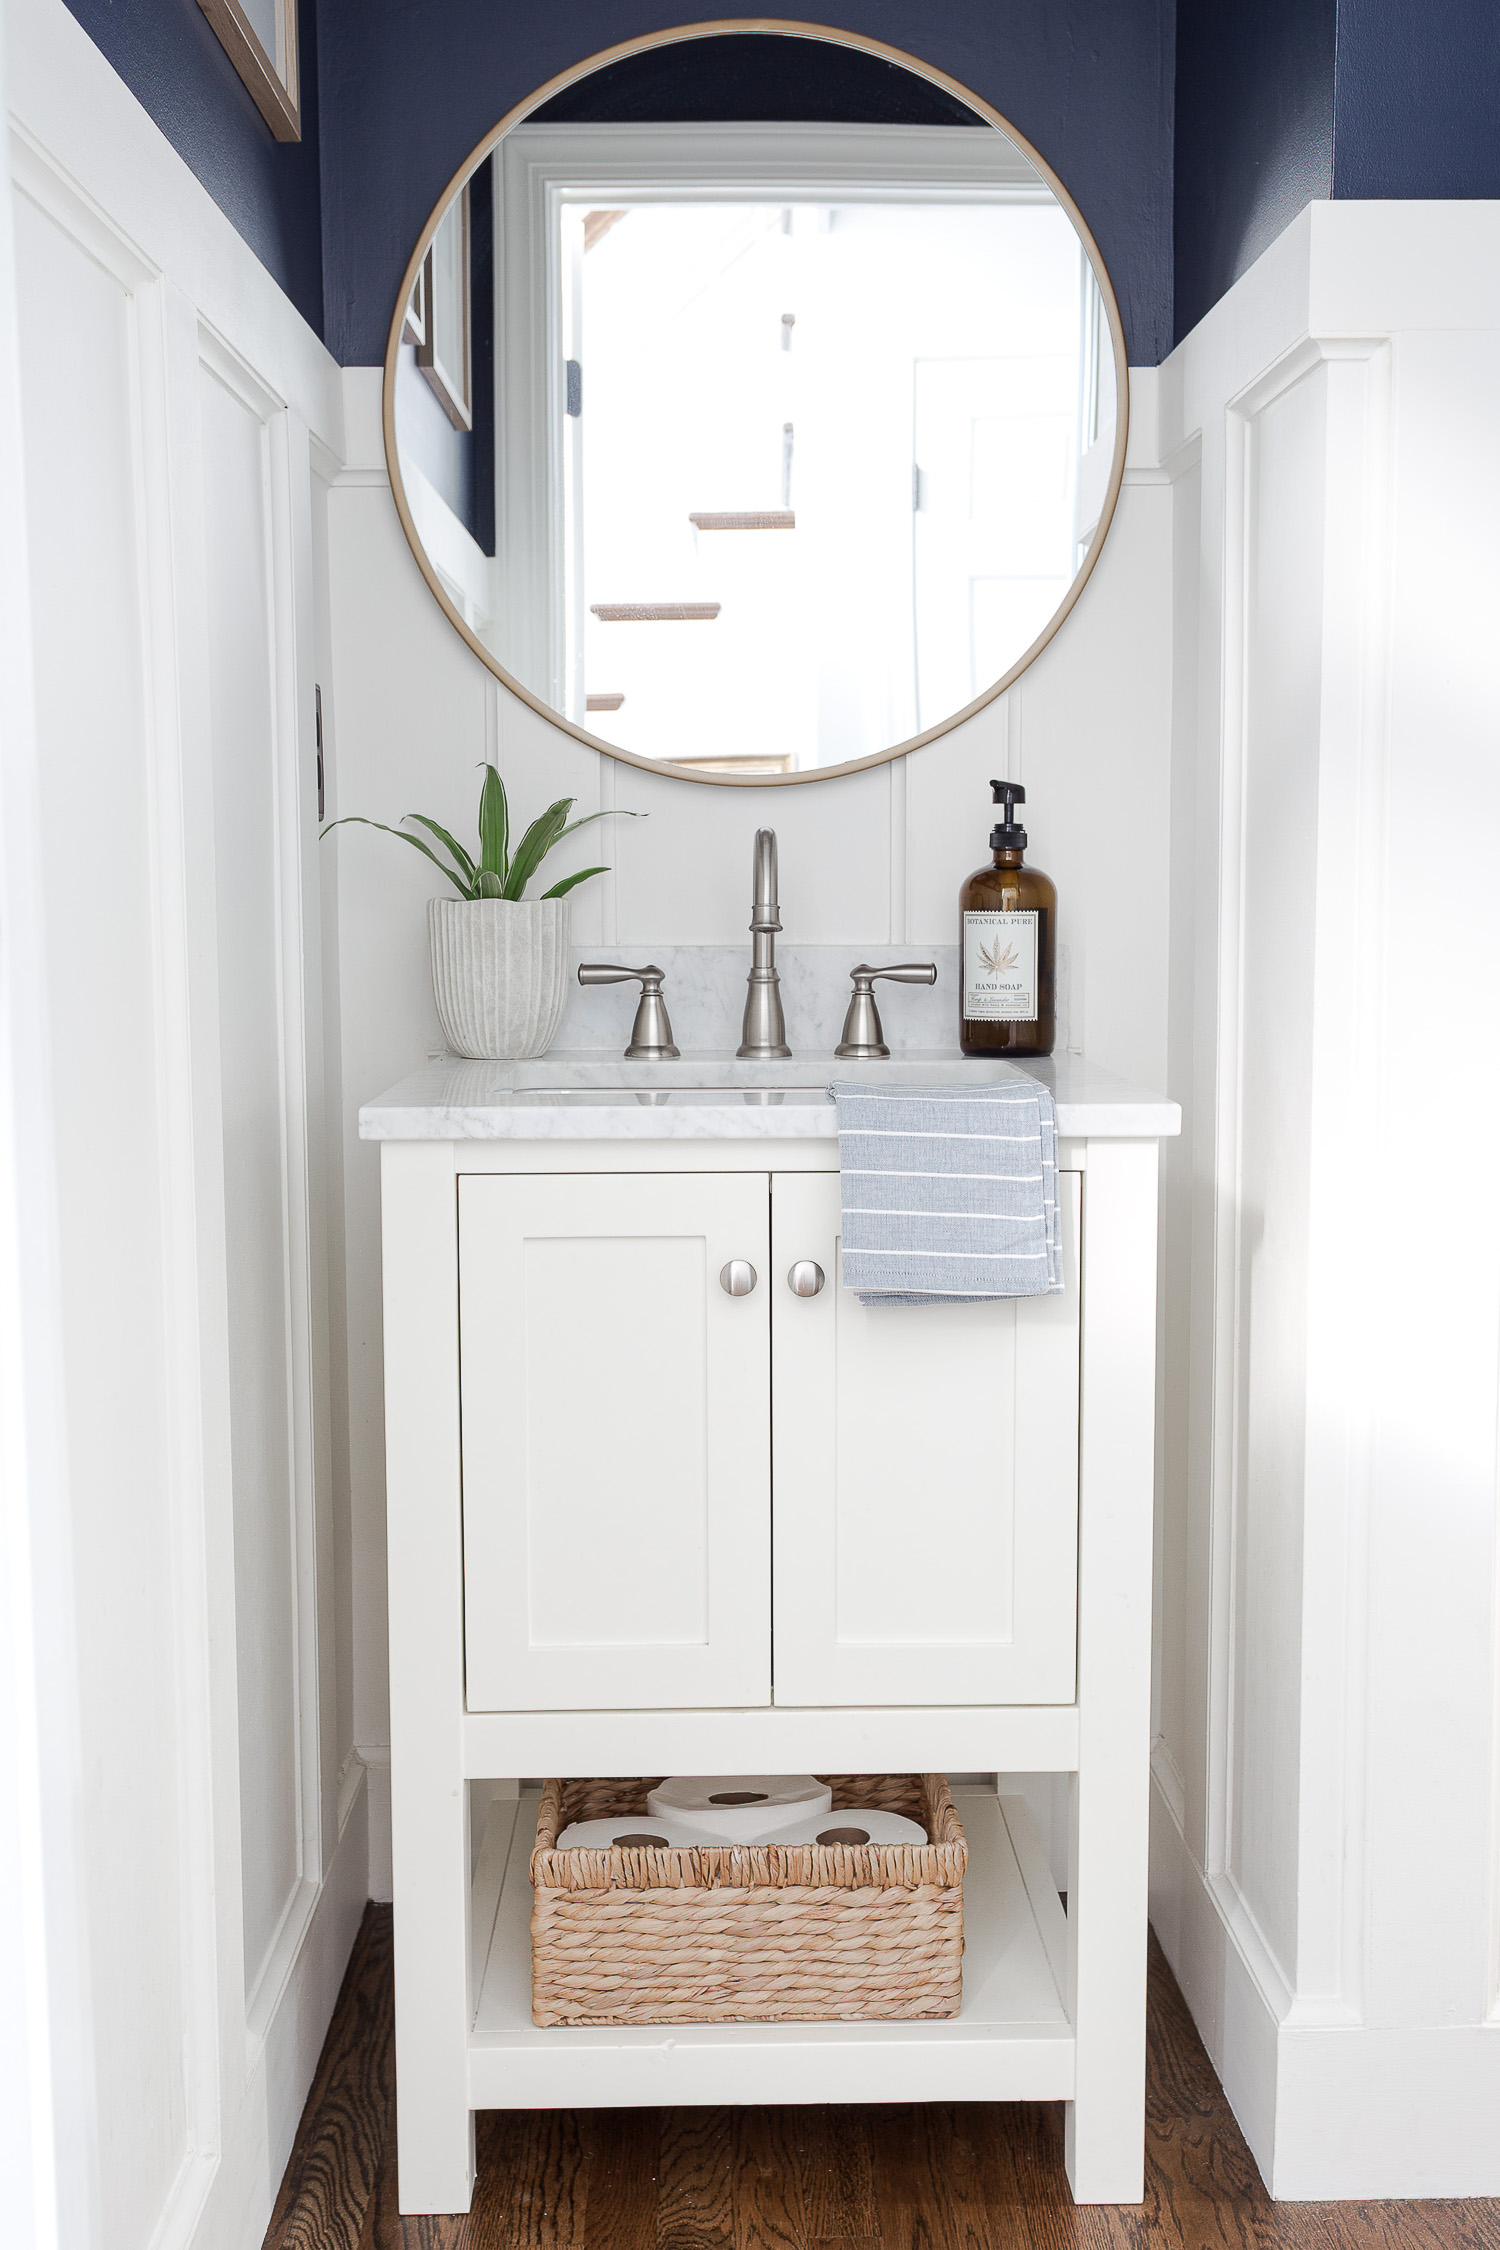
You can use board and batten in any room you like. In our previous home we added this style wall trim to our powder room and it made the space so much more elevated. We used a wider board with a little cove moulding for the inset to dress it up a bit, but you can have your board and batten be more simple if you like.
Here we just had one layer of trim instead of two like we did in our dining room. Even though this is a little more decorative than simple board and batten; having just one layer made it easy to space everything evenly.
Add Board and Batten to:
- Kids Room
- Primary Bedroom
- Hallway
- Foyer
- Bathroom
- Dining Room
- Laundry Room
- Stairway
Since there are many different board and batten styles, you can add it to any space you would like and have it fit the design of that room. Create your custom board and batten to go along with your interior decor. With our more detailed board and batten in the dining room; I plan to add a more simple version to our son’s room once the addition is complete.
Board and Batten is Not Shiplap
Careful not to confuse board and batten with shiplap; they are not the same thing. I once said to a friend that I wanted to install vertical shiplap and they said, “you mean board and batten?” NO, that is not what I mean, as I do know the difference.
Shiplap is wooden boards of the same width with grooves that help each board fit together tightly, while board and batten refers to boards of different widths installed with space between, usually vertically.
You can install shiplap both vertically (more of a modern look) or horizontally (more of an historical farmhouse look), but board and batten and shiplap are their own styles of wall moulding perspectively and not one and the same.
How to Install Board and Batten
Now it’s time to delve into this project. I didn’t see a lot of board and batten tutorials that did a lot of detail and layered boxes so a lot of this we learned as we went. Taking the basic concepts of installing board and batten, we created our own style. Hope what we learned and created might help you with your DIY board and batten project.
Materials Needed:
- Paint
- Paint tools: roller, brush, tray and tape
- Drop cloth
- Batten boards
- Decorative moulding
- Brad nails
- Paintable Caulk
- Wood Filler
- Sandpaper
Tools Needed:
- Circular saw
- Brad nailer
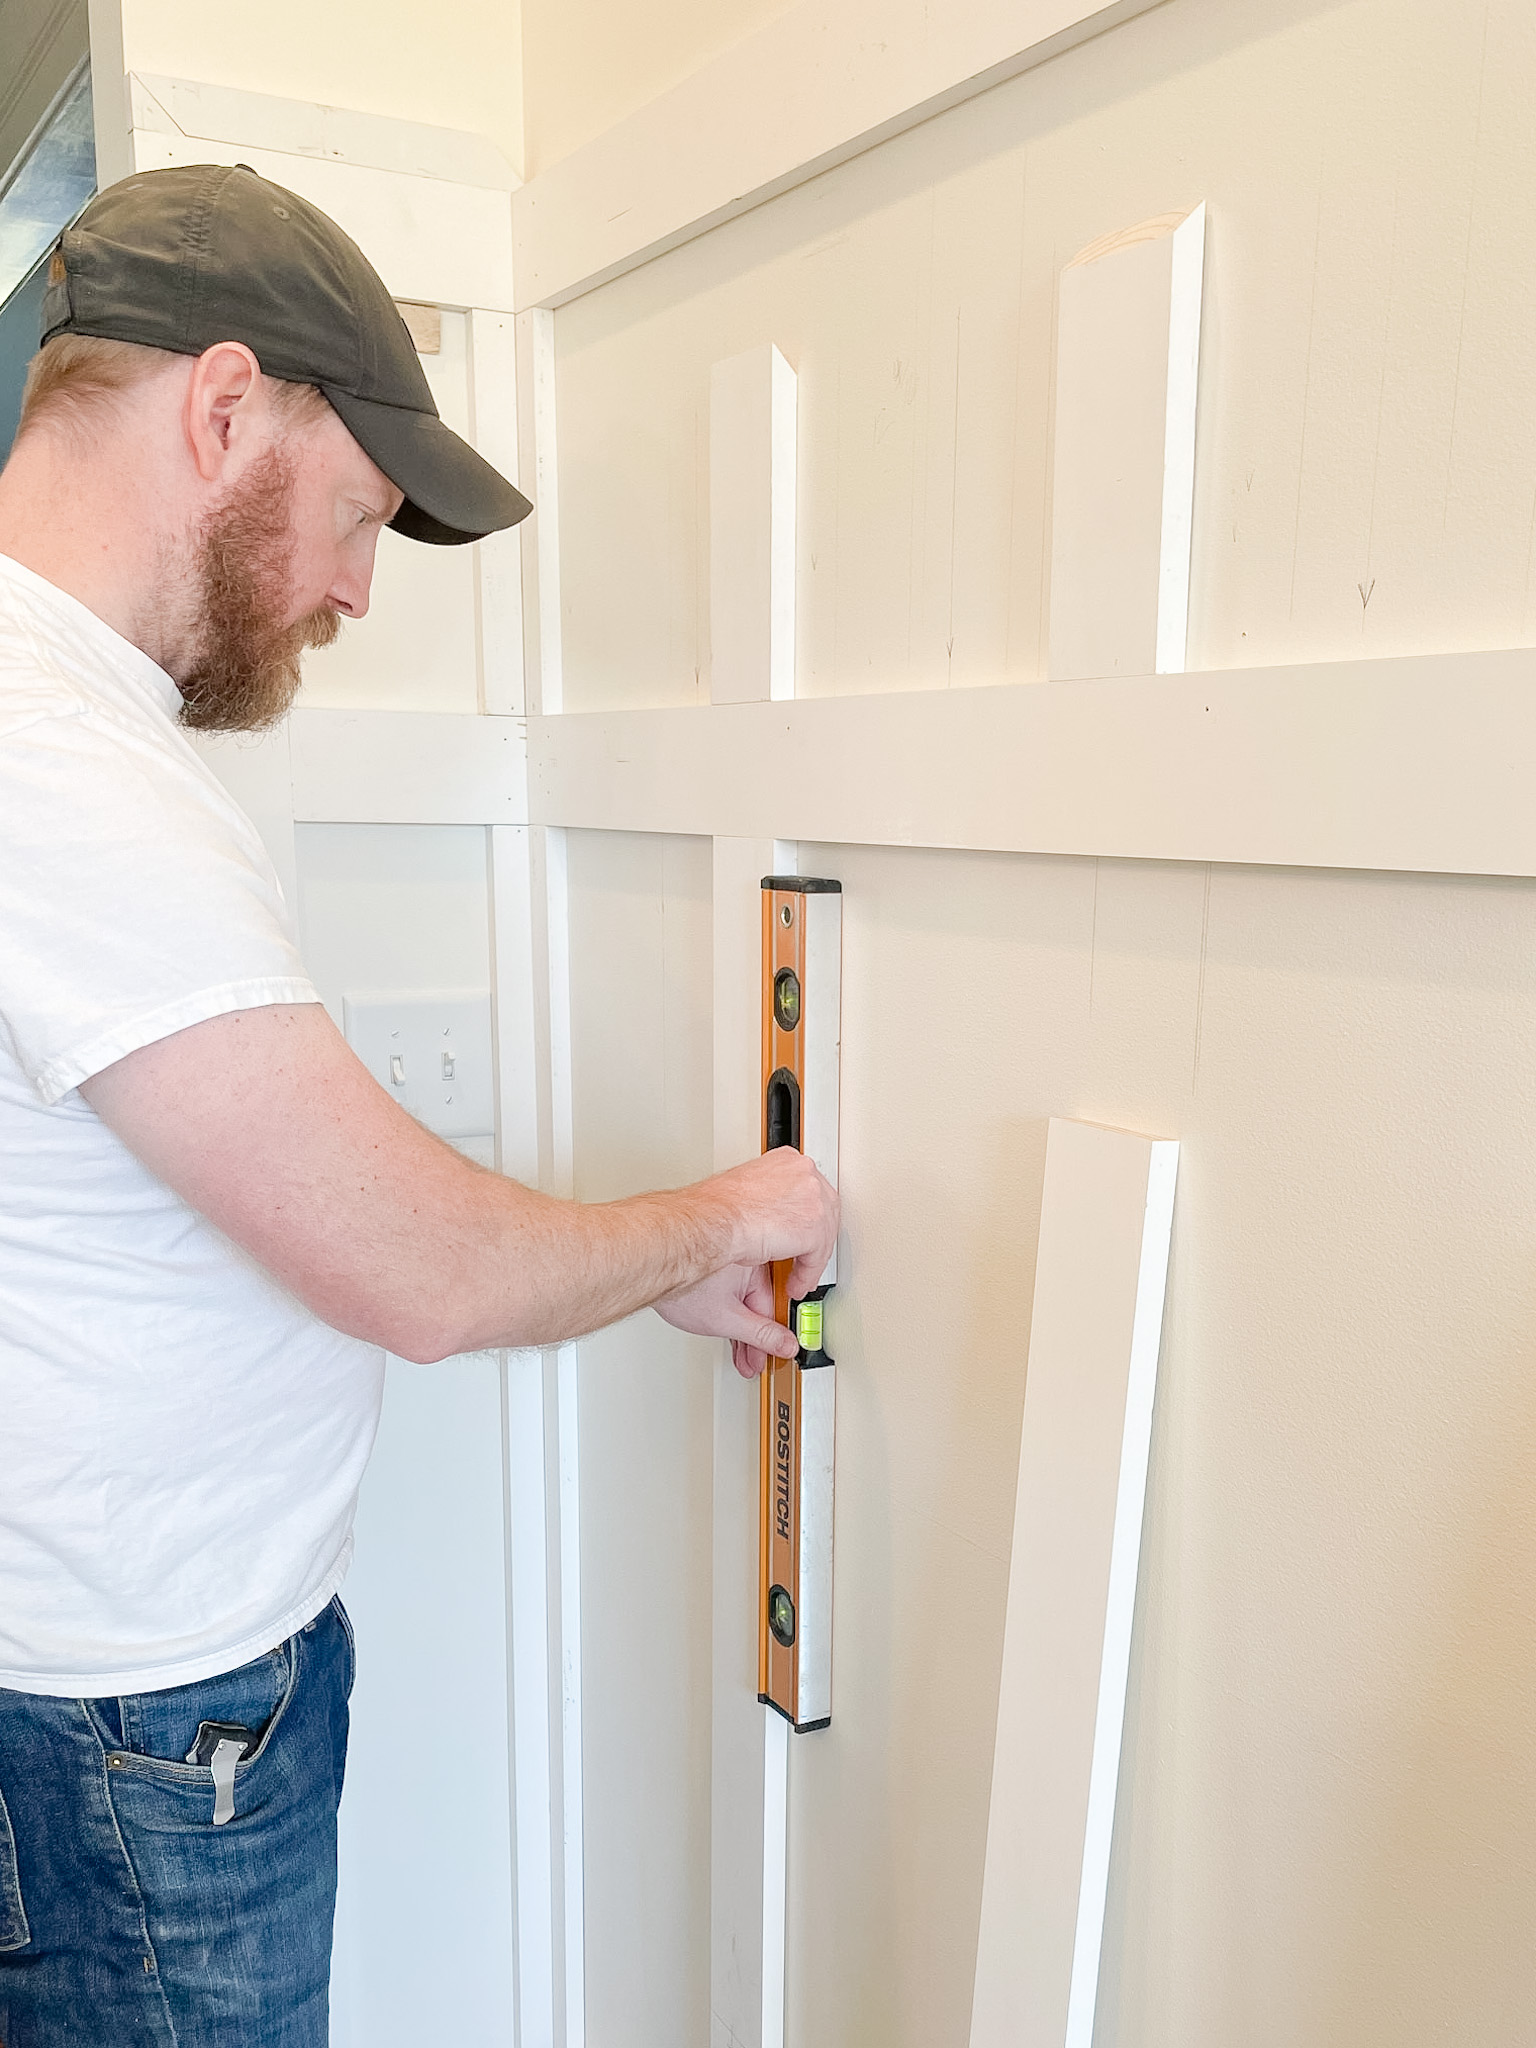
- Level
- Measuring tape
- Stud finder
1. Remove your Baseboards (if applicable)
Depending on how thick your boards are will determine what you need to do with your baseboards. We plan to change our house baseboards over to 1×6’s because we love the look of them. In the dining room we removed our baseboards and installed 1×6 primed pine before installing board and batten. This ensures the 1×4’s will sit nicely on top of the baseboards without overlap.
You can use more narrow boards that sit on top of your baseboards…again, design is up to you.
2. Determine Layout and Design
Come up with a plan for your end result. We wanted a layered board and batten with square boxes above and inset moulding throughout. Anytime you add another layer you have to take into consideration spacing and how the top layer will come together.
Depending on how you space your boards you will create either rectangles our squares…either is fine, but determine what design you are going for. The questions always arise, how tall is board and batten and how far to space board and batten? Well, those are all up to you and your overall design
We wanted the board and batten about 3/4 of the way up the wall and then wallpaper above the moulding. This room has 9ft ceilings.
3. Measure Height and Length
Our board and batten goes around the entire room as I’m not a focal wall kind of person. You can do just one wall, but doing an entire room makes the trim package and space feel more finished.
Measure the height and length of every wall to determine how much lumber you need and how you will need to cut that lumber for install.
Measurement Tips
- Gather your measurements to calculate how much wood you need.
- Wood usually comes in 6ft and 8 ft lengths so you might need more or less pieces depending.
- You will need both horizontal batten (top and baseboard) and vertical batten – if they are the same width, just add them all together. Our baseboard was wider than the rest of the boards used so we had to calculate separately. We also used a ledge at the top that was a 1×2 and more narrow. Calculate each width separately.
- If your total length needed is 6ft 4in then round up to 7ft.
- If using an inset moulding on the battens you will also need to determine that length as well. Each batten will need inset trim all the way around so you need to measure length and width to create your inset “box.”
- Remember that a 1×4 is not exact measurements; usually .75″x3.50″ They are just called 1×4, 1×2, etc.
- Two battens will meet in the corner and you will need to ensure to add that space into your measurements.
- TIP: Space your battens to avoid electrical outlets. Once you have drawn out your design and taken your measurements, you might need to shift battens around to avoid plugs (unless you want to move them).
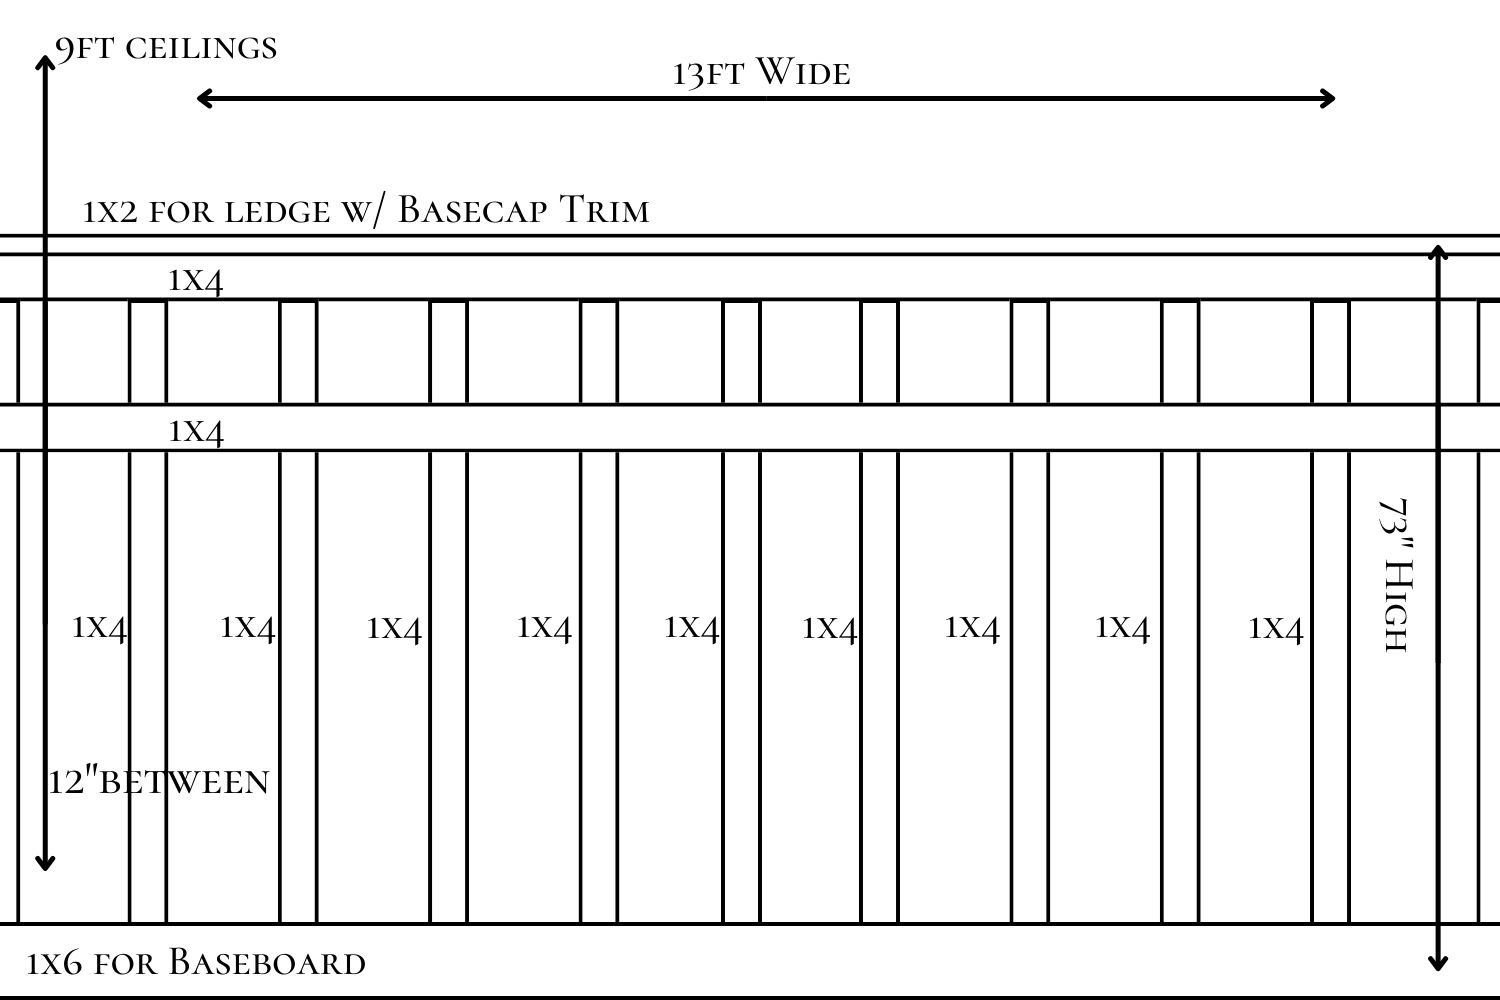
We used:
- 1×2 for ledge
- 1×4 for vertical and horizontal battens
- 1×6 for baseboards
DIY Board and Batten Instructions
The more complex the board and batten the more planning you will need. Have your sketch and your measurements ready as you will need to make adjustments before cutting and installing.
Traditional board and batten has a board and the battens that go over the seams. Our walls are smooth and the need for the “board” was not necessary so we just added our battens right to the wall. So, it’s board and batten by design but not technically true board and batten.
- Once you have determined the length of the horizontal boards, you can begin cutting. Work one wall at a time here working with the longest wall first.
- Install the Horizontal Batten – Cut the top horizontal batten to size and install, using enough nails to secure the batten. No need to over nail as that makes more finishing work later.
- Install the Next (2nd one) Horizontal Batten – Cut and install to length. This batten should be the same length as what you just installed. (applicable if doing an extra box)
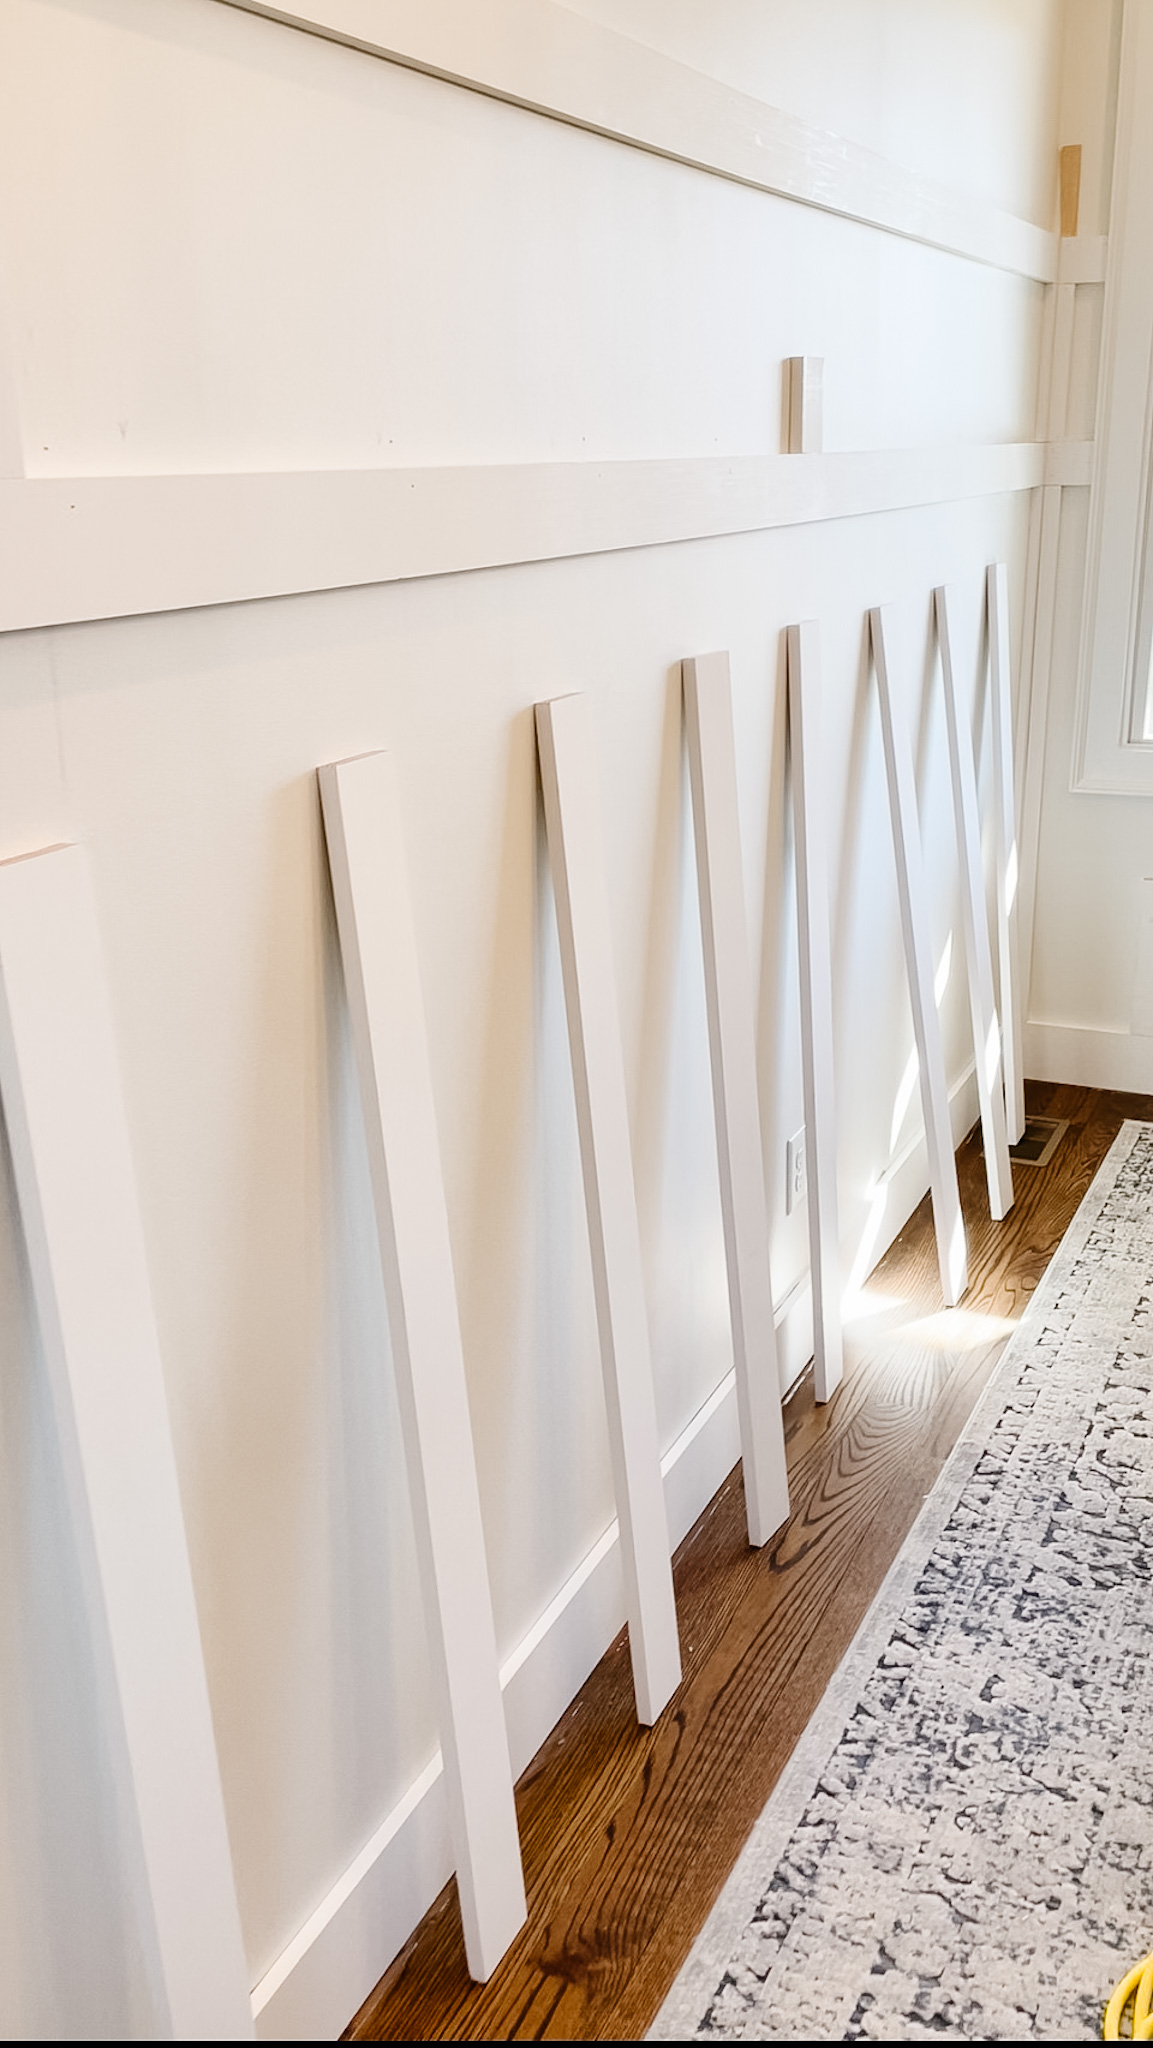
4. Install the Corner Battens – Cut and install your vertical battens that join the corners of the room. We cut our 1×4 in half on a table saw so when they butted next to each other they were the same width as the other battens. It just looks like the batten is being wrapped around the corner.

5. Cut and Install Vertical Battens. Now that your horizontal battens are installed you can add the vertical battens. Measure around the area you are going to install each batten, since measurements can change as you work your way down the wall. Measure and cut each batten at a time ensuring not to force a fit; go back to the saw to trim the batten.
6. Install the Ledge – If adding a ledge, you will need to secure your measurements and install the ledge to the top of the horizontal batten. We used a 1×2 and cut to length for every install on every wall.
7. Add Interior Board and Batten Trim – Once all your vertical and horizontal battens are cut and hung, it’s time to add your decorative trim (if you chose). You do not have to add more trim and can leave your battens as they are. We chose to dress up this space a little by adding a little more trim.
NOTE: This is a lot of extra cuts and measurements equalling more time and more cost.
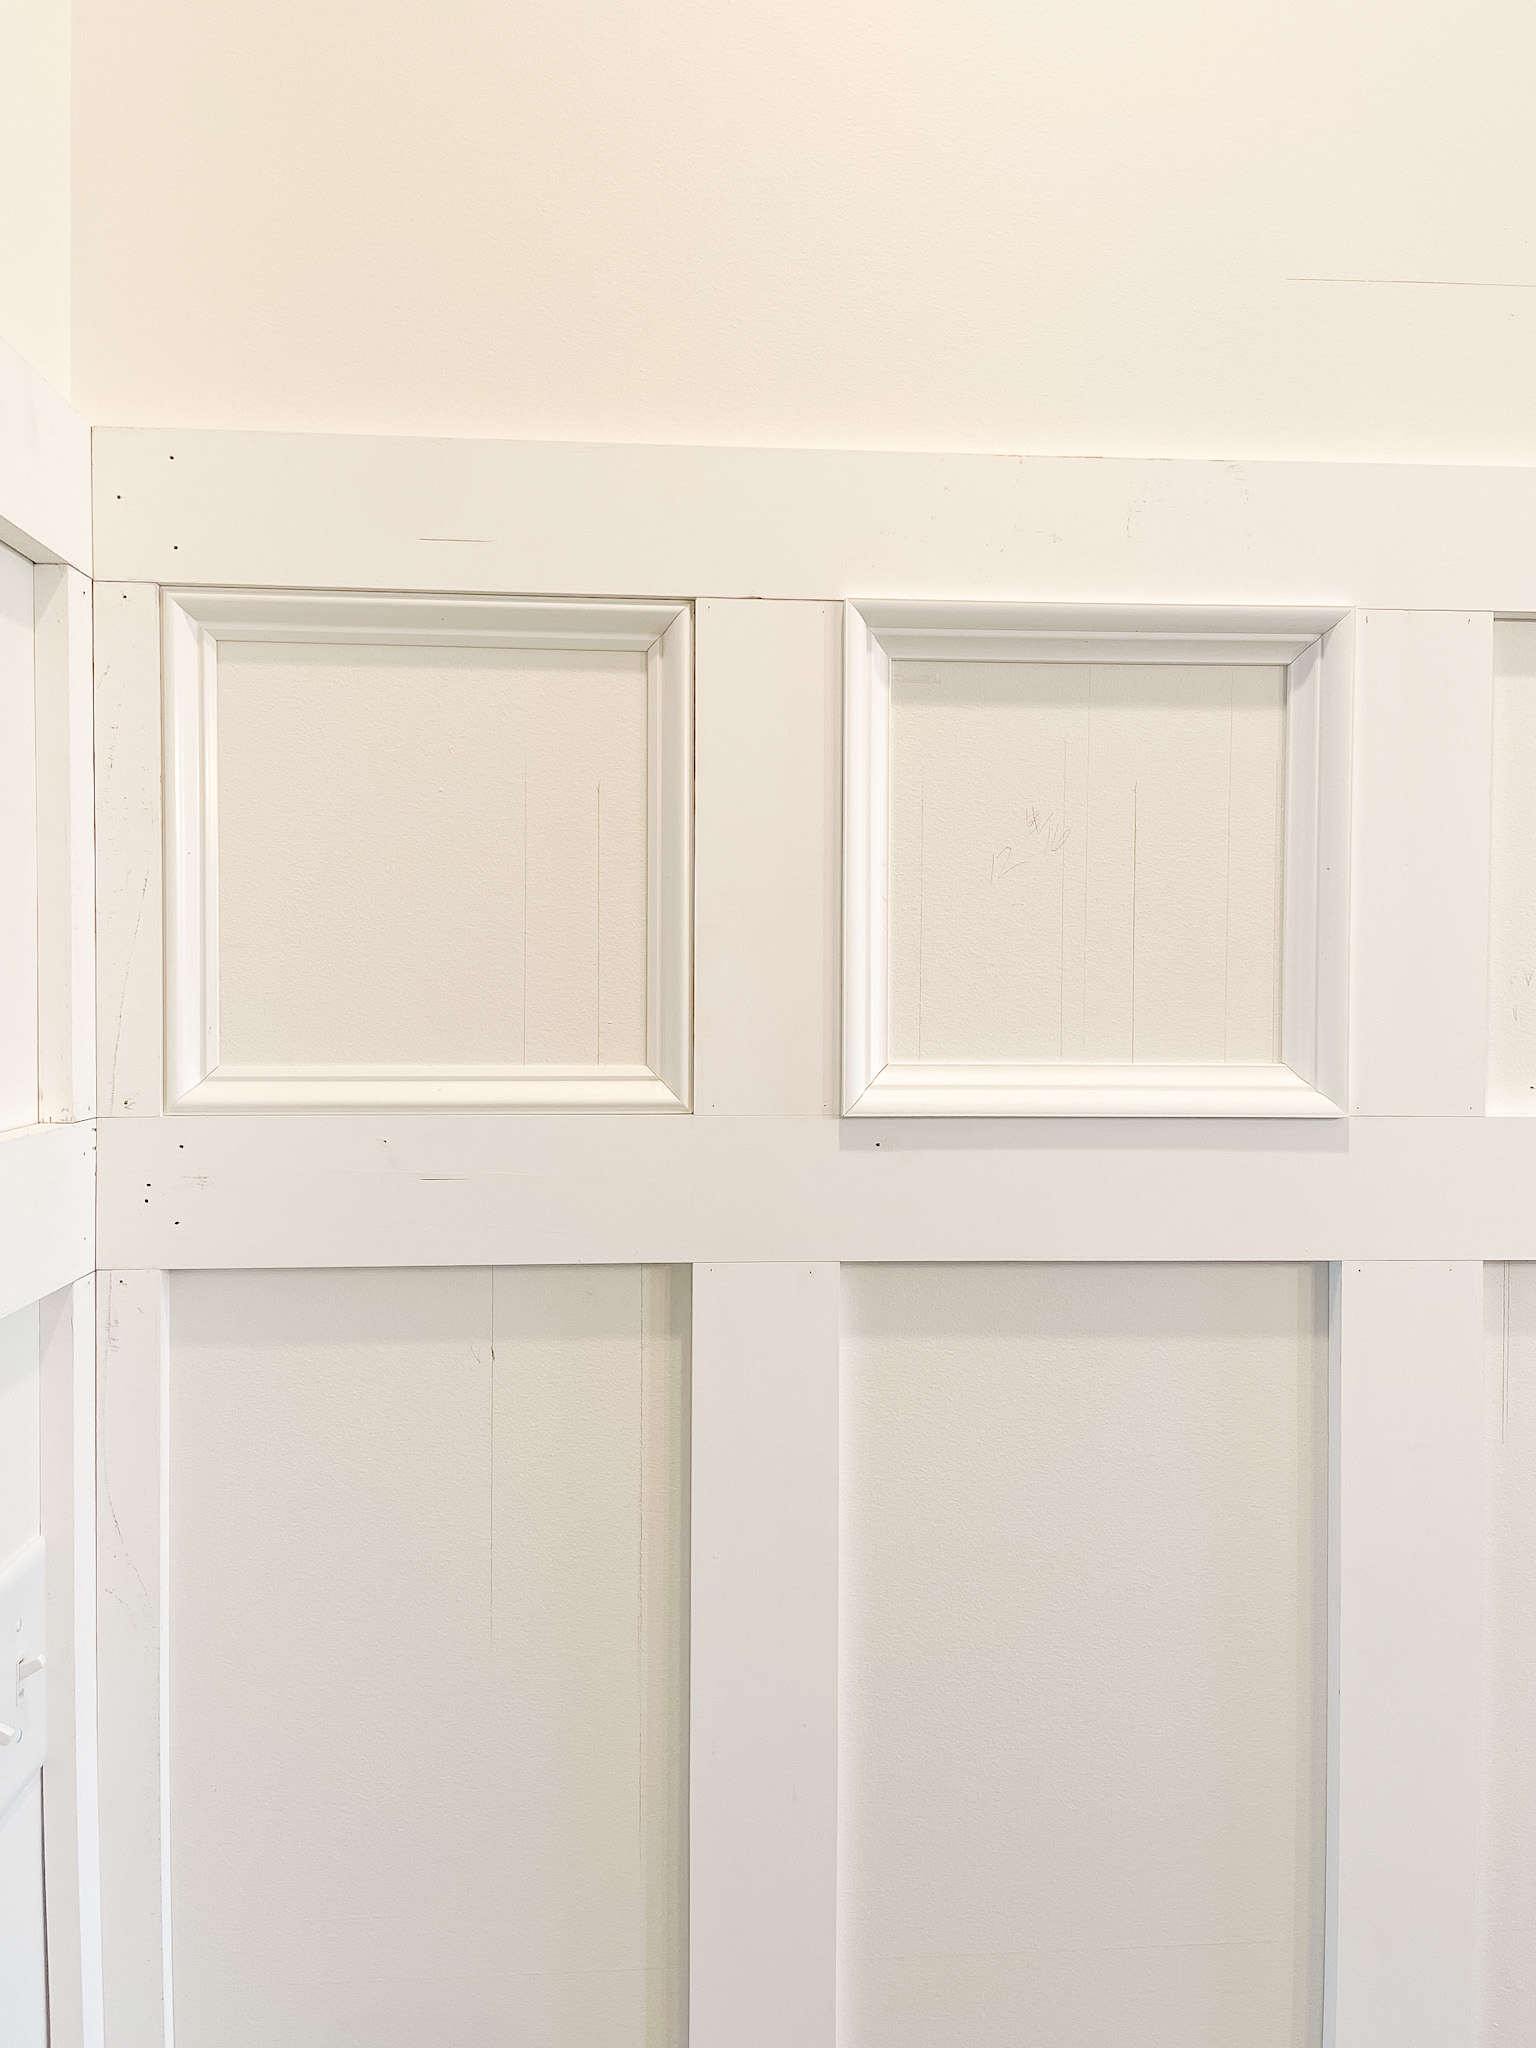
We were trying to determine what inset moulding we wanted to finish the project with. My husband wanted the larger trim and I wanted something more low profile and simple. We did end up using the base cap moulding which is the same moulding I used for the Picture Frame Moulding project I did in our bedroom using a PVC product like I did previously.
Each corner will have to be cut to a 45 degree angle if installing inset moulding. Straight cuts won’t do the trick.
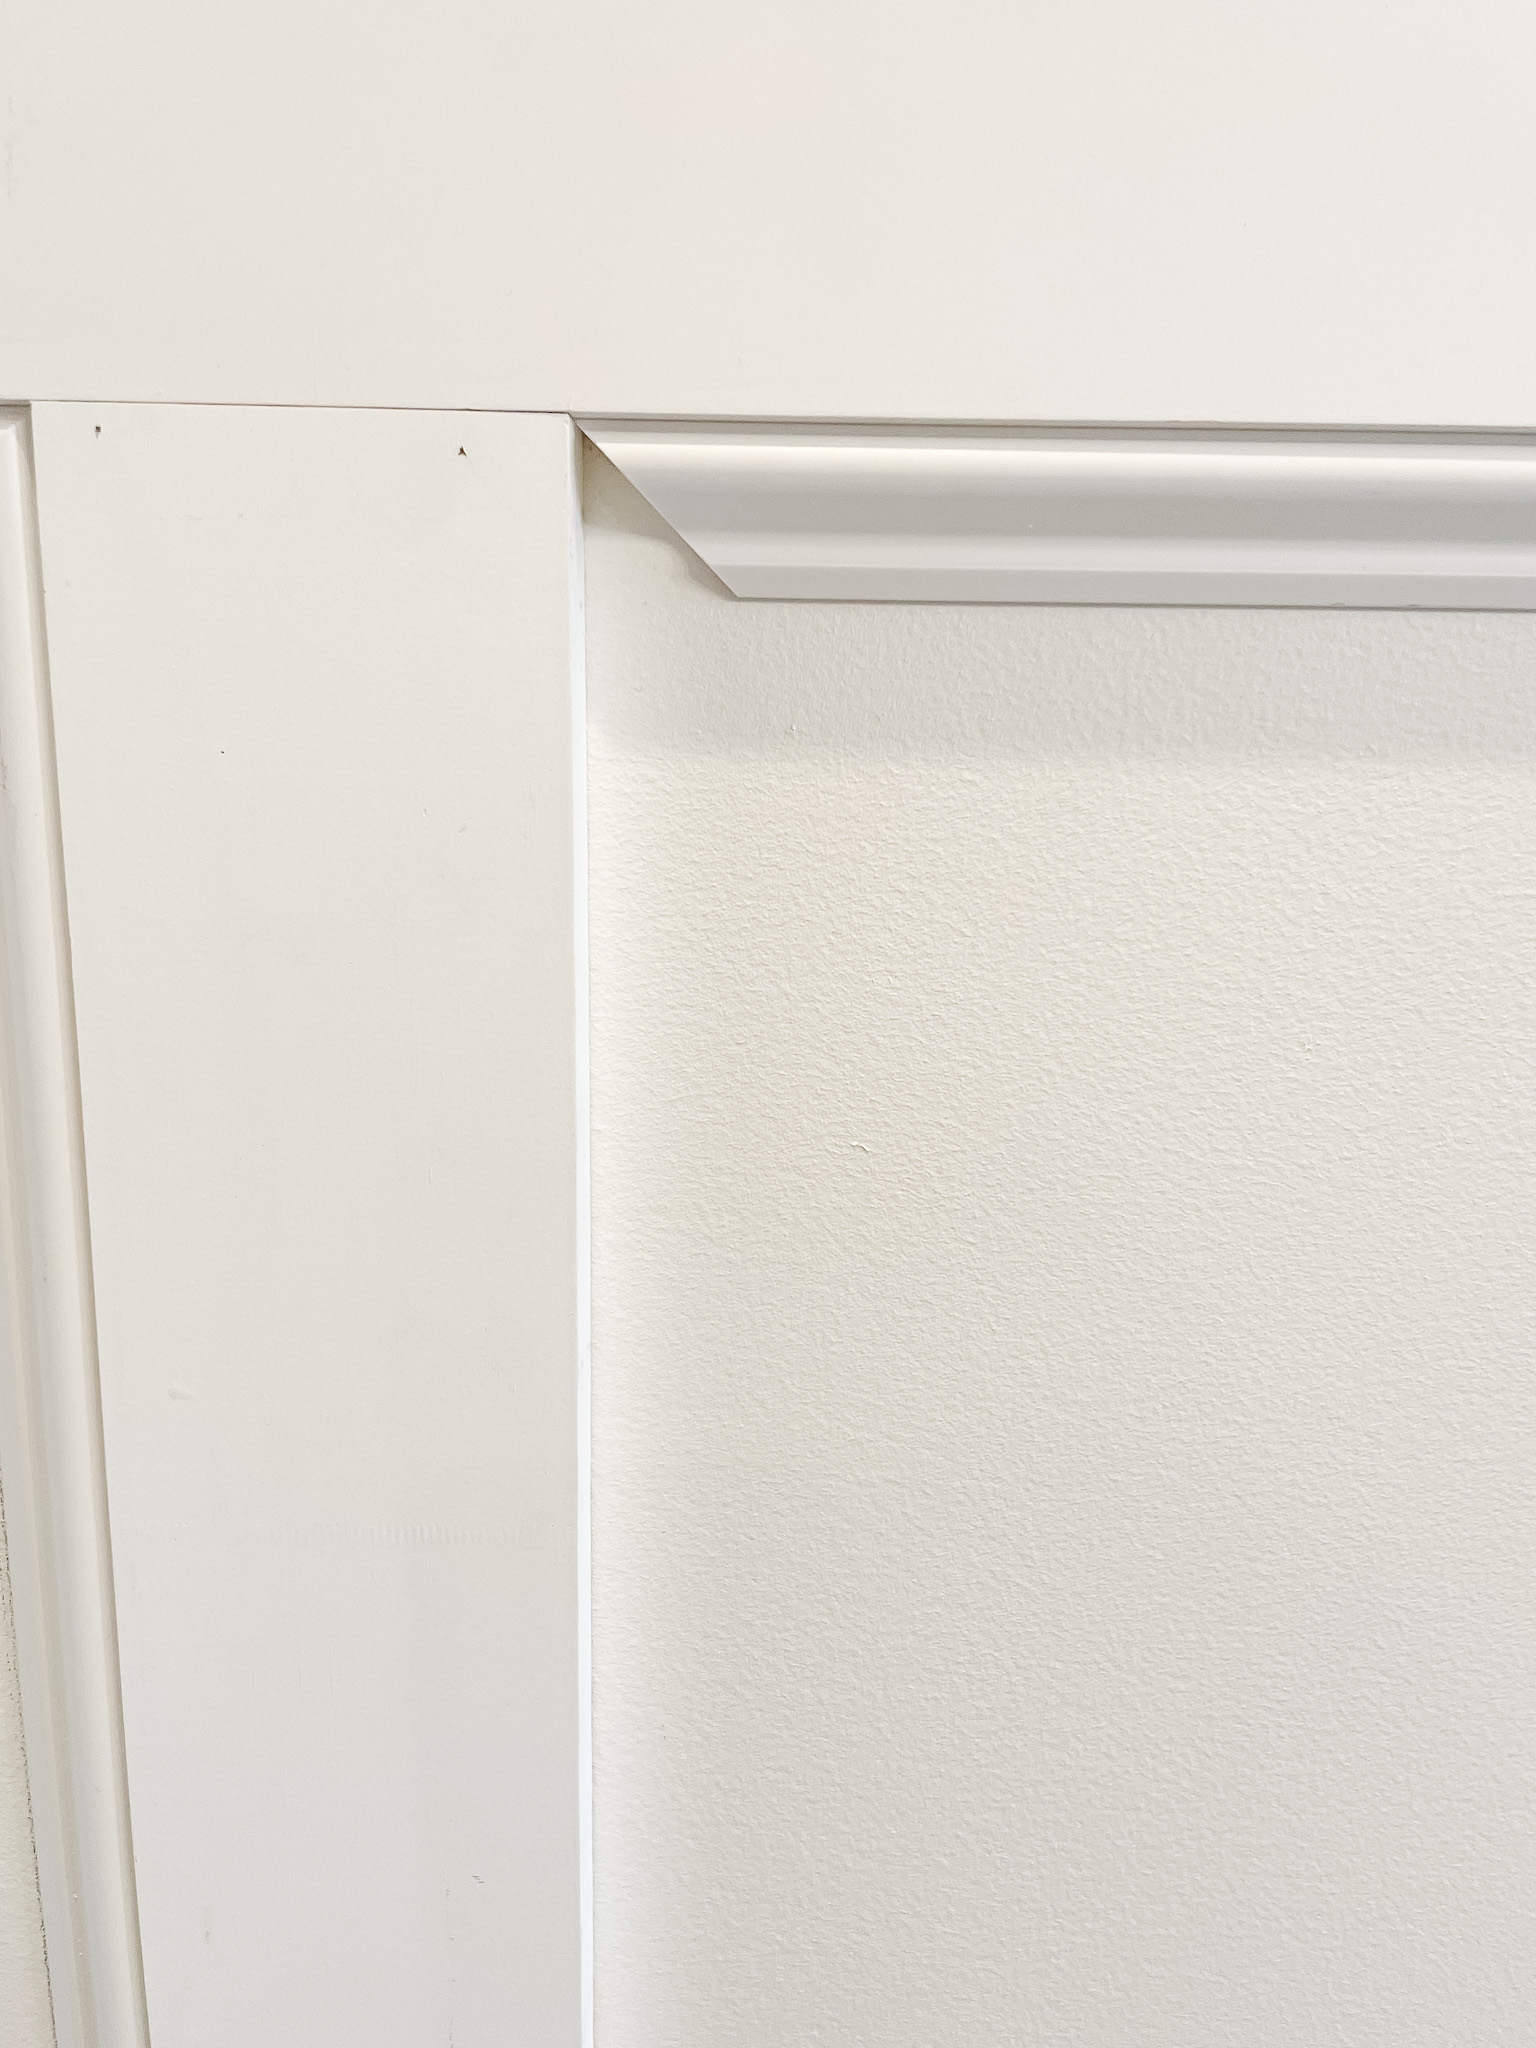
8. Cut and Install Inset Trim to Ledge – Install your inset trim to your ledge too. Just right under it to give it a finished look and tie in the with the rest of the inset moulding on the battens.

How to Caulk and Paint Board and Batten
Once everything is installed comes the critical part of ensuring the finished job looks great!
- Caulk all the Seams – Add some caulk to all the seams between the battens, corners, trim, etc. Everywhere there is a seam you will need to fill them in with caulk.
- Use Just Enough – Careful not go to overboard with the caulk. Use just enough for what you need.
- Proper Application – Have a cup of water and paper towels handy. Dip you fingers in the water, smooth the caulk, wipe off the excess on the paper towel then repeat. Using the water helps a ton for a smooth finish.

REMEMBER – Caulk for all the seams and wood filler for the nail holes. My husband used wood filler on the seams and that was not the best decision.
- Fill the Nail Holes – Using wood filler fill all the nail holes with just enough wood filler. Let it dry and sand all the filled areas until smooth.
- Let it dry overnight.
- Painting – Paint all the edges and corners with a brush and use a roller for the larger sections. Let dry and repeat with a second coat. We used a paint sprayer for this project but it is not necessary.

Complications with Board and Batten
1. Electric Outlets – The more complex your board and batten the more issues you might encounter. We encountered a major snag and tried to work around but the electric plugs were right smack dab in the middle of where we needed to place our vertical boards and we tried re-spacing many times but we couldn’t avoid all the electric plugs as we have several outlets in this room.
If I wasn’t doing a layered board and batten, I could have just shifted the boards to miss the plugs, but in order to create the squares the boards had to be a certain width apart and a certain height. It go complicated and slowed down our project, but we had to move the electric outlets around to avoid the battens.
2. Corners/Windows – Working around corners and windows had its frustrations too as we tried to ensure the battens flowed seamlessly with the rest of the trim that was already around the windows.

Frequently Asked Questions
What kind of wood is used for board and batten? – We used primed pine, but you can use MDF which will save you some money. For our inset trim we used PVC which was also less costly than wood at the time.
Is board and batten inexpensive? – A simple DIY board and batten project is inexpensive, but the more elements you add the more costly it can get. The wider the boards, the more boards you need, if you add inset trim, etc. can all add up. A simple 1×2 board and batten with no additional trim can be an inexpensive and easy project.

Board and Batten Install Tips:

RELATED DIY POSTS:
Board and Batten
Follow for home decor, DIY and to shop: Instagram | Pinterest | LiketoKnowit
I do like the classy look of board and batten but can people overdue it and use it in too many rooms?
thank you. Yes, anything can be overdone. Moderation is always key.
Are the boxes on the window wall the same distance apart as the back wall?
That is a good question. They are not exact due to the windows. There was no way to have them perfectly line up no matter how hard we tried. We spaced them as best we could to be exact but they are a tad bit different. When you are in the space you can’t even tell because it’s such a minor difference.