DIY Wood Closet Shelves
Turn that unused, messy closet into a beautiful organized space. Optimize your closet’s storage potential by easily adding wood closet shelves that are completely customizable for your needs.
Most homeowners dream of beautifully organized closets that meet their storage needs. It’s easier than you think to add some wood closet shelves and create a closet that will help make your life more organized. When you’re done this closet will look so good you might just accidentally leave the door open for guests to take a peak. Ha!
Disclosure: This post may contain affiliate links. As an Amazon Associate, I earn from qualifying purchases at no additional cost to you.
When we moved to Tennessee from Virginia we downsized more than half in the main house. Moving to a smaller house was not a problem for me but I needed the space to function for us. We needed at least one optimal storage area. This hall closet was in desperate need of a makeover.
Factors to Consider Before Building Wood Closet Shelves
Before you tear everything out of your closet and begin your DIY closet renovation consider what the closet will be used for.
- Who will be using the closet?
- Where is the closet located?
- What will be stored in the closet?
- Do you need to hang clothes?
- What is the height of the items to store?
- How many shelves do you need?
- Do you want cubbies or only shelves?
- Do you want painted or wood shelves?
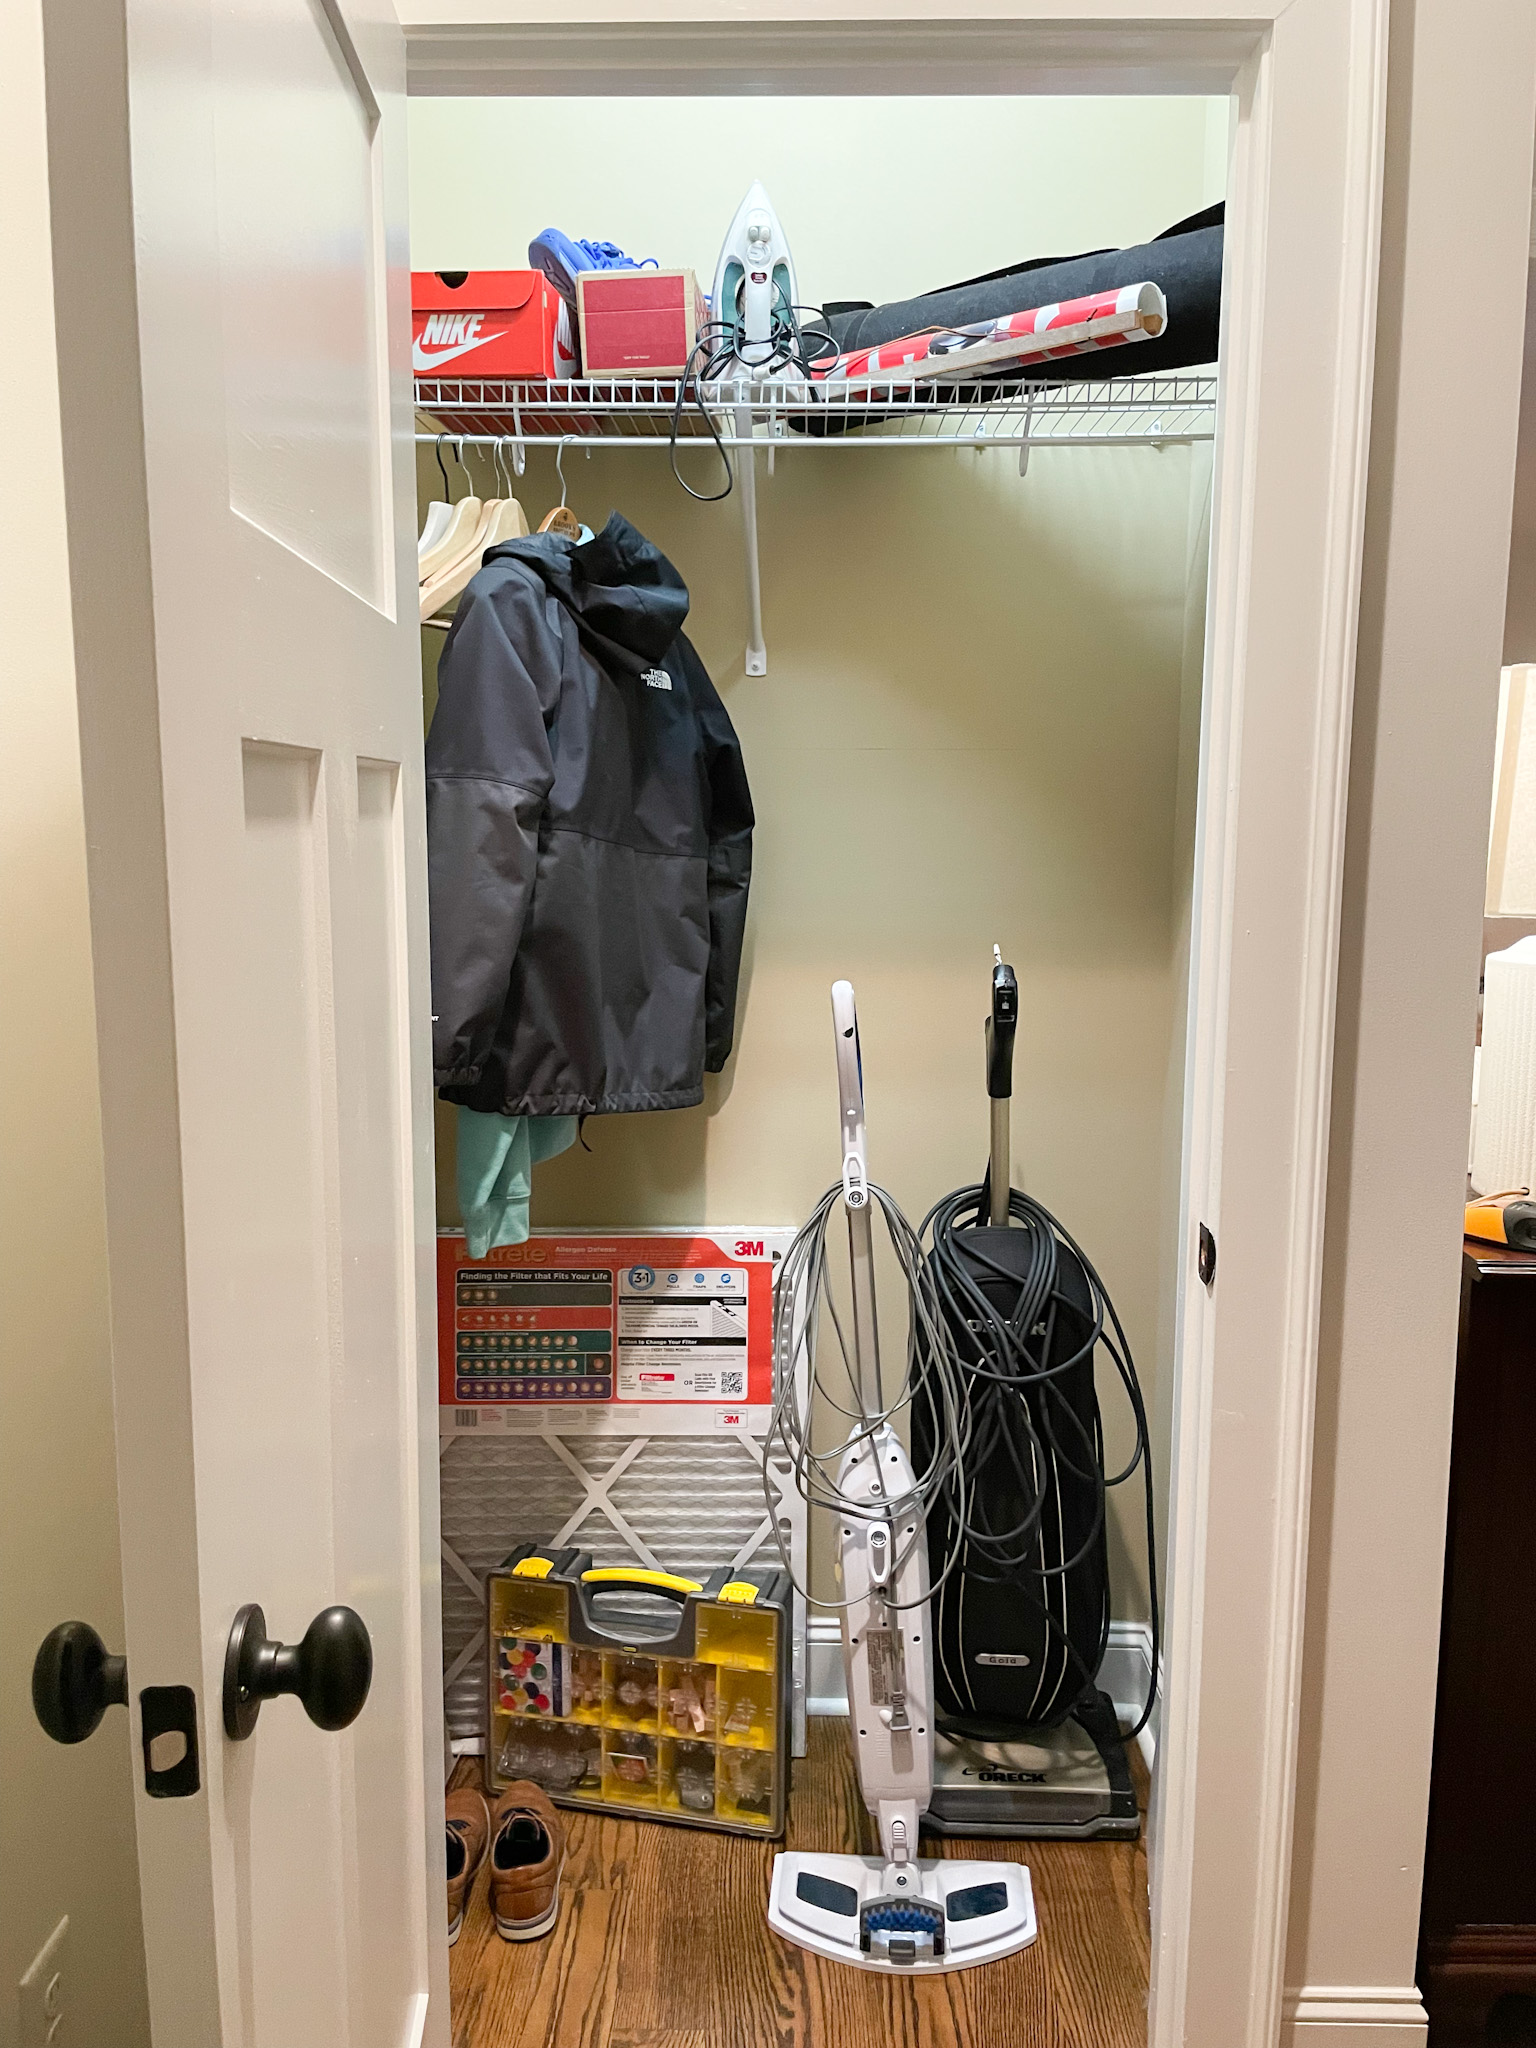
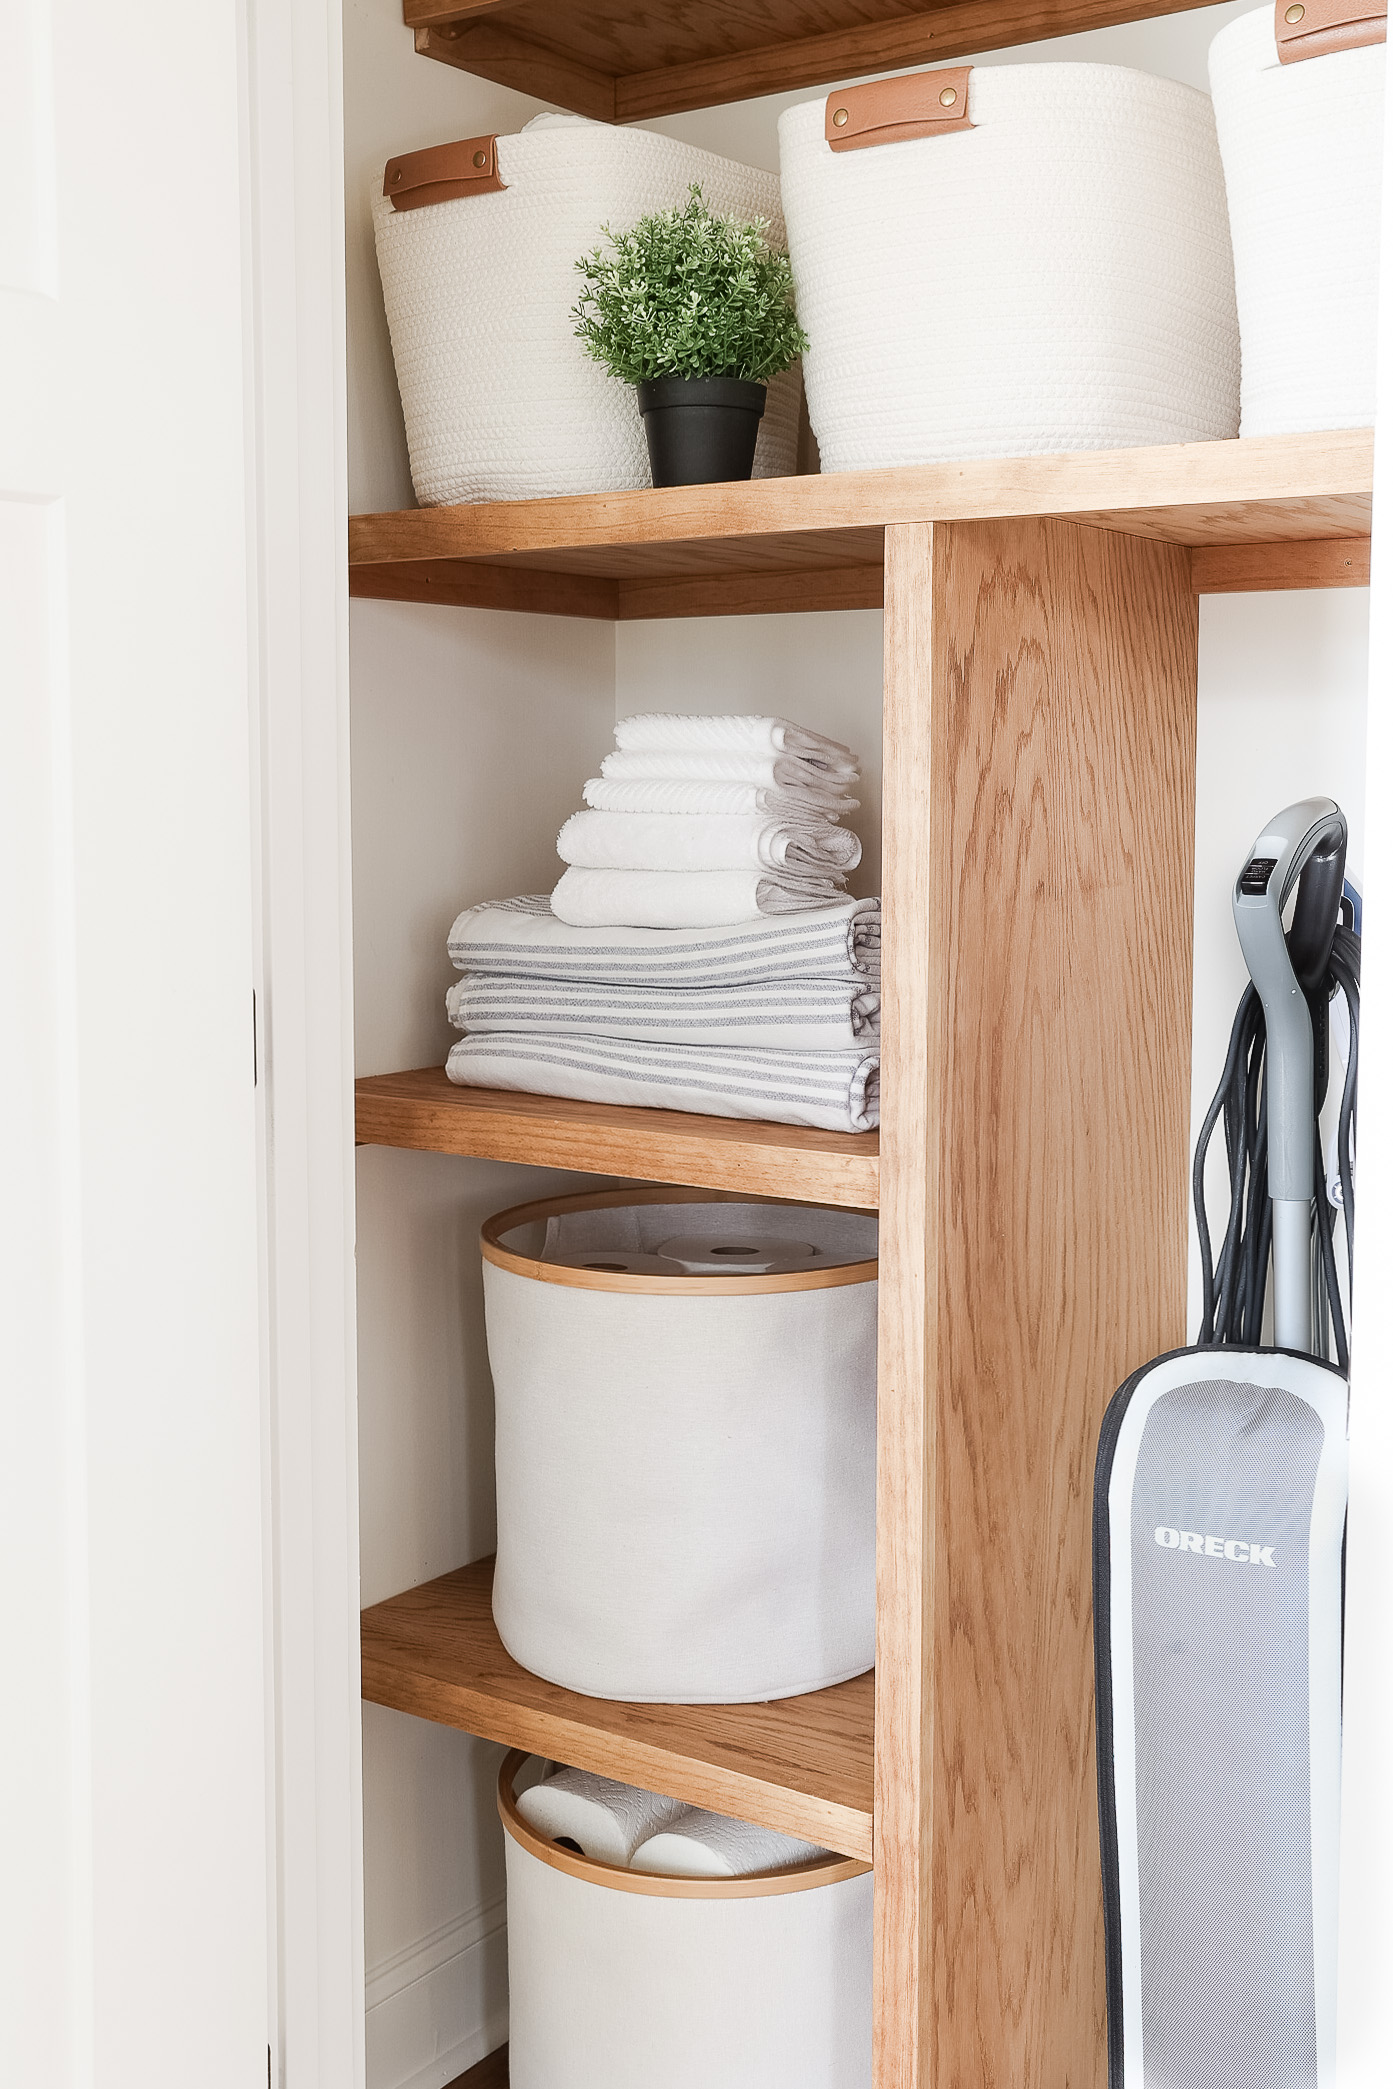
In the front hallway we have a coat closet with one wire shelf and rack – non-functional for us!! Instead this closet needs to house our vacuum and steam mop, toilet paper, cleaning supplies, extra linens and whatever else. Since a vacuum and mop need to be in this space we needed shelves and a section without shelves.
Why Wood Closet Shelves?
Most linen closets have wire shelving and that might be ok for you. Wire shelves drive me bonkers because items get stuck or fall through. I like solid wooden shelves. Plus they look nice too! Some closets are just for coats with a shelf and a hanging rack (like ours) and that space could serve a better function. Adding wooden shelves gives you the option to customize the layout for your needs. More on that later.
Create a Design Plan for the Wood Shelves
Now that you have determined the function for your wood shelf project you need to create a design so you know how to move forward with supplies. If you just want equally spaced shelves all the way across for each row then it makes it fairly easy. I needed a combination of shelves and a tall section to house the vacuum and mop and I created my design from there.

Establishing the design and plan took a while, probably a half a day. That seems like a lot but we were adding more of a shelving unit. If you take the time to plan the installation is easy.
Gather Supplies for DIY Wood Shelves
This is a fairly basic DIY project and only basic tools are required. Gather everything before you begin and your design plan.
Tools Needed:
- Miter Saw or Miter Saw
- Table Saw (or have Lowes cut down boards for you)
- Nail Gun or Nail Gun
- Metal Square or Metal Square
- Laser Measurer
- Stud Finder
- Level
- Pencil
Supplies Needed:
- 3/4″ 4’x8′ oak plywood (the amount you need varies based on closet size, we only needed one)
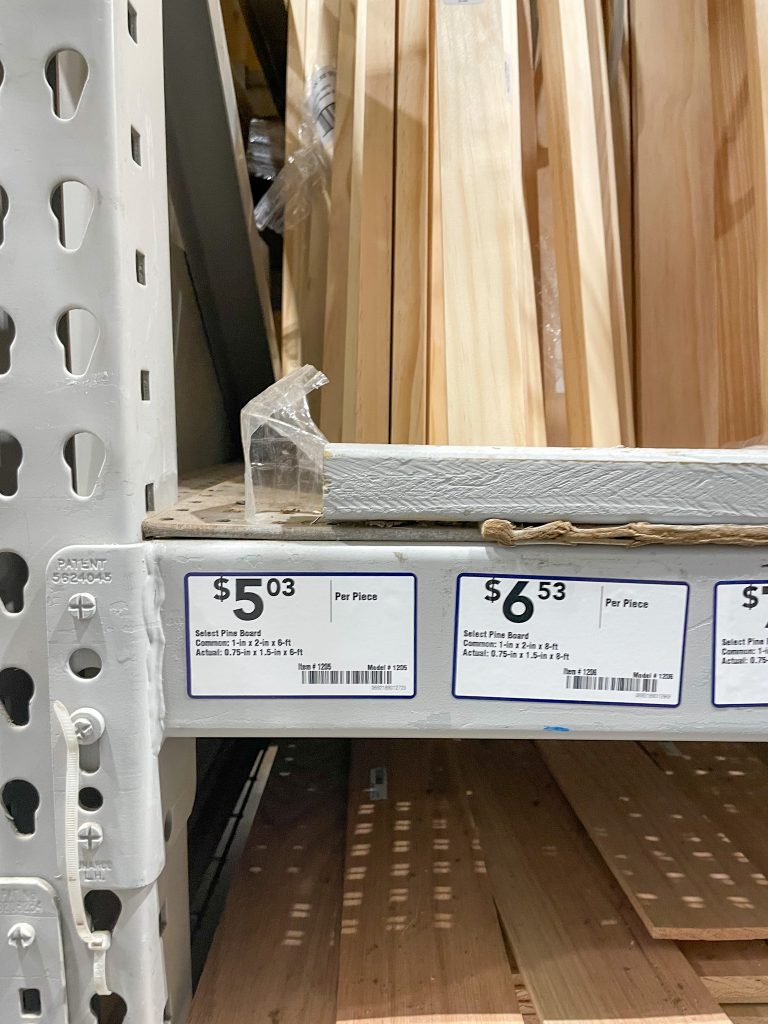
- 1x2x8 common pine boards (the amount you need varies based on closet size)
- Wood filler
- Spackling
- 1.5″ nails
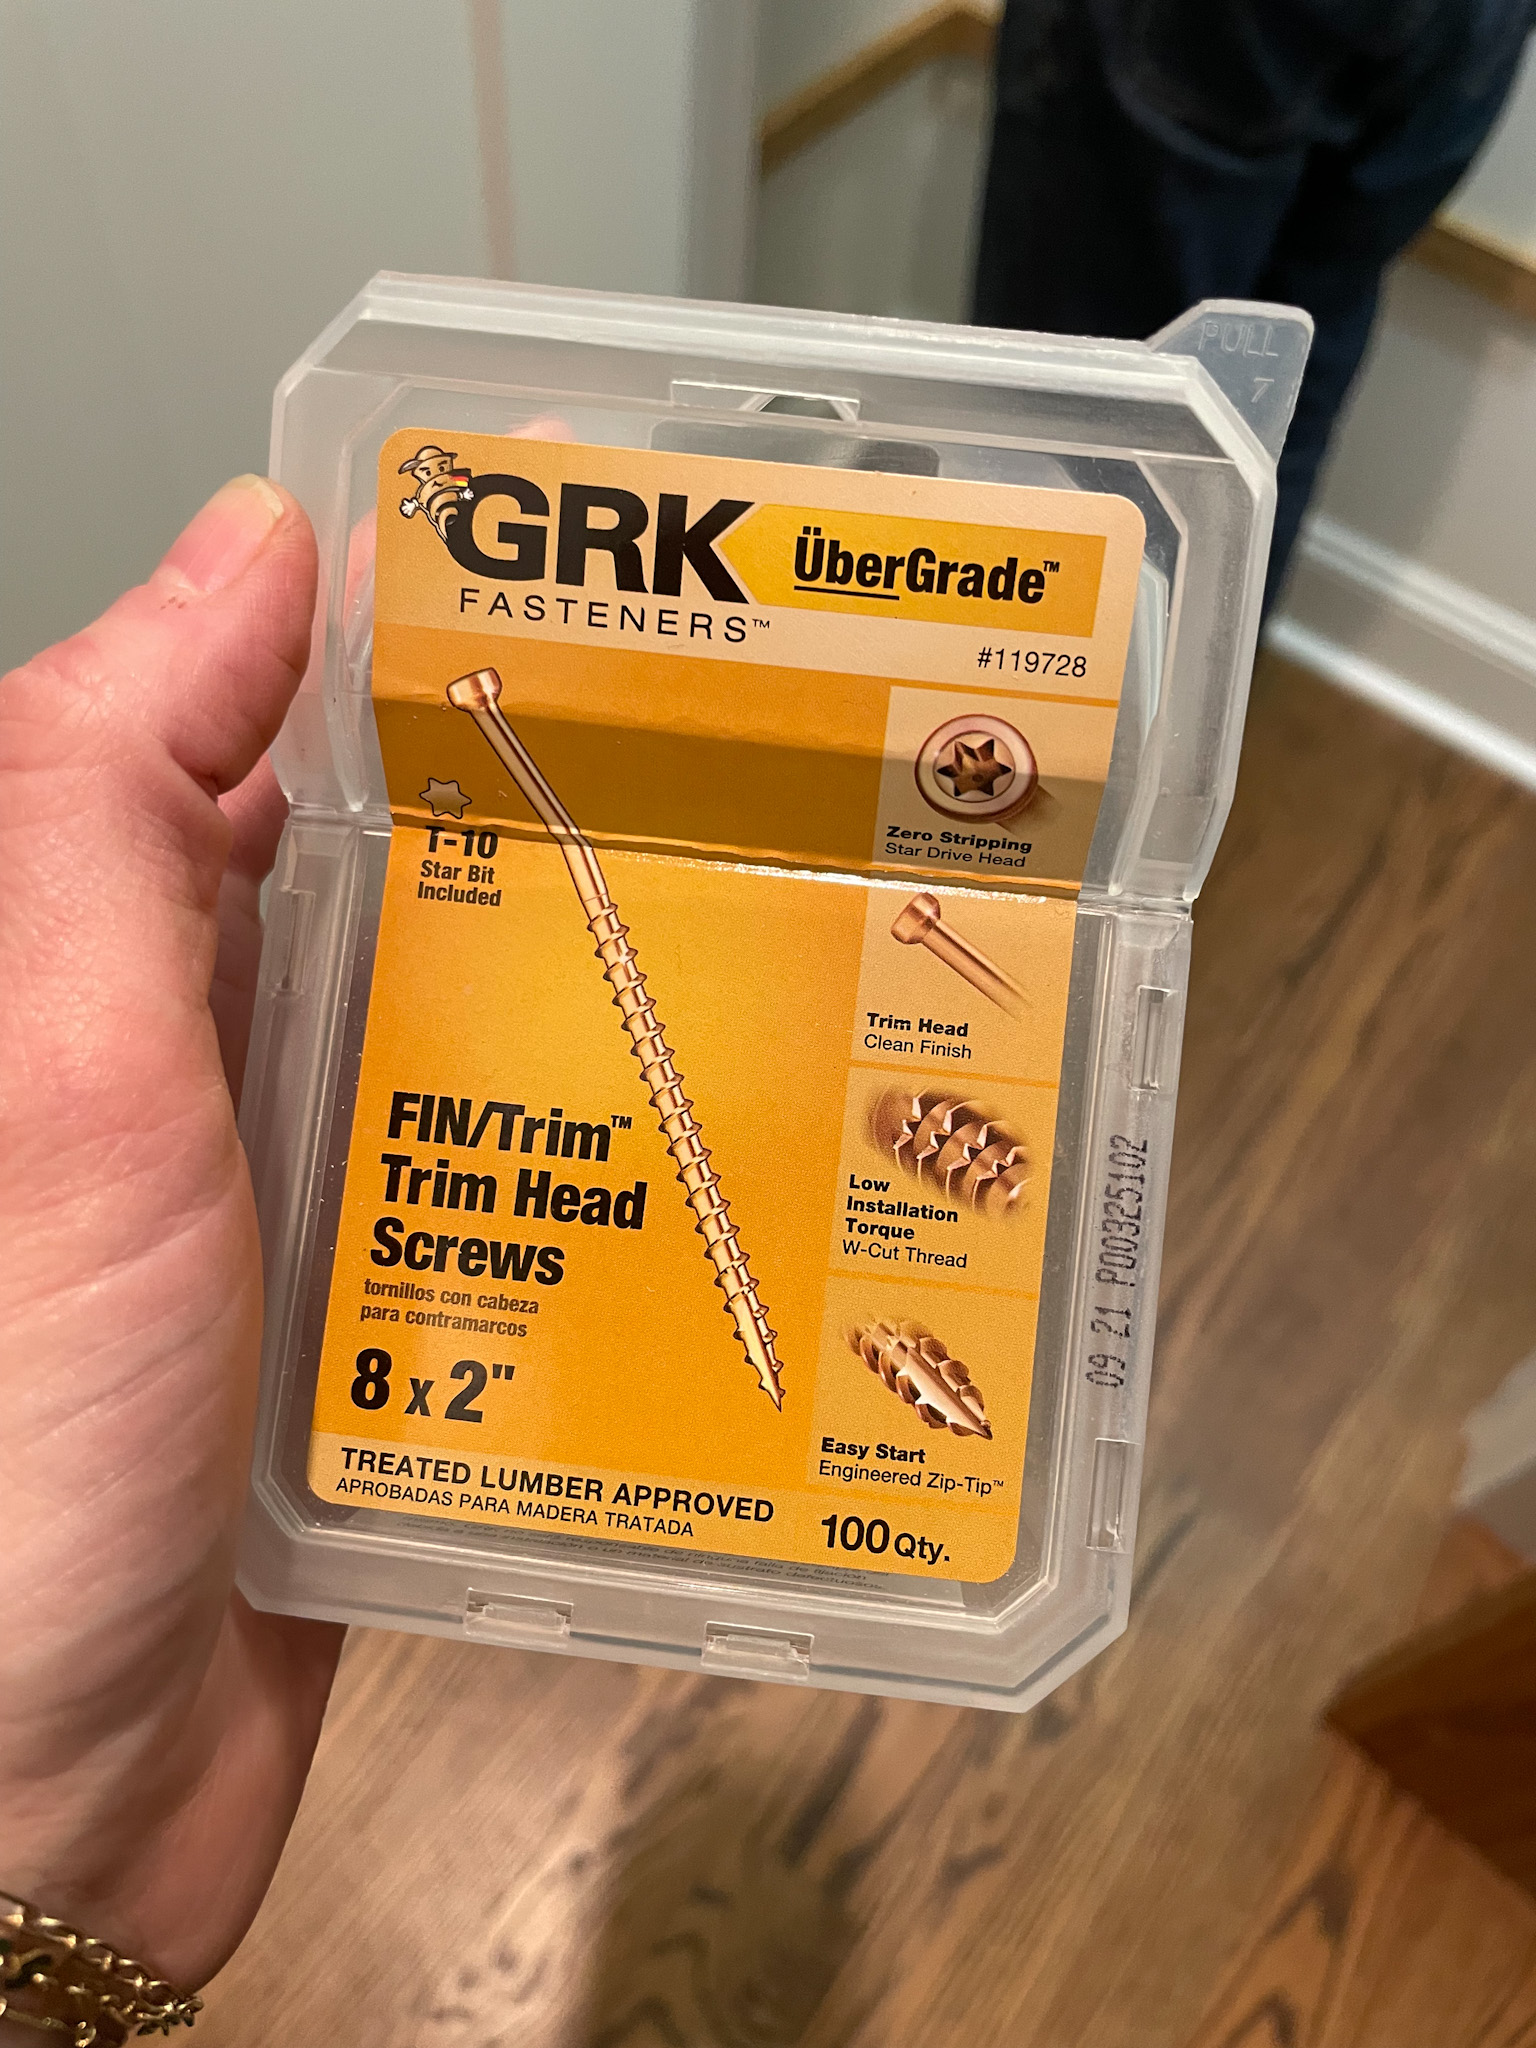
- Screws
- 180 and 220 grit sandpaper
- Stain (we used Golden Oak)
- Minwax Polycrylic (we used Ultra Flat)
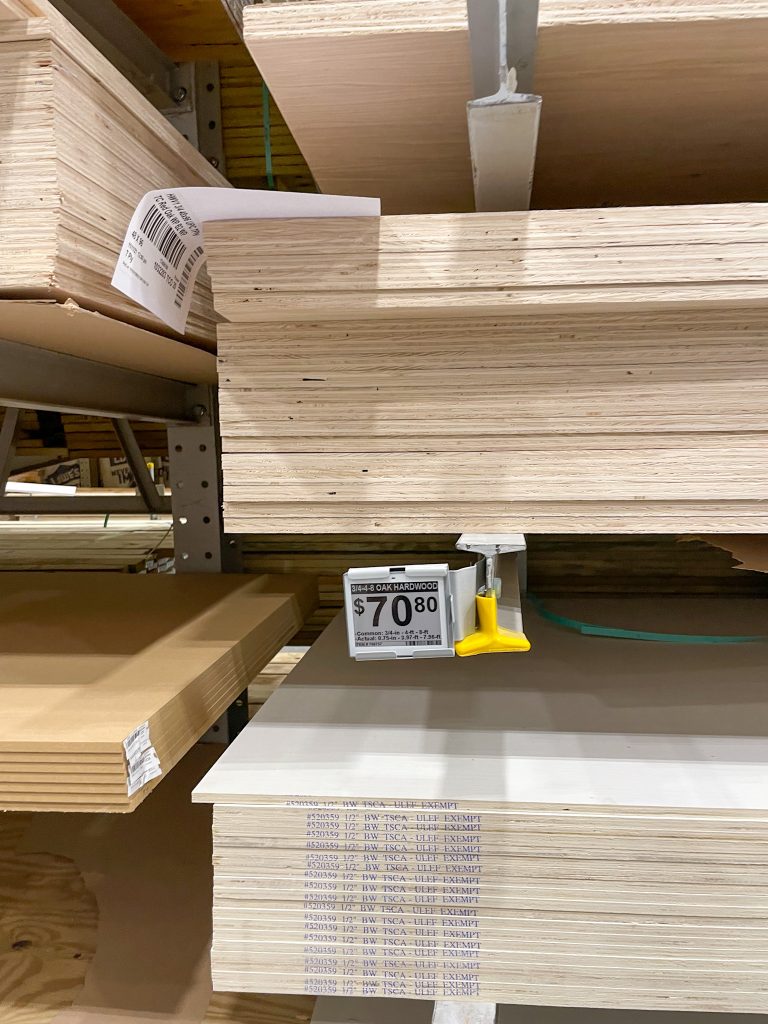
NOTE: We used oak plywood but you could use pine plywood (currently $60) to save some cost. When I began to look at this project the oak plywood cost $55 for a 4x8ft section, when I purchased it a couple months later it was $70 and now that I am writing this post, a month after purchasing it, the same board is now $94.
STEPS for Building Wood Closet Shelves
1. Remove Items from the Closet & Prep
Now that you have your plan and all the necessary supplies it’s time to get to work. Take everything out of the closet. Remove any attached items such as shelves or rods and fill any wholes left behind.
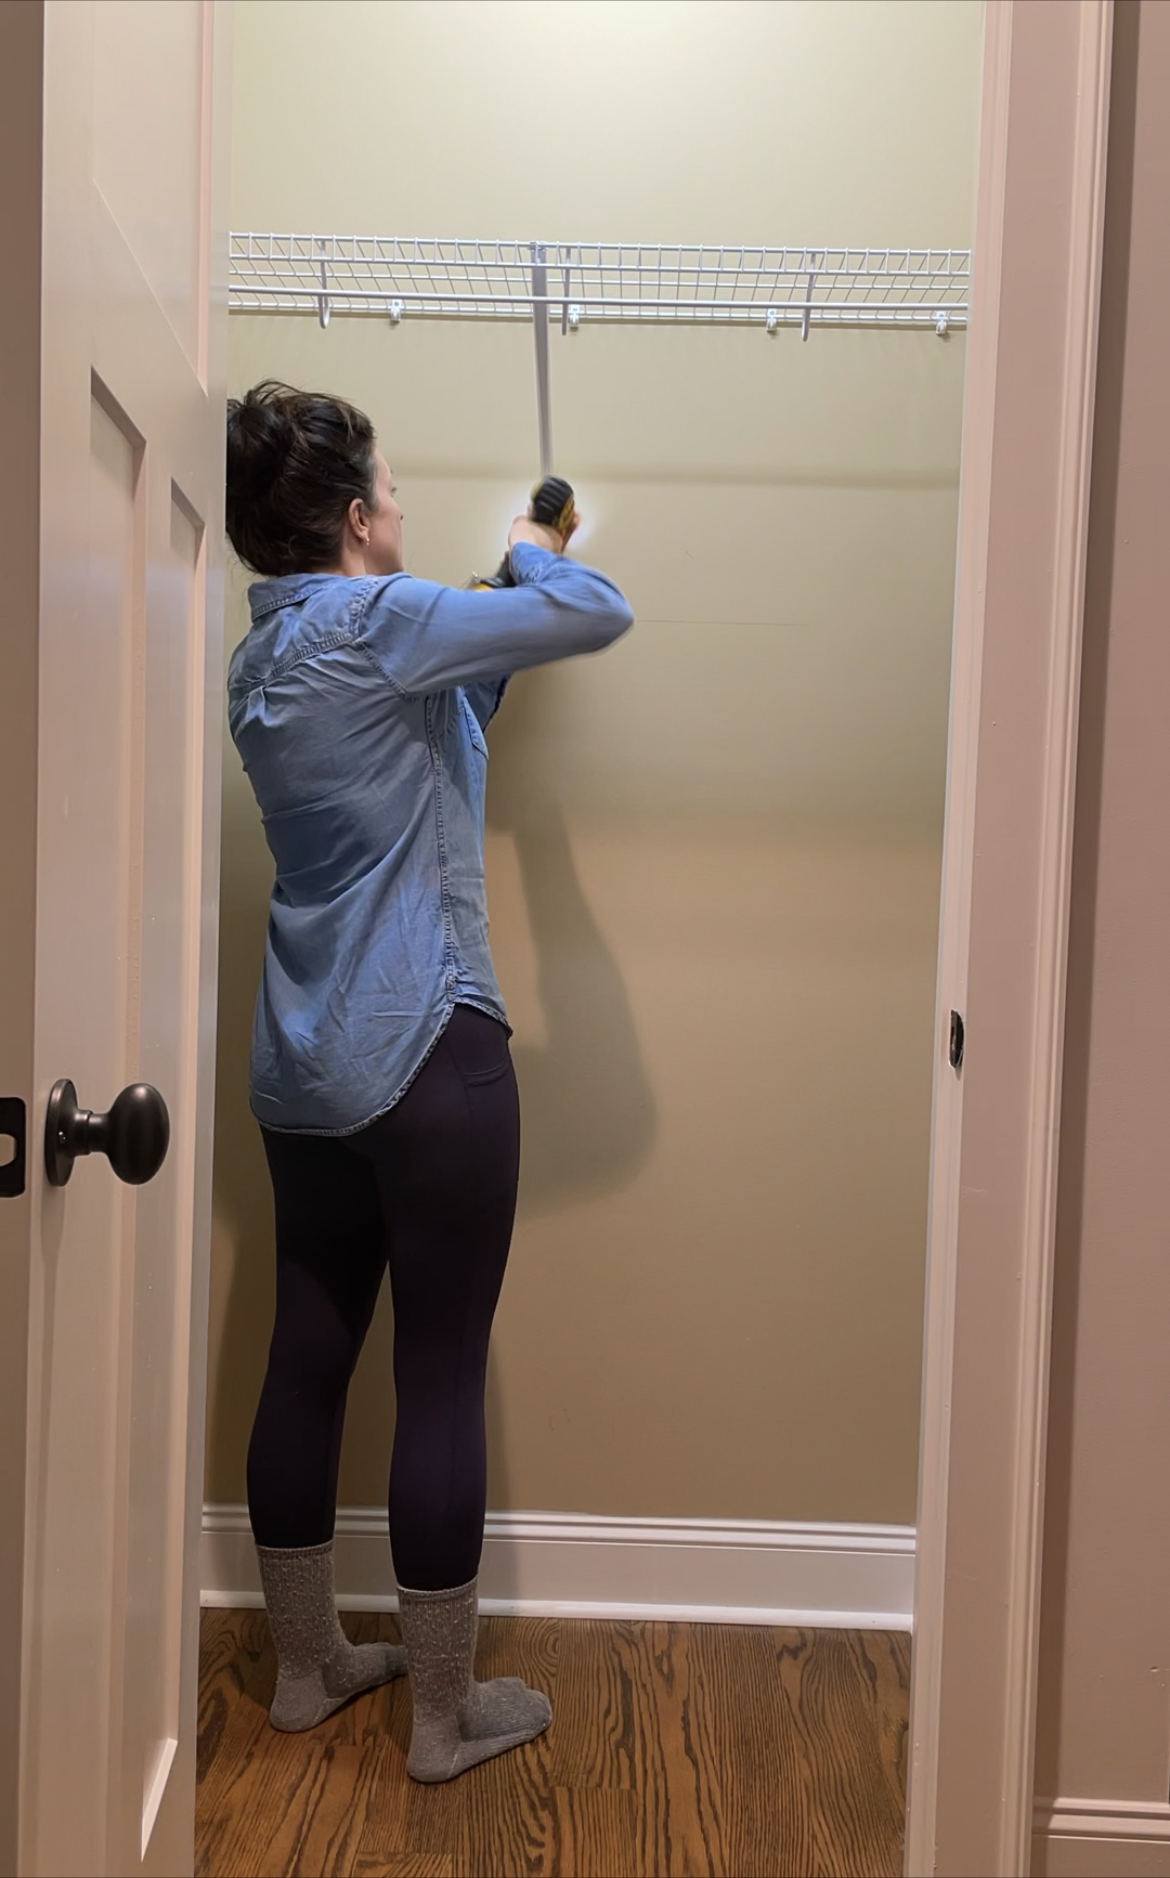
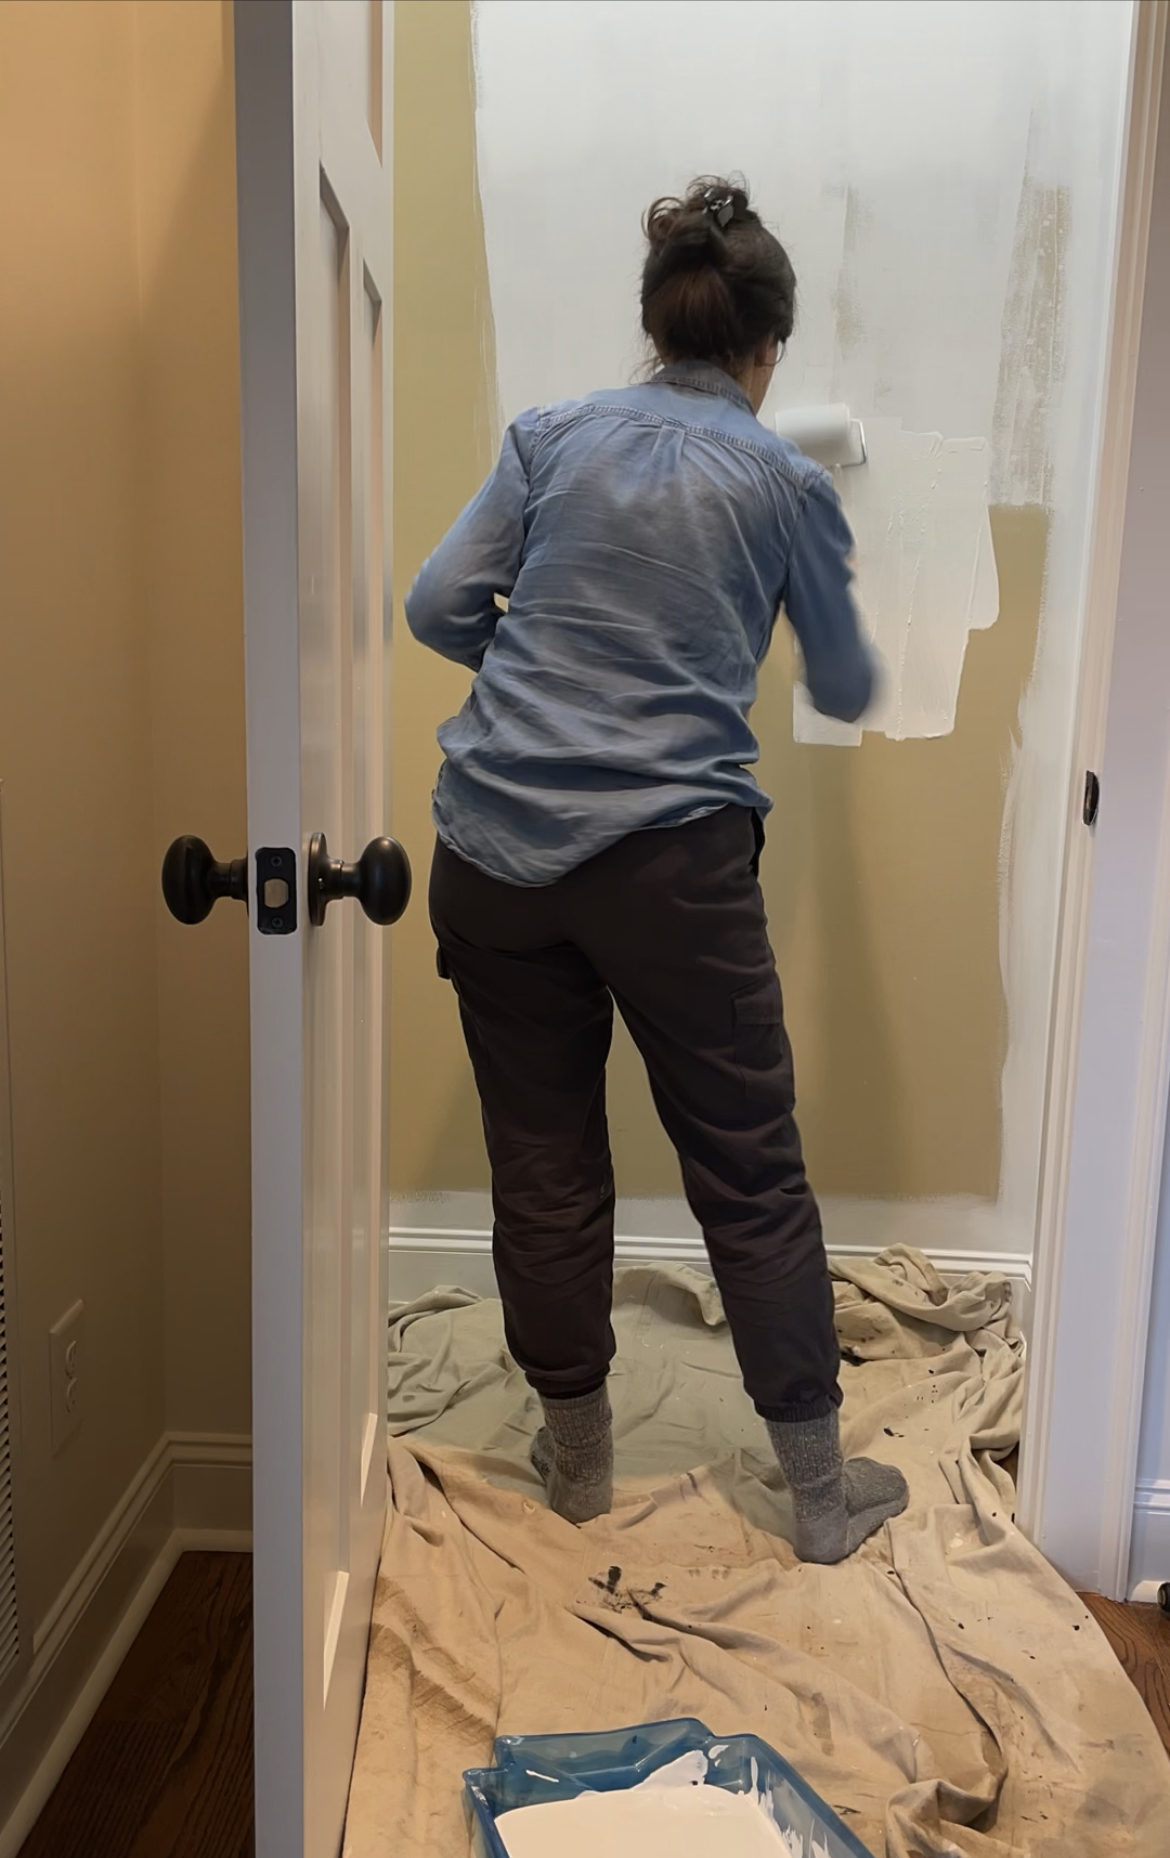
Fill wholes, sand and paint. I recommend painting before adding the support boards and shelves. You won’t be able to paint easily once the shelves are attached. I just used white paint as I didn’t want any color, but you could add color or even wallpaper.
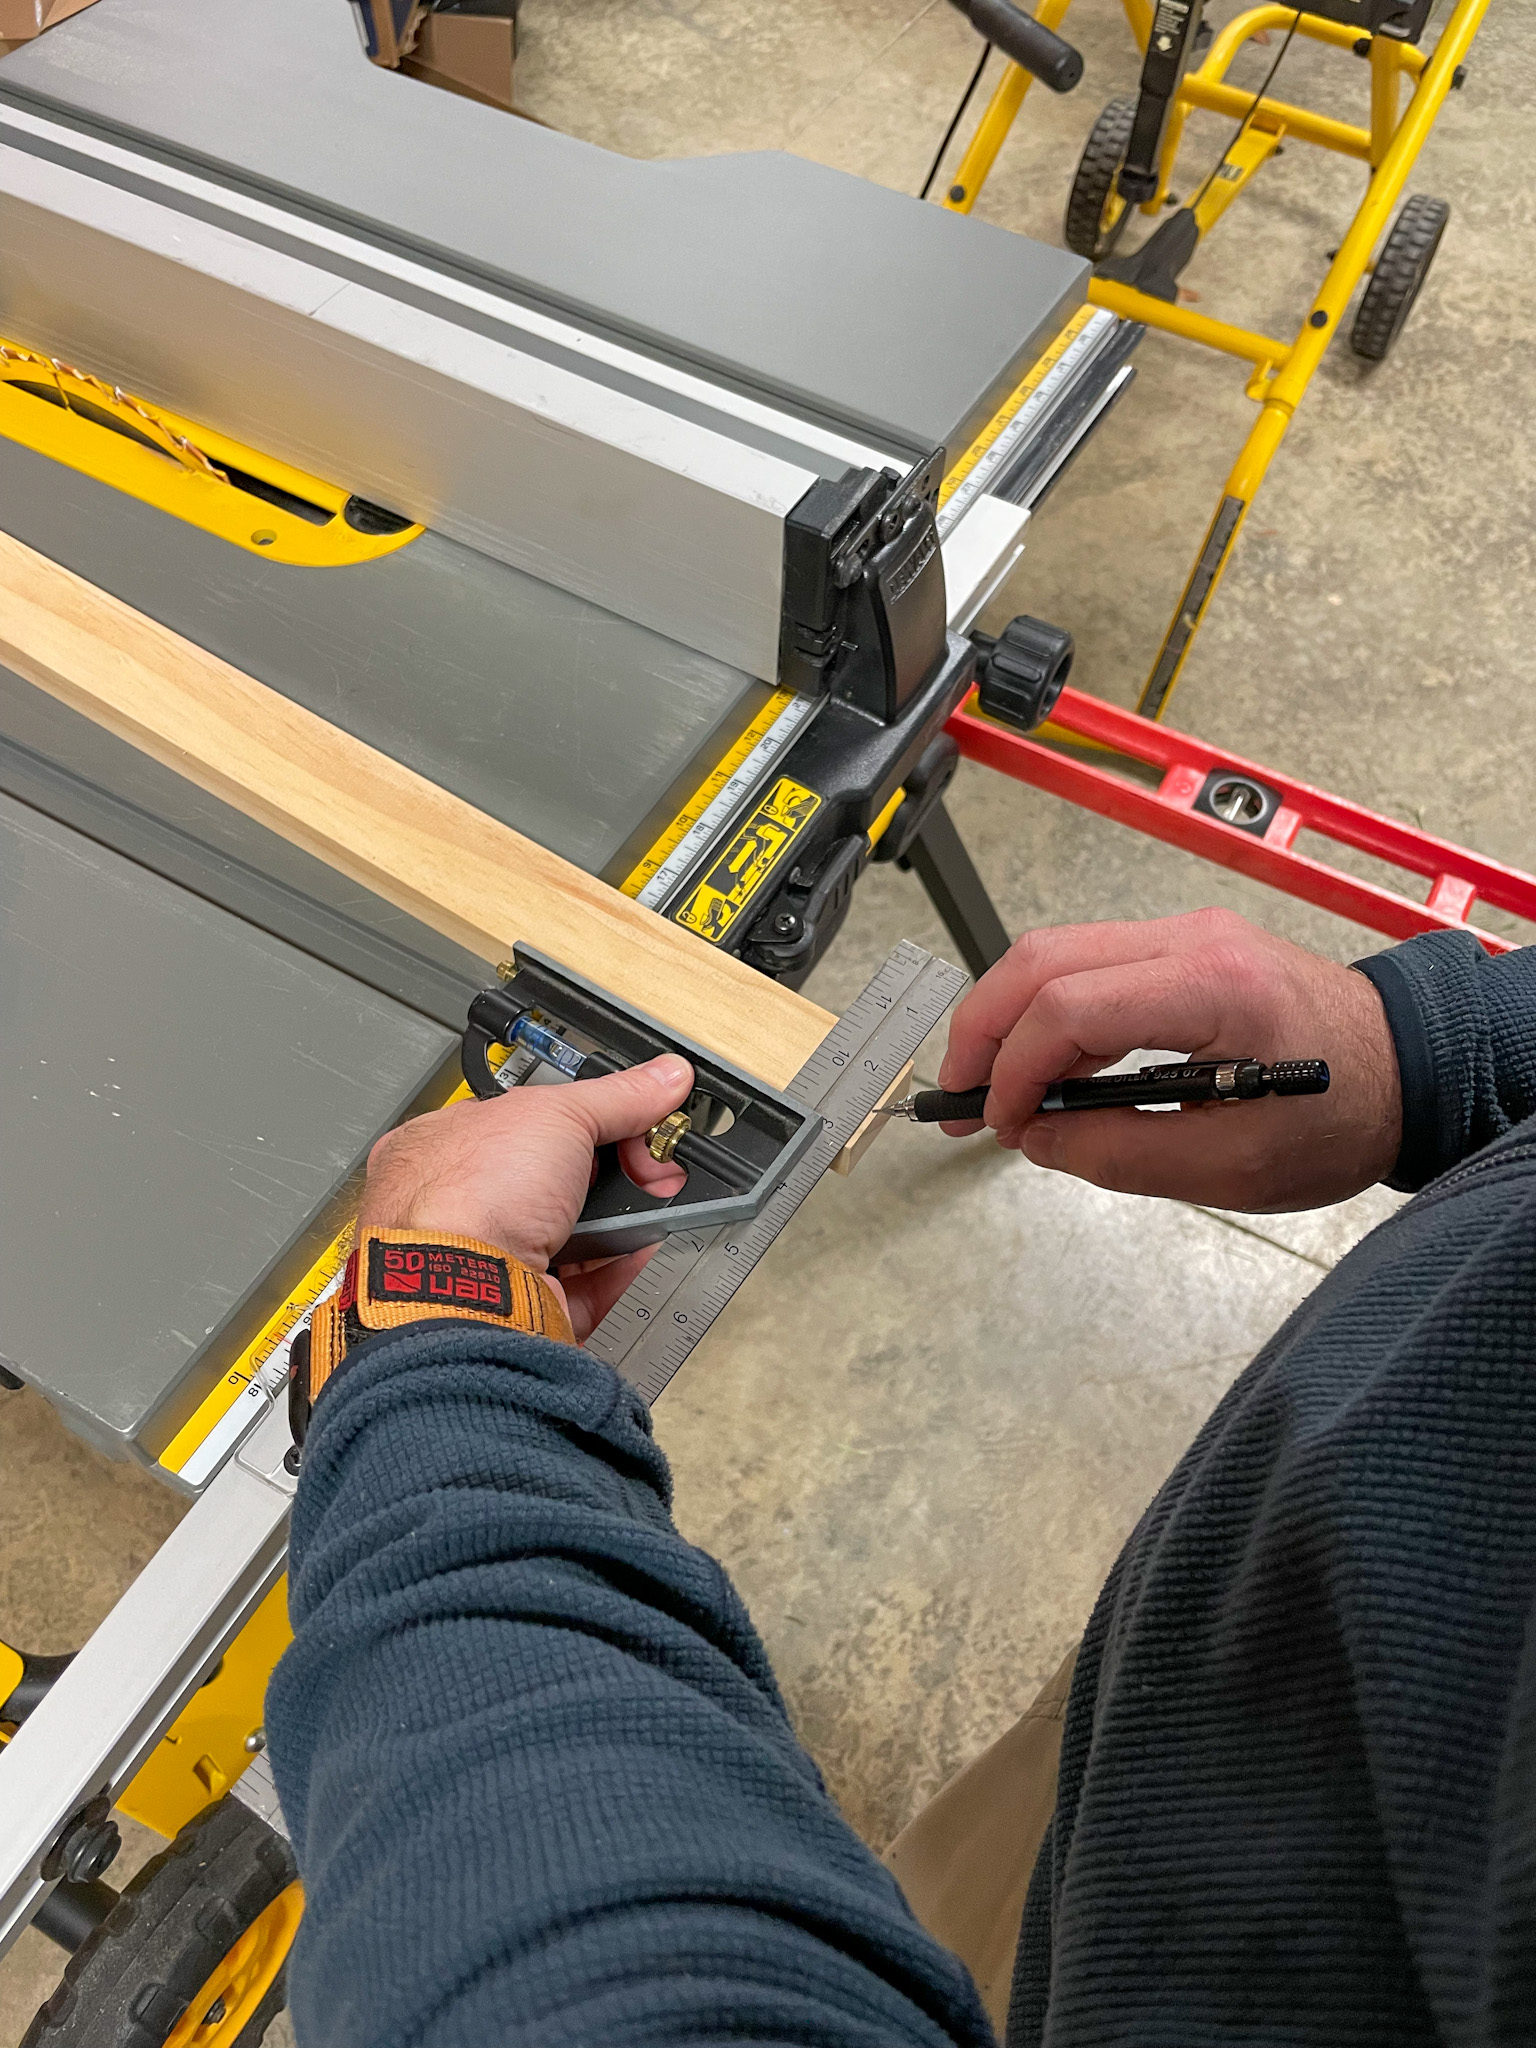
2. Measure and Measure and Again!
Once everything is removed you now have a clear area to get proper measurements. Measurements and proper measurements are key. I suggest using a laser measurer; not only do they make measuring really fast, it’s also a lot more accurate than trying to read a tape measure.
Whenever you’re doing built-ins it’s imperative that you spend time focusing on the measurements. Always assume that the space you’re working in is NOT square.
Measure at the back of the closet, the middle, and the front. It’s likely that your measurements will be slightly different from the back to the front. If they are, you’ll want to account for that when cutting your shelves.
3. Cut Your Support & Face Boards
You need to cut supports for your shelves using the 1×2’s. These will be drilled into the wall for your shelves to rest on. Based on your measurements and overall design will determine how many and how long these support boards will be. Don’t attach these just yet; just get them cut and ready for sanding and staining.
Also cut your shelf facing using the 1×2’s. These will be cut based on how long your shelves are or any piece of plywood that needs a face. We had shelves and a center portion that needed the facing. Set all your cut 1×2’s aside for later.
4. Cut & Test Your Wood Shelves
Now that your wood supports are cut and installed it’s time to make your shelves. Cut your plywood shelves to size based on your measurements in step 2.
NOTE: Your shelves will be slightly different sizes based on your wall. Ensure you keep them organized so you know which shelves go where on the wall.
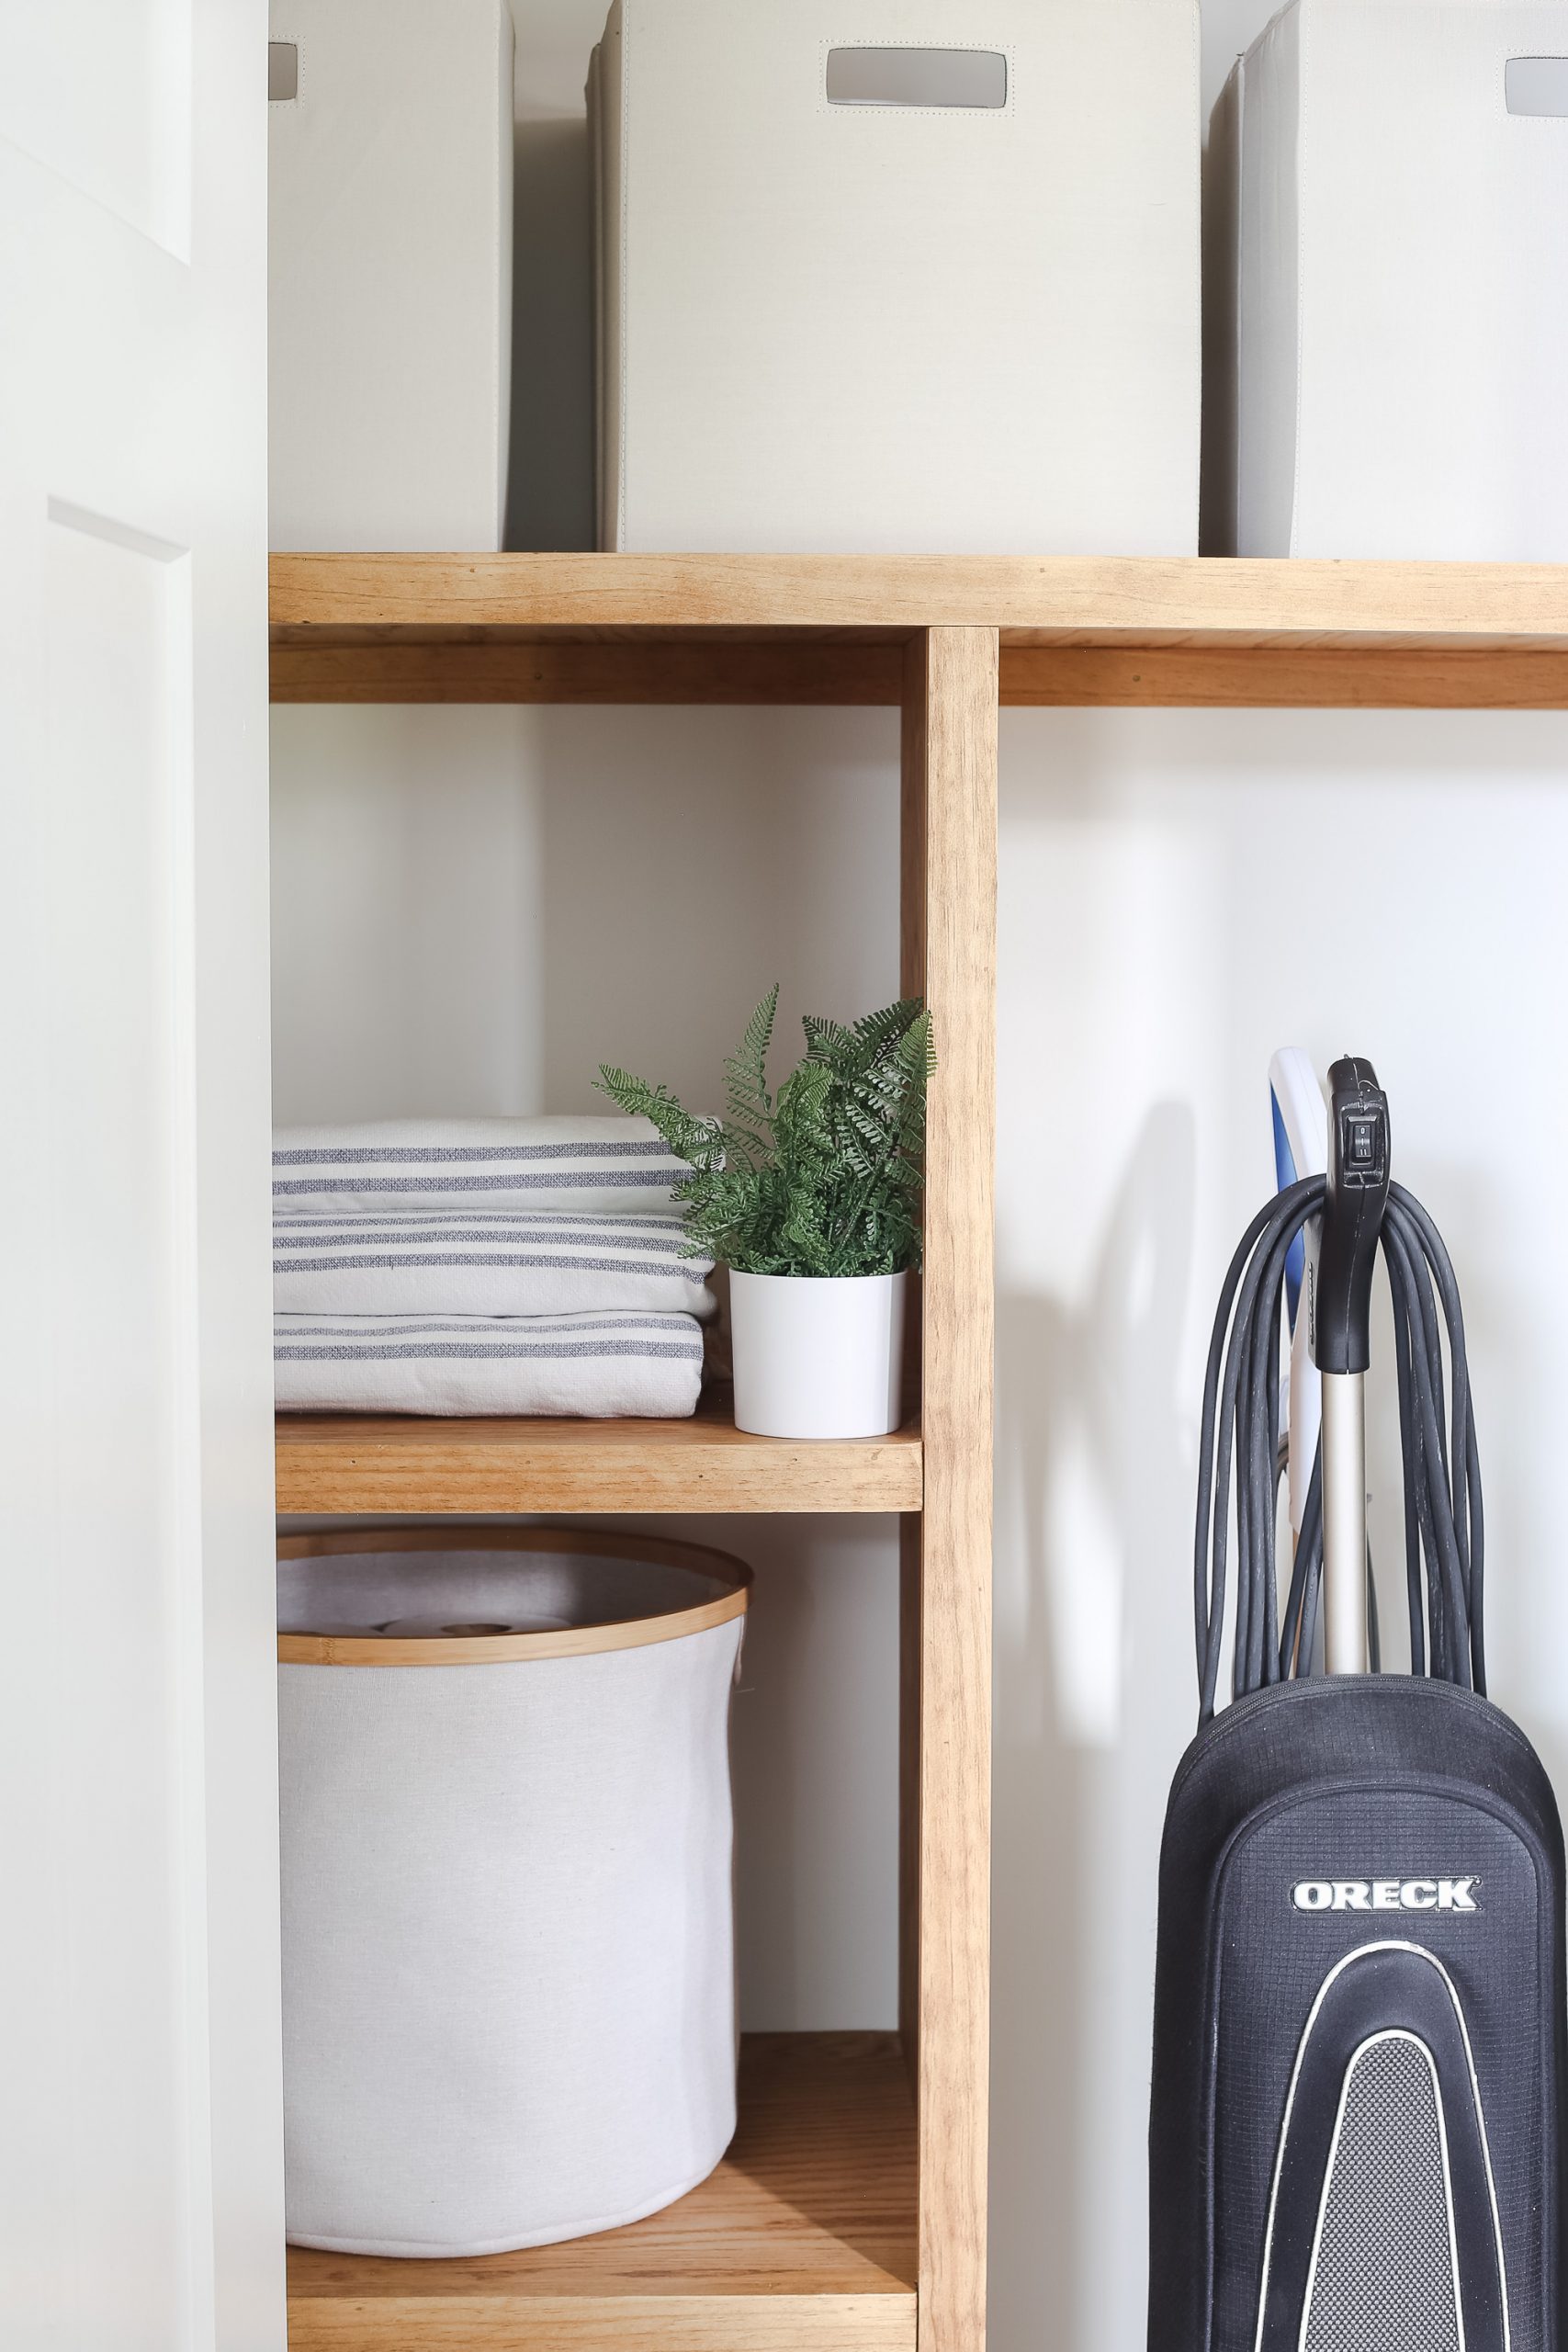
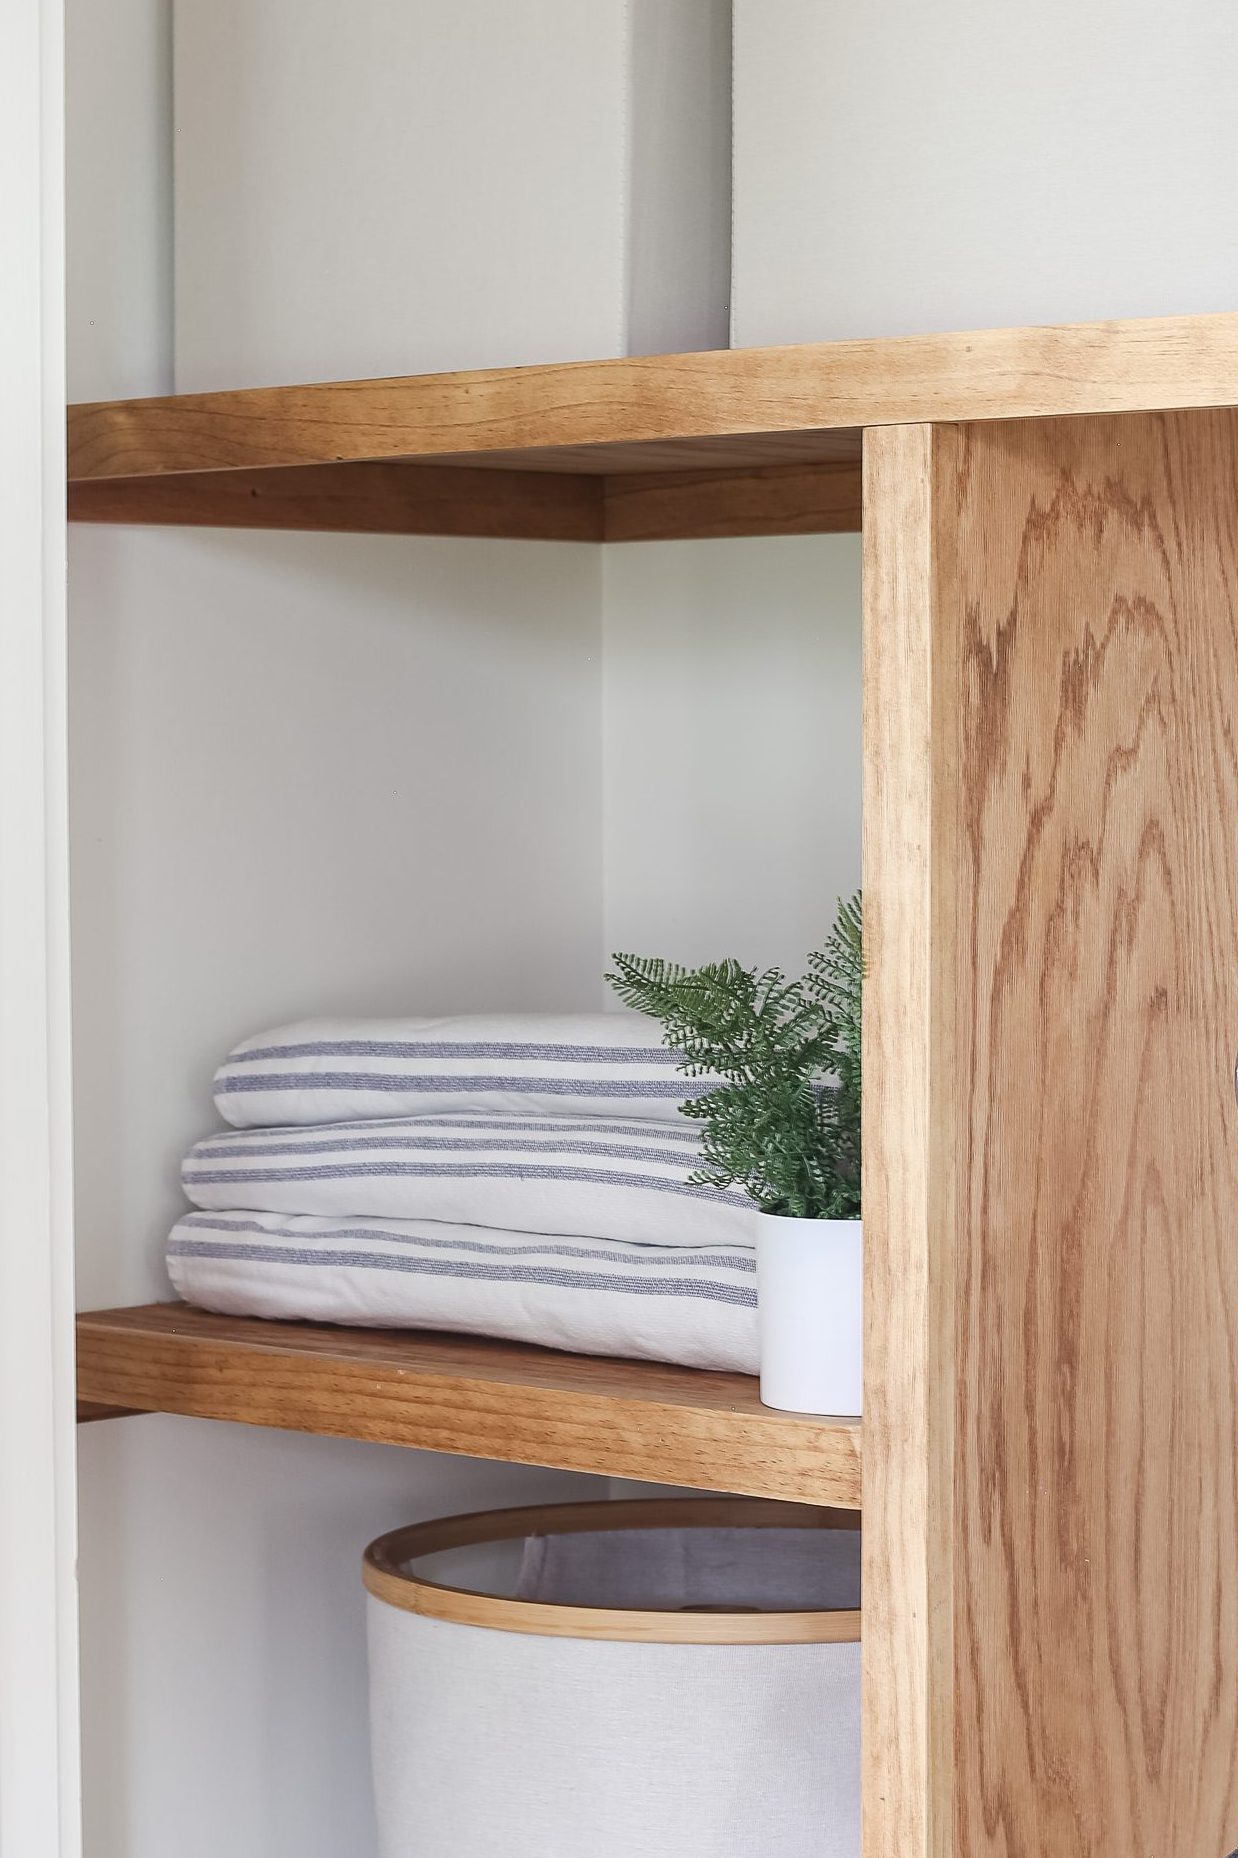
We cut the plywood for our shelves to be 17.25 deep. This will make our shelves 18″deep once we add a 1×2 to the front of the plywood shelf.
Once you’ve cut your shelves test them to ensure they will fit. You will likely have different size shelves for each shelf and you will need to label them accordingly.
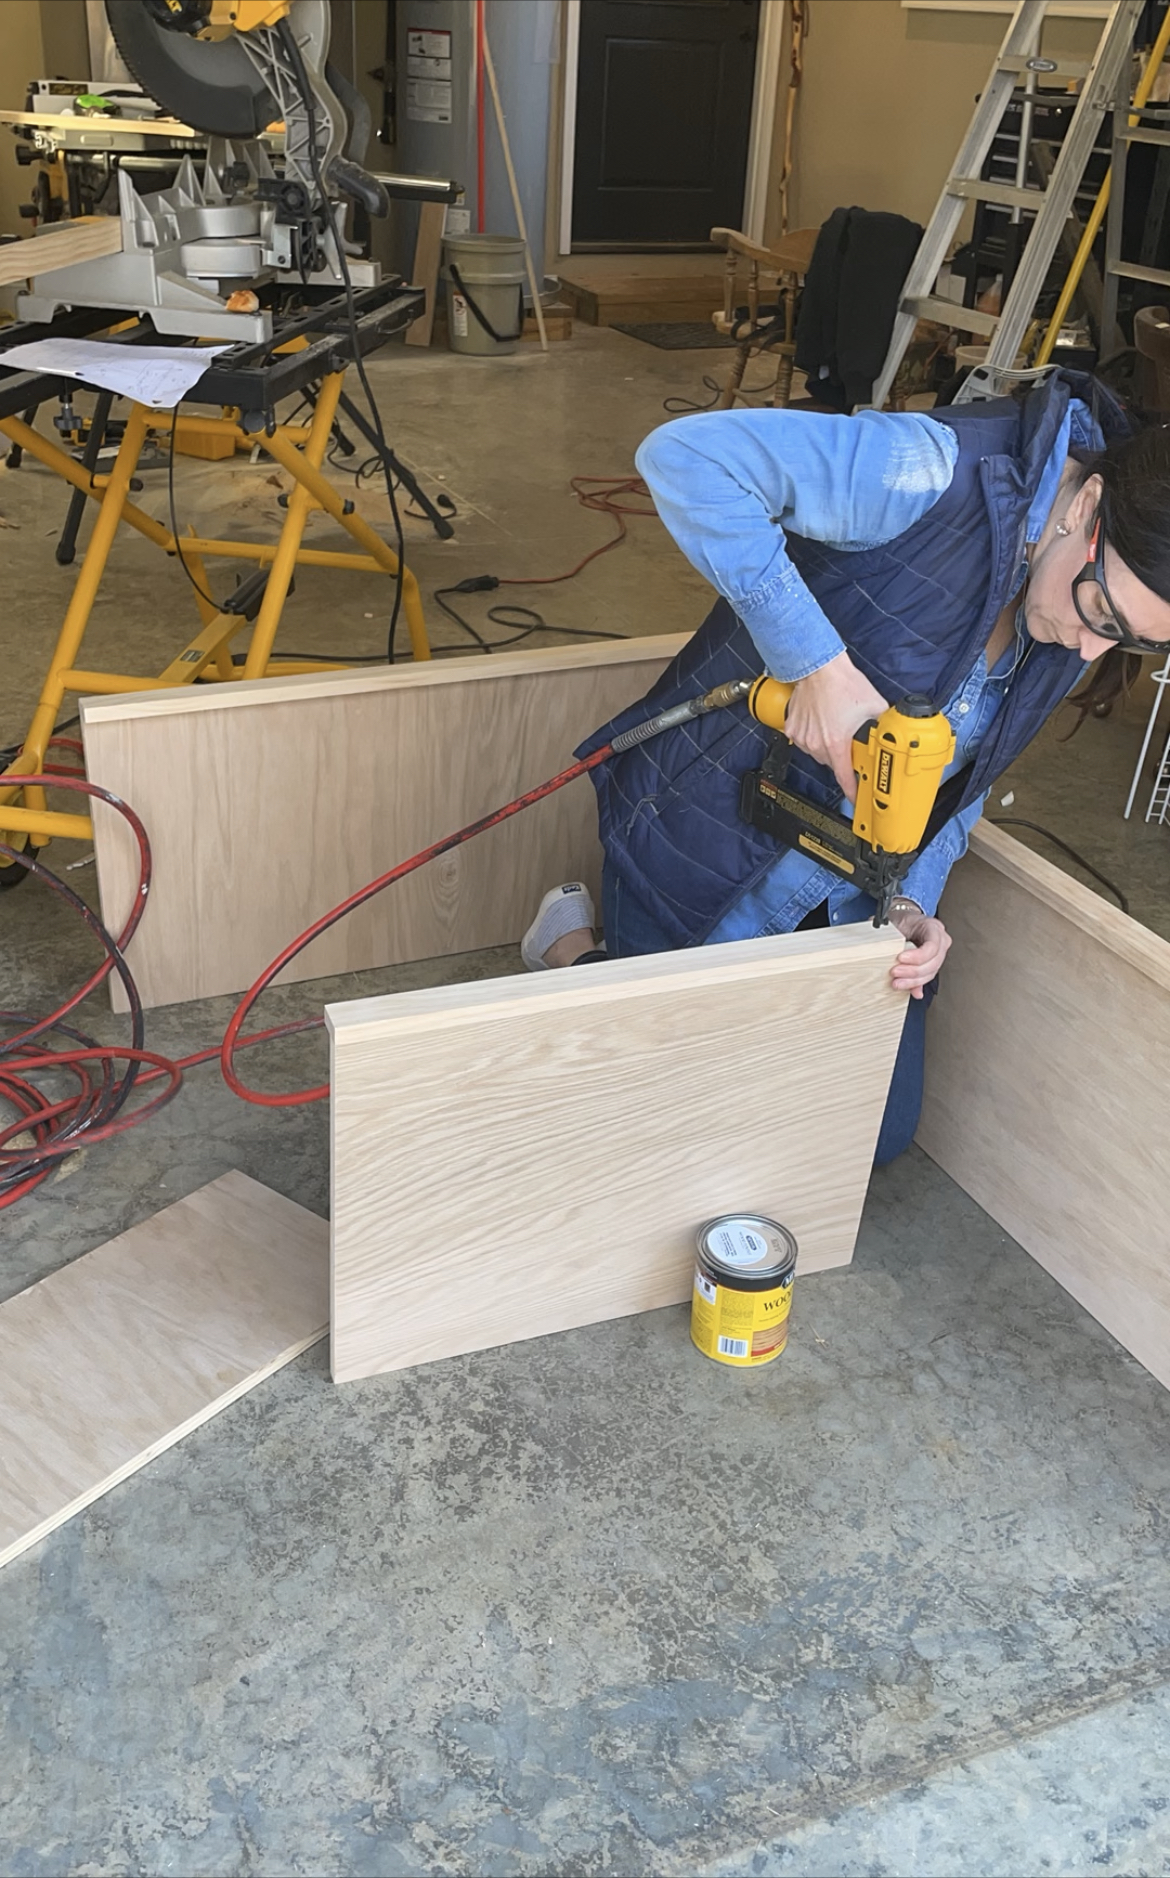
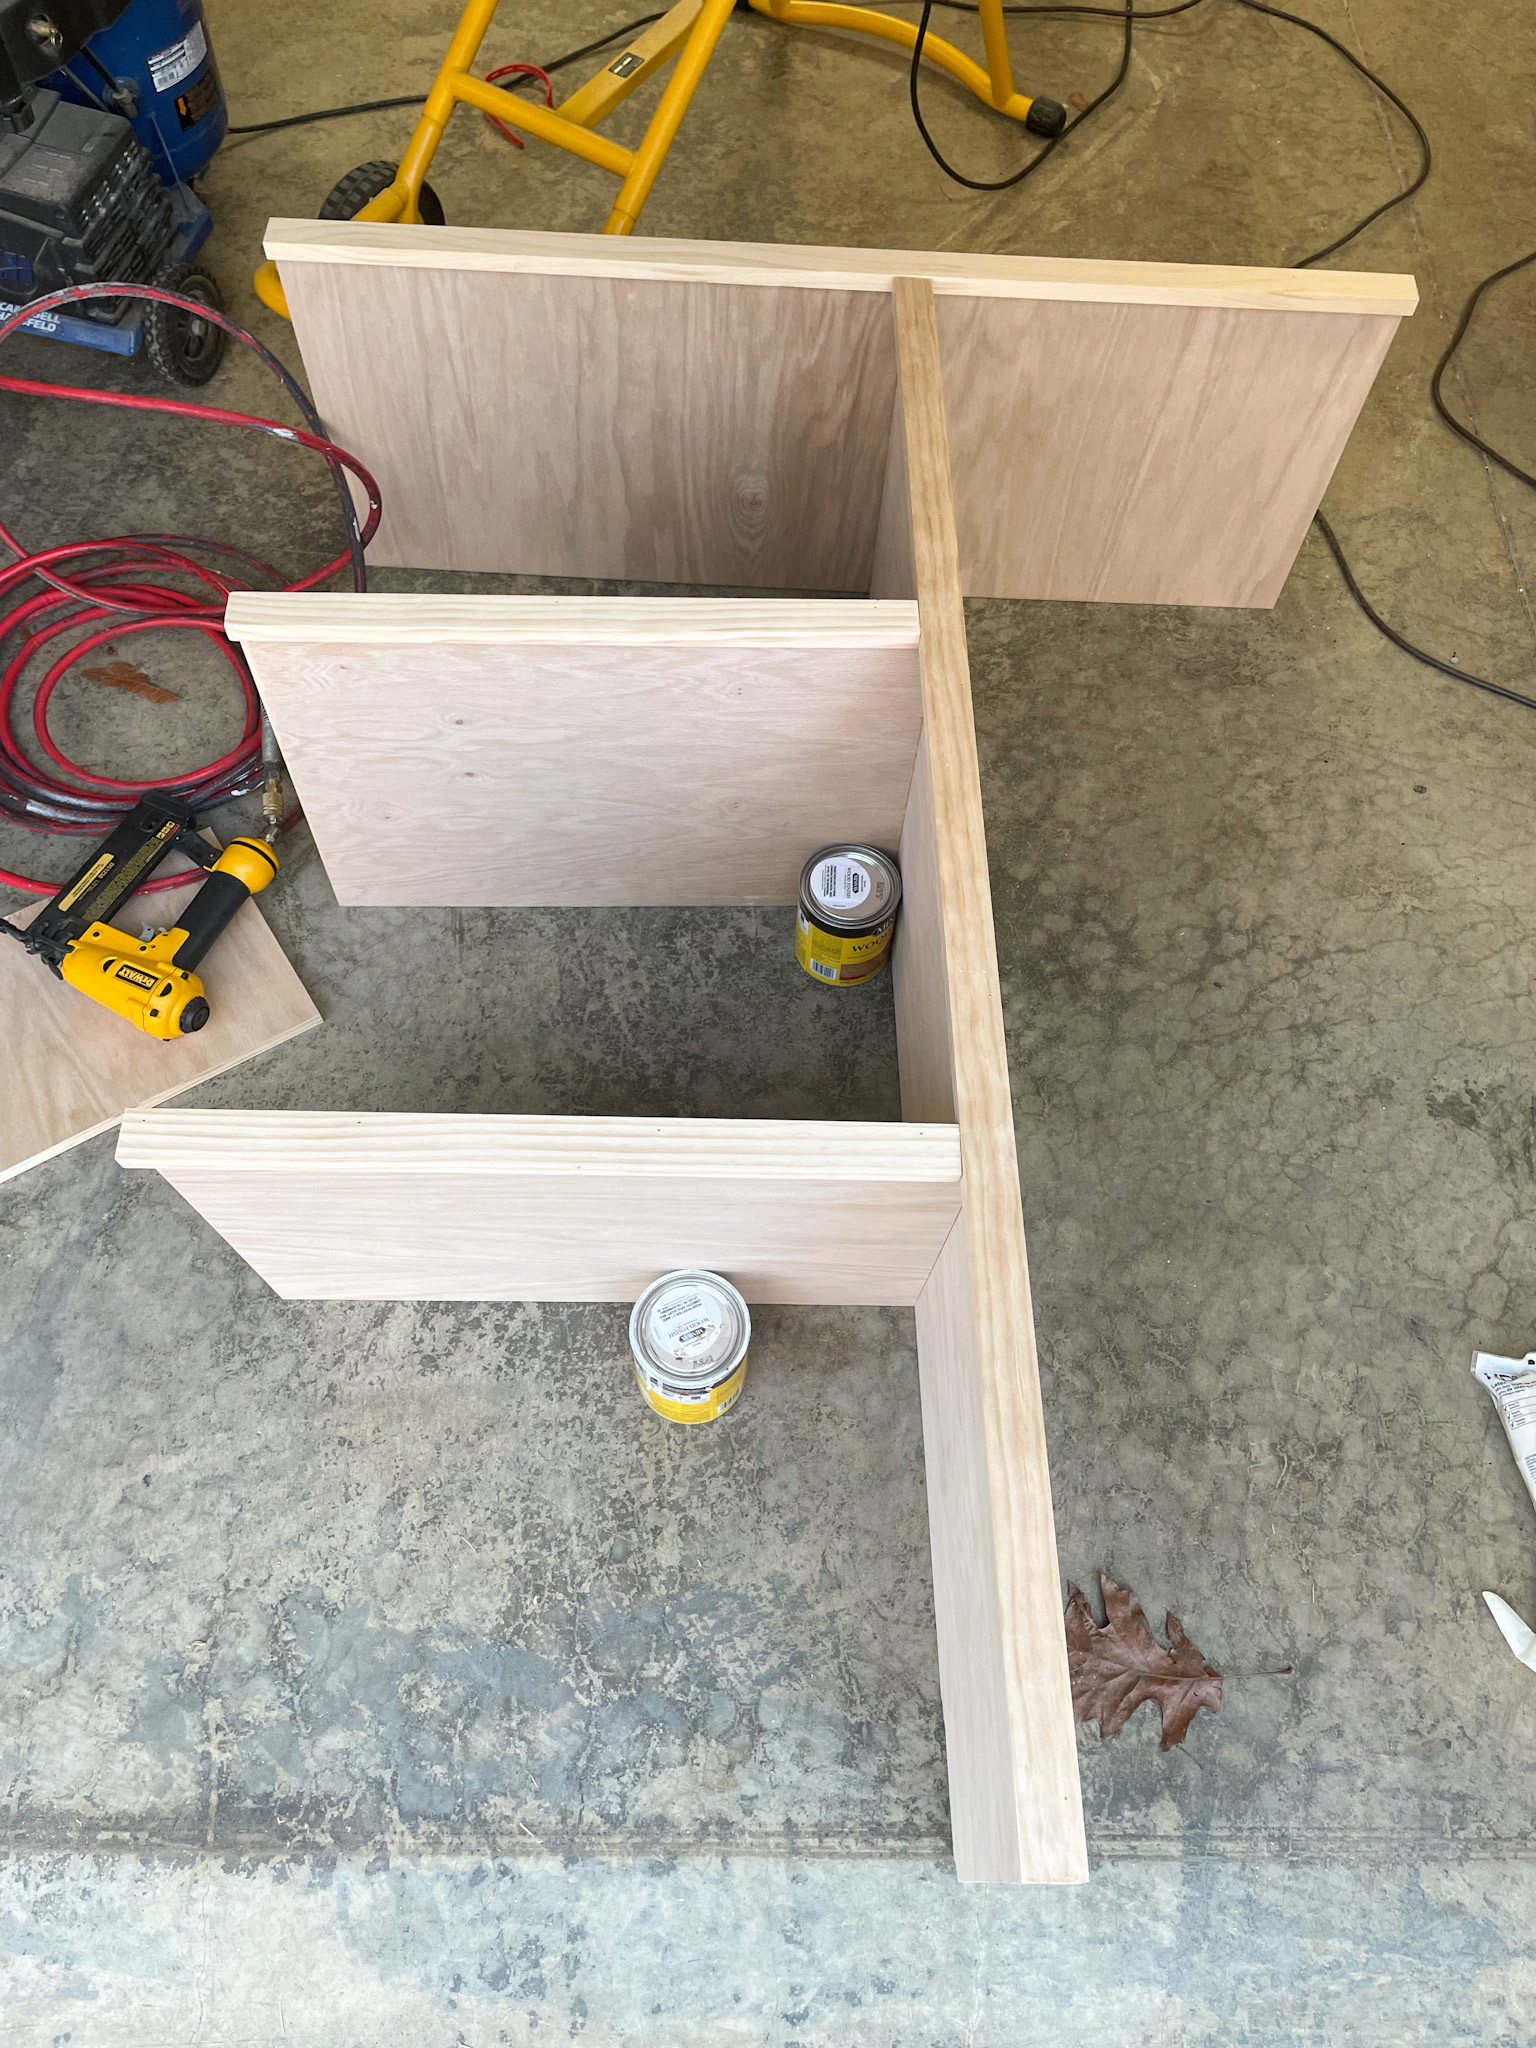
5. Attach 1X2’s to Your Shelves
Now you want to take your shelves and your cut 1×2’s and attached them to the face of the plywood shelves. I would use wood glue to attach these and let them dry before nailing them together. I did not use wood glue and wish I would have; would have made the faces a little sturdier.
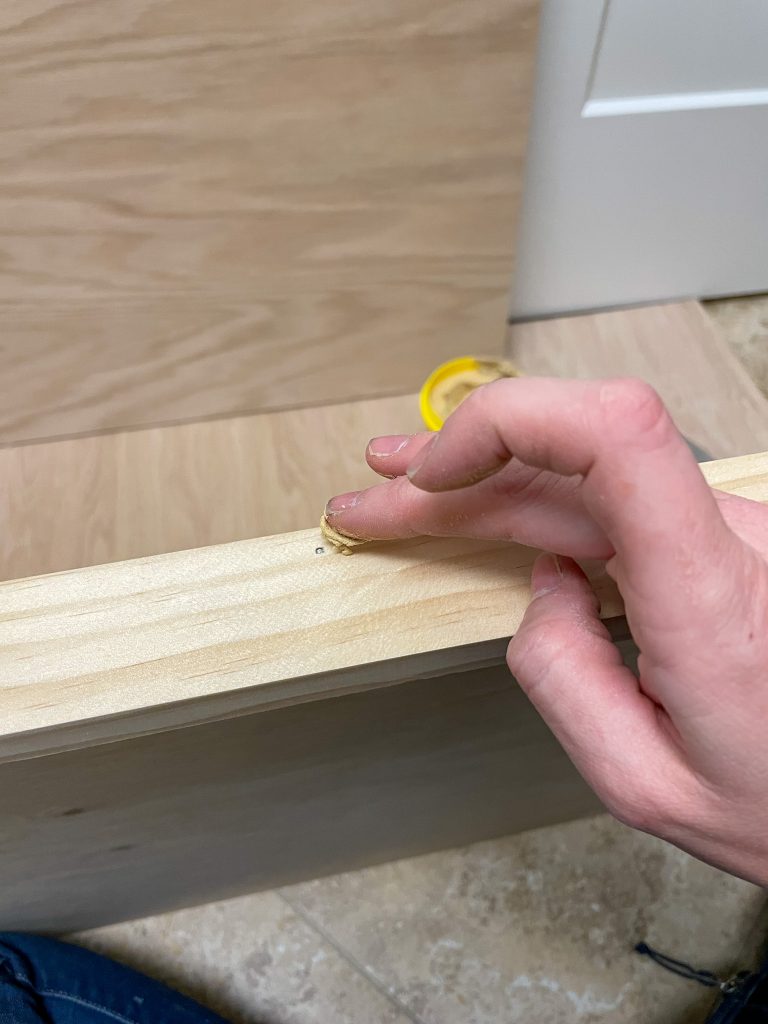
6. Prep, Stain & Protect
Your supports are cut; your shelves and facings are cut and the shelves are assembled. Now you want to make these look good.
Wood fill the nail holes on the face of your shelves.
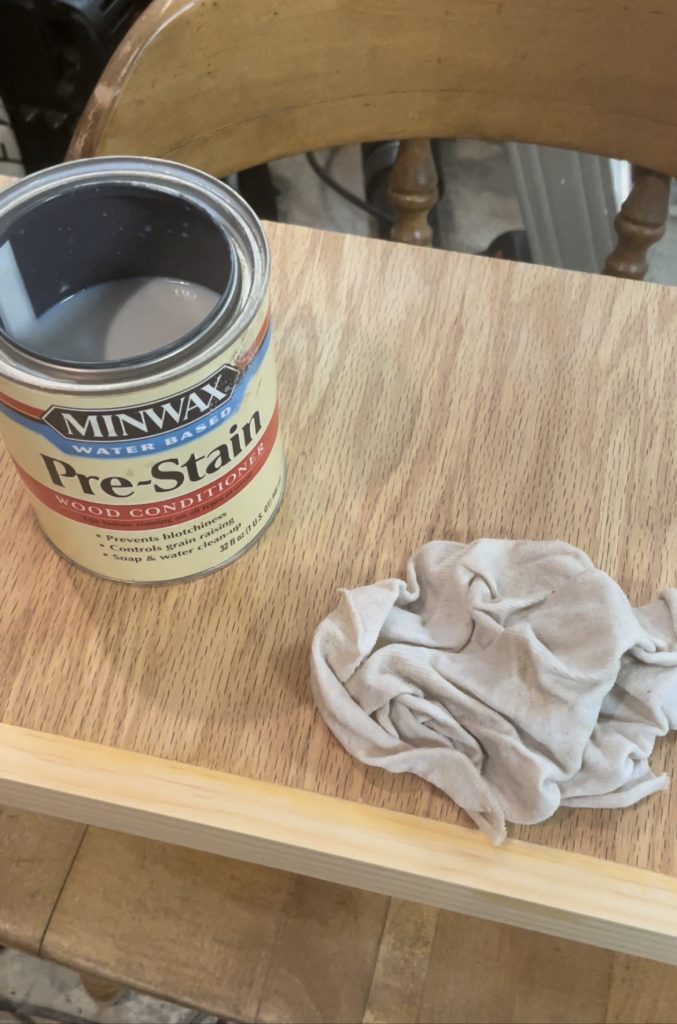
Sand your shelves and support boards with 180 and 220-grit sandpaper. Once your shelves are smooth apply pre-stain to ensure your final stain is consistent and not blotchy.
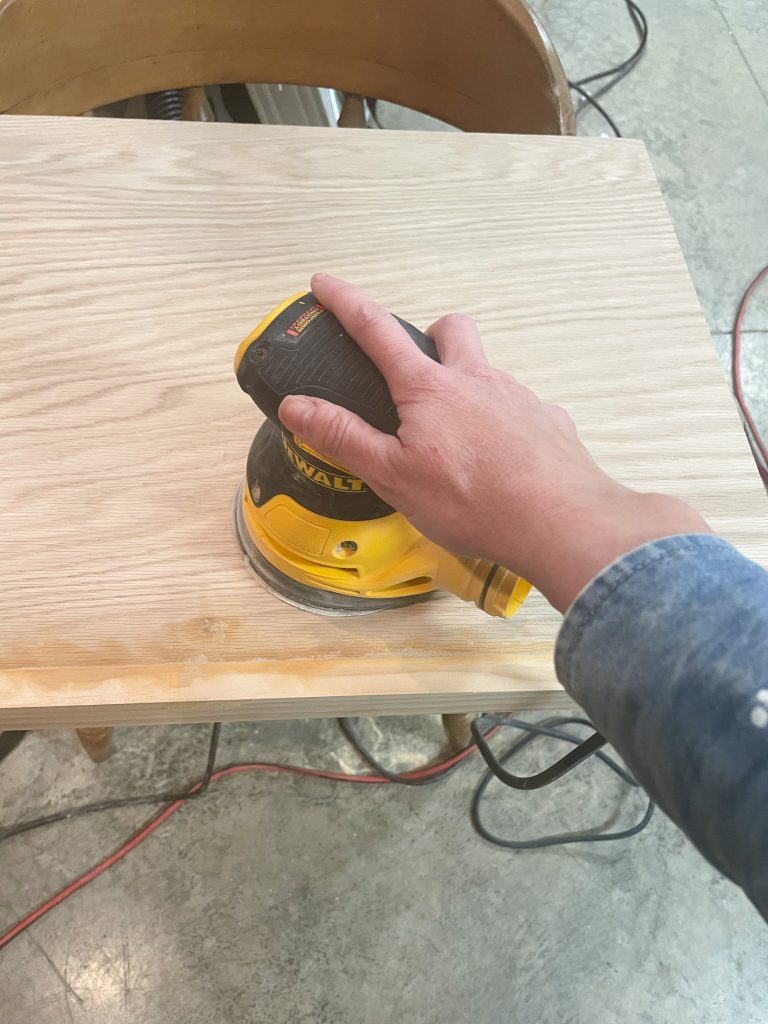
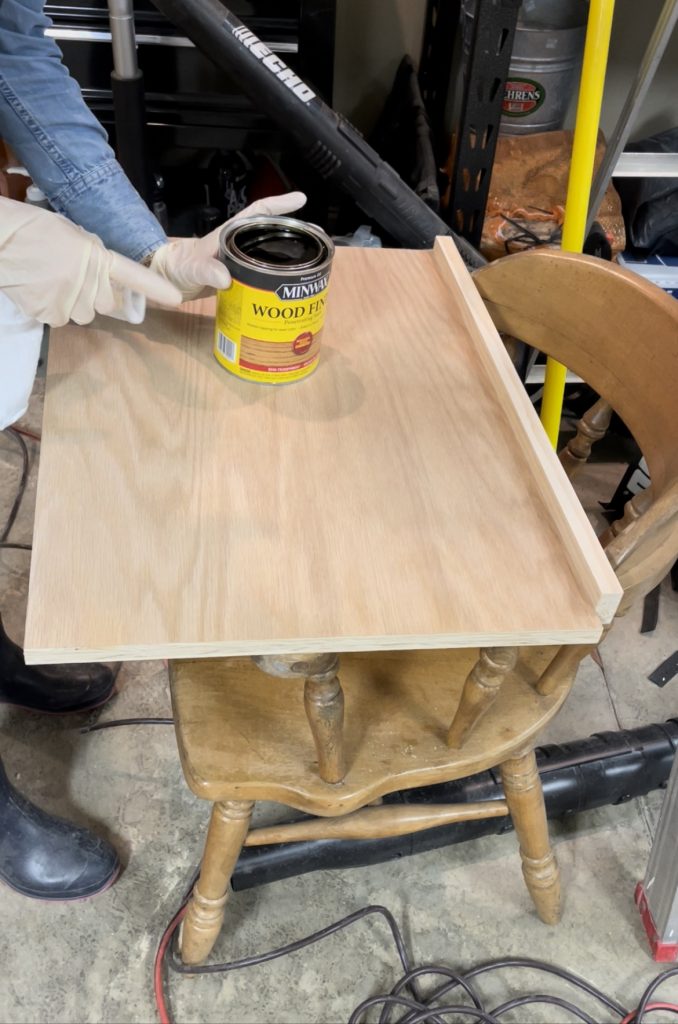
Now it’s time to add your stain; which is my favorite part because I can begin to see my project finally coming together.
After the stain has dried go ahead and seal your shelves. We used Polyurethane in Ultra Flat because it doesn’t change the color or add any sheen. Let the shelves and supports board rest a few days before adding them to the closet to air out.
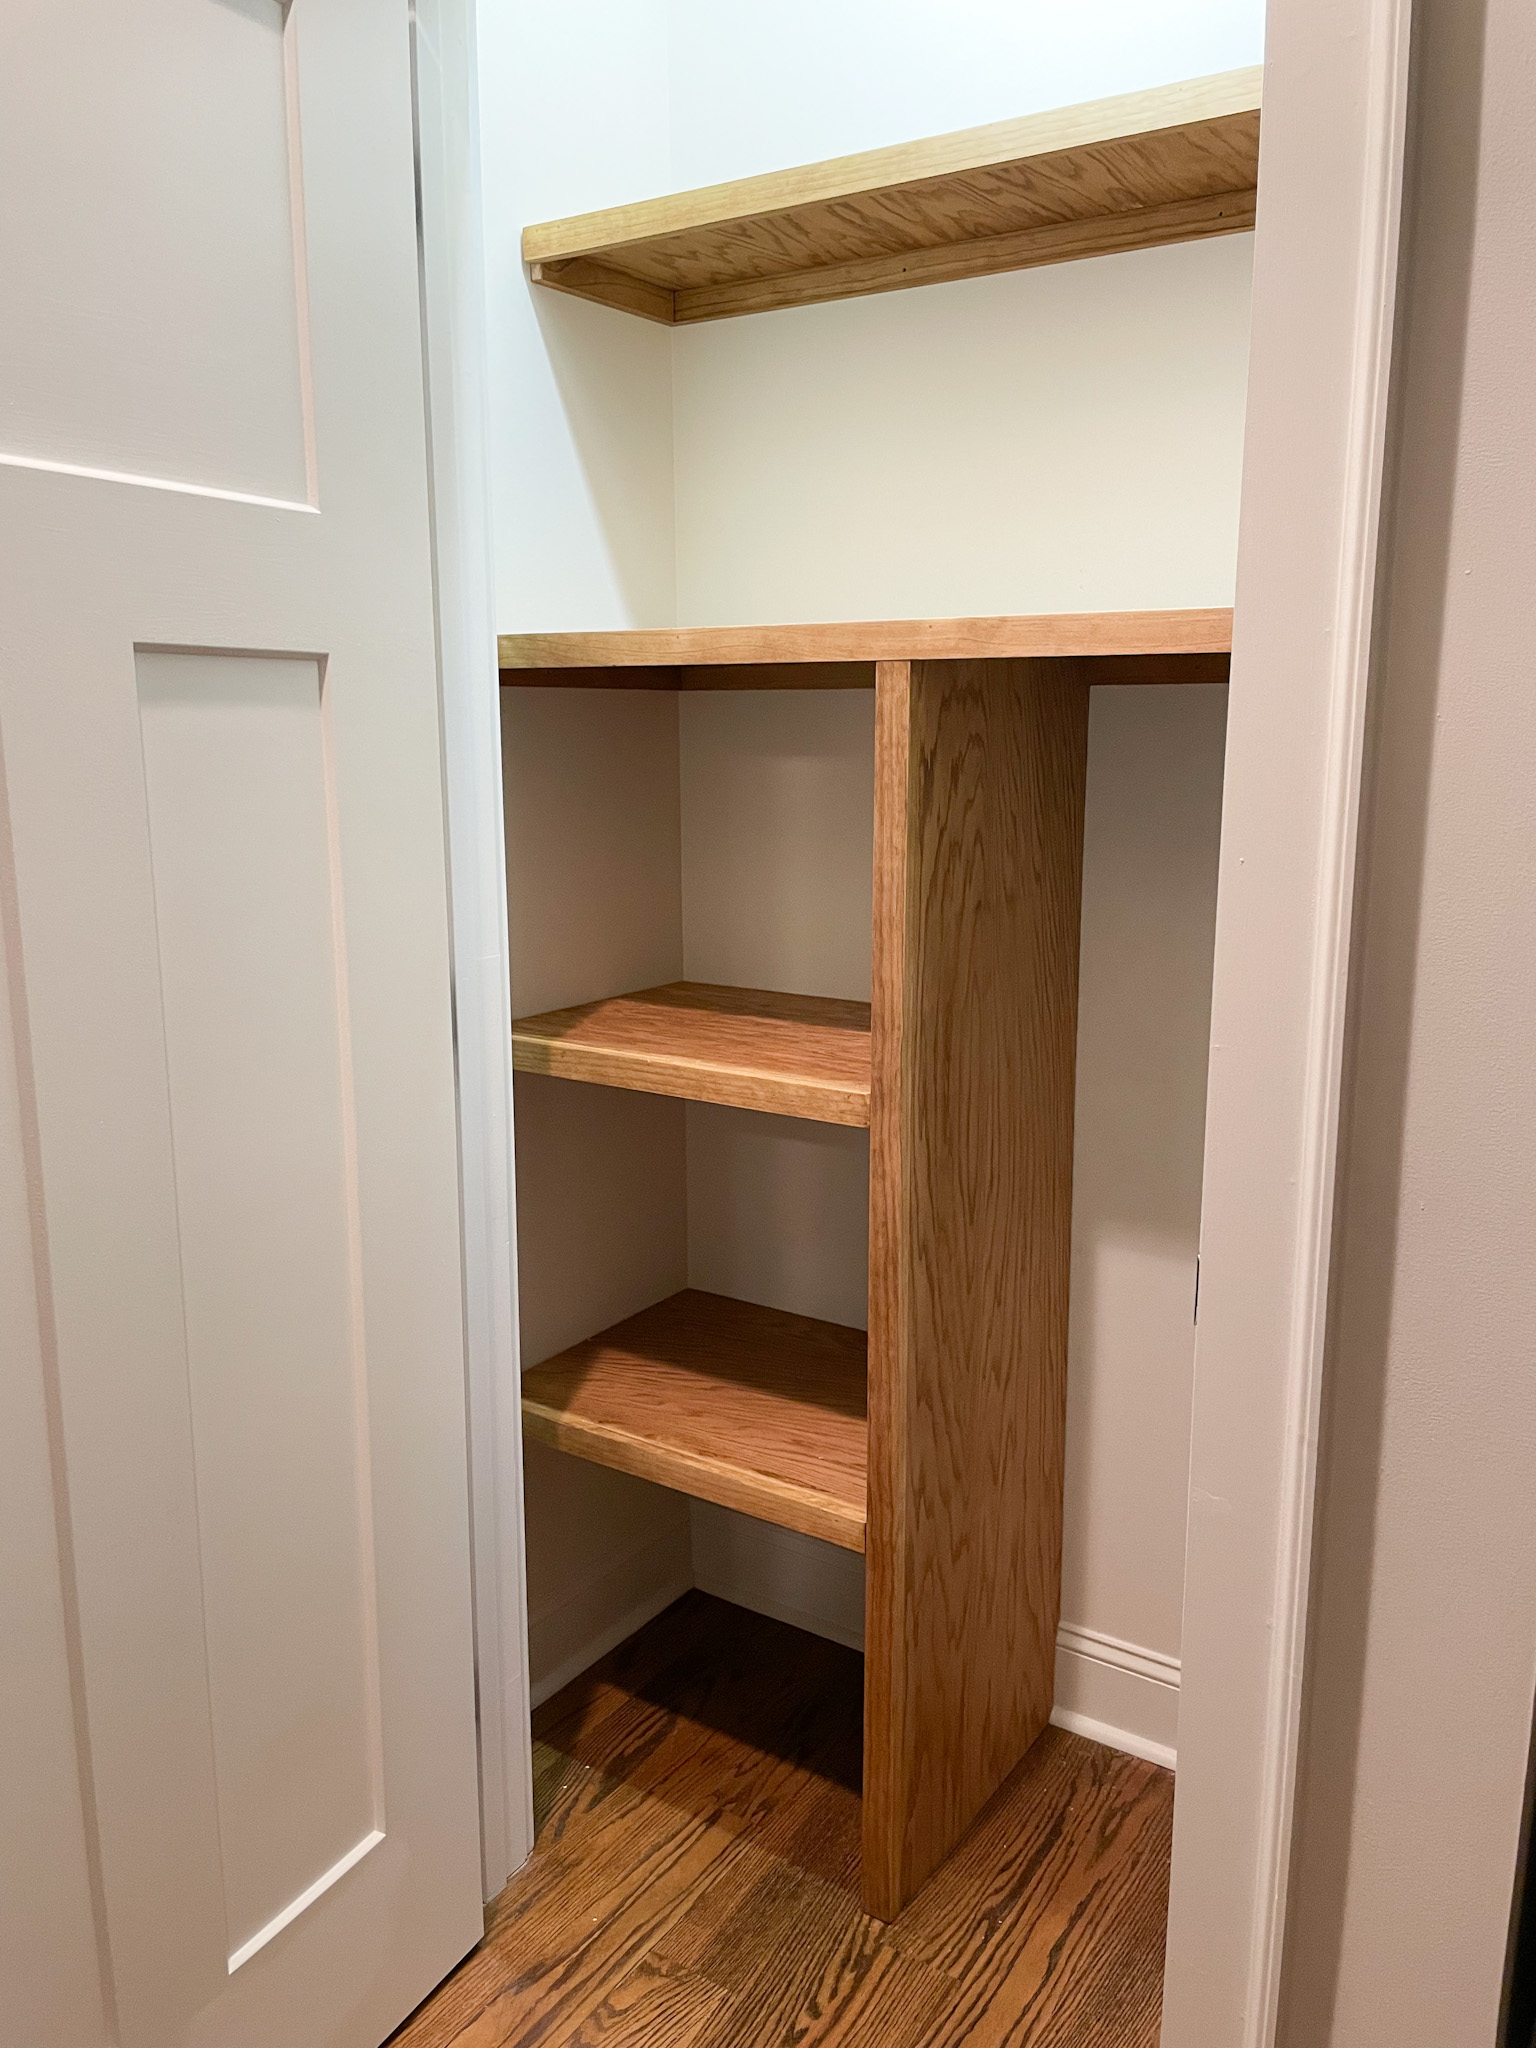
7. Install the Support Boards
All the measuring, designing and prep work is about to pay off. Now is the fun part of adding your shelves to the closet and seeing this project complete.
Mark your studs and then begin adding the support boards. We added our center partition first because that gauged how everything else was assembled.
Start with the supports along the back and then move onto the sides. Using your level ensure your supports are level and then pre-drill through your support and into the wall. Then, screw through the pre-drilled hole and anchor into the wall.
8. Add the Shelves/Walls
The supports are done and installed.
Add your center support and shelves. Finish up with the rest of the shelves by placing your shelves on the supports. You might need to add additional nails to ensure the shelves are securely attached to the supports.
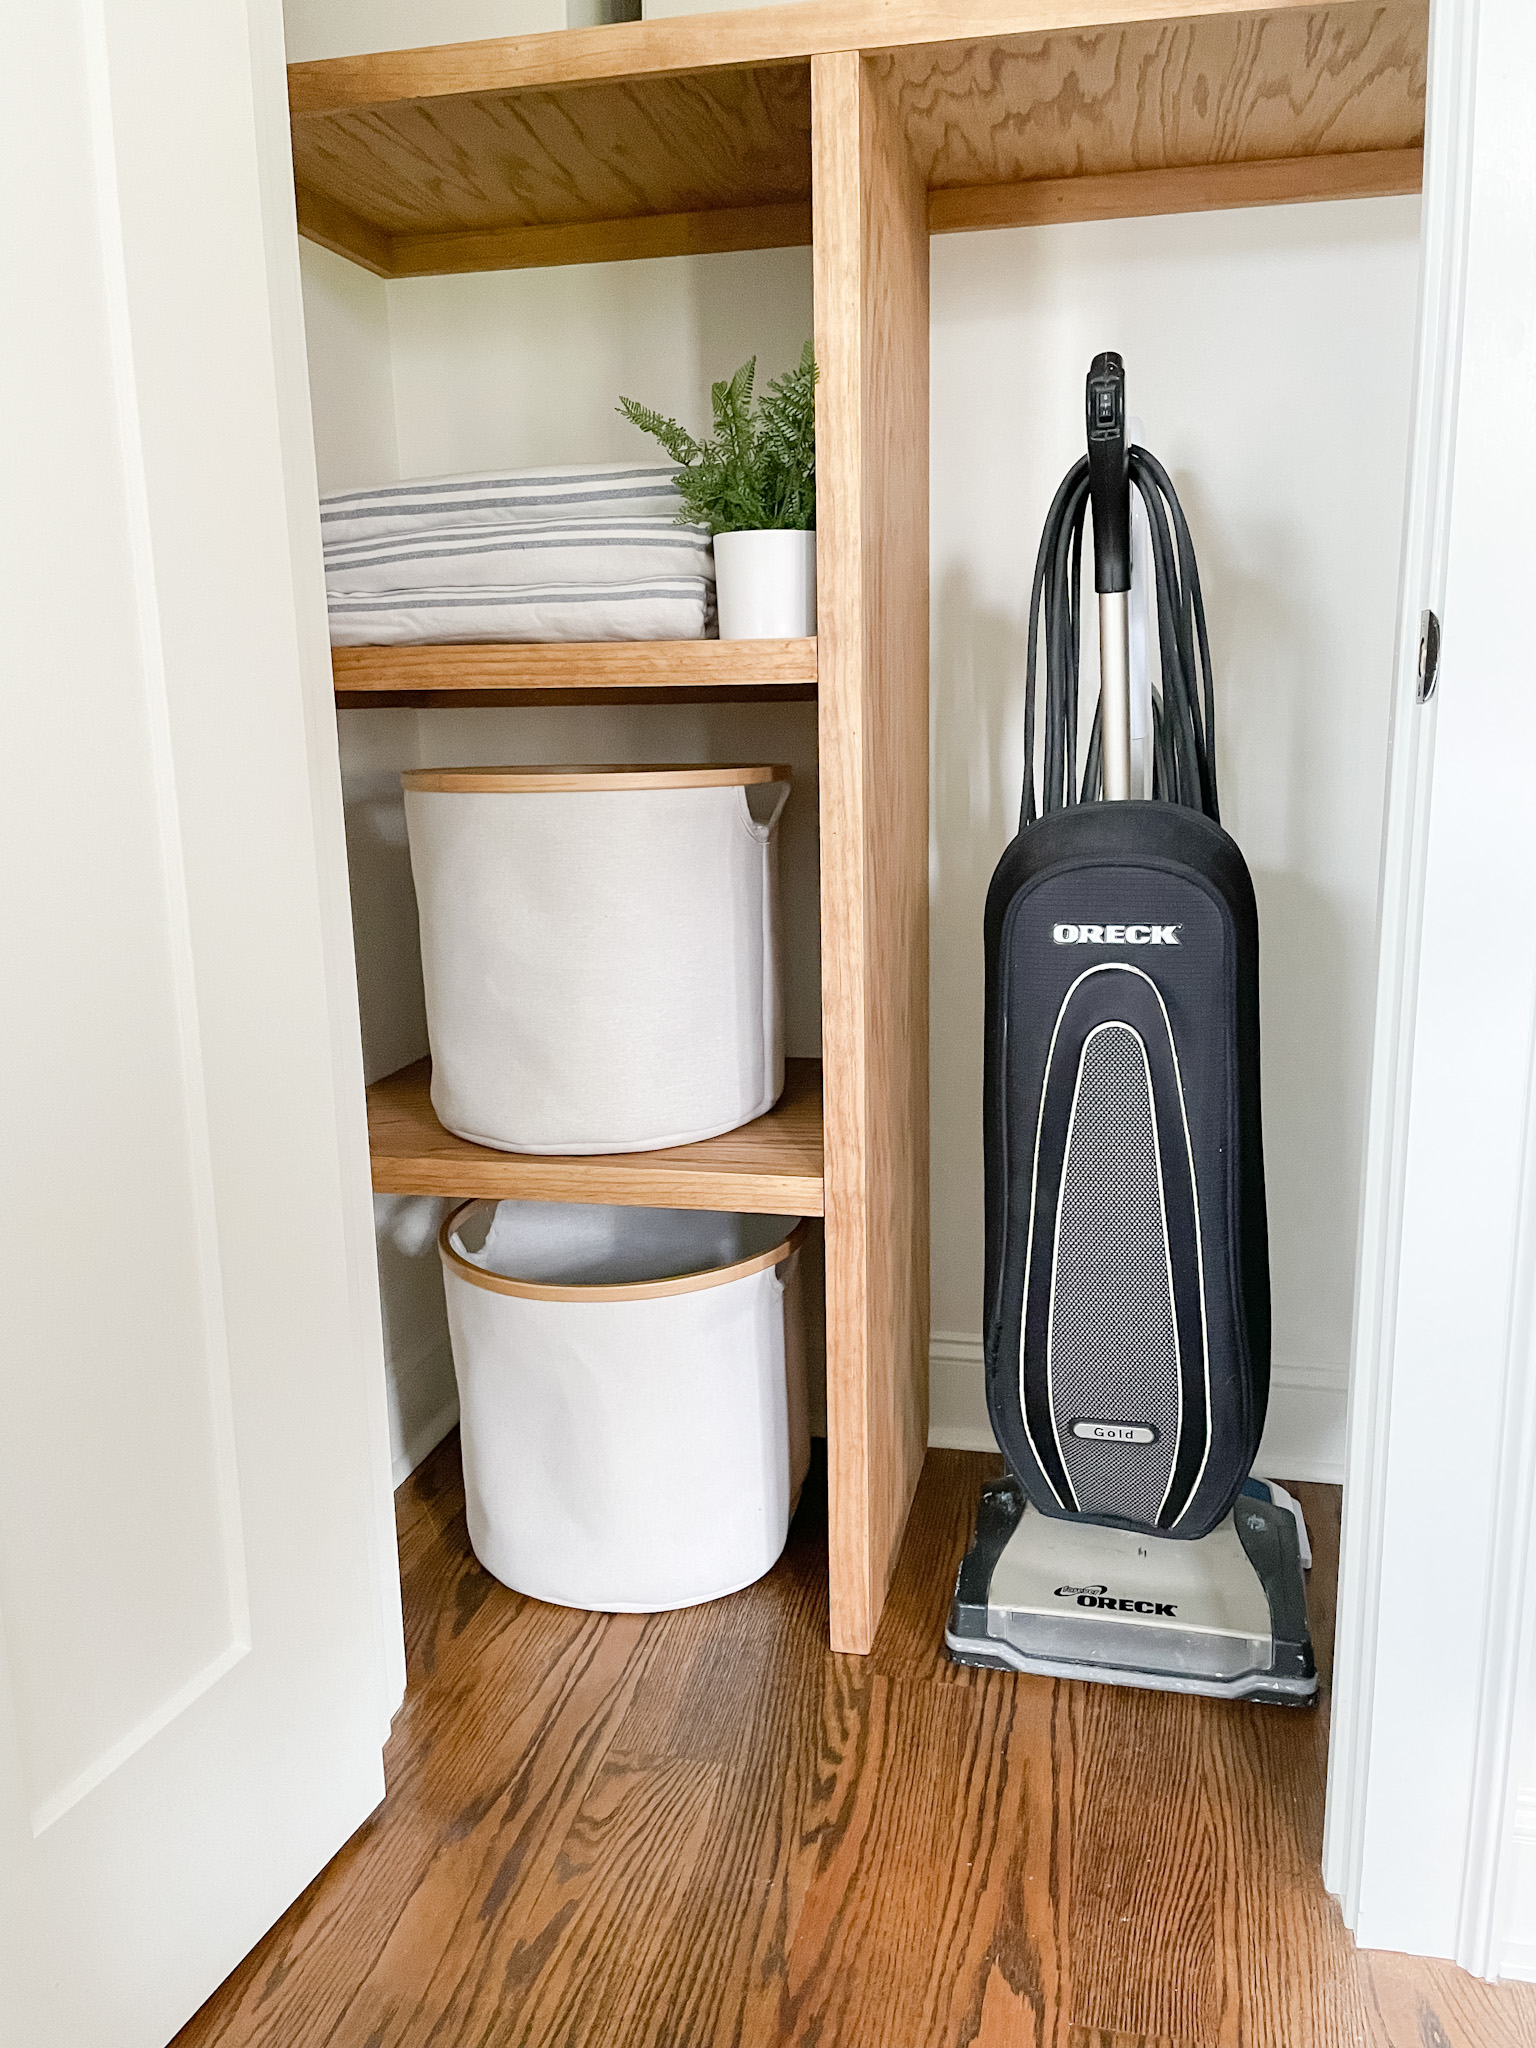
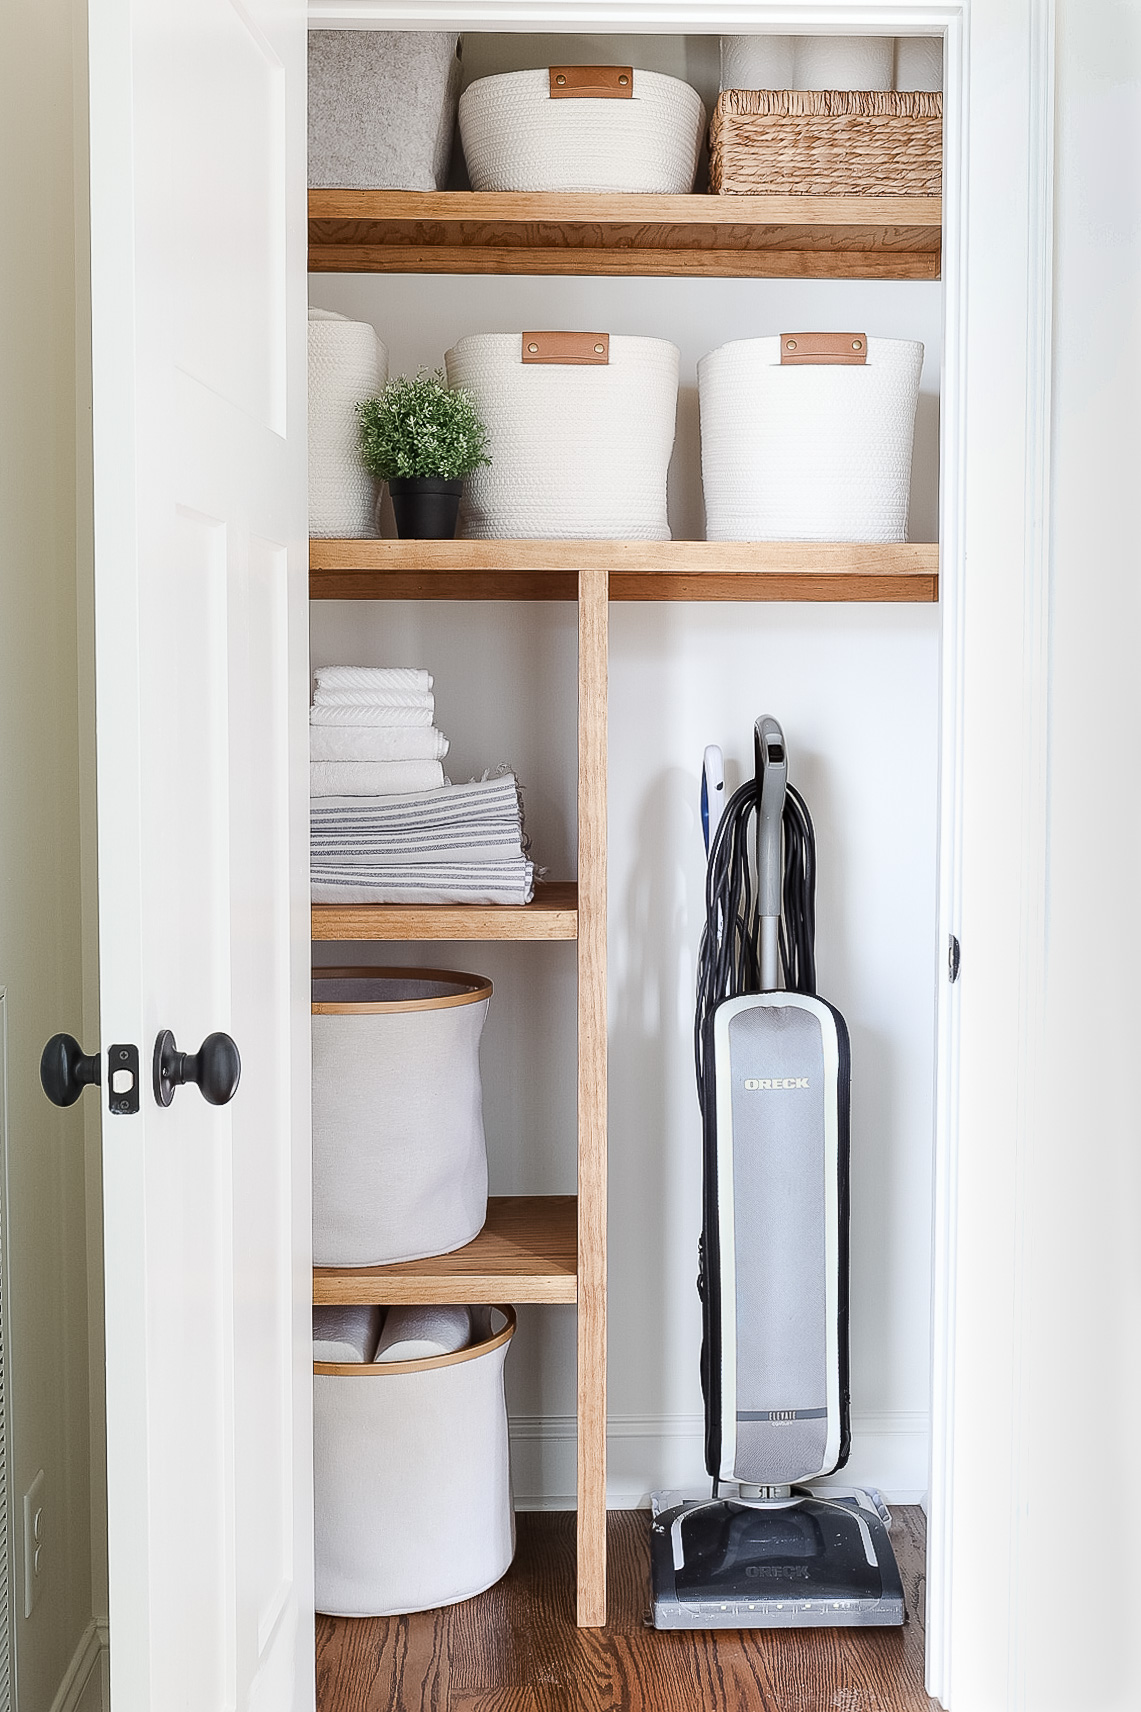
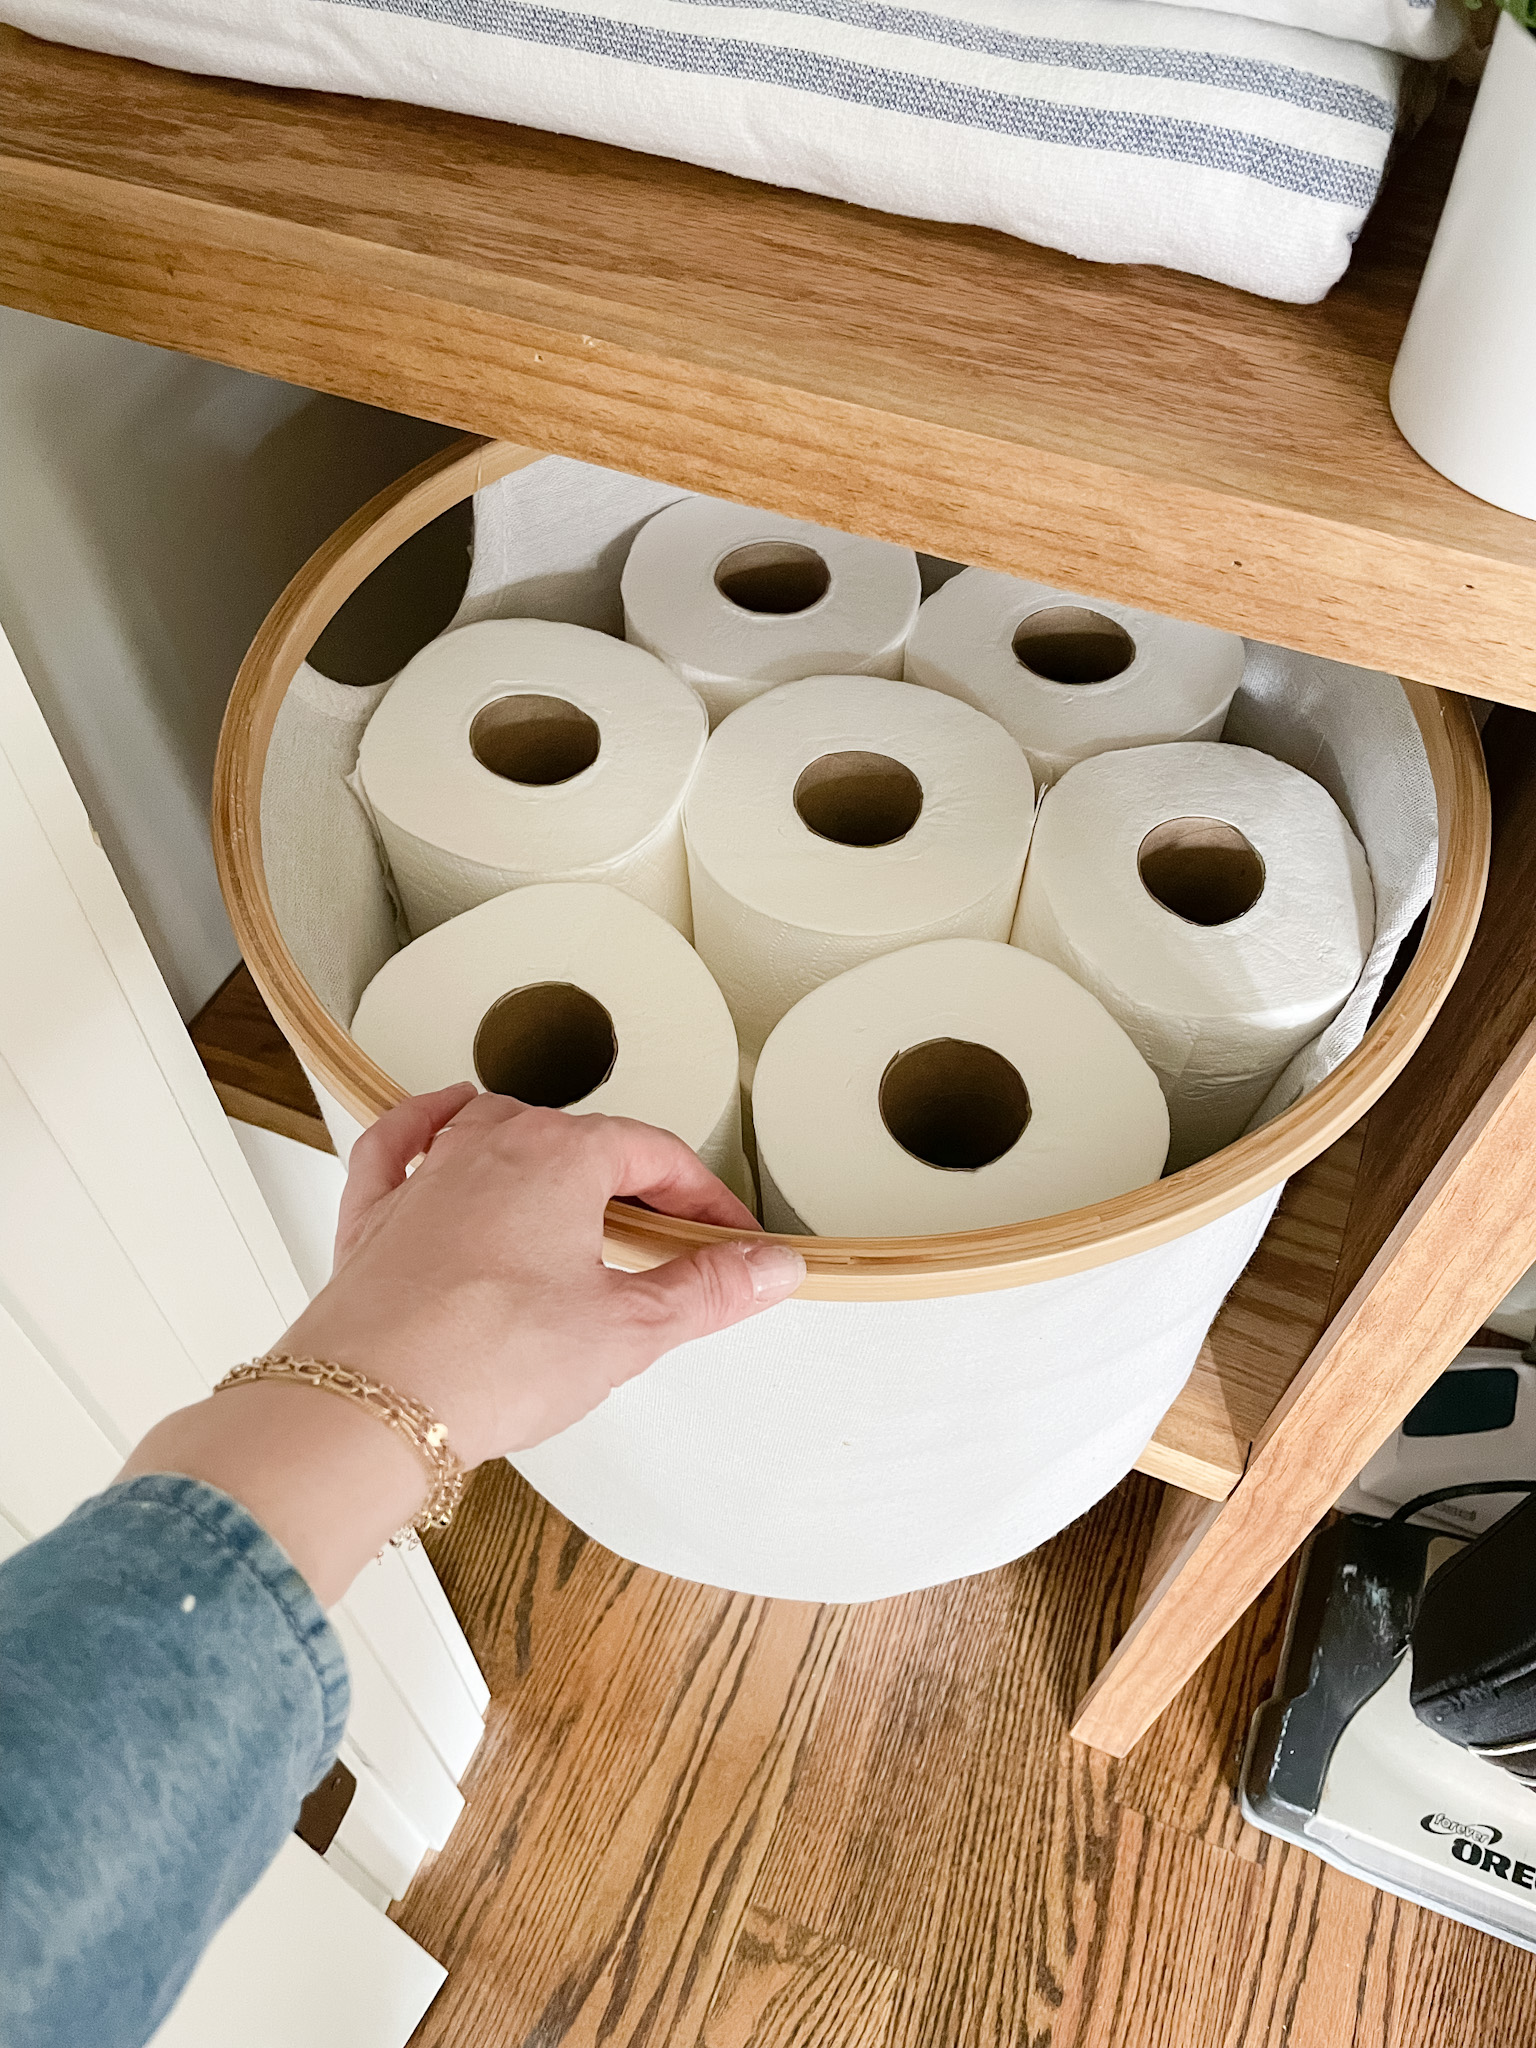
Organize Wood Closet Shelves
Now that you’ve done all that work you want to ensure you stay organized. Grab some baskets and bins to keep loose type items or cleaning supplies neat and tidy.
Shop for Home Organization Products at my Amazon Storefront
Amazon Storefront
Follow my Amazon Storefront to find more looks for less and all our finds!
Closet Organization Sources
Storage Baskets


Rattan Storage Basket
Round Storage Bin

Follow for home decor, DIY and to shop: Instagram | Pinterest | LiketoKnowit


Hello.
Amazing creation!
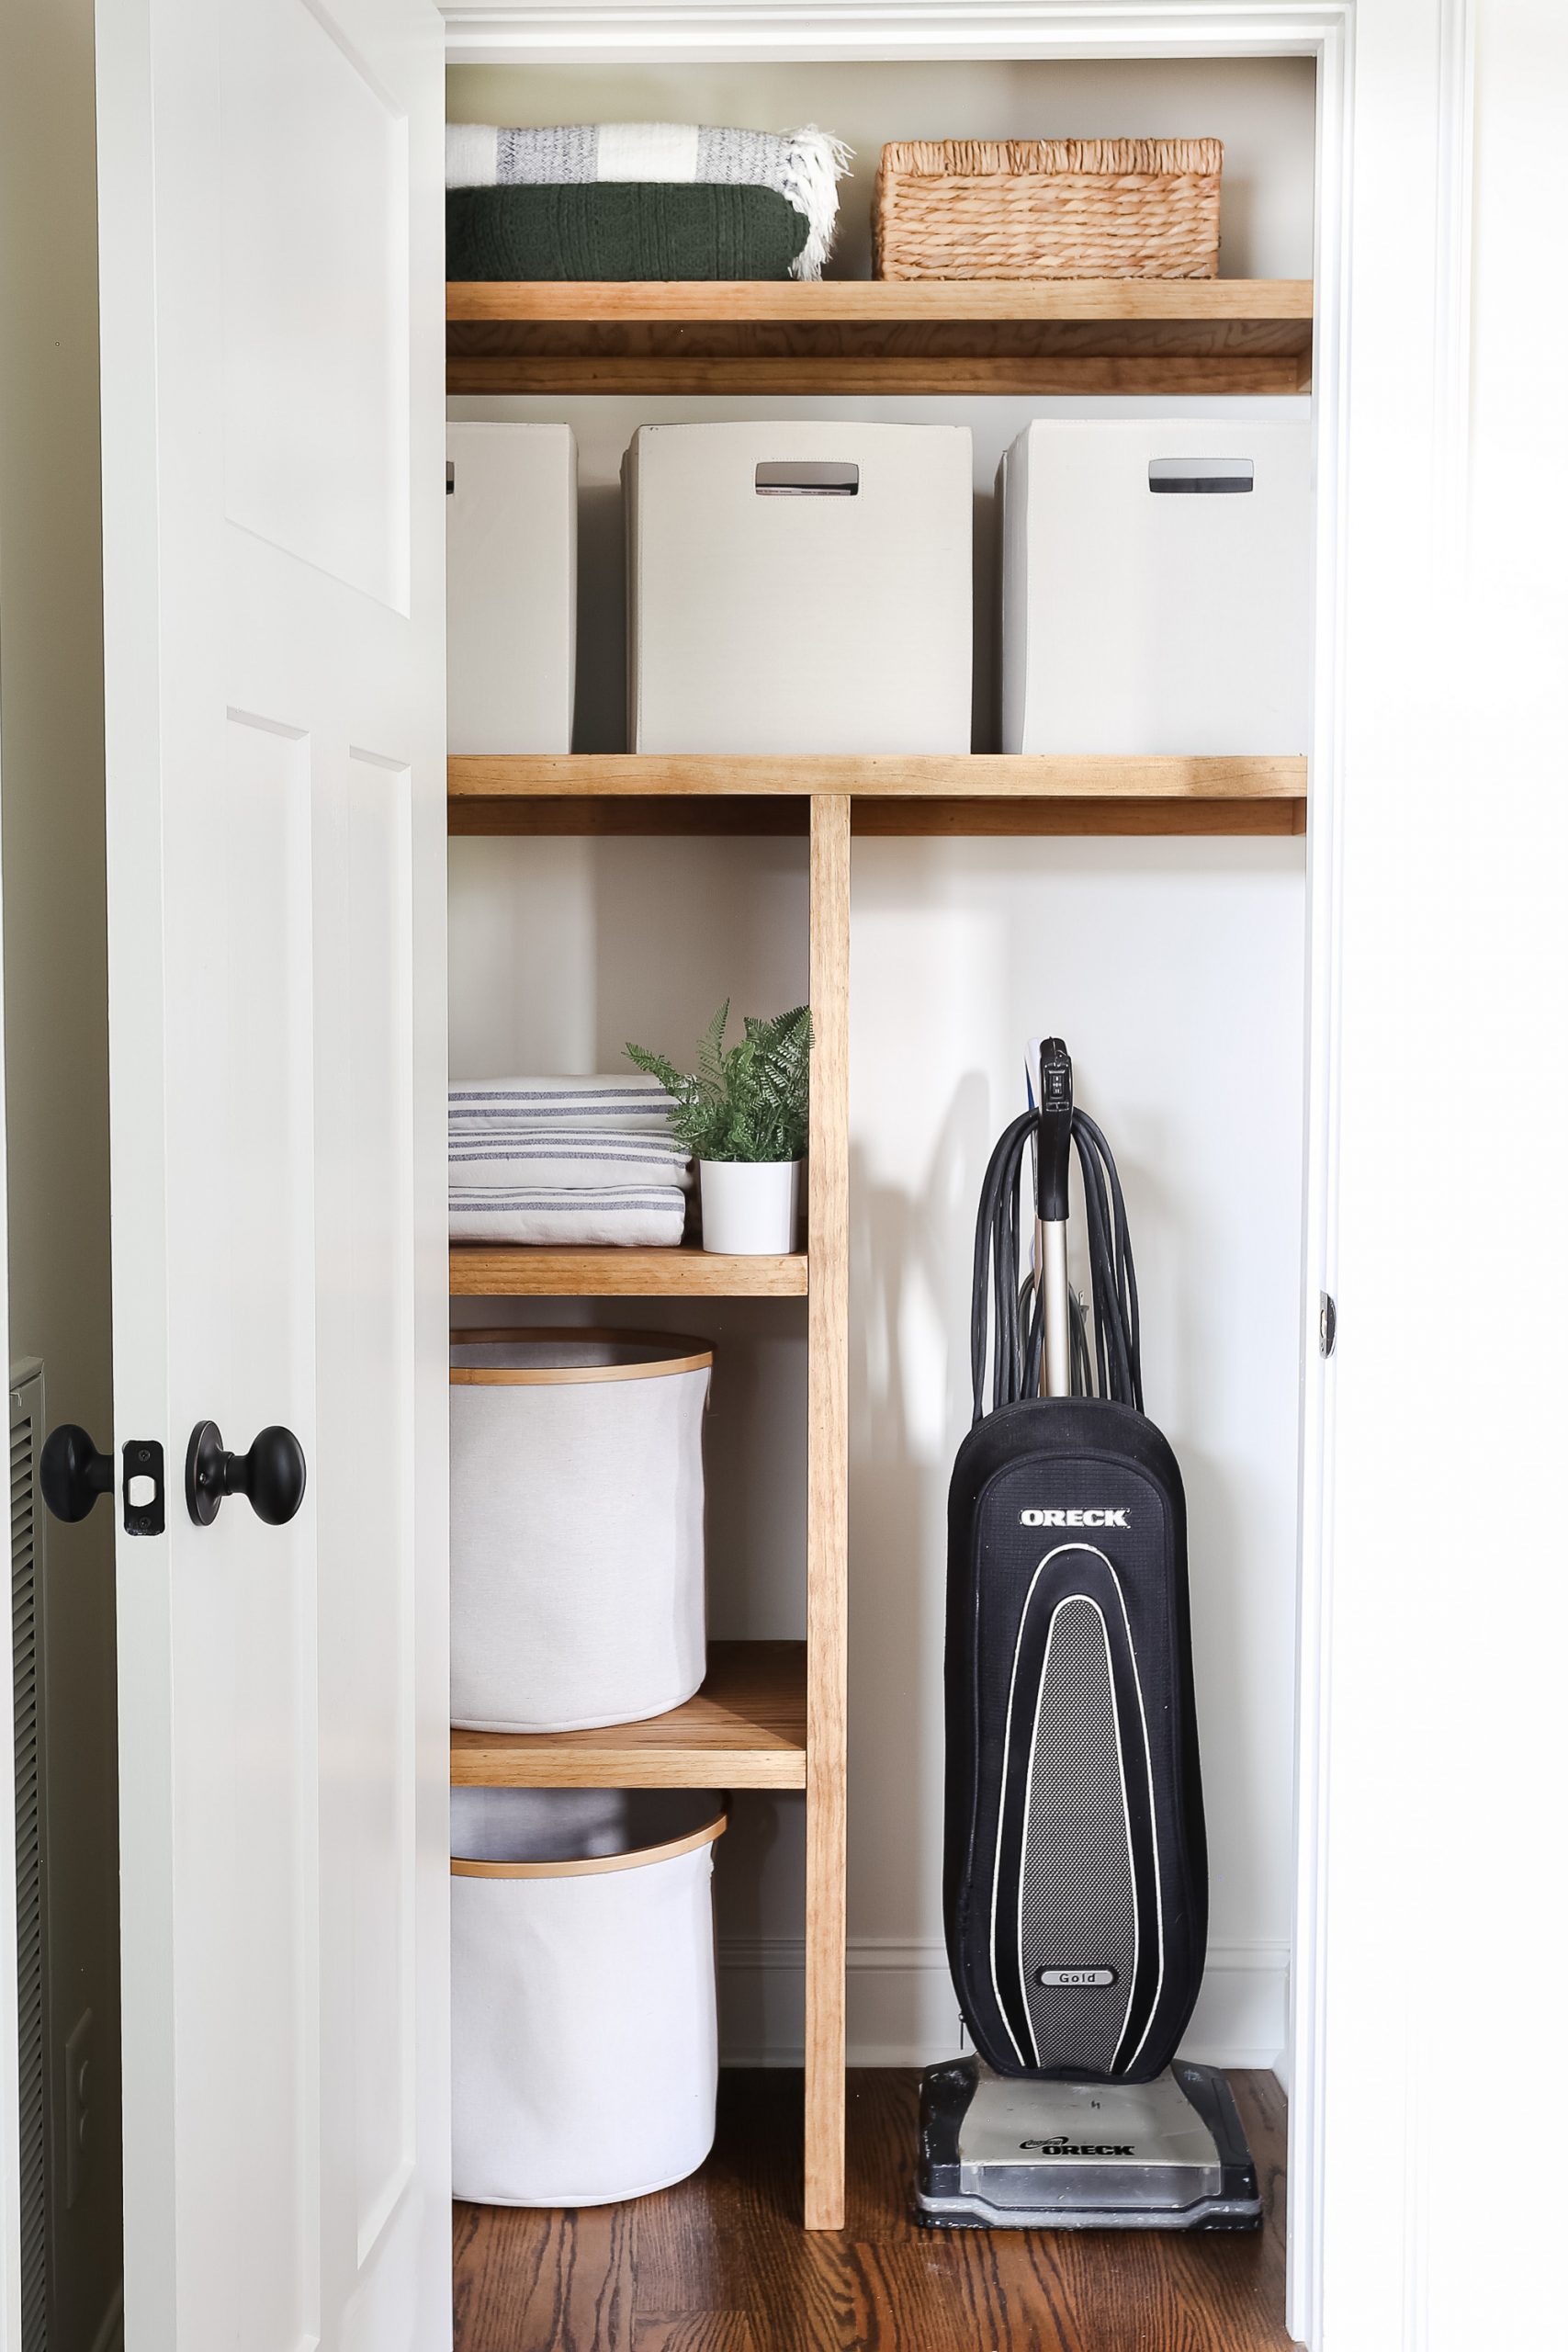
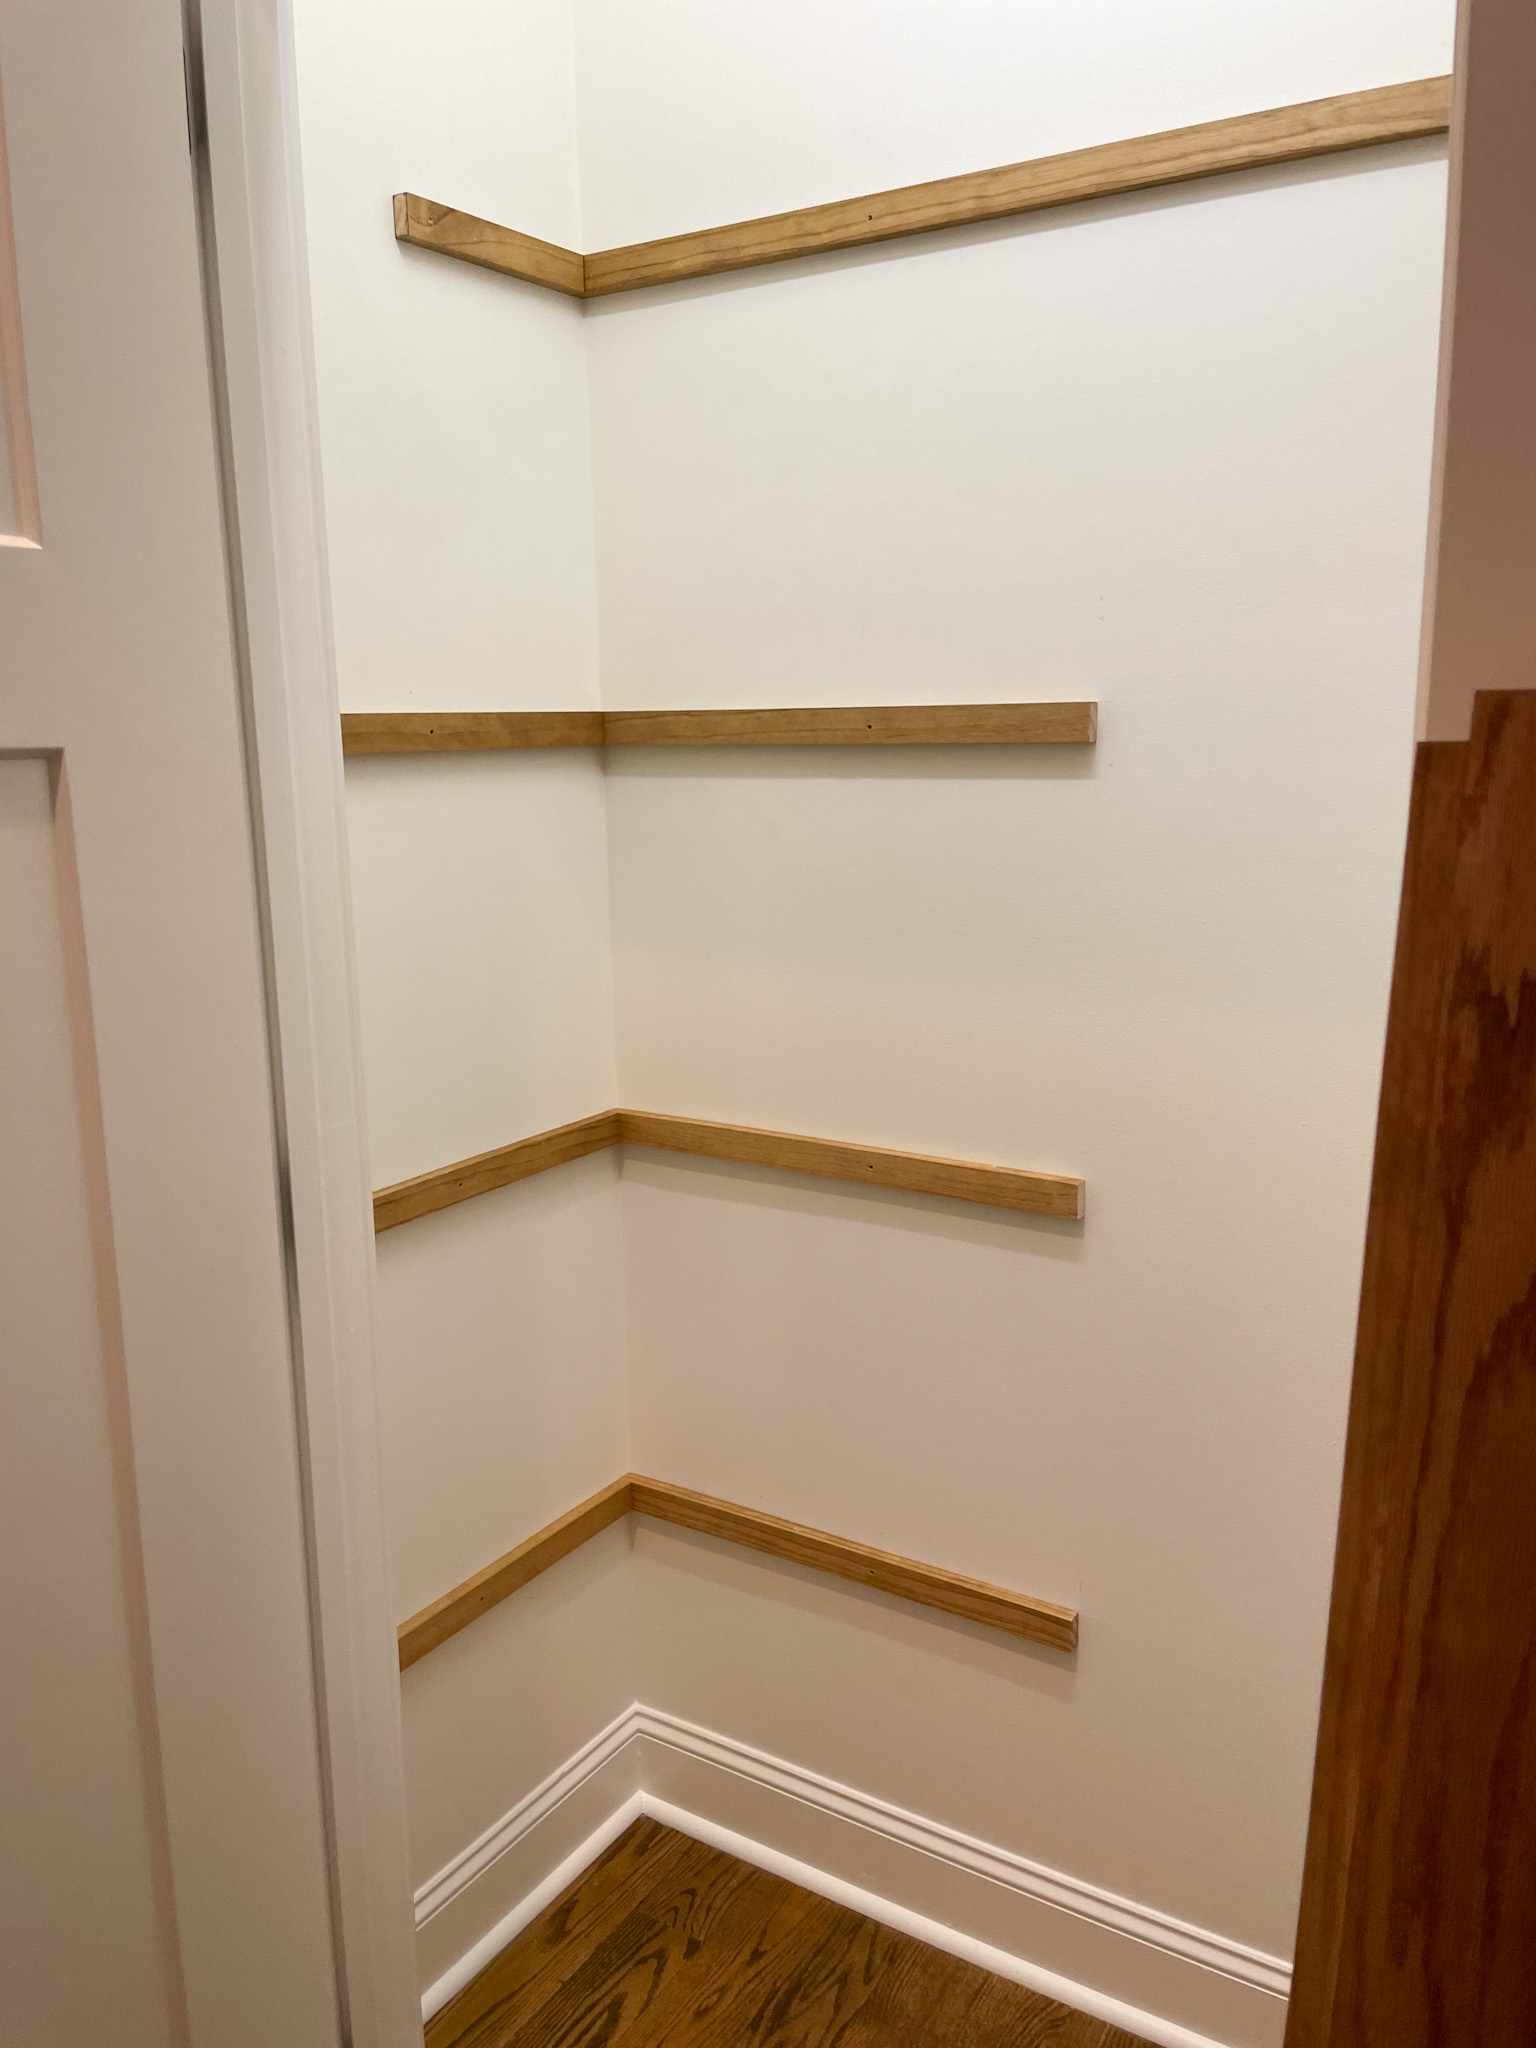
I was wondering if you did the project over again if you would use 1 x3 on the front of the shelves to fully cover the wall support on the top shelf shown in the first after picture published above.
Hello Amy! Thank you! Yes, we would have used 1×3’s but at the time of the project we couldn’t get any in our area due to wood supply issue so we finished it up with the 1×2’s.
Love this! Looking to do this in our nonfunctional utility closet. Did you notch out a spot in your baseboard or is there a gap behind the center vertical board and the wall?
Hello! yes, we did notch the vertical board so it would line up with the baseboards. Hope that helps.
Hi, this looks so nice.
How did you attach the center vertical board to the other shelves?
Hello…thank you. We used a nail gun and attached them from the side into the shelves and filled any nail holes with wood filler.
This is beautiful! Did you attach the vertical board to the wall or is it just attached to the shorter shelves?
Thank you Sarah! We did not attach the vertical board to the wall due to lack of stud. We felt the support of attaching it to the other boards was enough stability and truthfully it’s been very sturdy. This is one of my favorite DIY’s because it’s been so practical and sturdy. Hope that helps
Hey Amy. Was your vertical wall made from the 4×8 plywood?
Hello Edgar! Yes, the vertical wall was made with the red oak plywood and the face was finished with the 1×2’s. Hope that helps!
Amazing! Great job, I will try this in a hallway closet that is ready to burst, lol! We also downsized and it is disappointing that the builder only planned for the skinny wire shelves, it’s not very functional. Hoping to be able to now have 18 inches deep wooden shelves, and have an organized and functional closet.
Thank you so much for sharing!
You are welcome. This closet has been such a help for additional organized storage.
Hi, this is awesome! Can you tell me where you purchased the round storage bins from?
Hello! Thank you. I purchased those at the At Home Store, but here is a link for other options too. https://liketk.it/3wm3F
Hi Amy this is awesome I loved and planning on doing it in my closet ☺️ have a question the top shelve I notice the deep is different do you mind telling me what is the deep? Thank you
This is great! Hoping to do this to our hallway closet but I’m a beginner DIY’er & we don’t have a nail gun. Do you think we can accomplish this project with a hammer and nails instead?
Hello Ale! Thank you for reaching out! I think you could do it with a hammer and nails, but it will be more difficult, but yes…you could do it.
Looks great! Can you share the overall dimensions of the closet + door? Looking to create a linen closet from scratch.
Hi i’m confused if the shelves are supposed to just sit on the supports or where am I supposed to nail them in. I feel like them just sitting on the supports doesn’t seem sturdy. Would I put a nail from the top through the surface of the shelf and the support?
My apologizes for delayed response. Did not see your comment. Yes, we nailed them to the supports on the side.
You mentioned needing to accommodate a vacuum and a steam mop. Your pictures don’t show your steam mop. Were you able to accommodate your steam mop?
Yes, I was able to fit my mop and my vacuum in the same space.