DIY Large Scale Art under $100
Large-scale art typically comes with a large-scale price tag so I decided to find a workaround. Today I’m sharing this DIY large-scale art project with you and it’s less than $100.
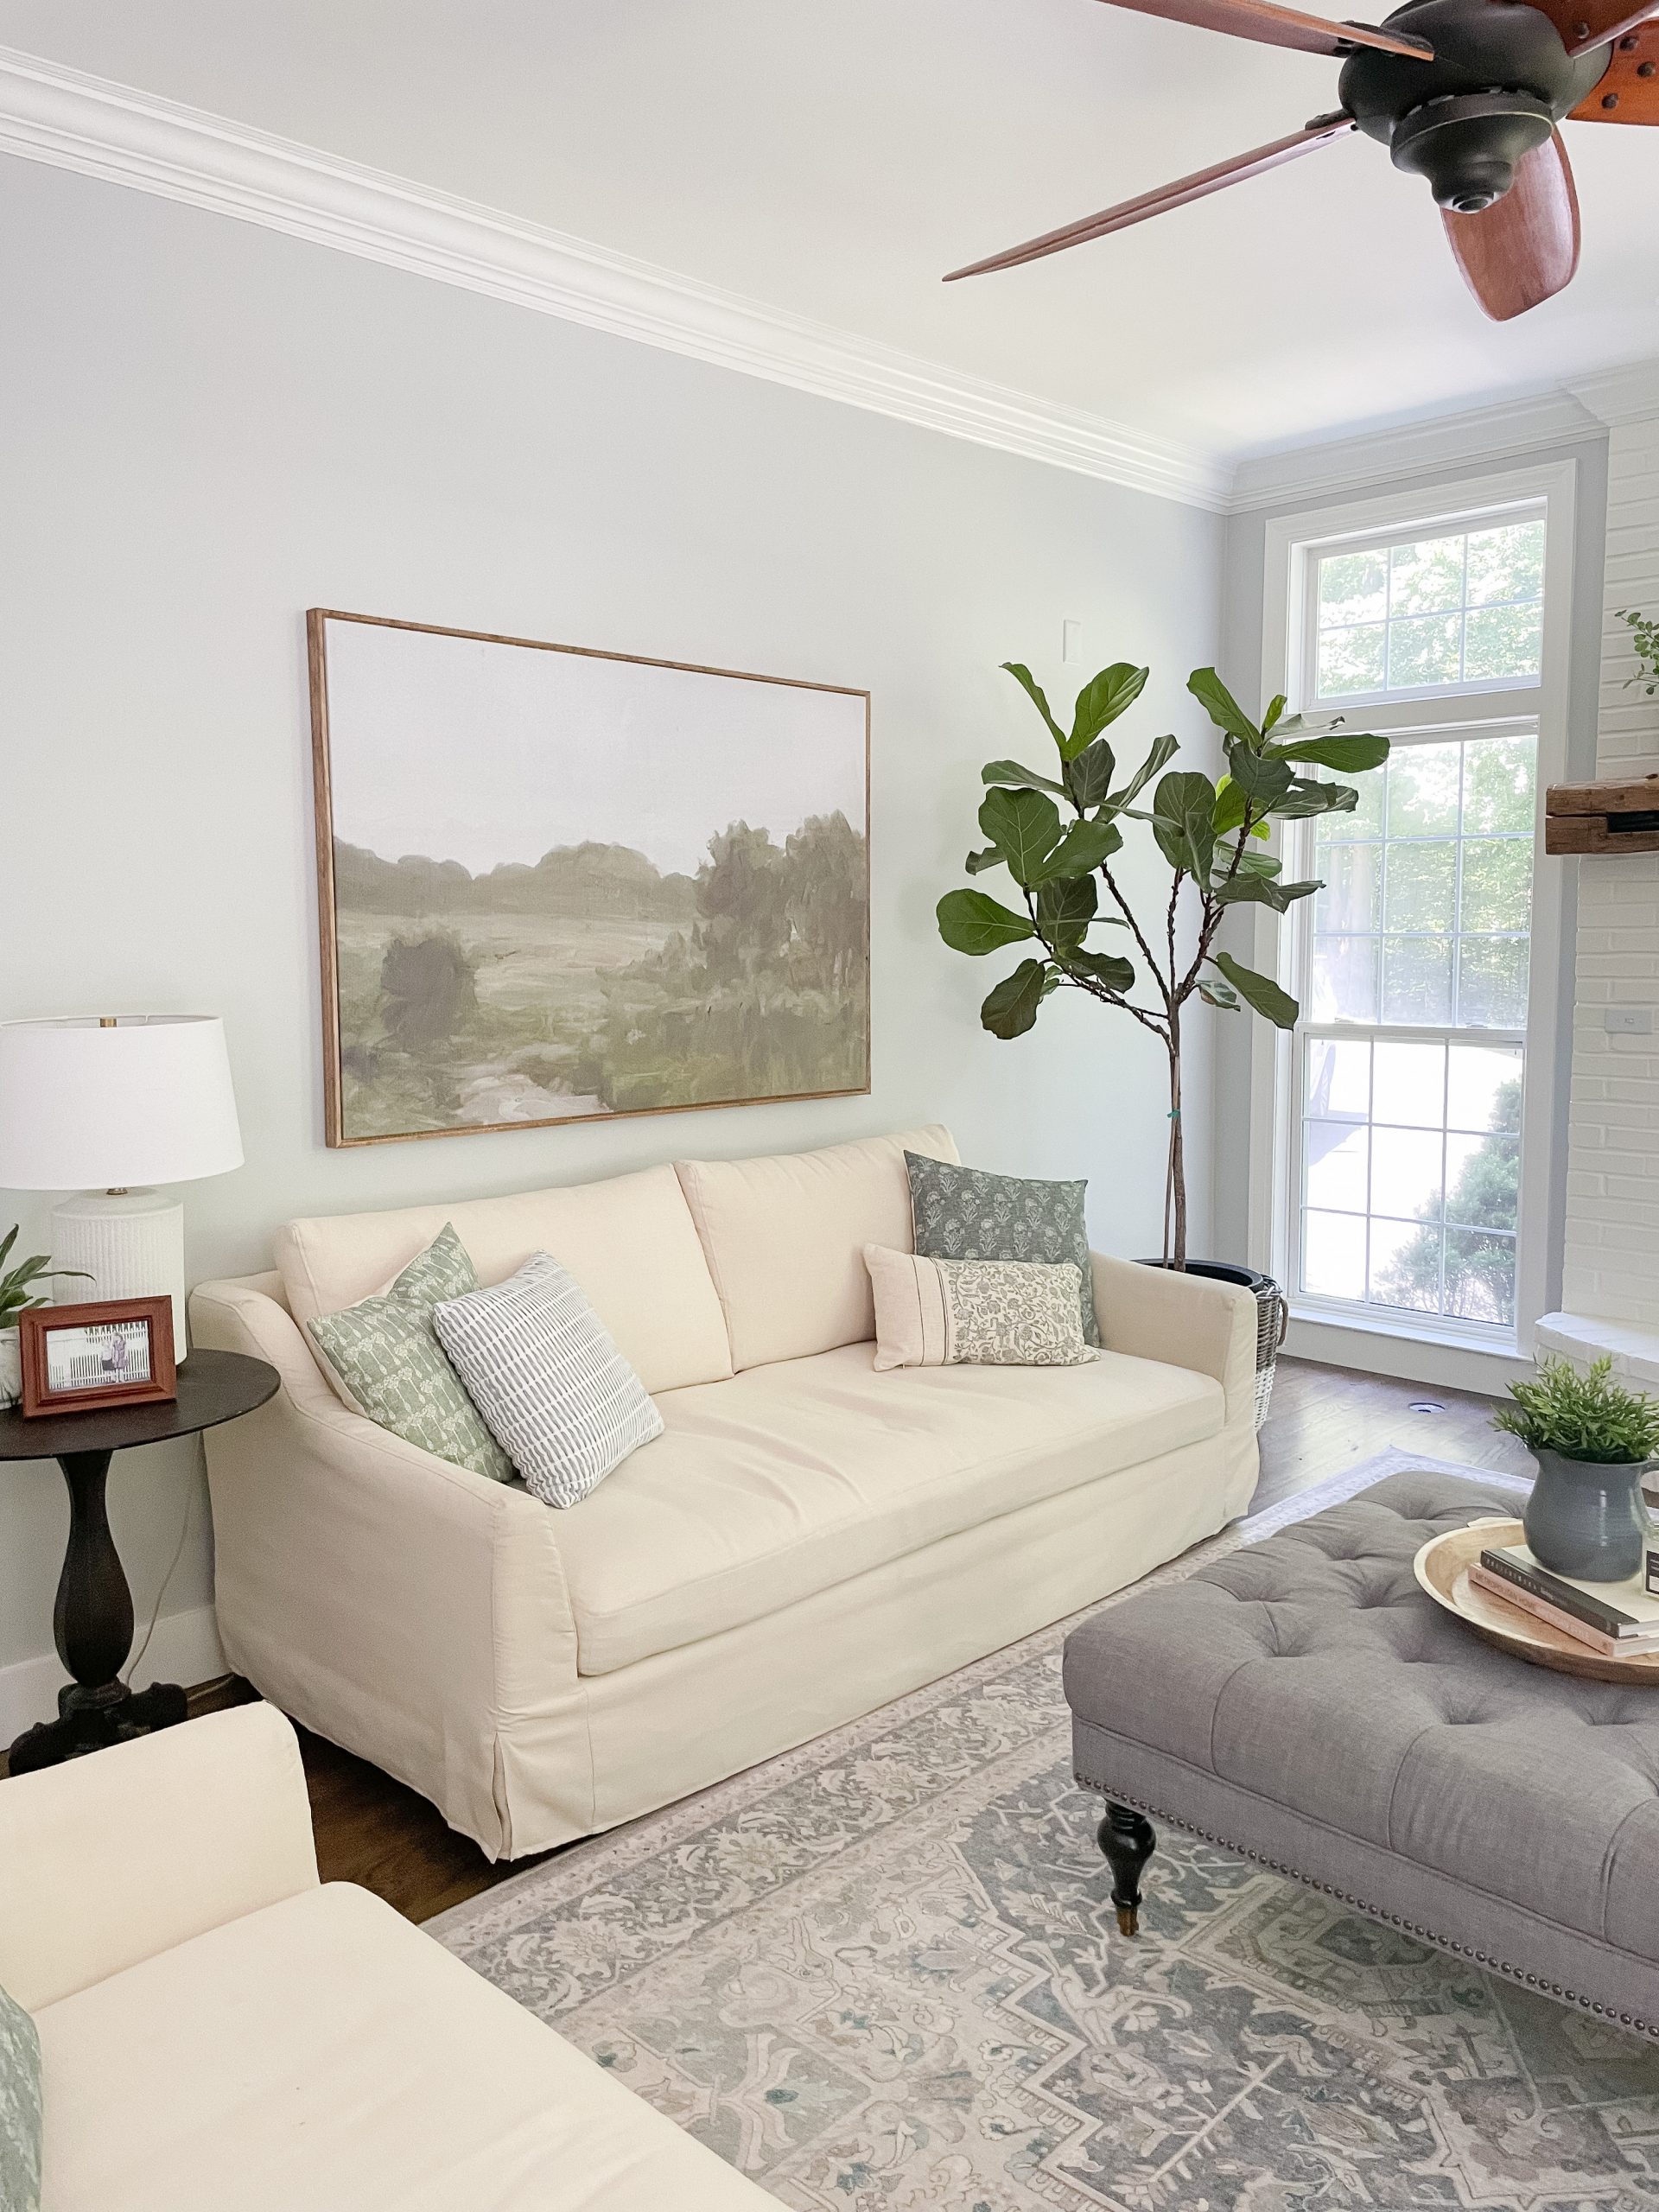
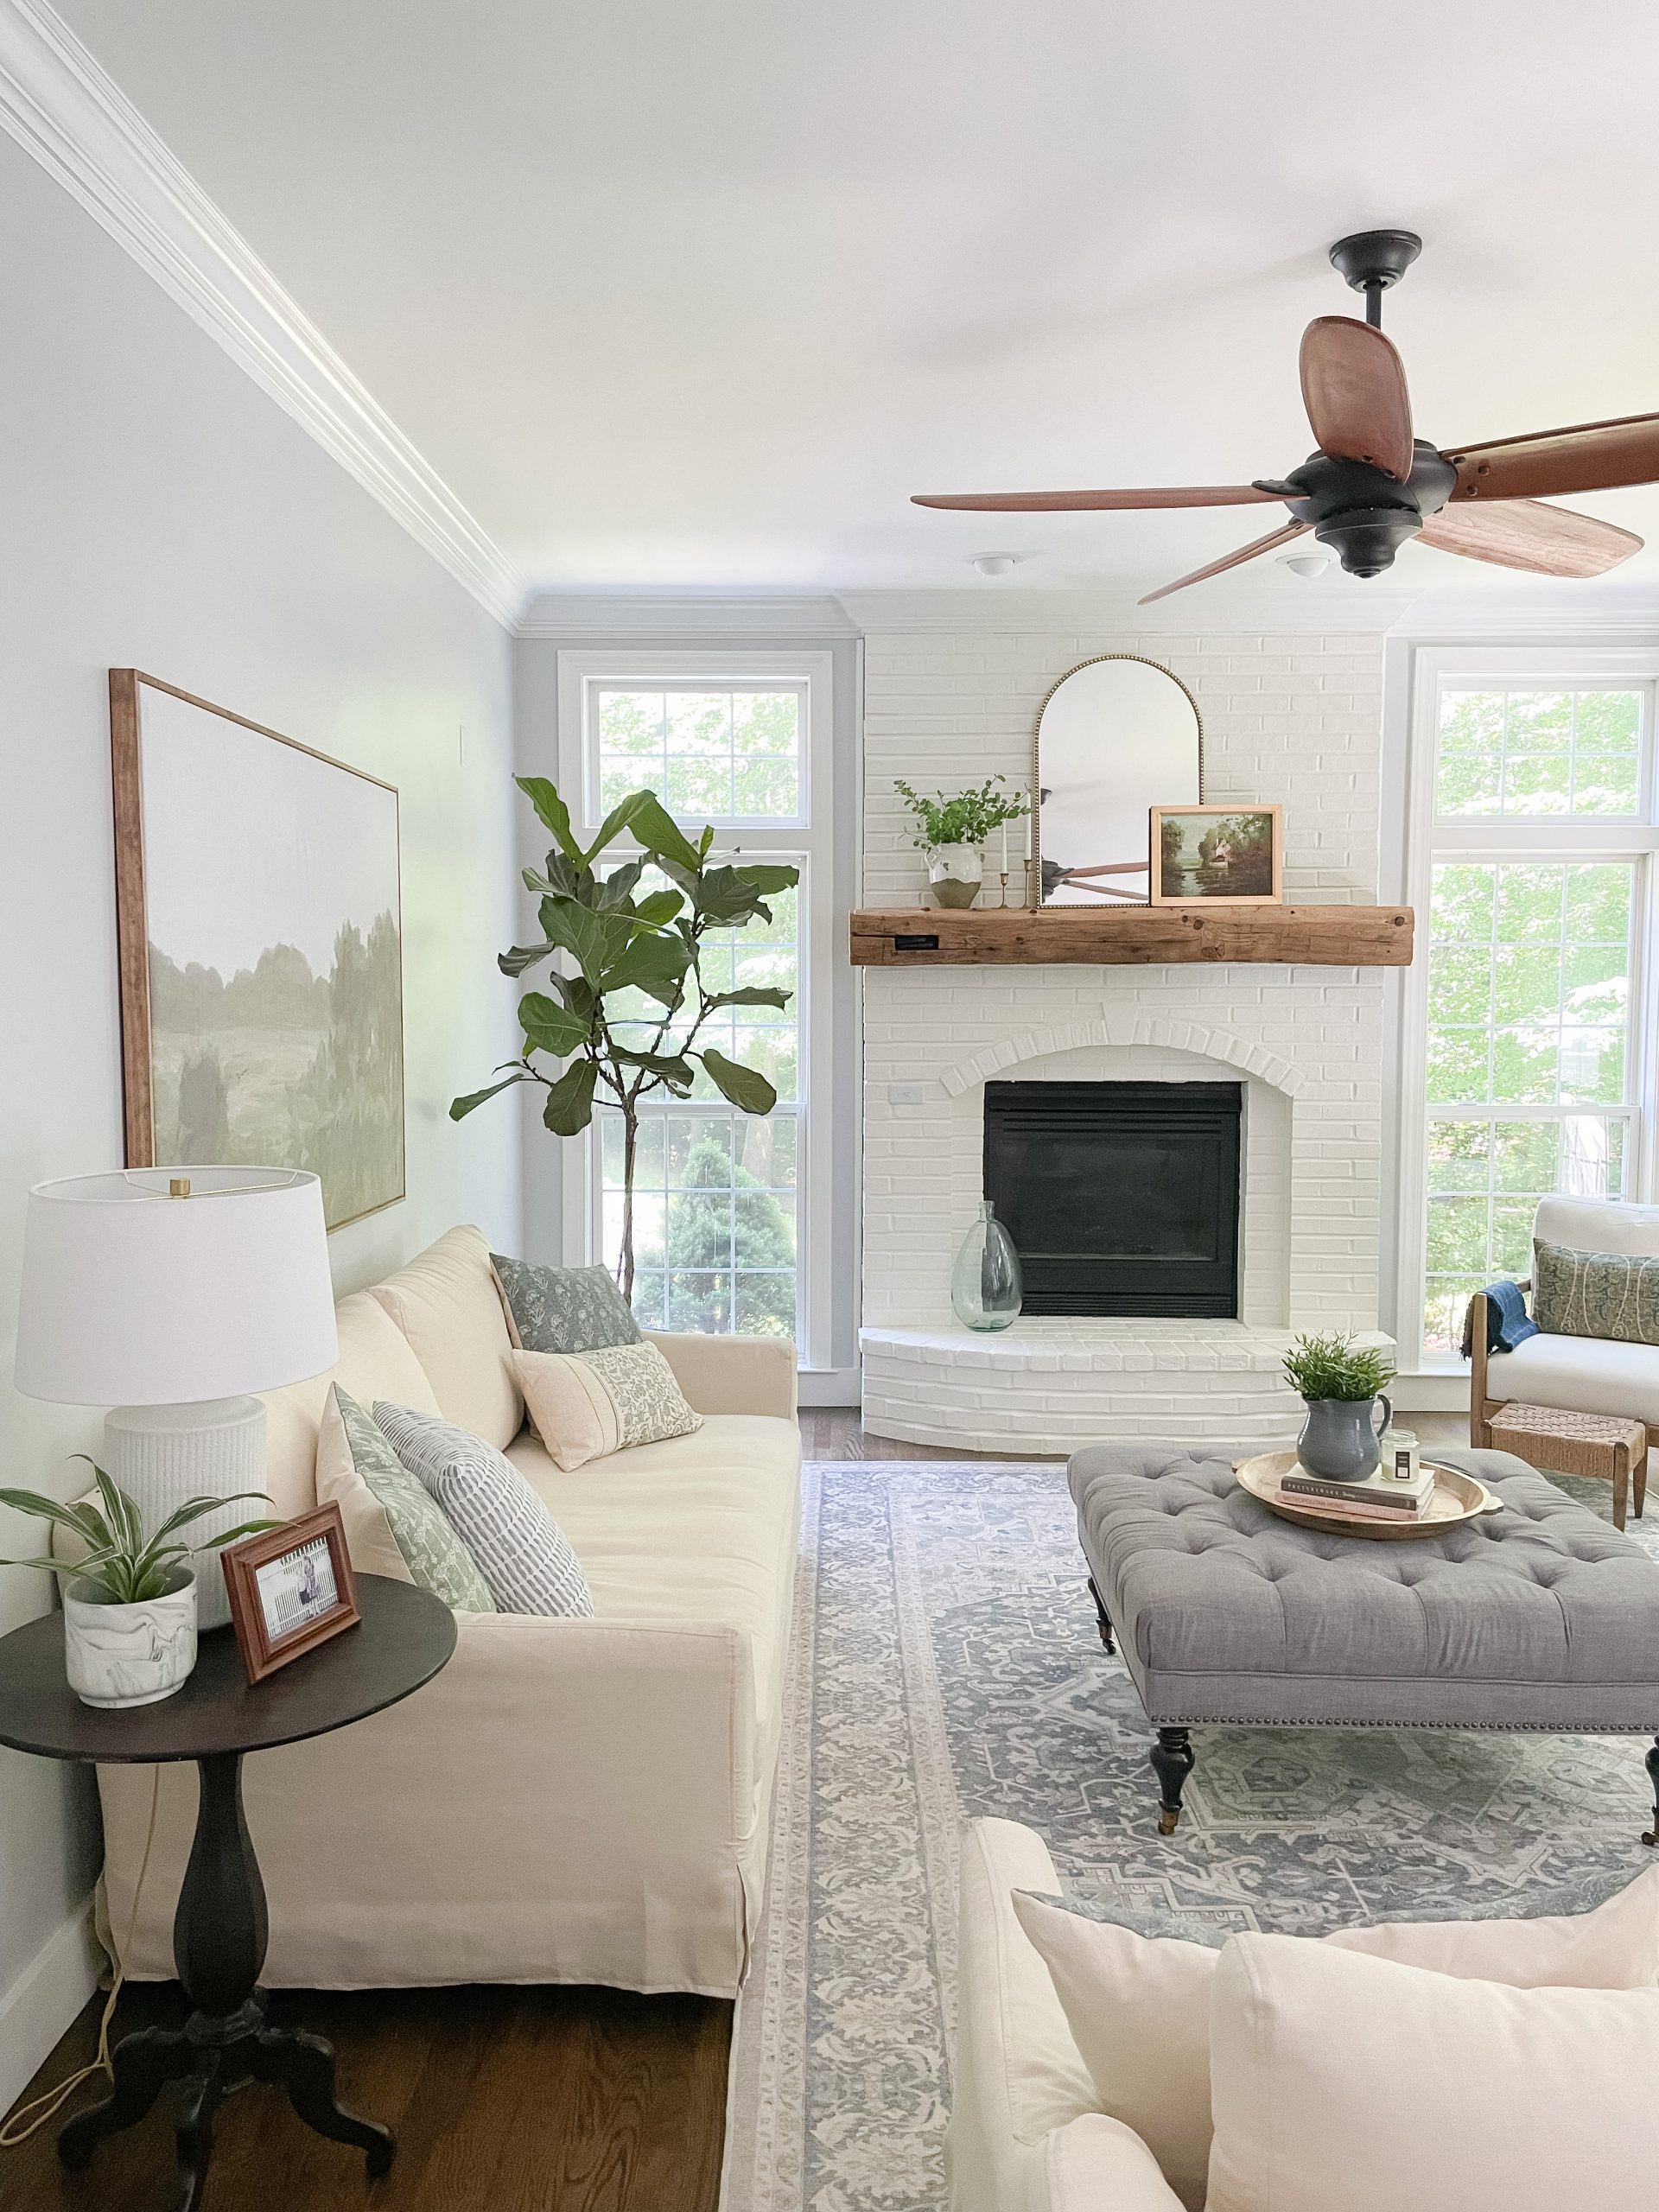
We have a long, large wall in our family room that was crying for some attention. I debated a gallery wall but wanted one large-scale art piece so the space would not look too cluttered. I looked at a lot of landscape art but everything I found was $1K and up and I did not want to spend that.
While researching large-scale art options I stumbled upon wall tapestries and artsy shower curtains. Then an idea was born. Why not make my own large-scale art piece for this bare wall in our family room?
The secret ingredient here is a shower curtain. Yes…you read that right.
With a little bit of work (it’s easy) I am going to show you how to create your own large-scale masterpiece too in 7 Steps. Then you can tell all your friends that you made it…from scratch! No painting skills required.
Affiliate links are provided below. Please see my full disclosure.
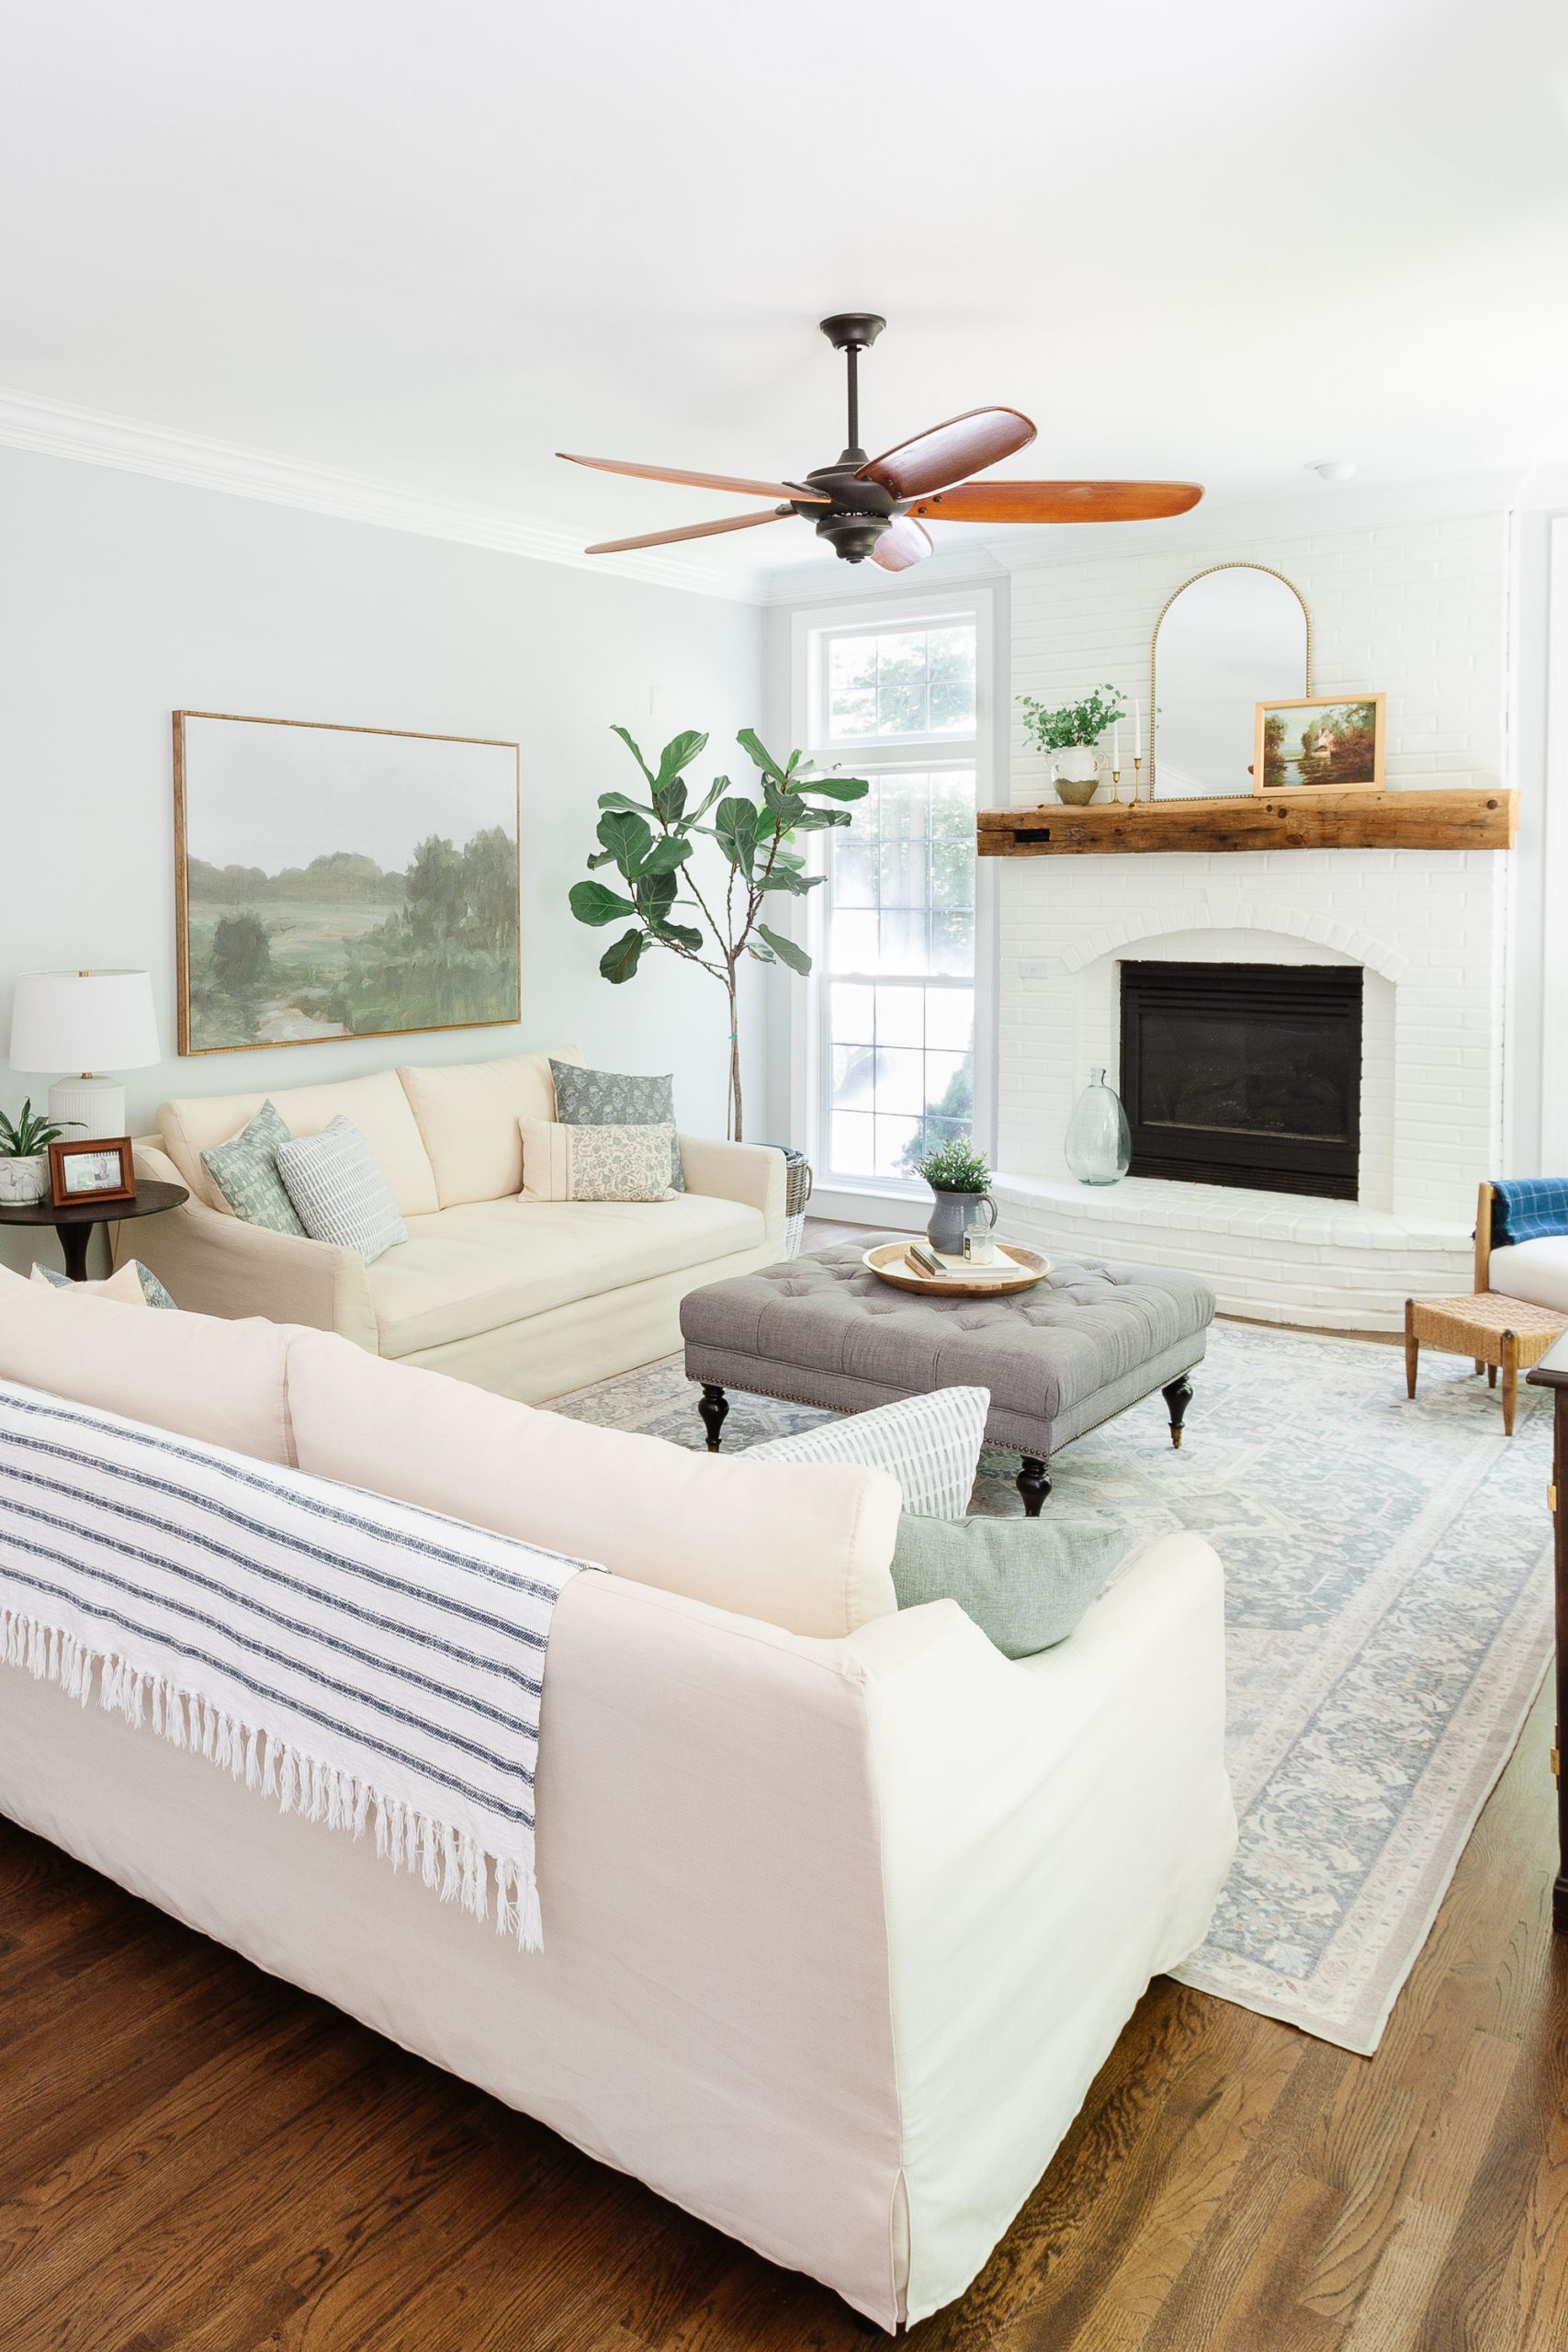
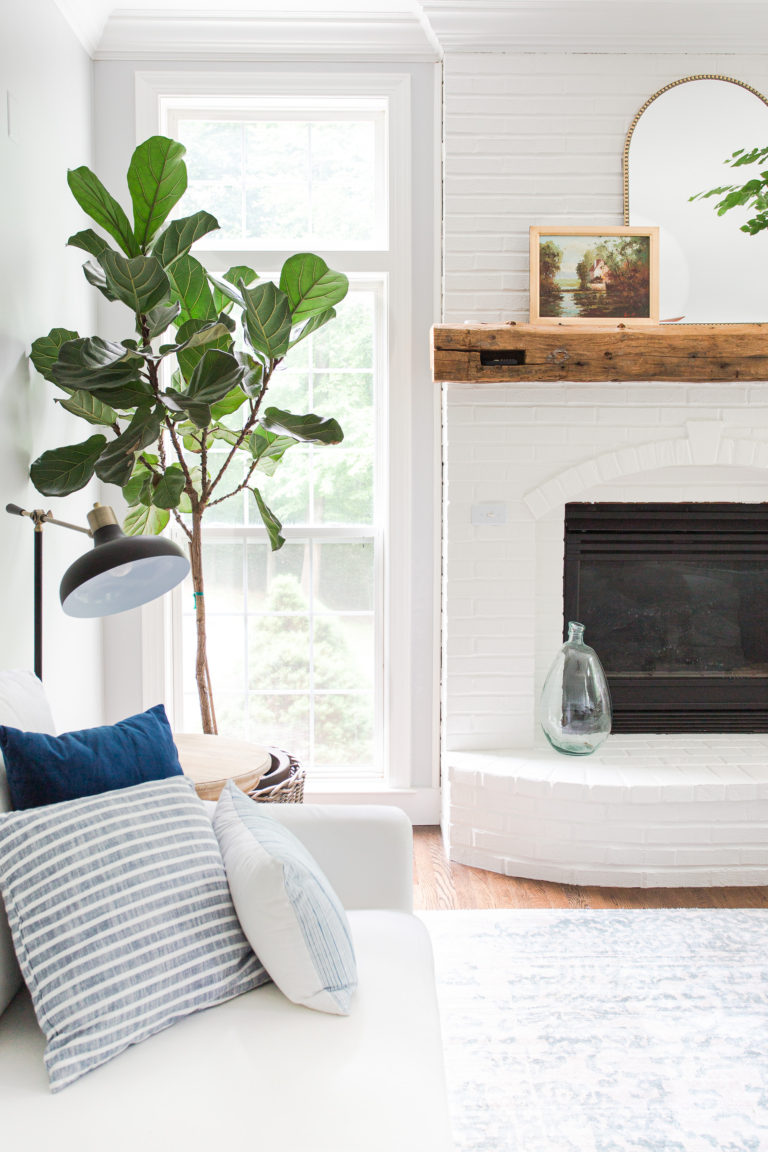
Rug | Sofas | Ceiling Fan | Mantel | Ottoman | Blanket | Lamp | Vase | Wood Tray | Chair | Mirror | Large Vase | Pillow | Greenery
Why Large-Scale Art?
Large-scale art draws immediate attention to itself the second someone enters the space its in. They help fill up your empty walls and allows everything else in the room to work around it, in terms of its themes, colors, shapes, and patterns. It can also make your job easier to find other pieces of art for your wall.
A large piece fills the space but it also keeps things from looking busy and chaotic like a gallery wall could. Don’t get me wrong; I love gallery walls, but not for this space.
Some may think a large piece makes a room look smaller, but large-scale art can have the opposite effect. They can make a space feel larger, brighter and roomier.
Rug | Sofas | Ceiling Fan | Mantel | Ottoman | Blanket | Lamp | Vase | Pillow | Greenery
Determine the Size of Your Art
The key here is to make this art large, but of course you can make it any size you want. How large your size is will be determined by the space it is going. There are a few rules to follow to help get you started.
- If hanging art above a sofa or buffet/console table the art should be 2/3 the width of the furniture
- The art should be approximately 6-8 inches above the piece of furniture (most people hang art way too high)
- If hanging a large piece where there is no furniture it should have at least a foot of wall space on either side
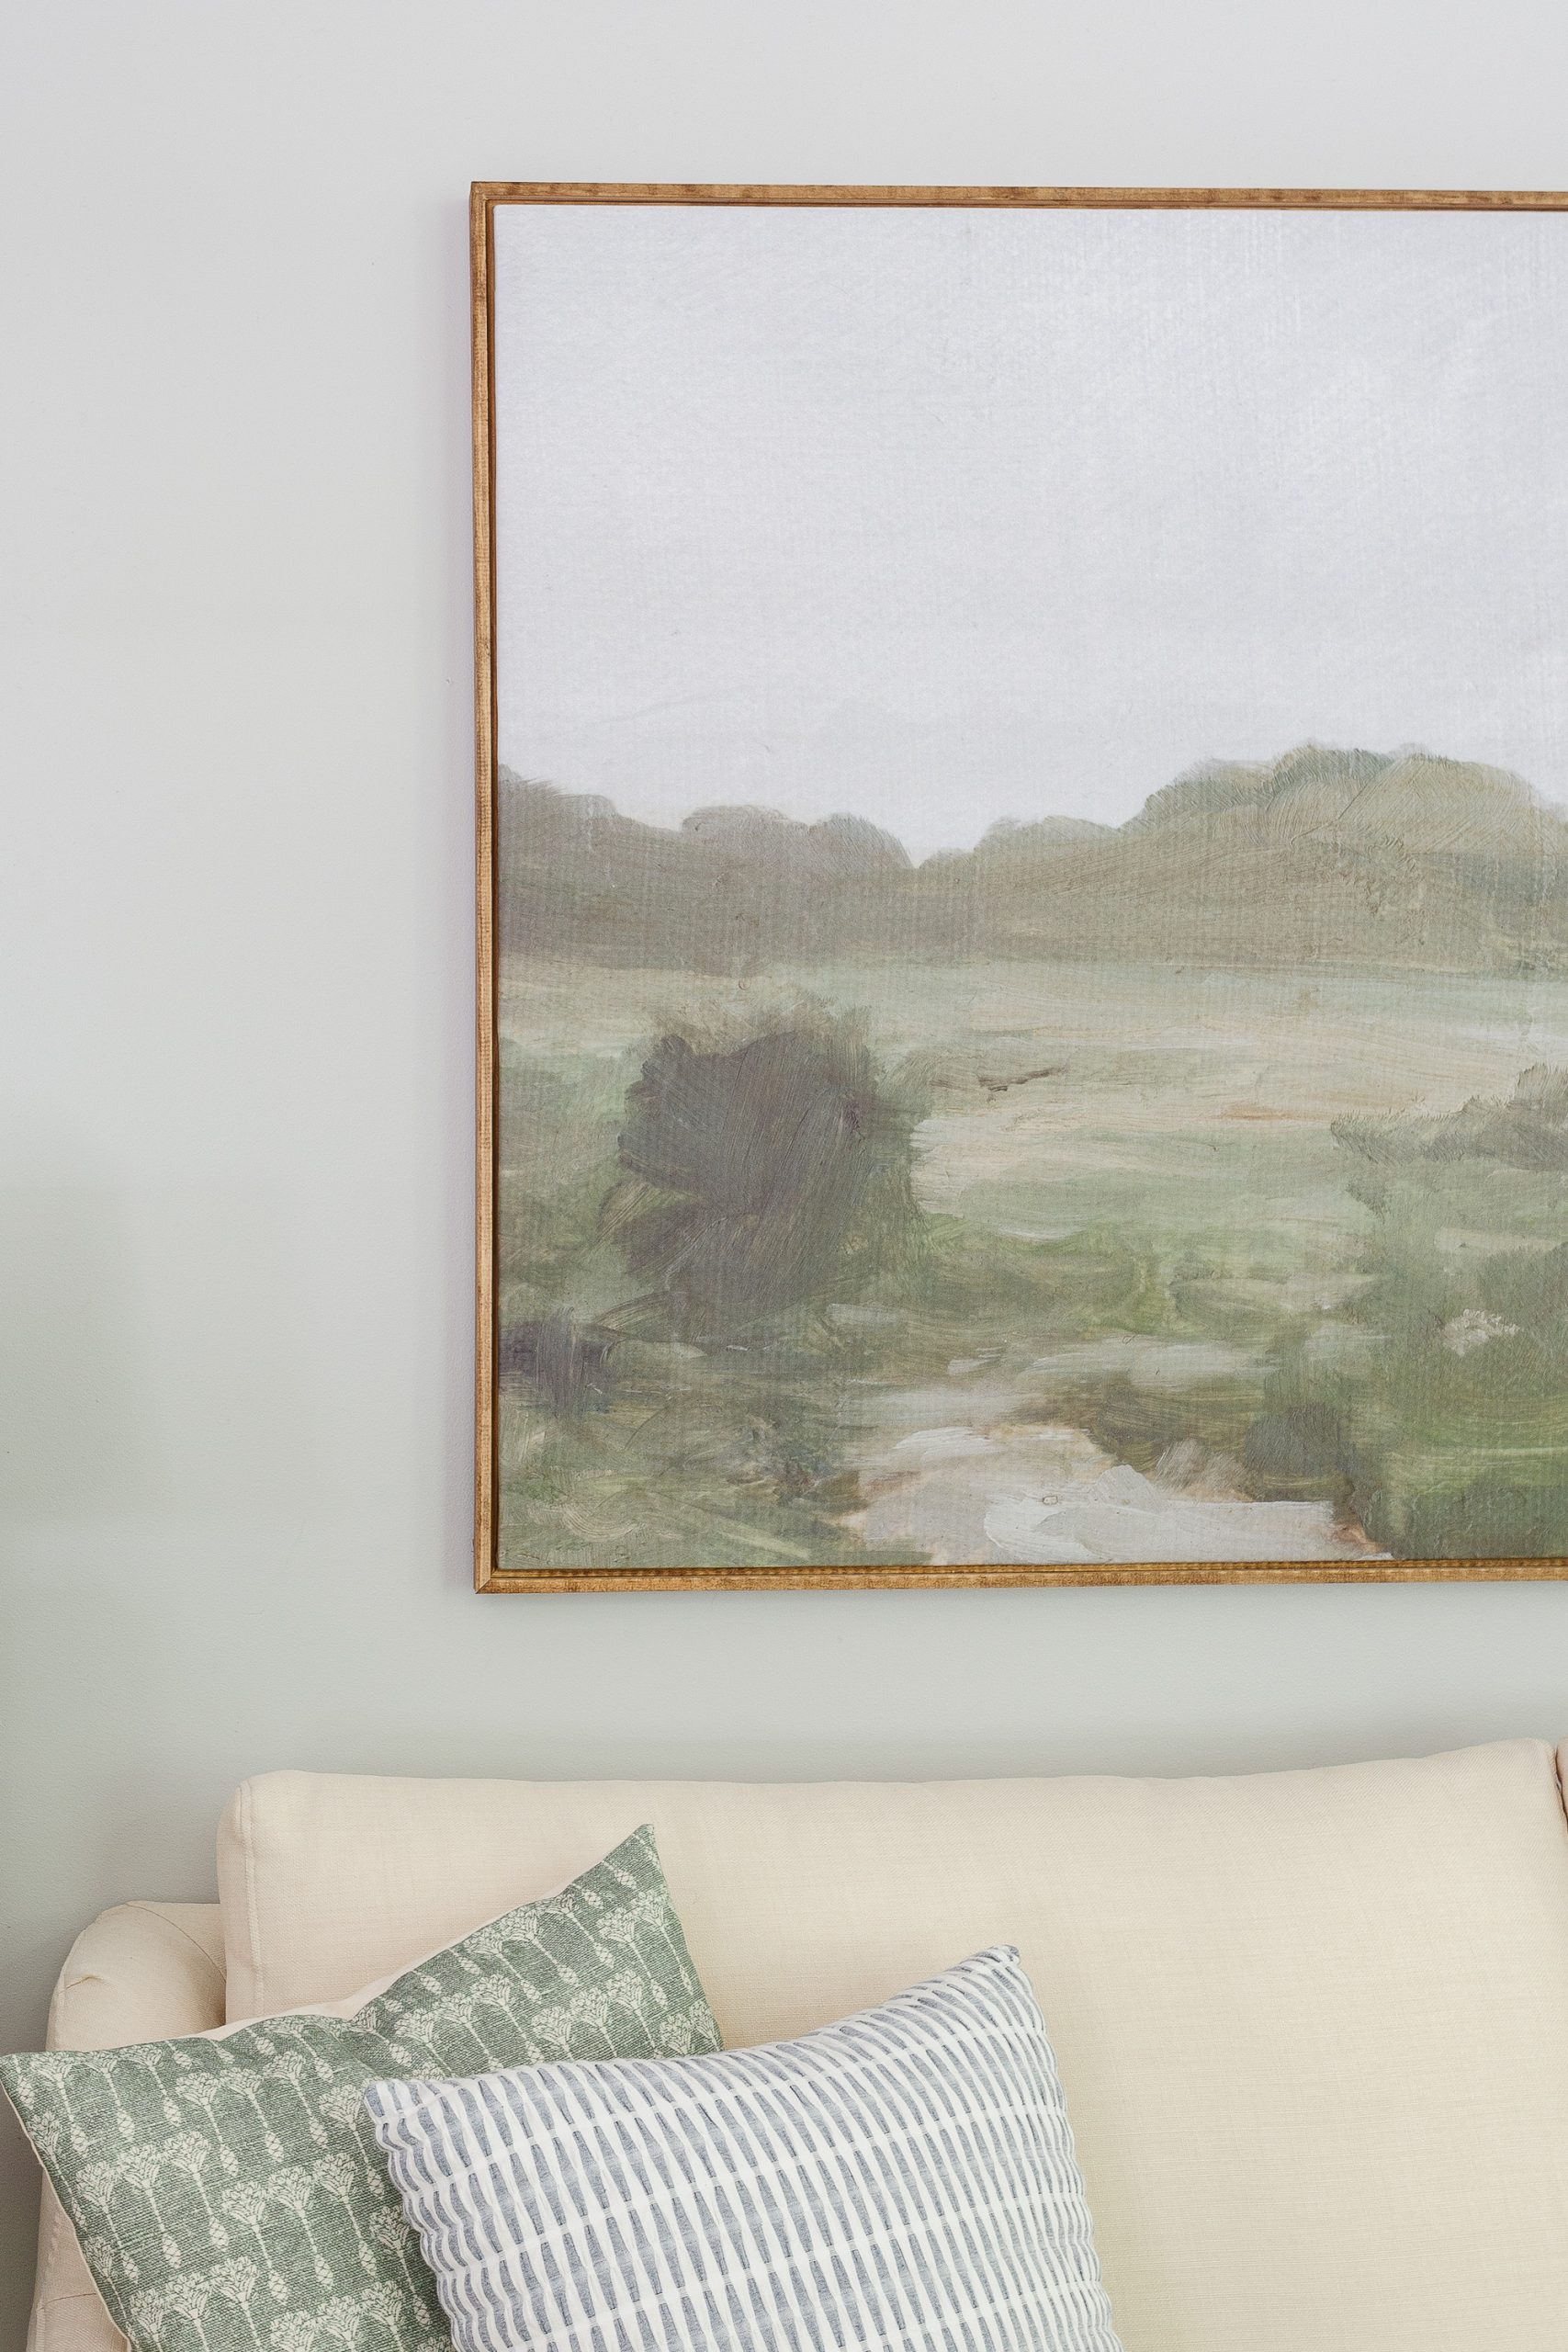
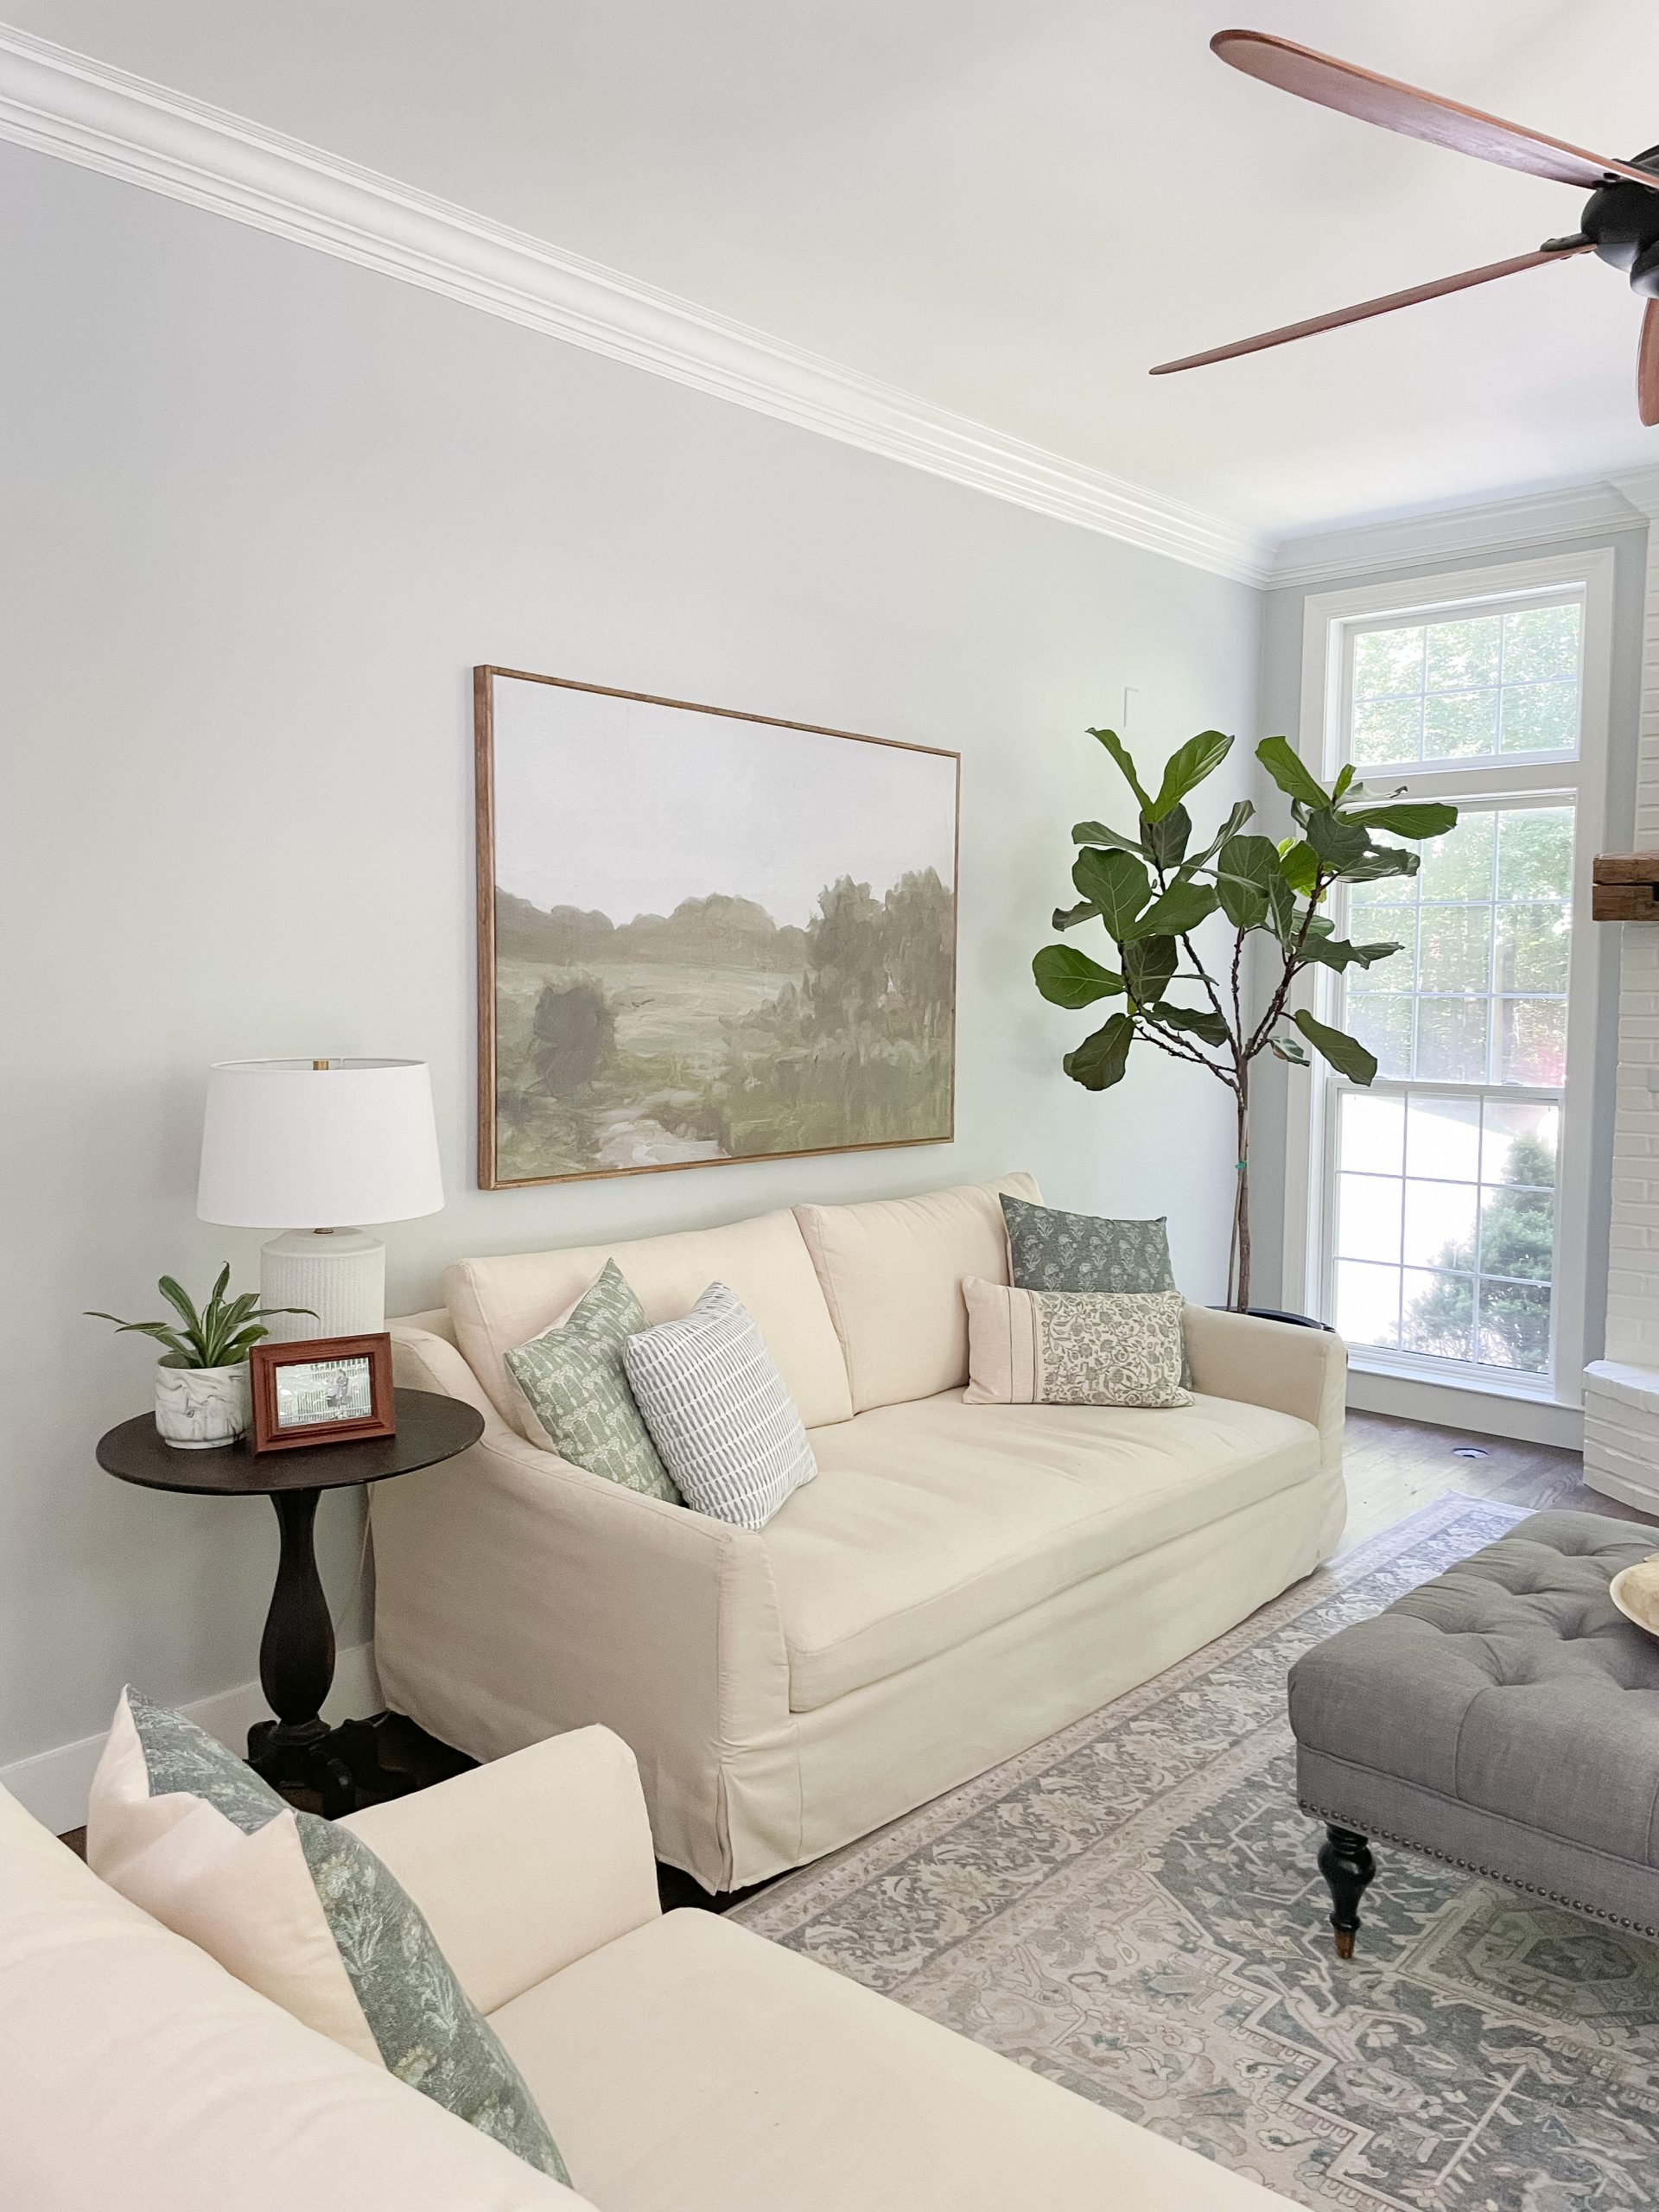
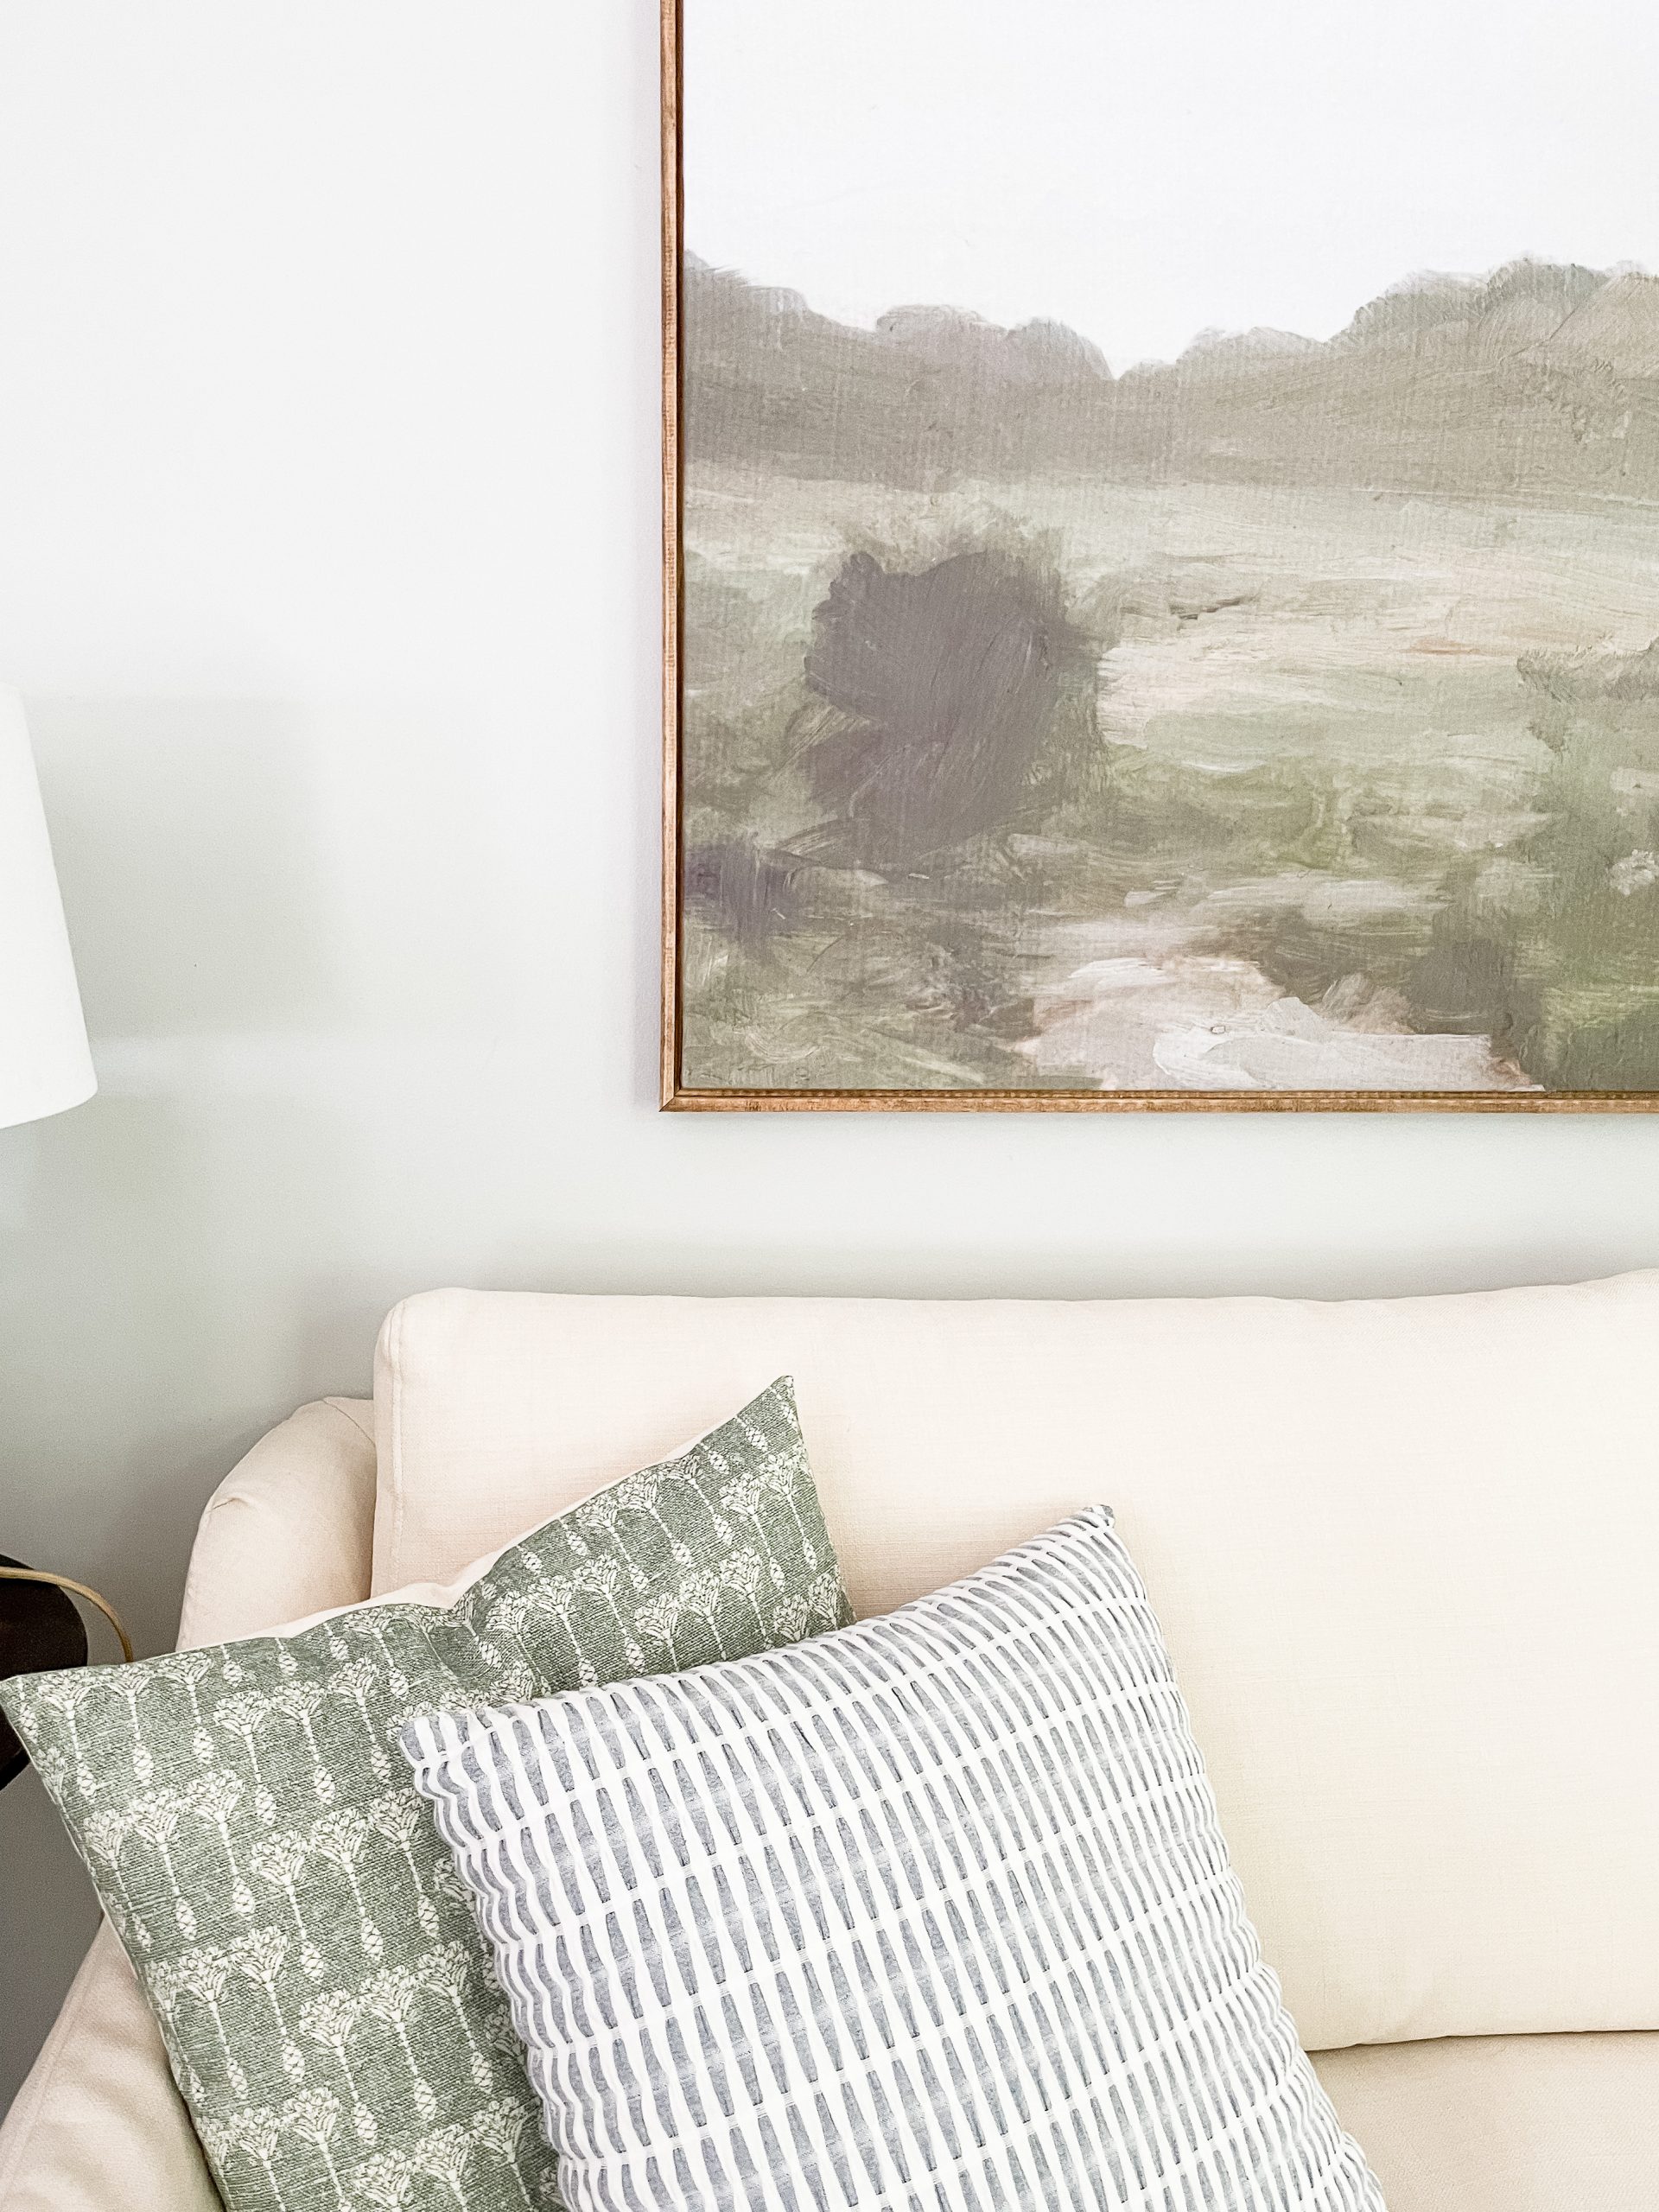
Our sofa is 85″ long which meant our art needed to be approximately 56 inches wide, if following the 2/3 width rule. We created our art 62 inches by 42.” It’s quite large.
Supplies Used for Large-Scale Art:
Now that you have determined the size of your art you need to gather your supplies.
We made a very large piece so the amount of wood we bought we based on our final dimensions. Yours might be different. We used a large shower curtain due to its ease of being able to staple it to the wood frame.
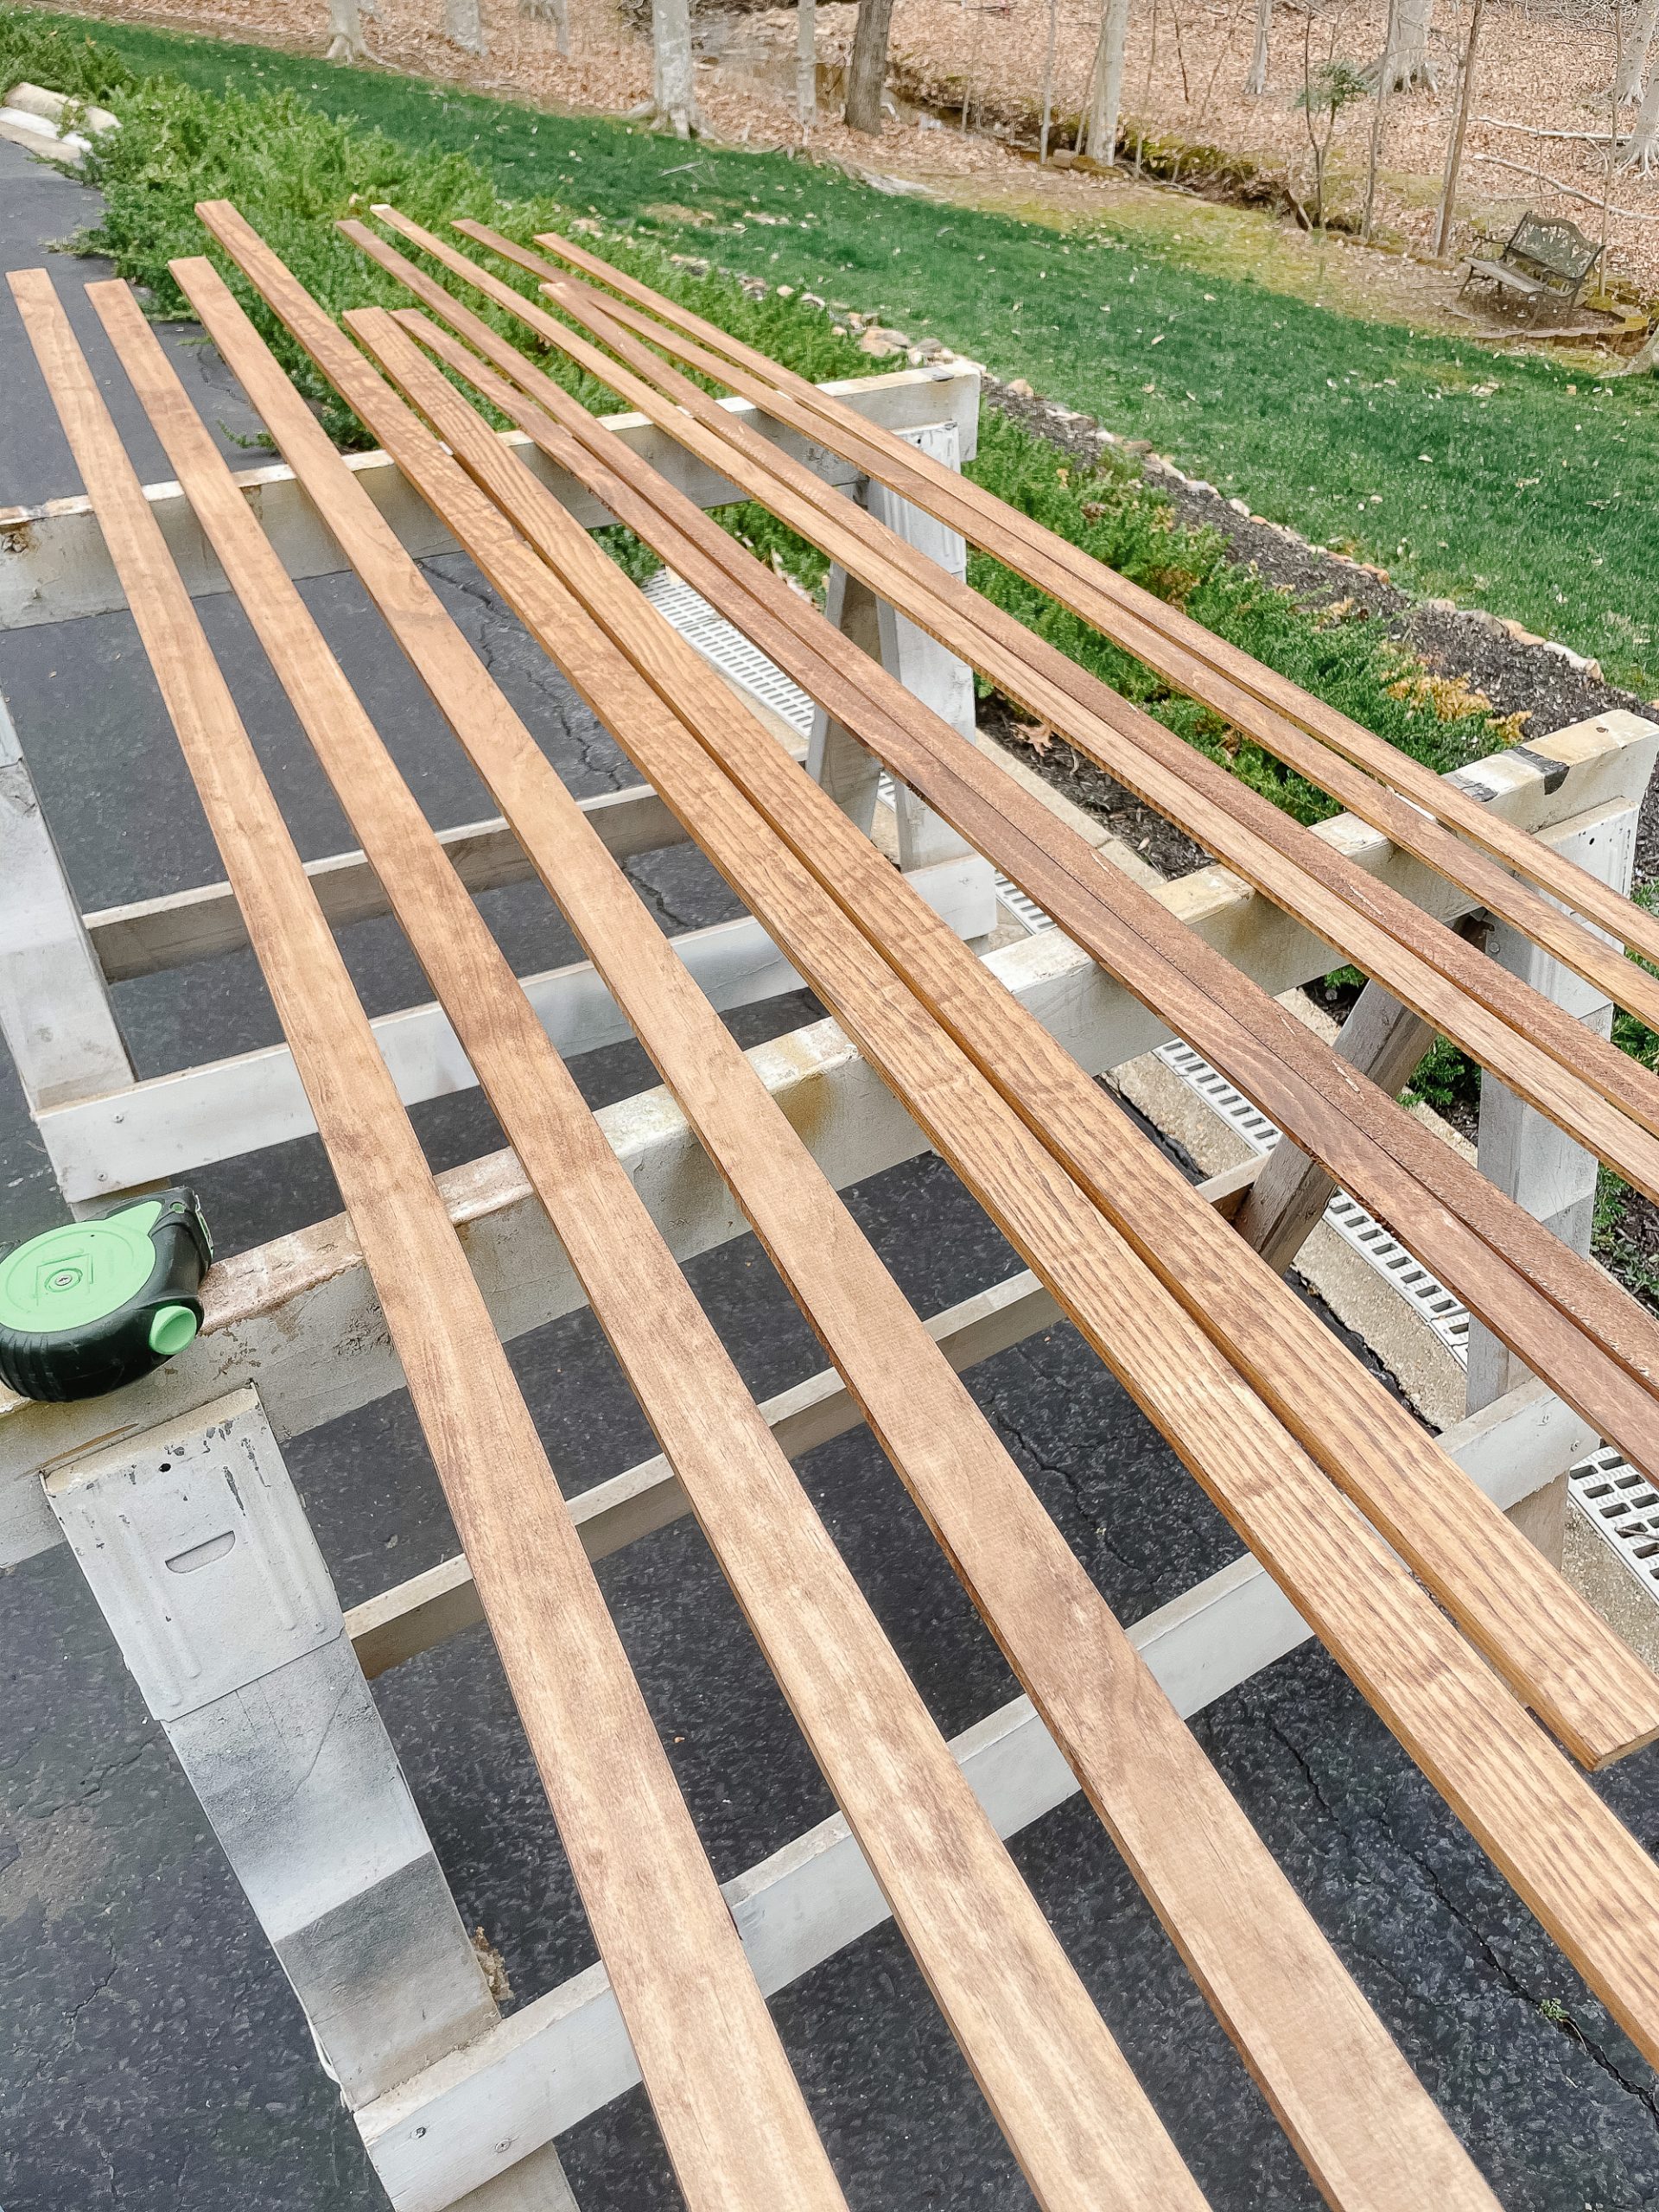
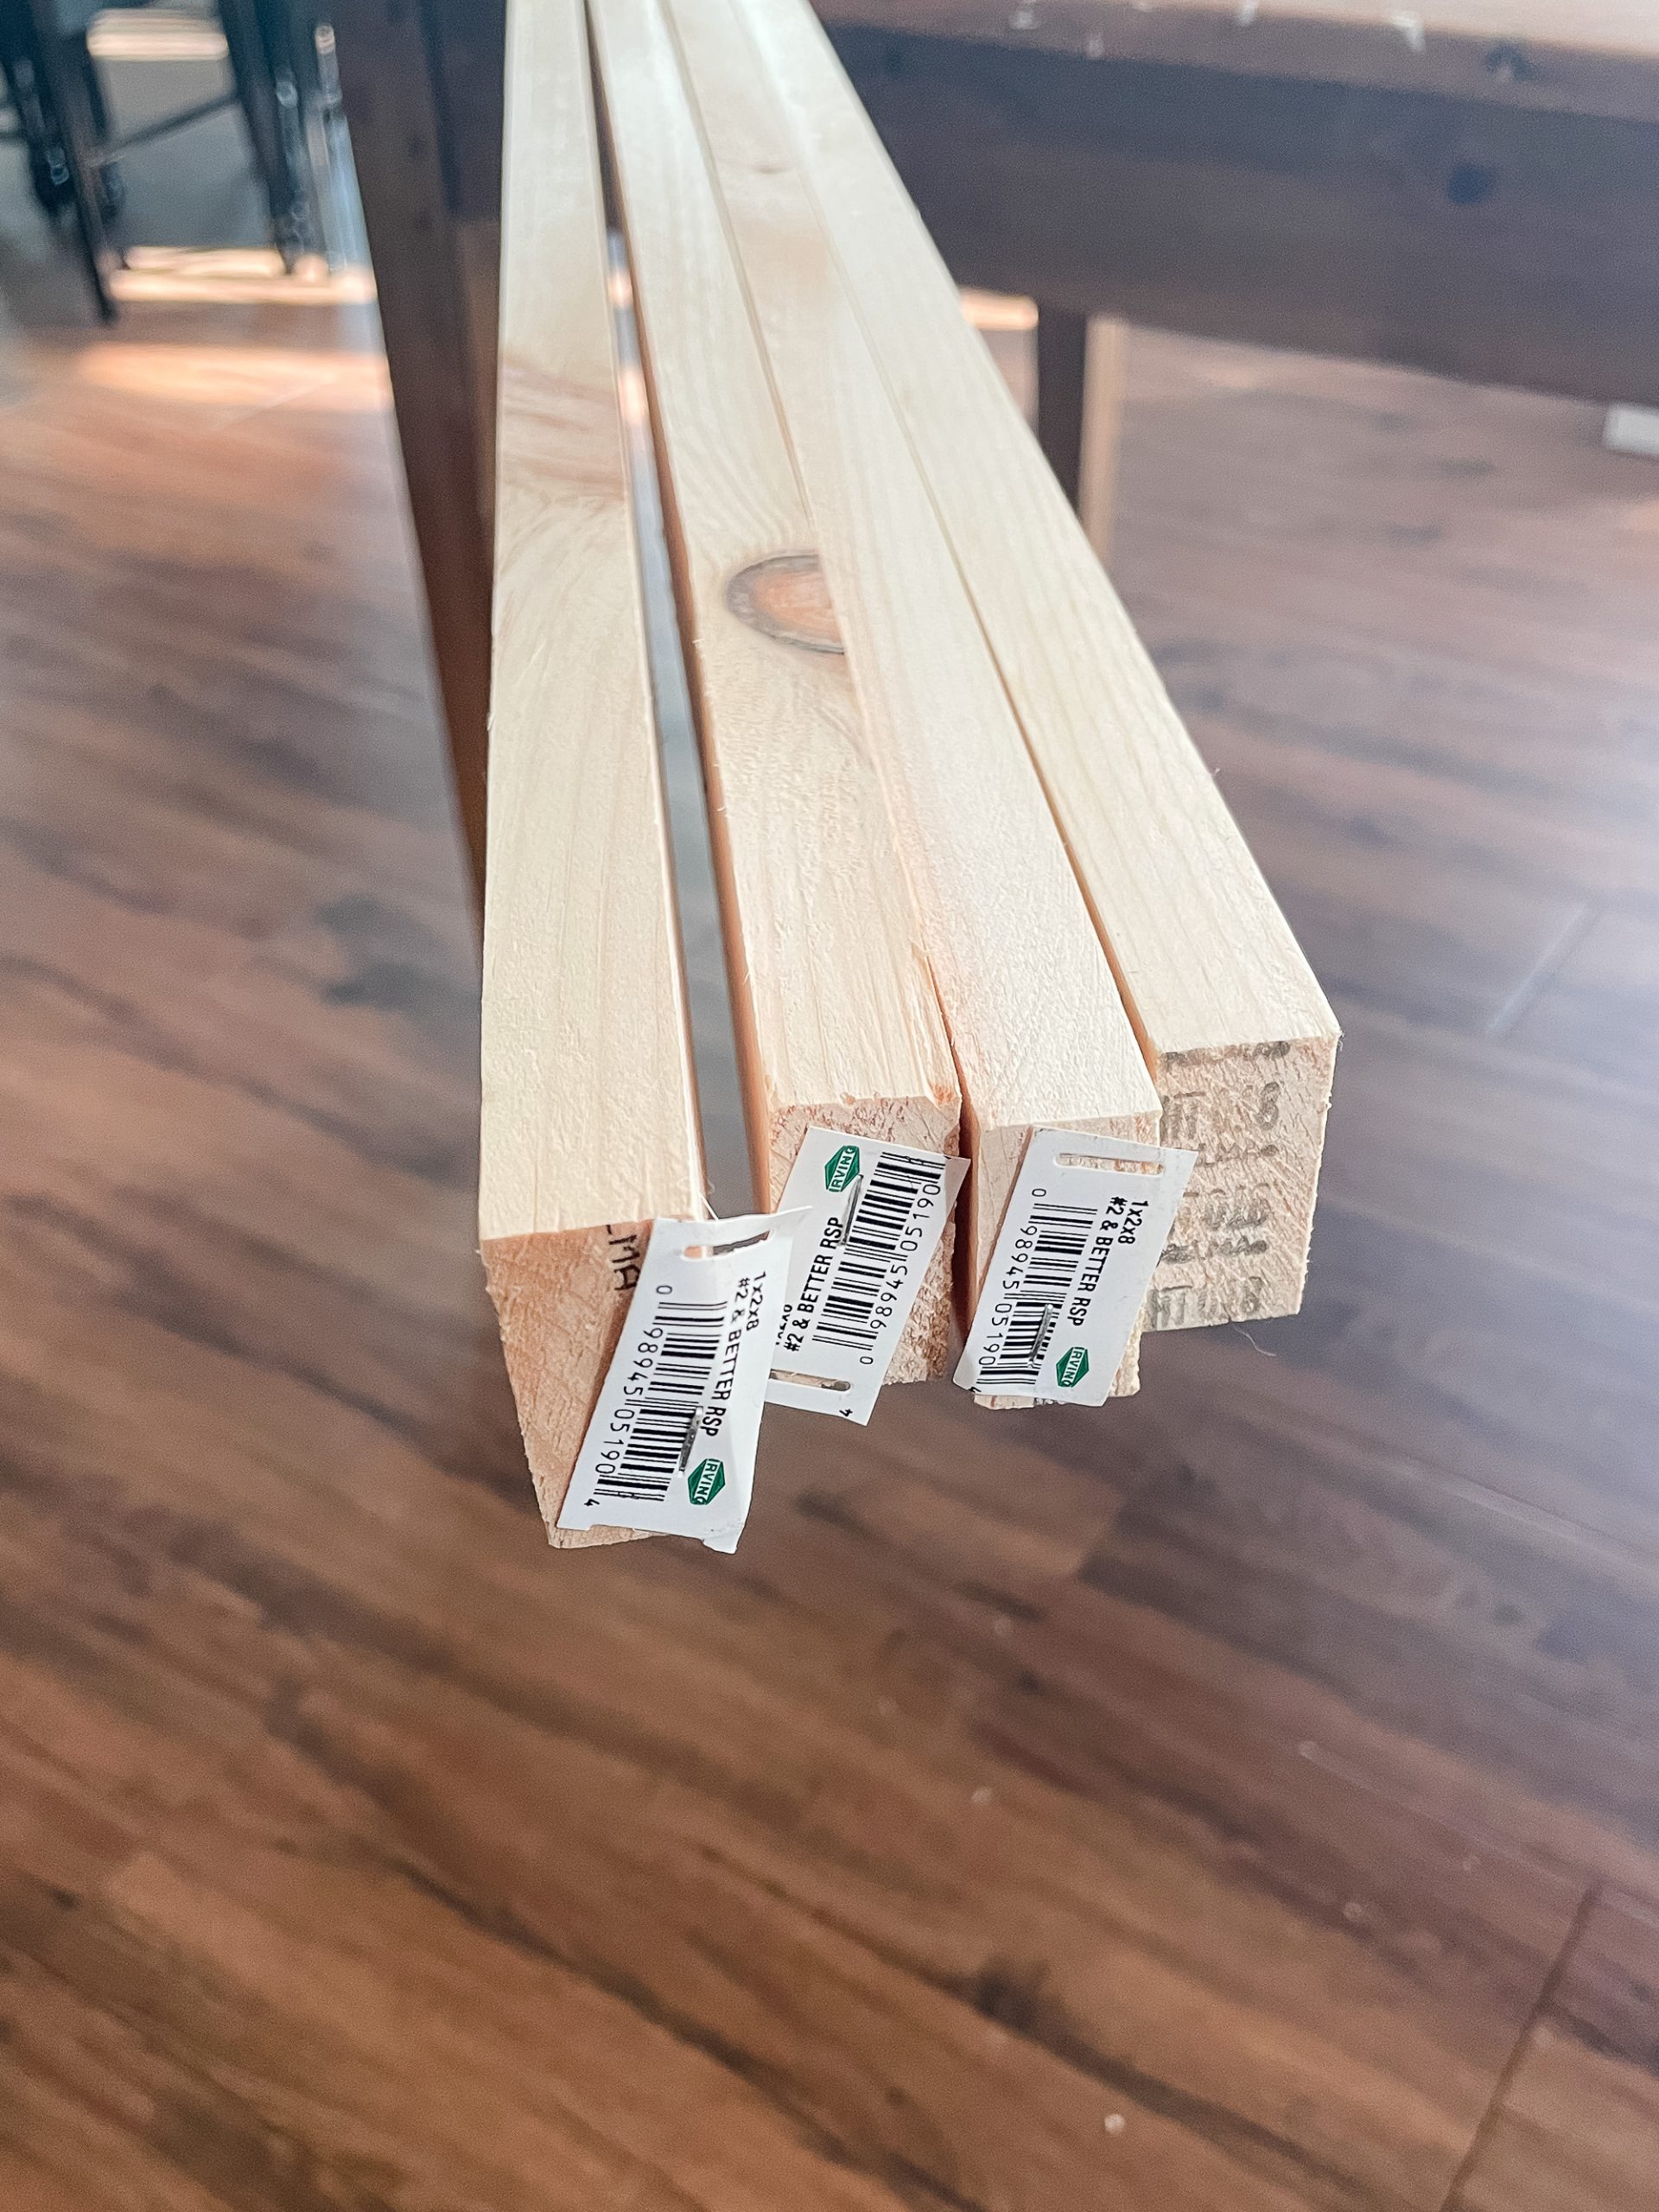
- 10 1″ x 2″ x 8′ boards (used to create the base frame and the frame around the outside of the art)
- 4 lattice strips
- Shower curtain with design of your choice
- Drop Cloth or plain white sheet –
- Power drill & bits
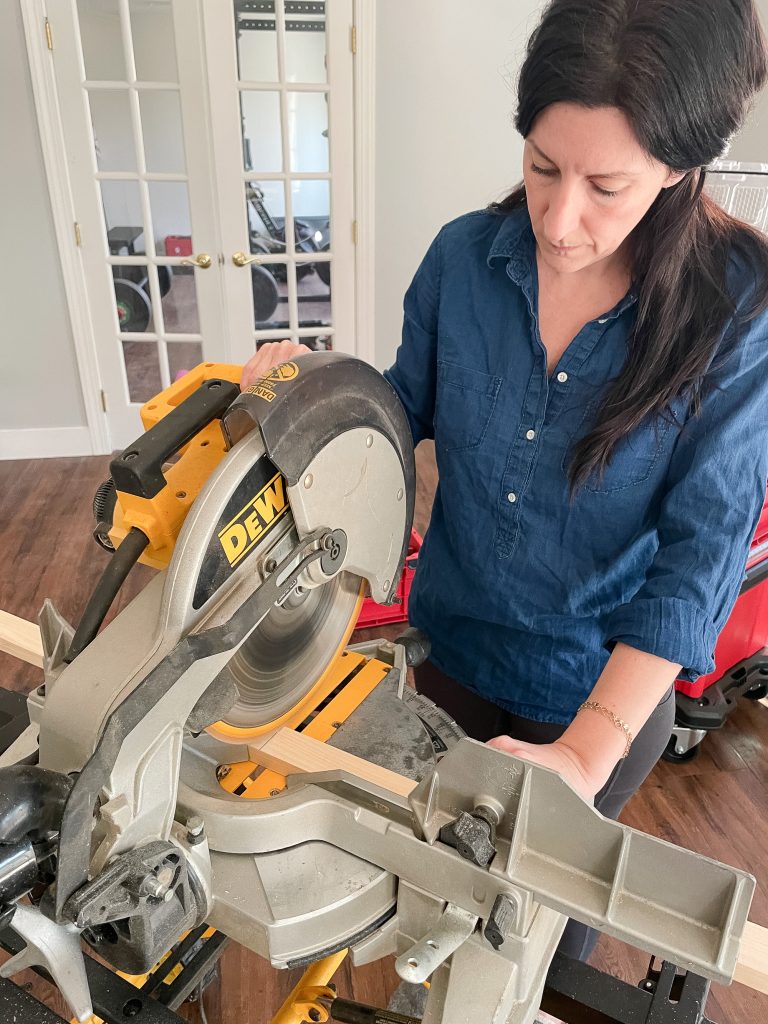
- Miter Saw or a hand saw
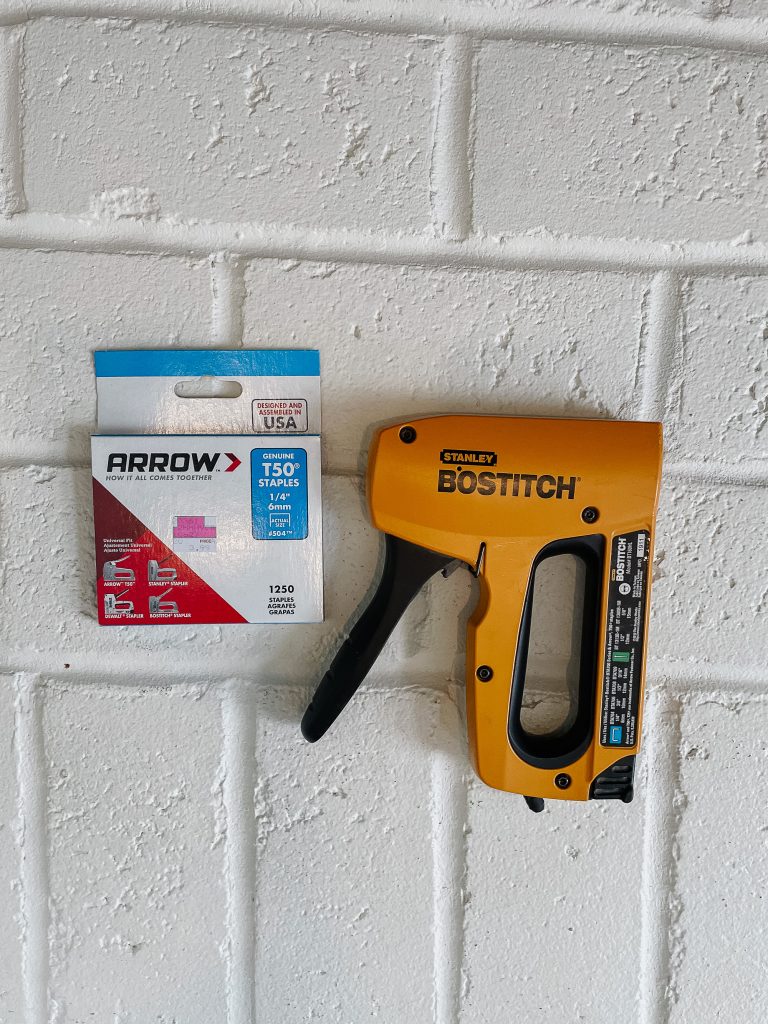
- Staple gun and Staples
- Wood screws
- Nail Gun
- Finishing Nails
- Wood stain (I used Minwax Special Walnut)
Select Your Shower Curtain or Tapestry
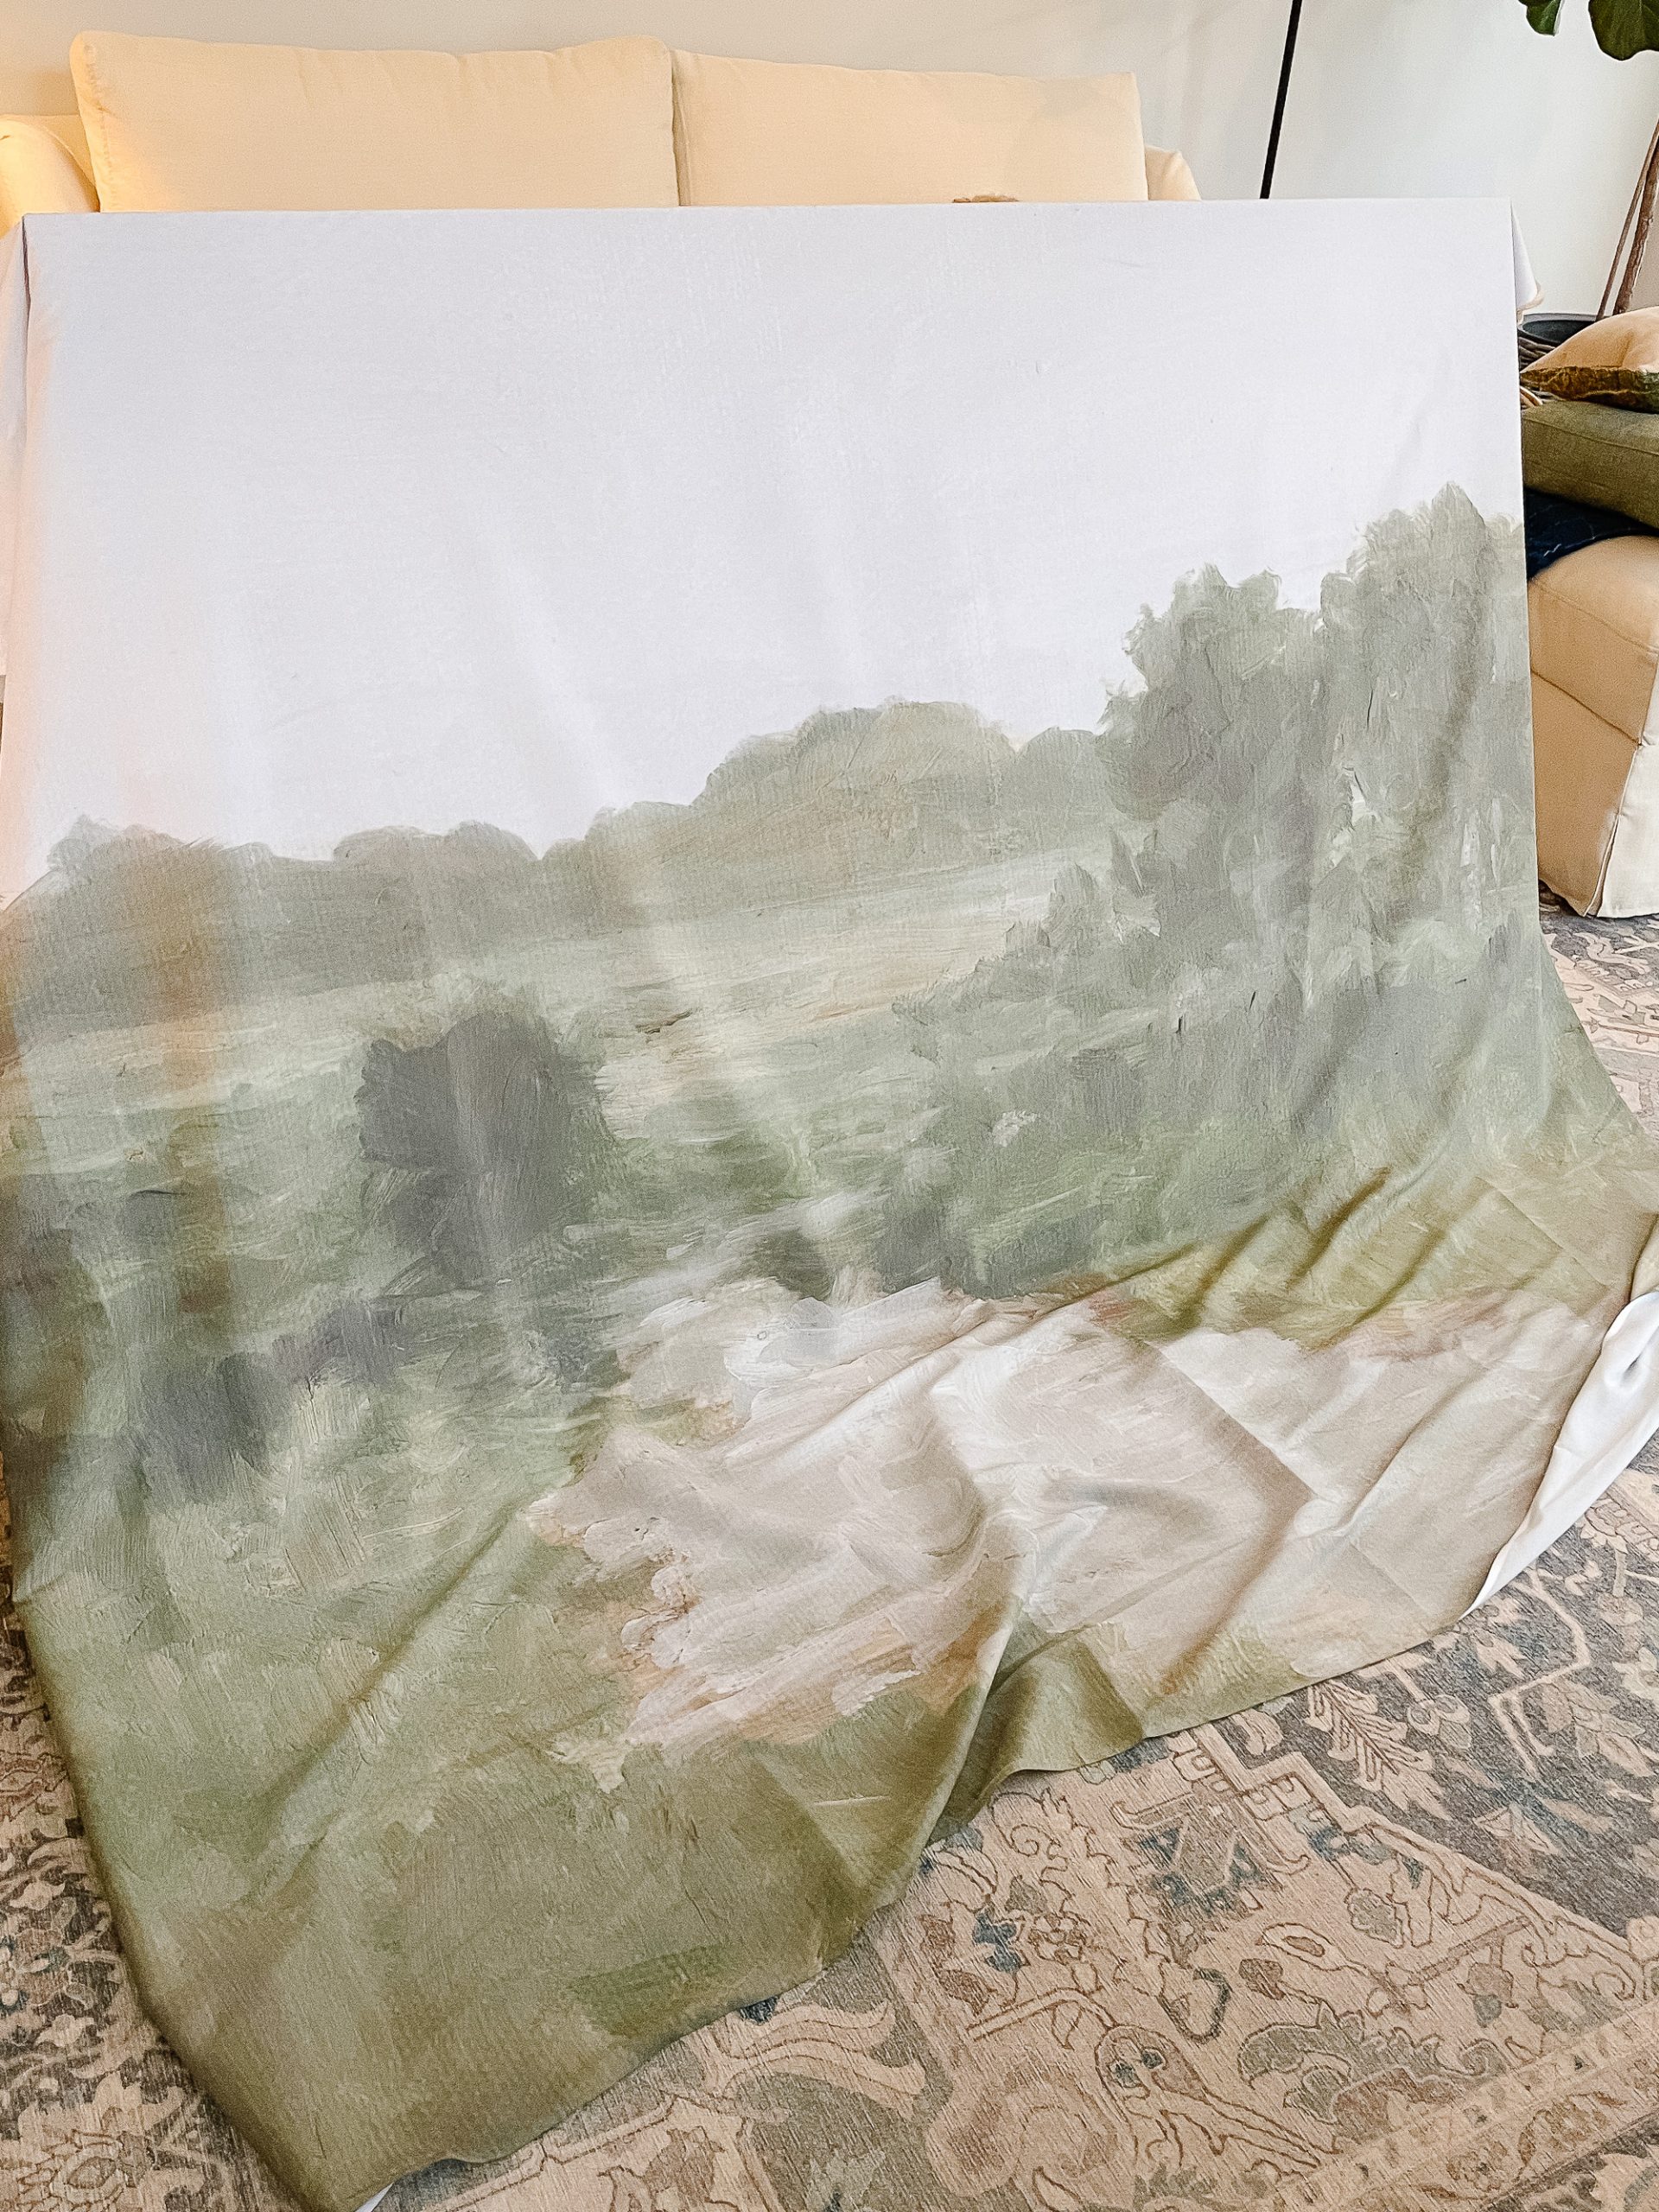
The best part is selecting your art; although with so many options and selections narrowing down a piece took me quite a bit of time. In fact, I order a shower curtain that looked perfect on the computer but once I put it up on the wall it wasn’t exactly what I was looking for so I began my hunt over again.
This is the shower curtain we used, but in all my hunting I curated some pieces for you to chose from as well.
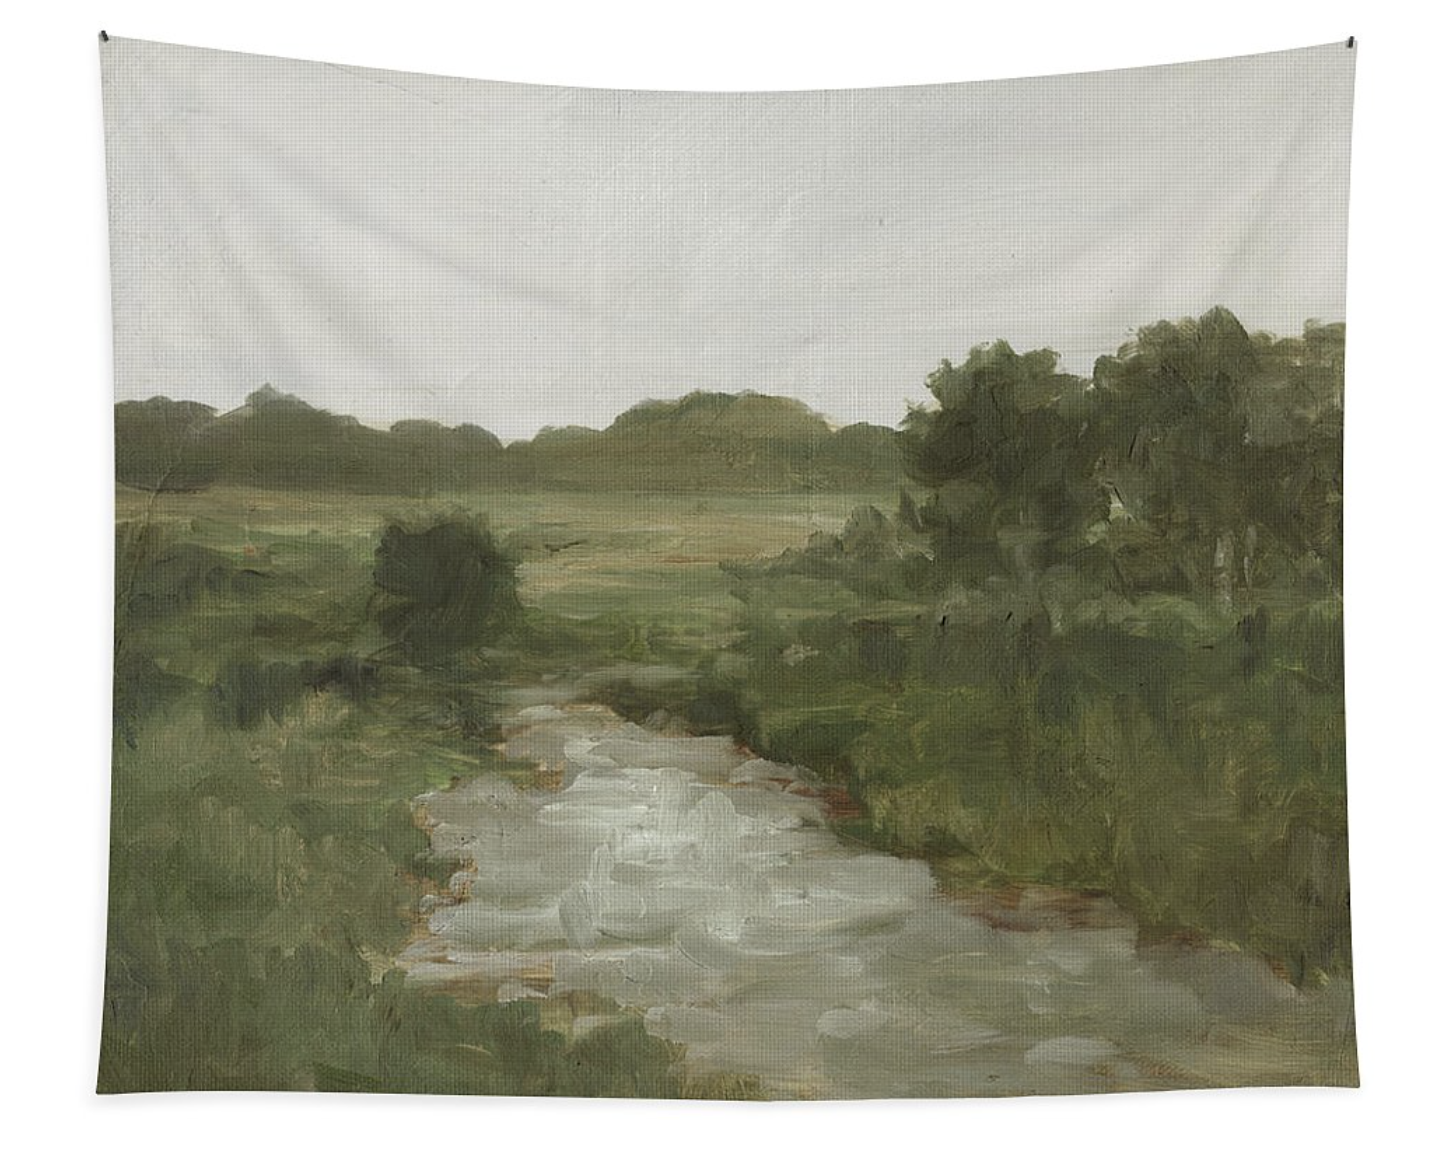
Tranquil Fen II by Ethan Harper
[show_boutique_widget id=”1079319″]
Now that you have your supplies and your art masterpiece ready to frame let’s get started with these steps.
Step 1 Sand and Stain the Wood
If you plan to put a frame around your art then you will need to finish the raw wood somehow. We stained the wood with Minwax Special Walnut because I already had some, but you could paint it or do a natural stain. The choice is yours.
We stained the wood first so it would be dry by the time we were ready to use it.
Stain both your lattice wood and the wood you are not using to build the base frame. You do not need to stain the base frame wood.
We built a floating style frame on the finished piece, but if you don’t want a floating frame you could just stain the lattice wood and put that as your frame. The choice is yours. See more below in Step 7.
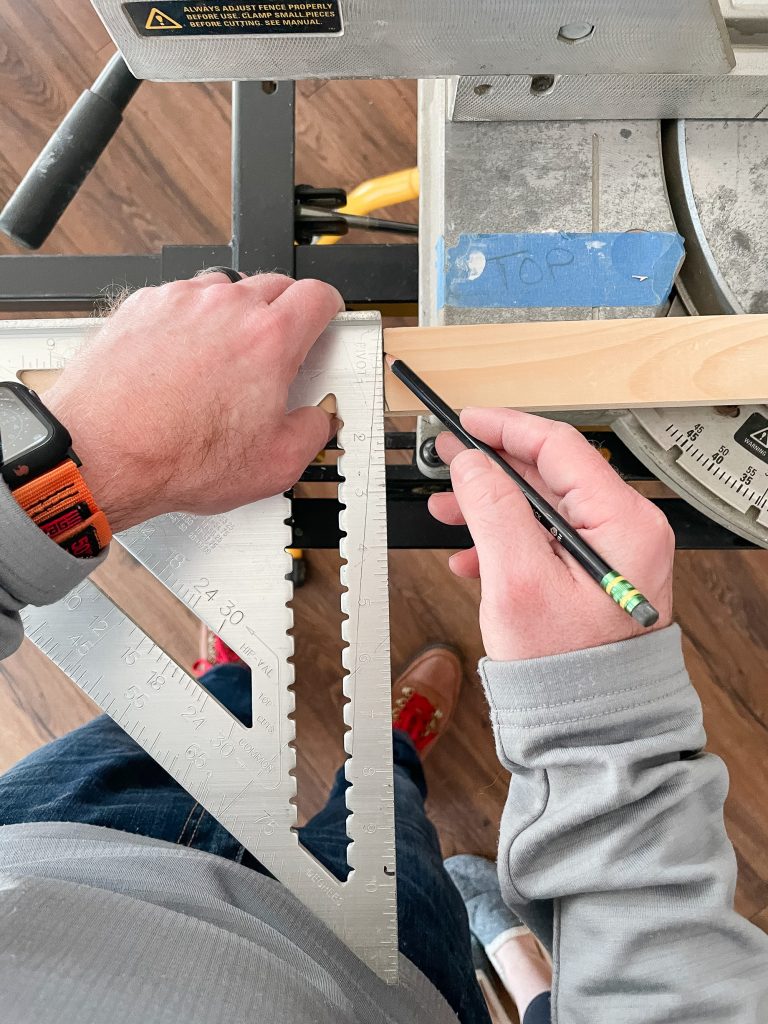
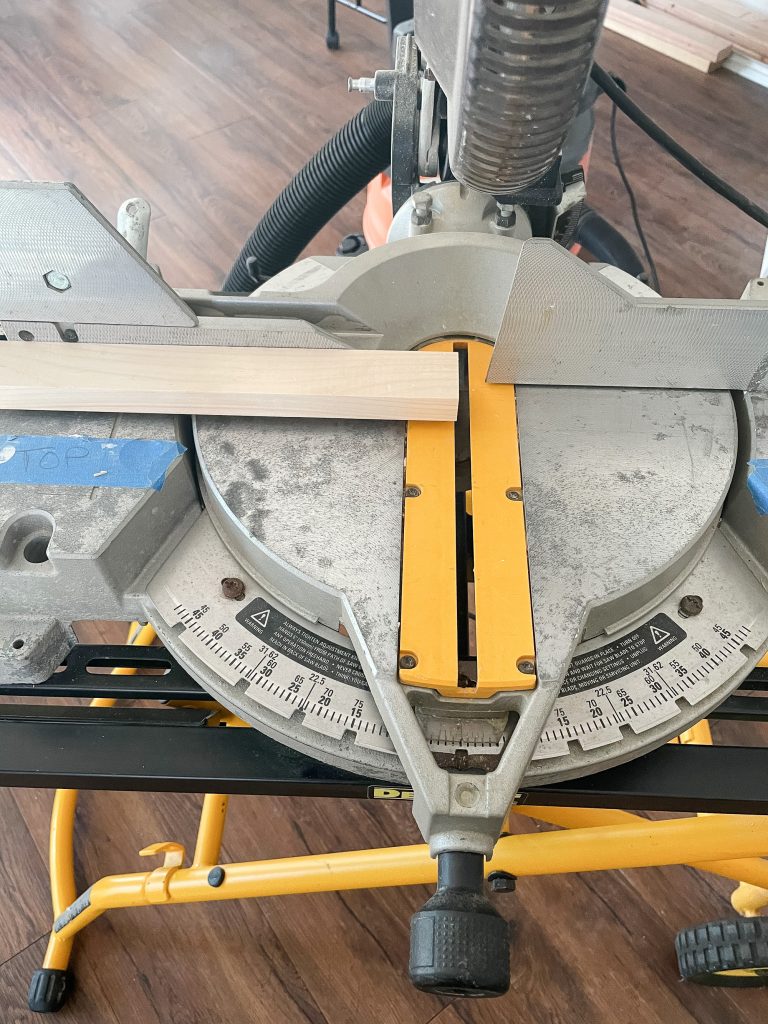
Step 2 Measure and Cut the Wood
Once you have determined the size of your art you will need to cut the wood so you can build your base frame. We wanted to create a 62″ x 42″ piece of art and that is the size frame we needed.
We decided to keep things simple with a straight cut so cut on your marks using a miter saw or miter box.
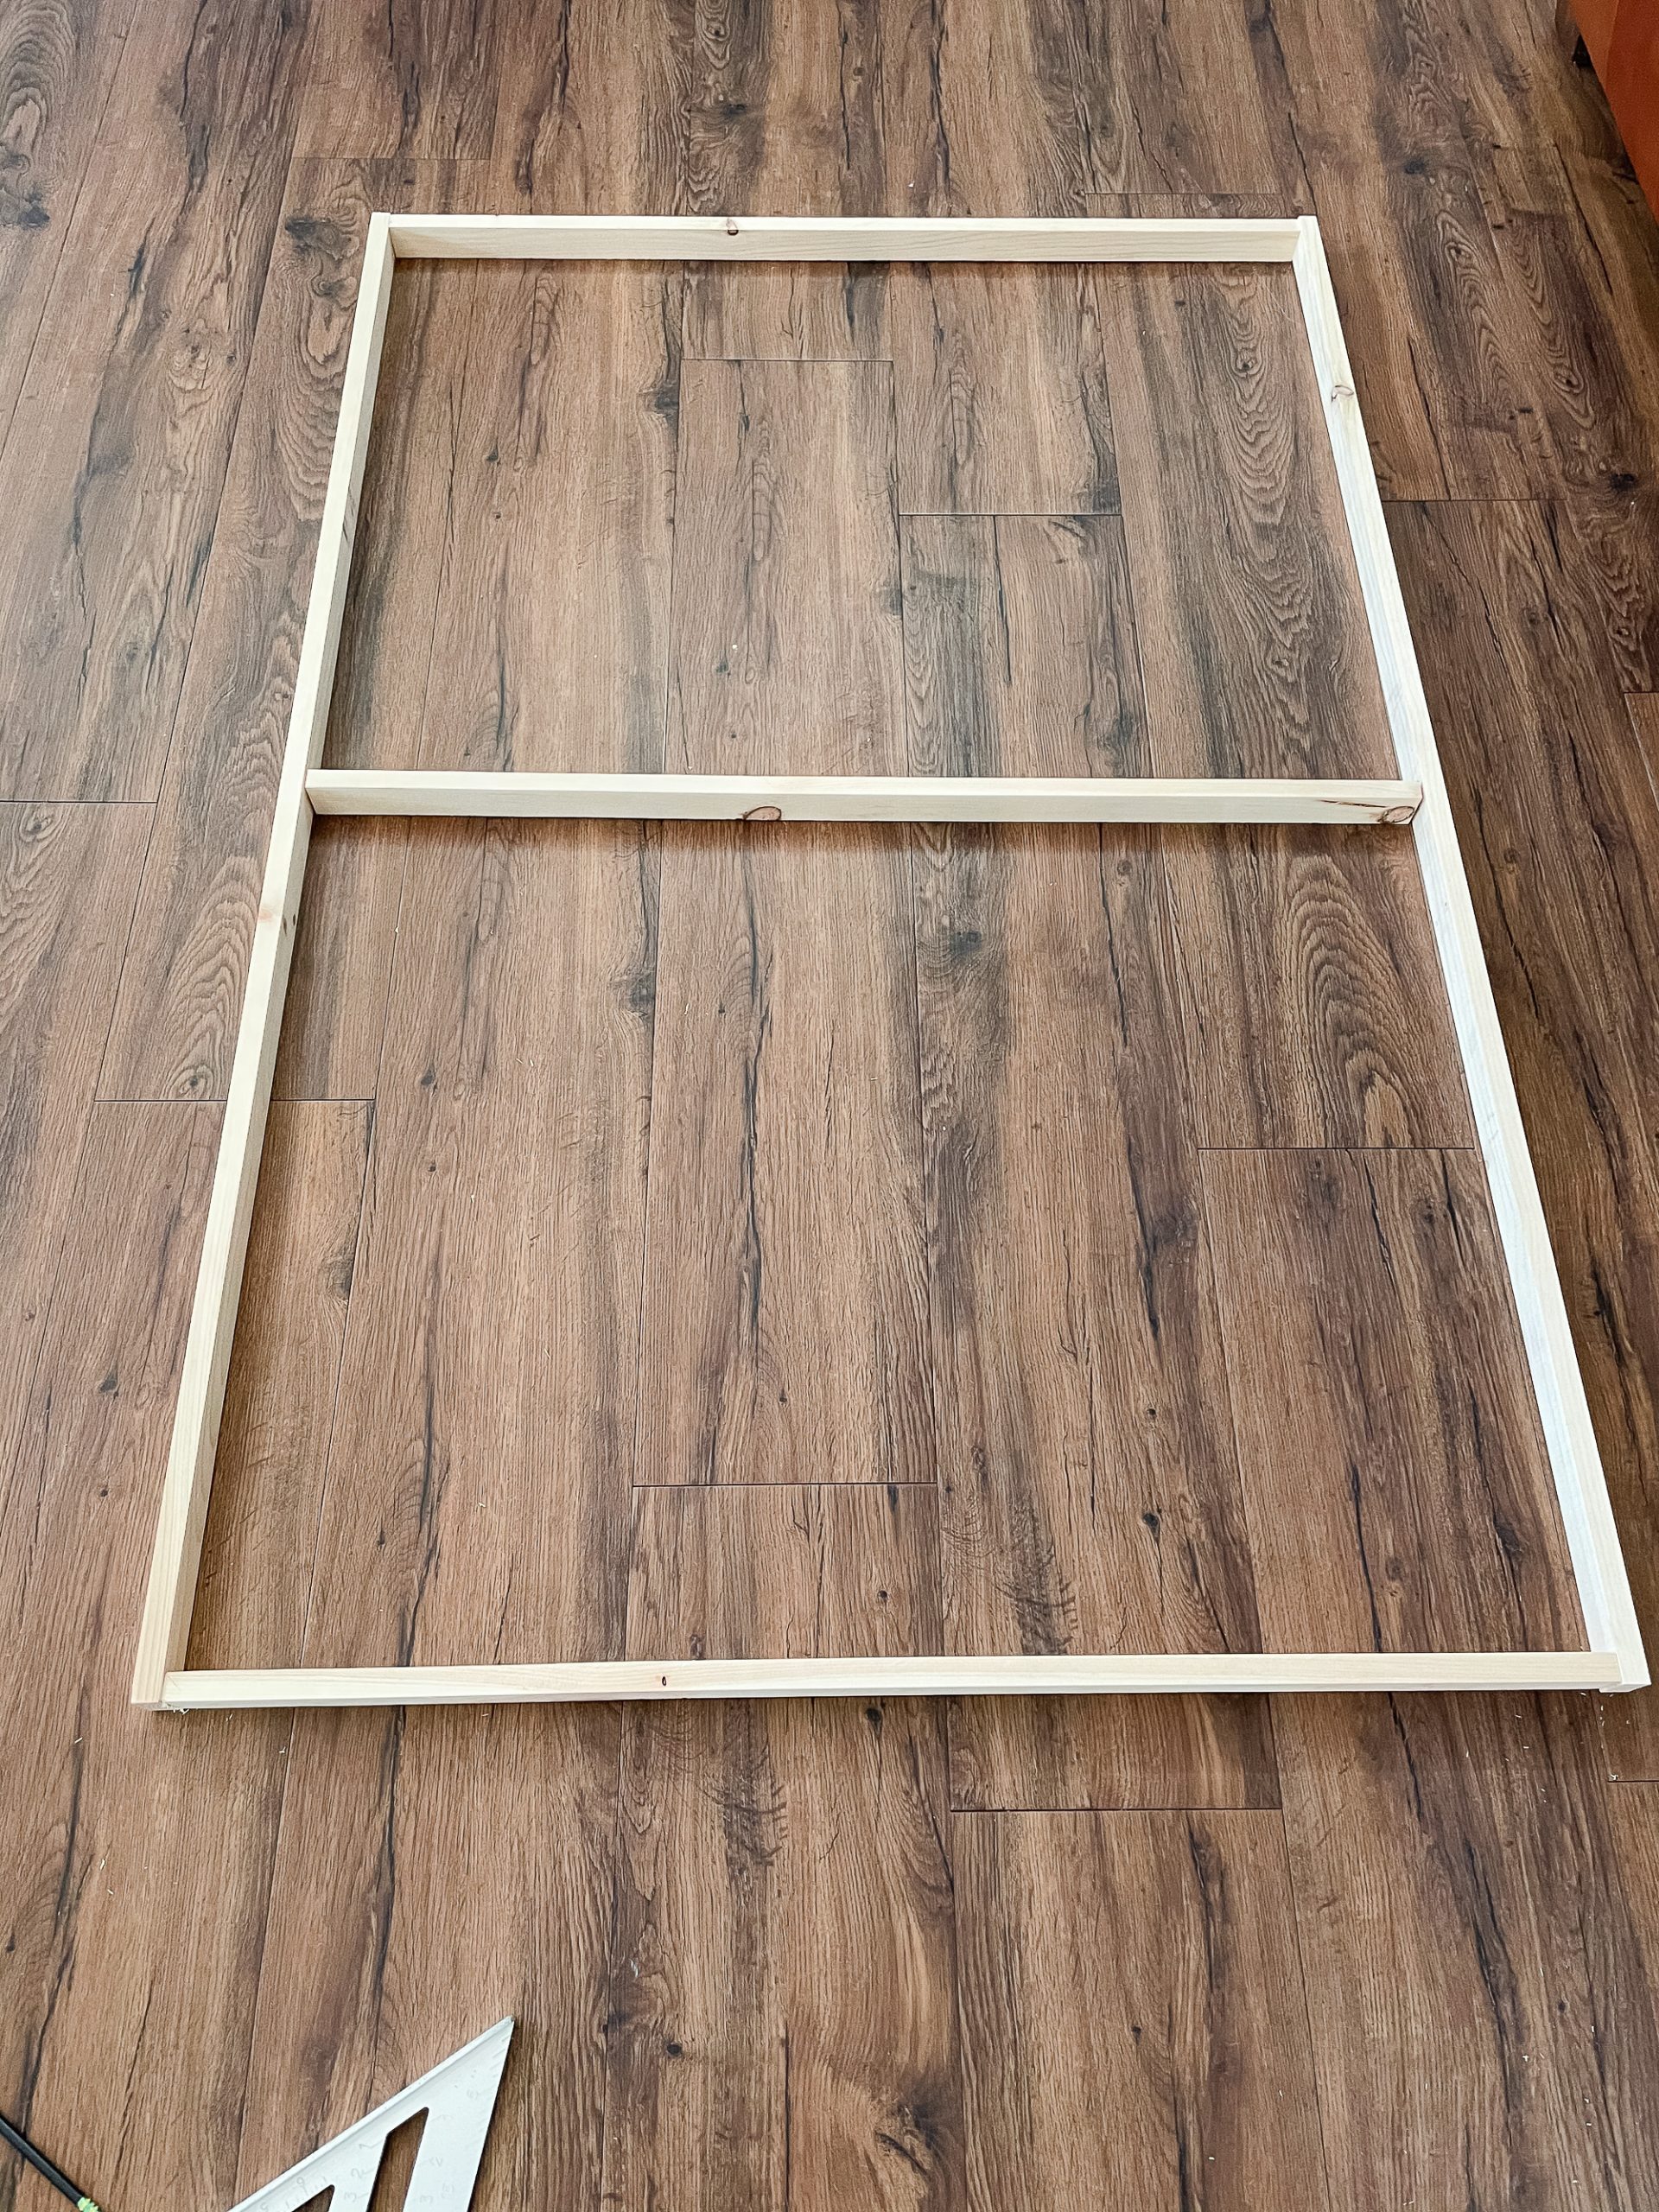
Step 3 Build your Large-Scale Art Frame
Take your cut pieces and lay them out to make a frame. We also put wood in the middle of the frame for support so you will need to ensure you have cut a total of 5 pieces if you are including a middle support joint.
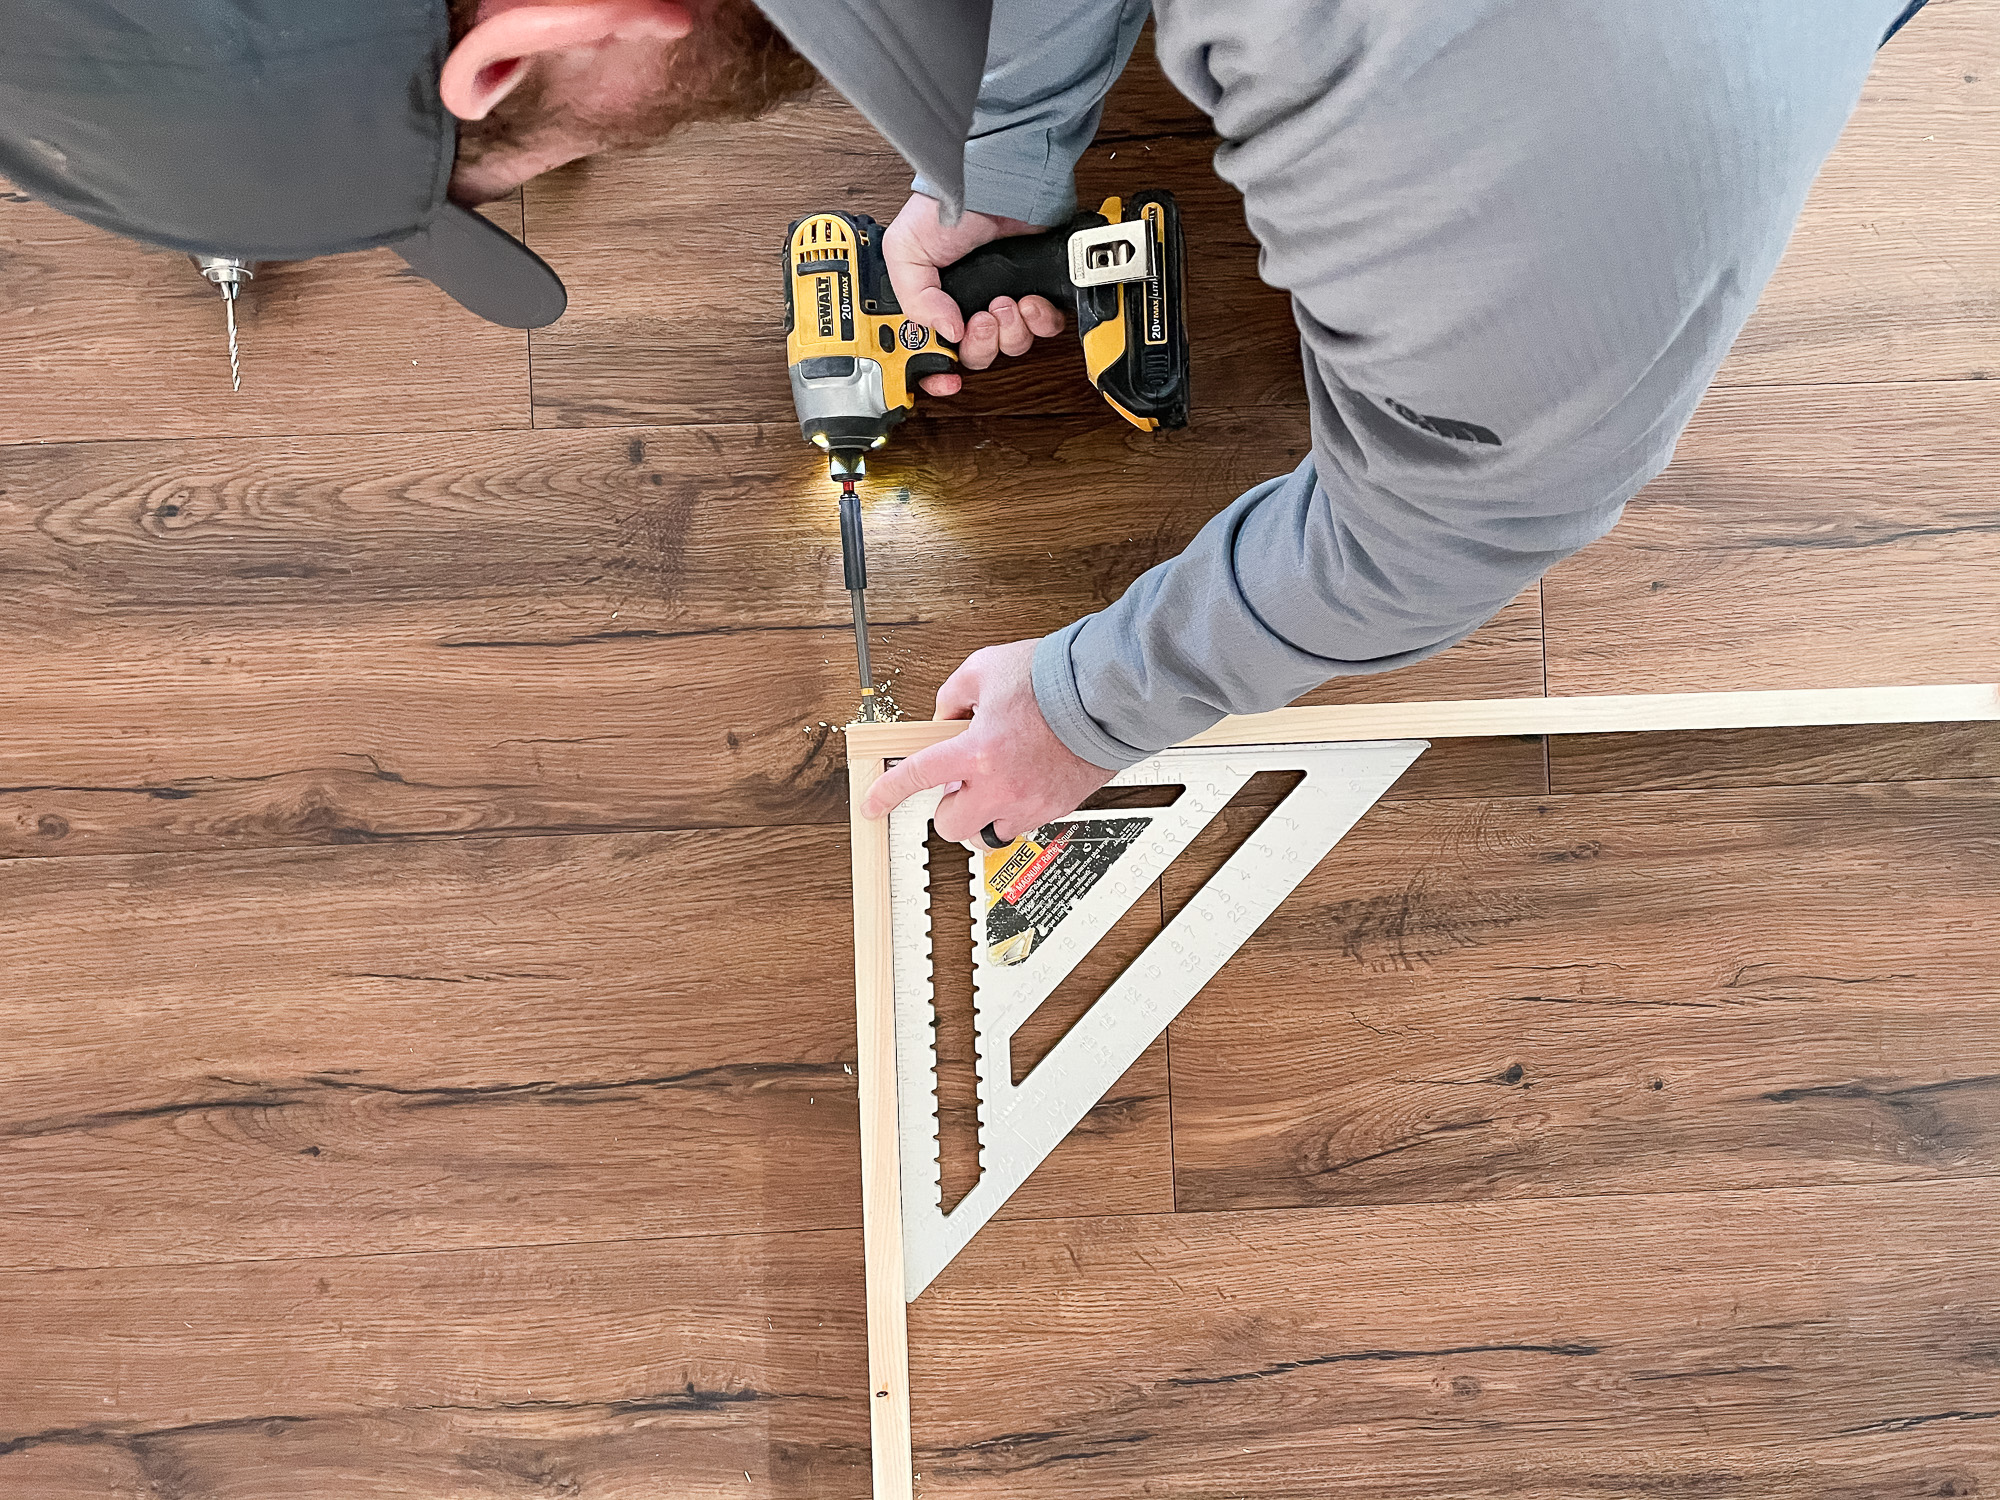
Step 4 – Pre-Drill your Wood
We used a drill bit and held both 1×2’s together securely in place by hand while we drilled into both boards.
Tip: Pre-drilling creates small holes that act as a guide for the screws to go in straight, and also helps prevent the wood from splitting.
Step 5 – Screw the Frame Together
Once the wholes have been pre-drilled; take the wood screws and a square edge and screw your frame together. Since we are covering the frame with our art it was ok if the screws were exposed on the outside of the frame.
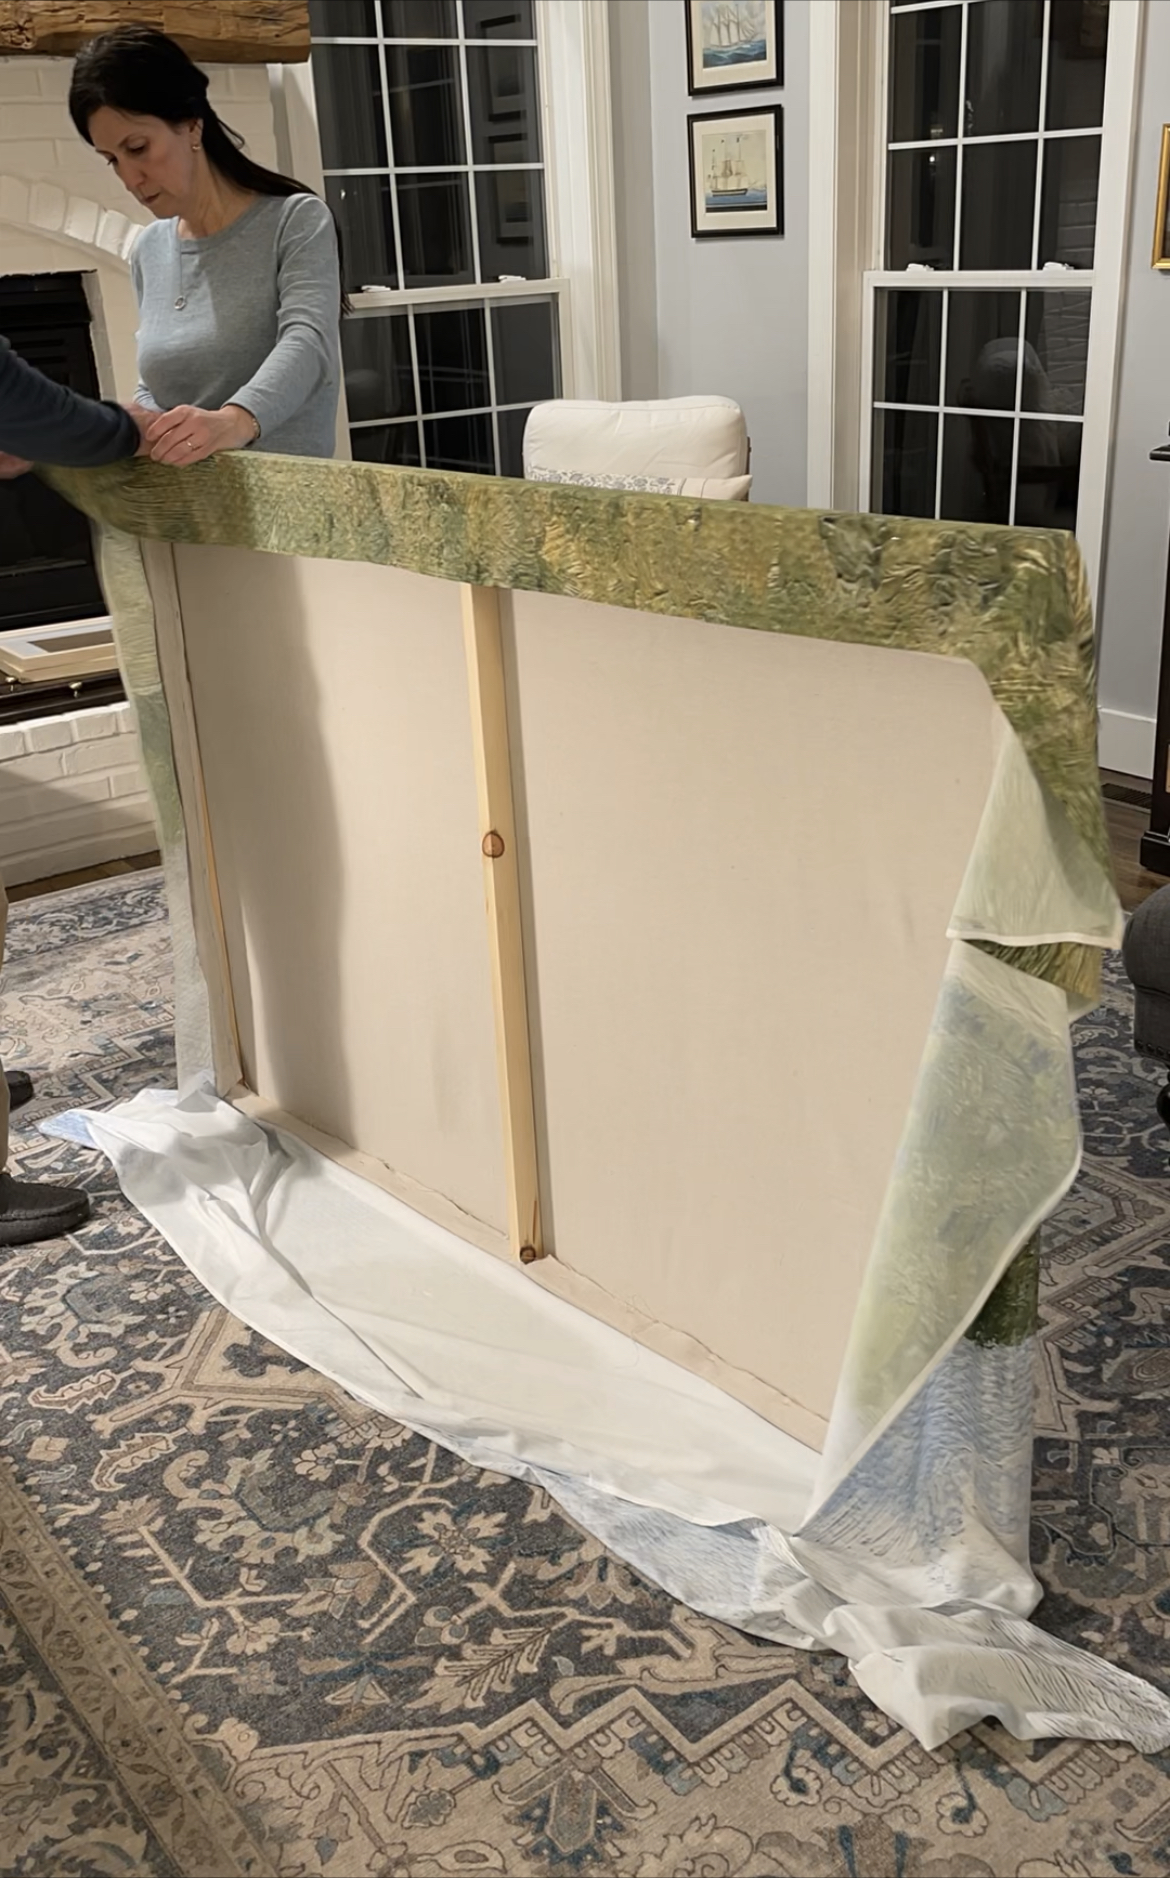
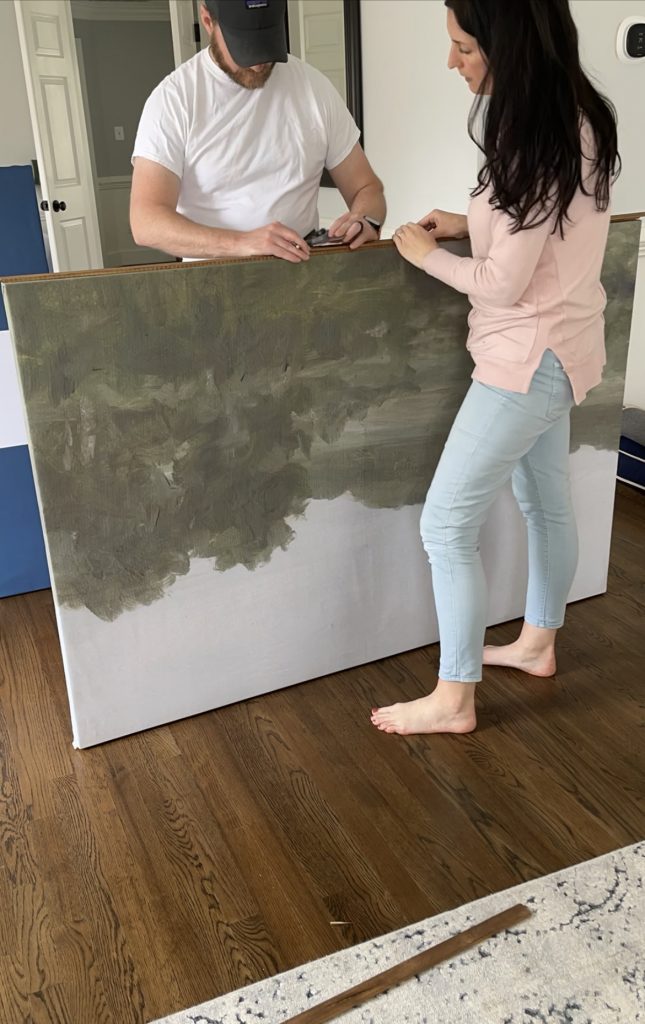
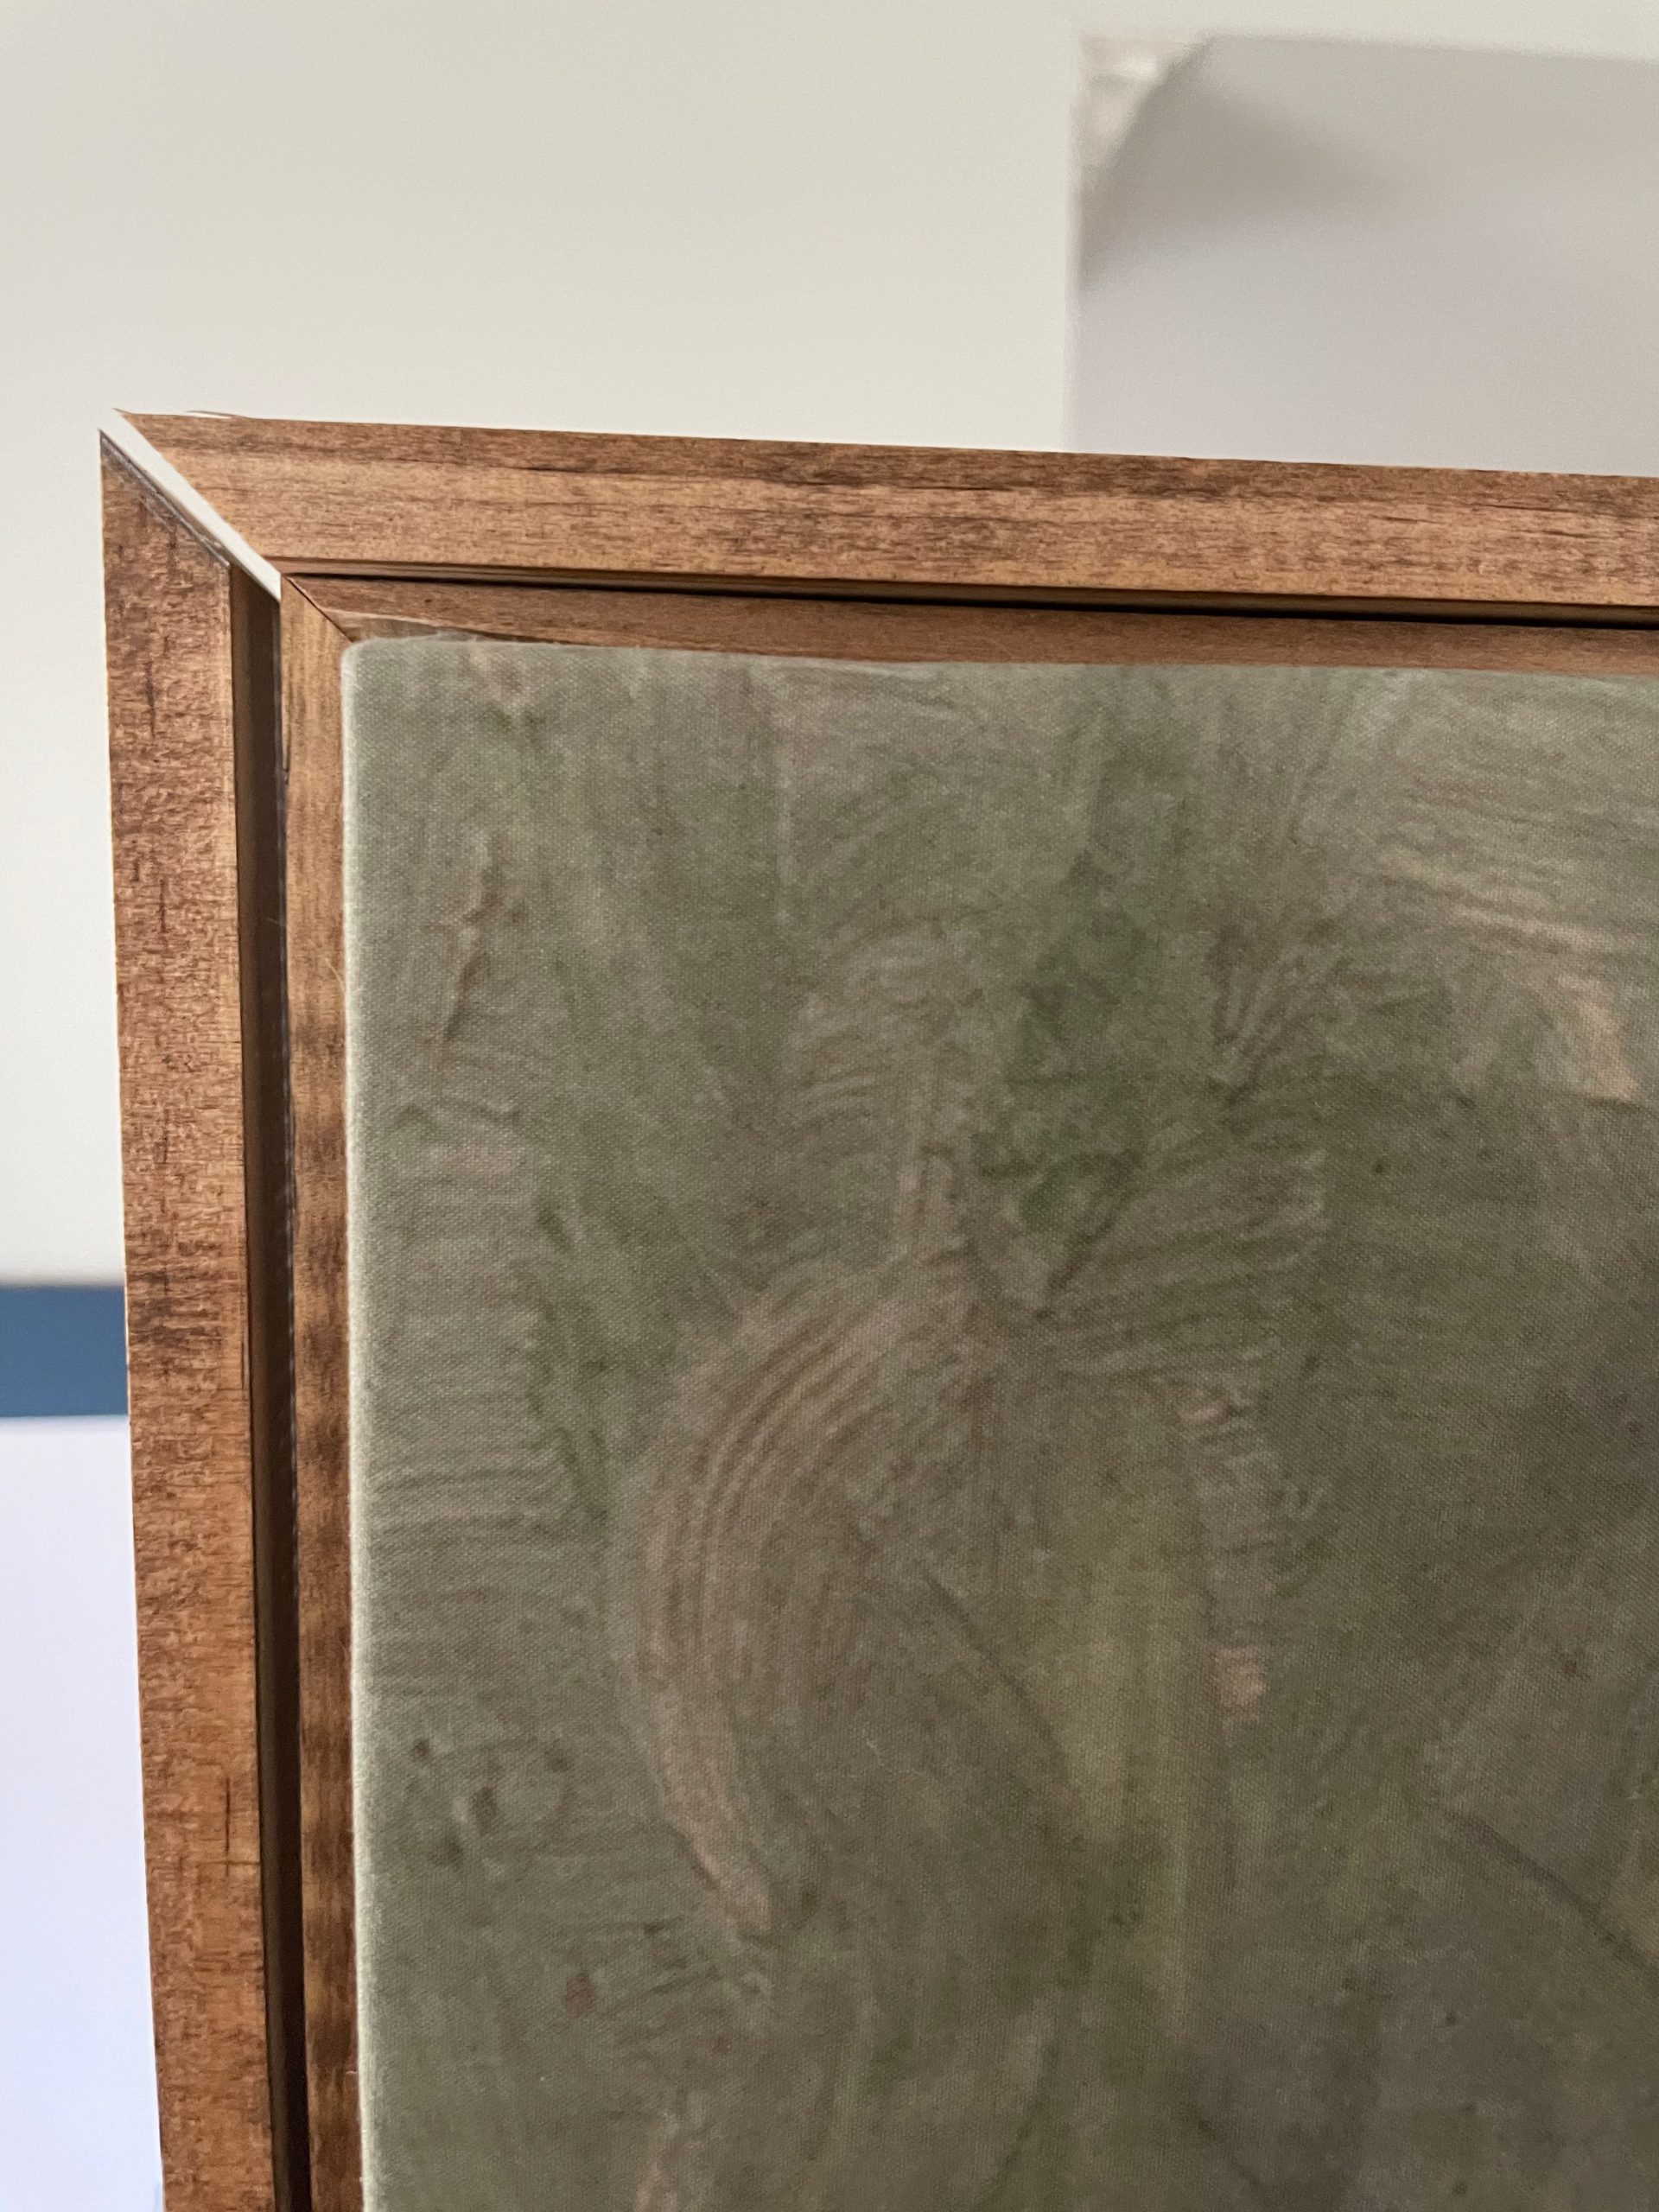
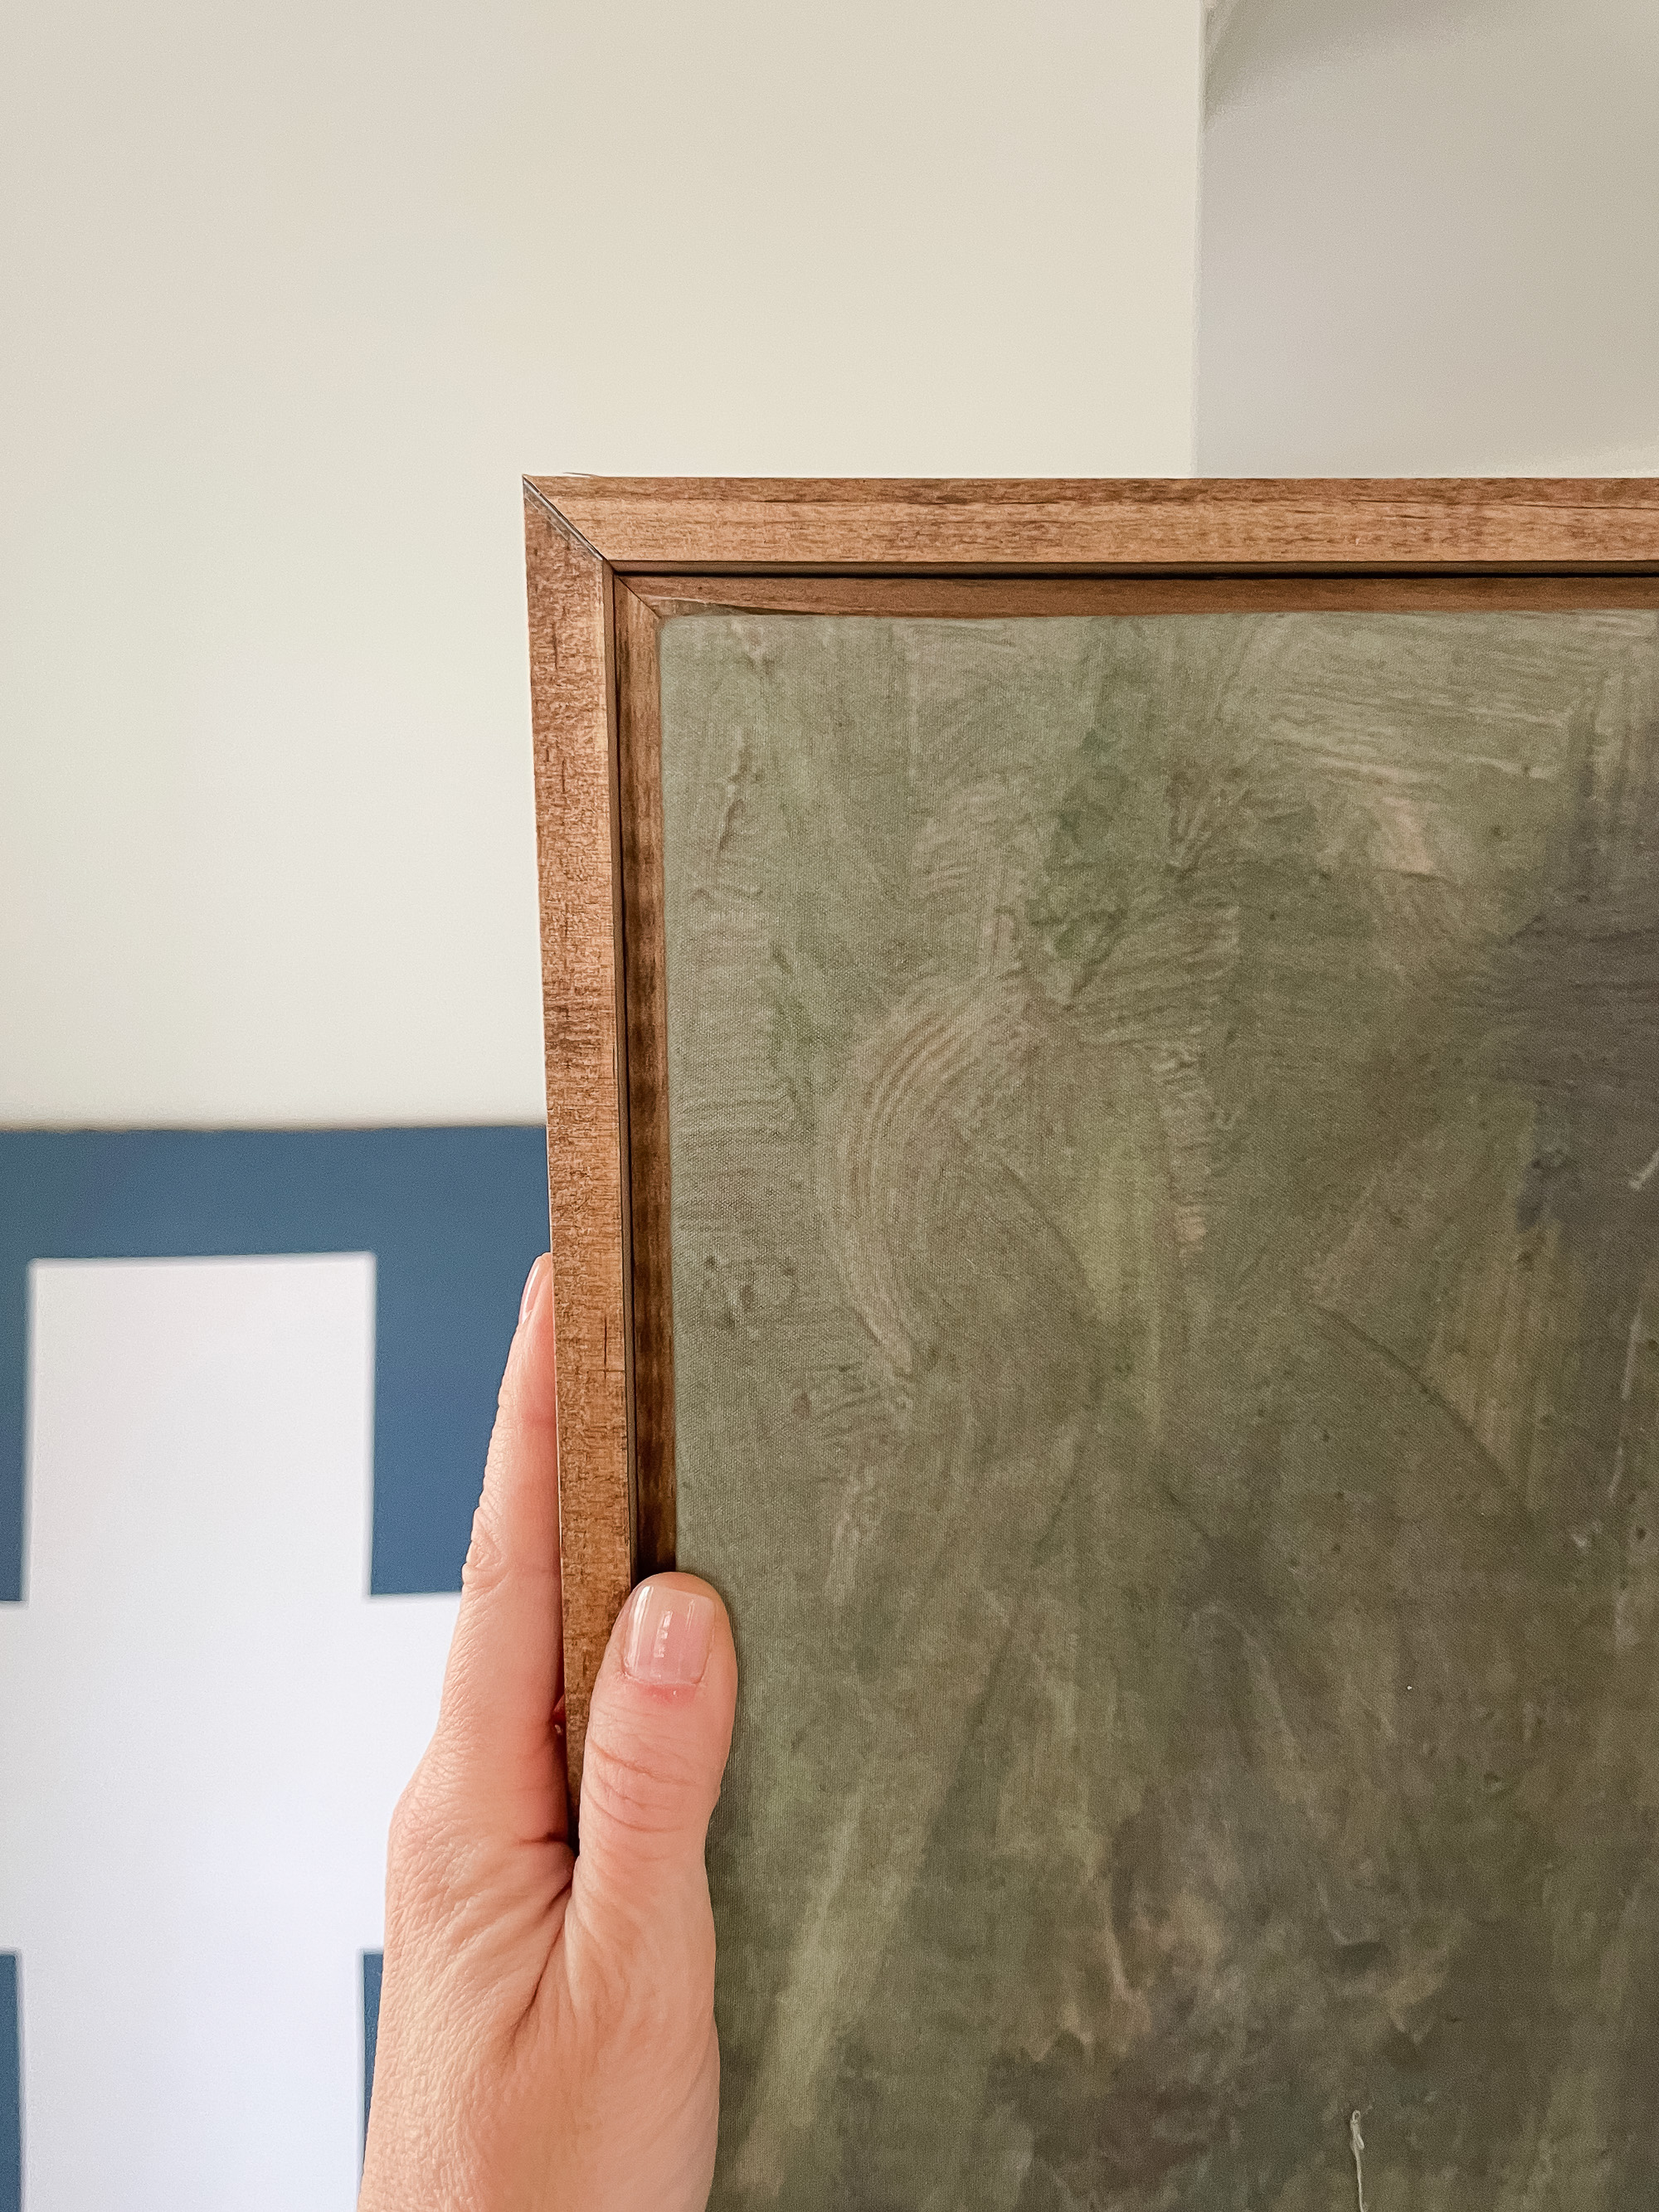
Step 6 – Staple on Drop Cloth and Tapestry
Since most shower curtains are thin polyester you will need some sort of under canvas or sheet so the frame doesn’t show through. We used a drop cloth because we were already at Home Depot and grabbed a cheap one, but a basic flat sheet would save you a few dollars I just didn’t have one handy.
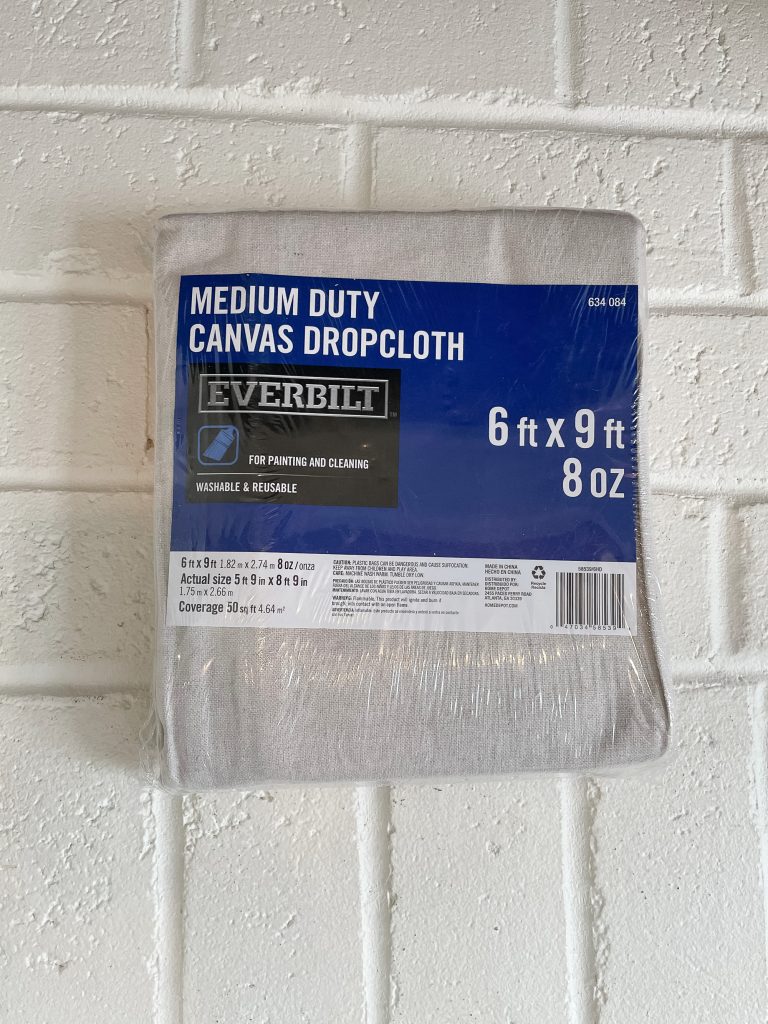
Use a drop cloth or sheet to the size closest to your frame so you don’t have to cut off a lot of excess. You will still have to cut off excess, but do so in a manner that is neat.
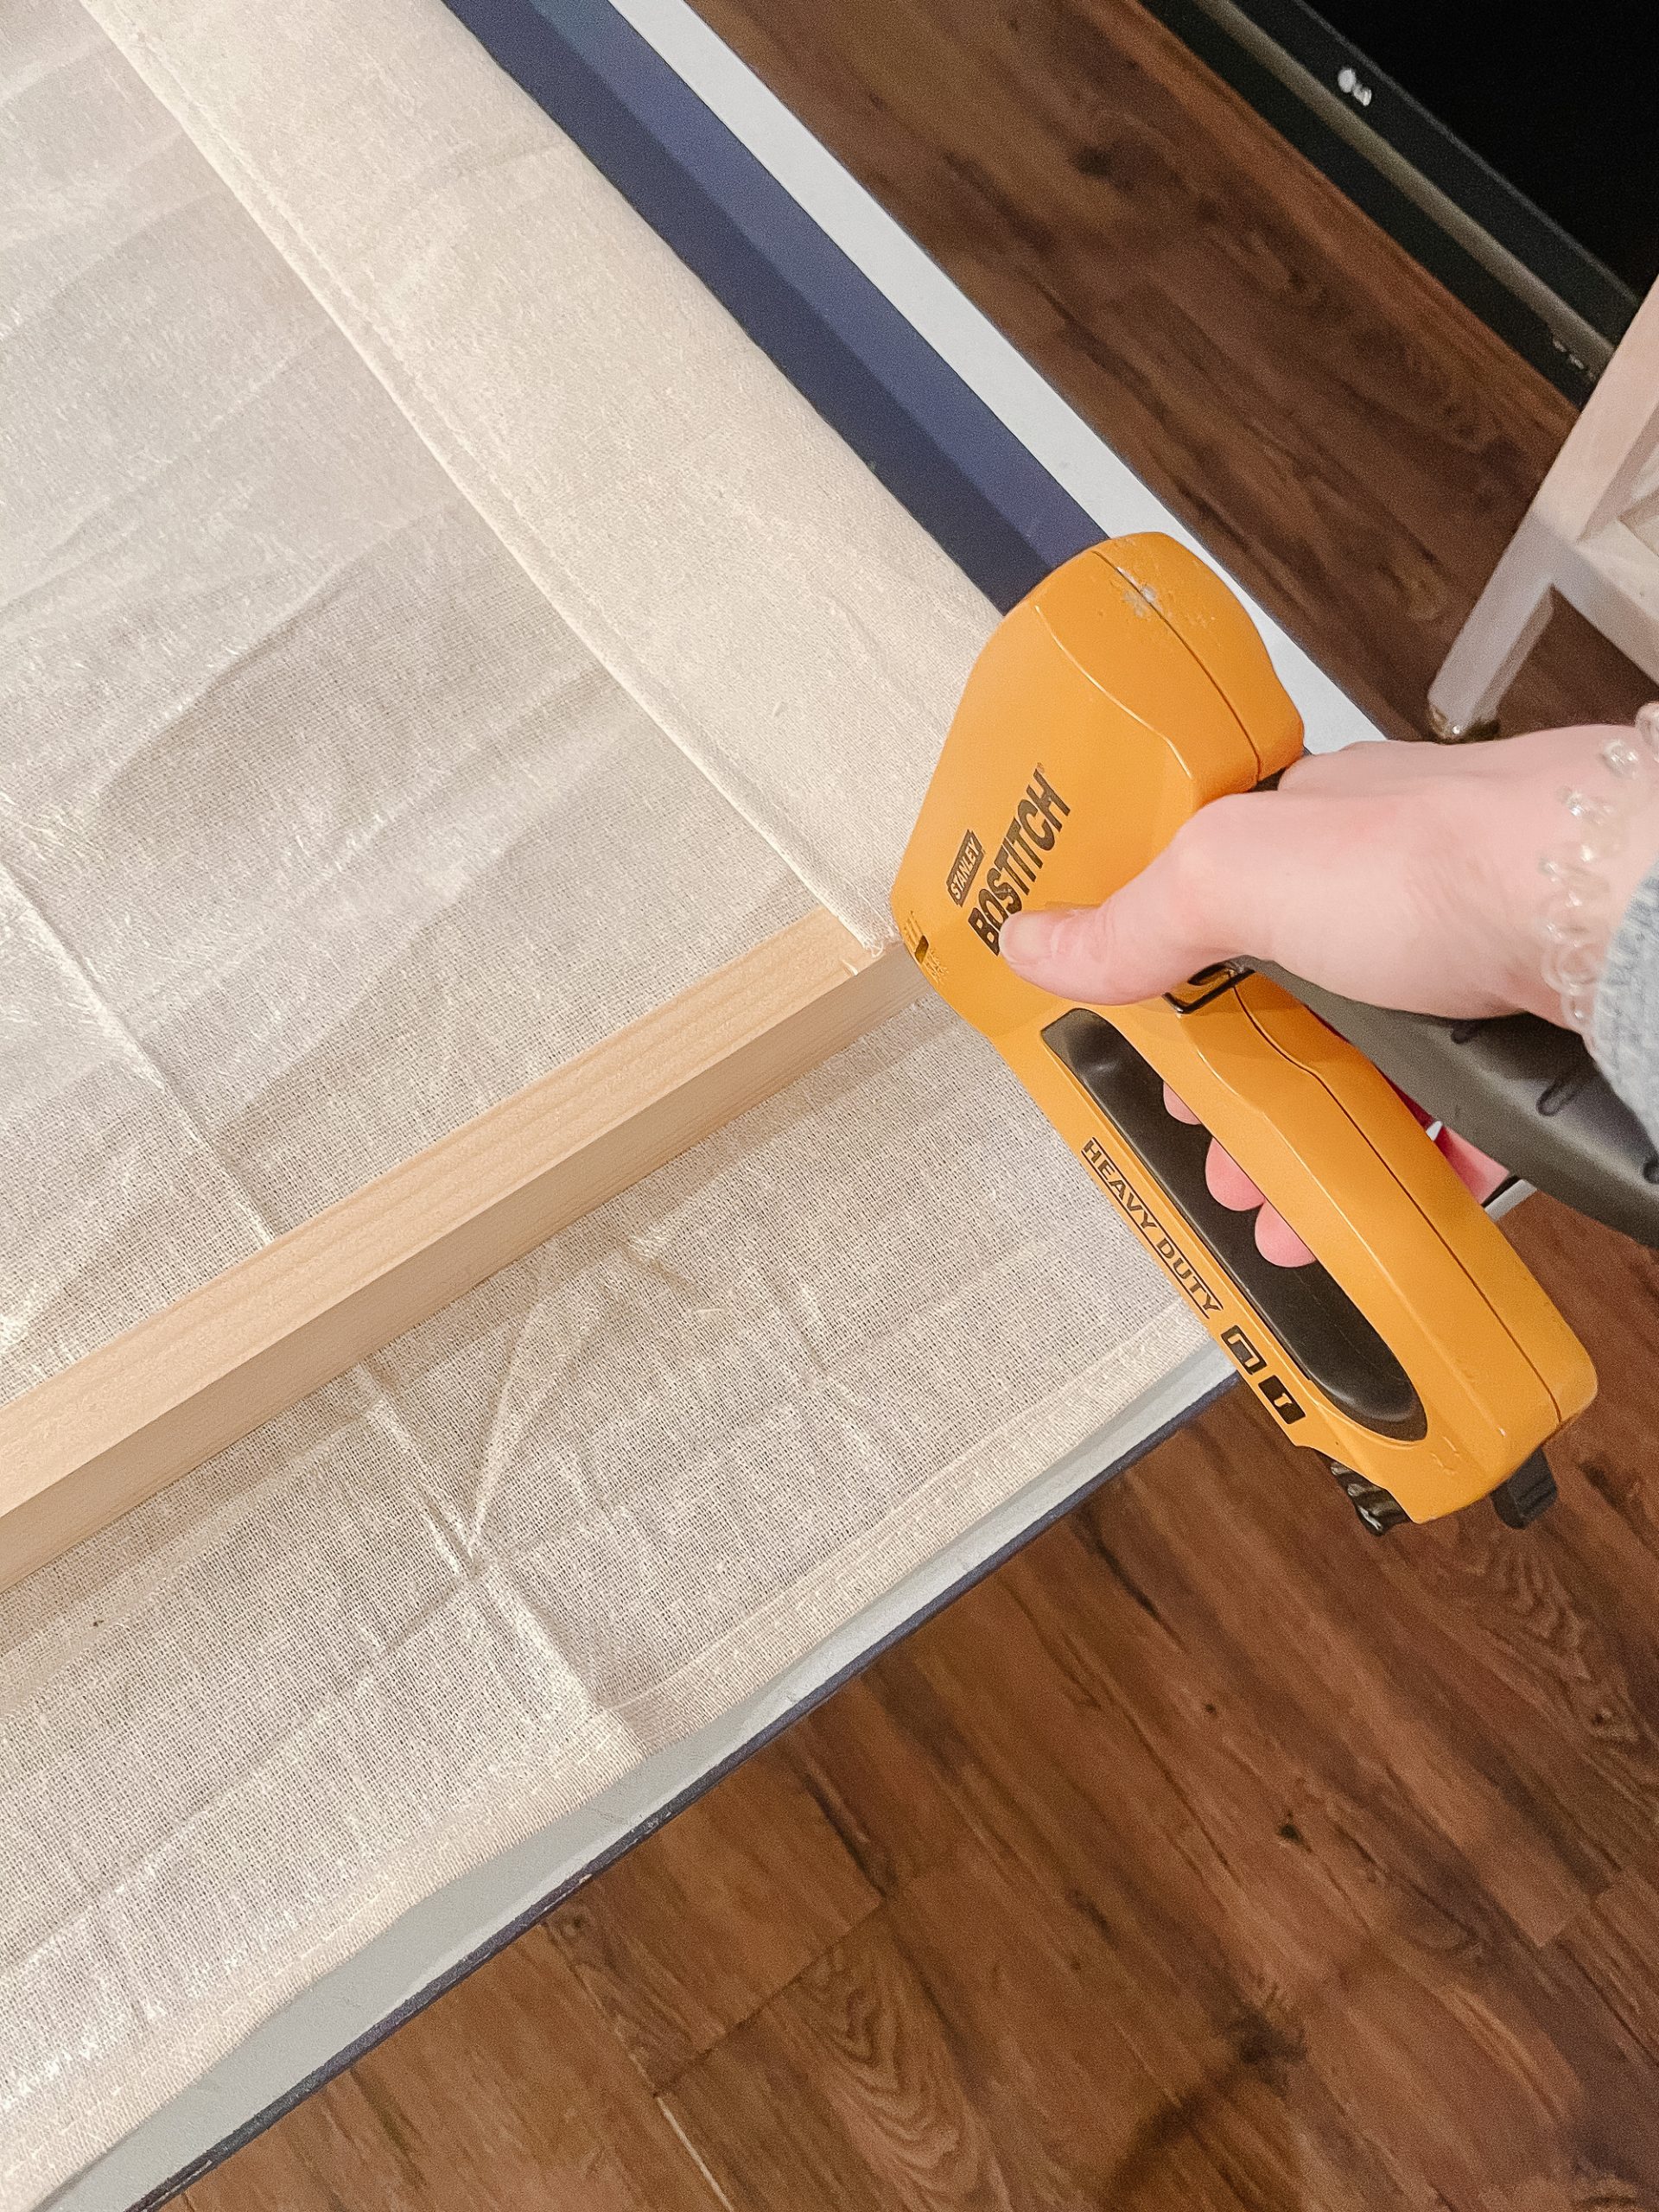
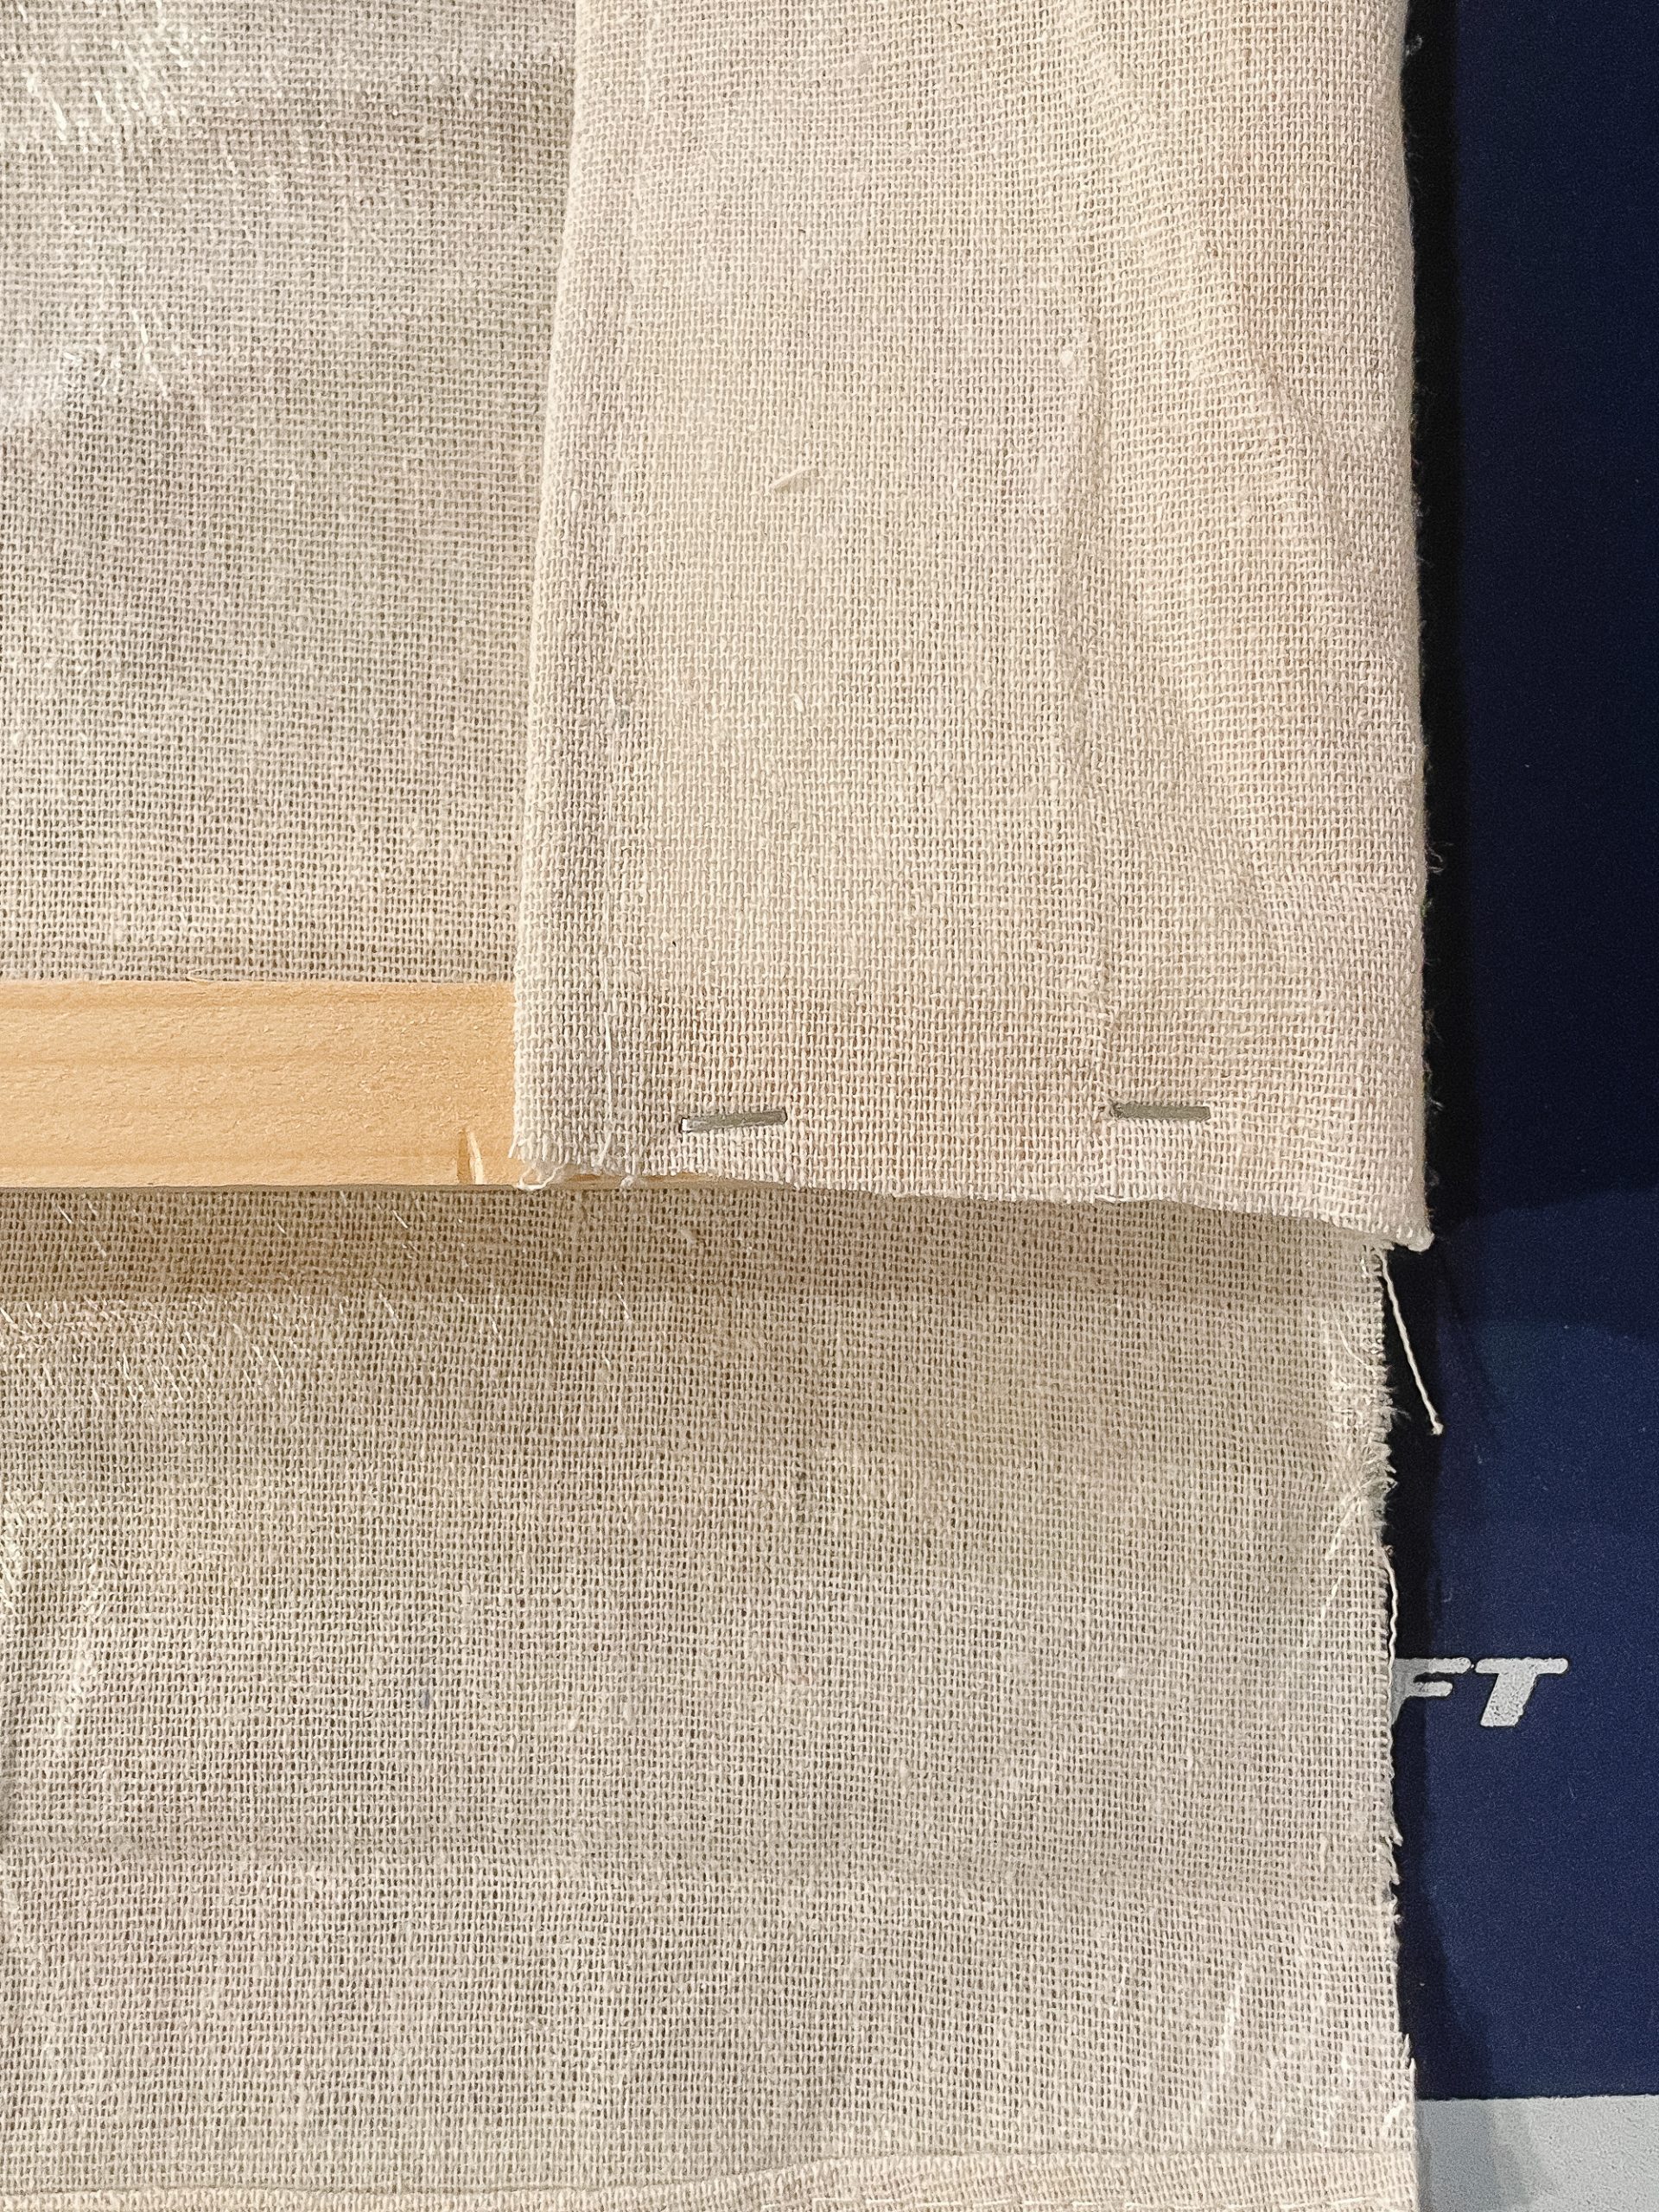
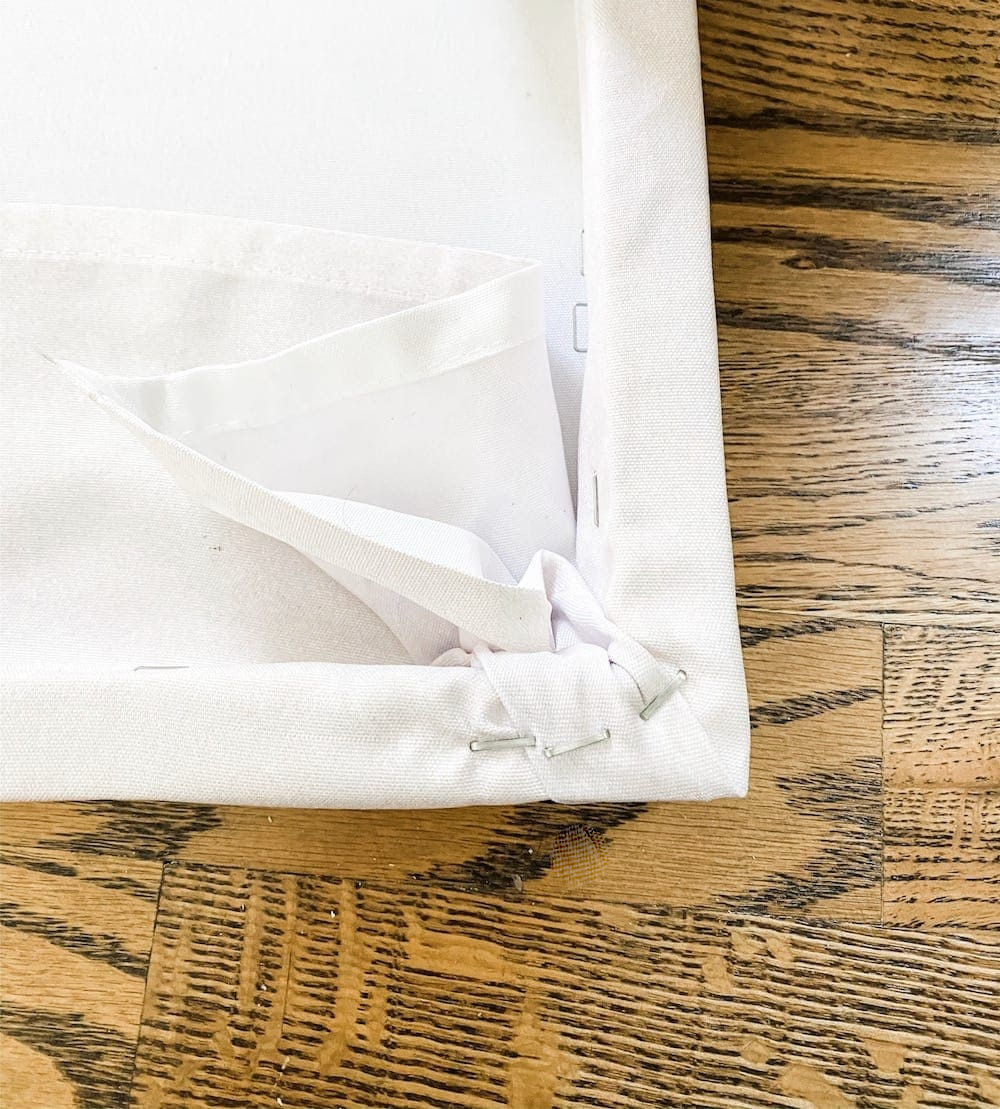
Staple the drop cloth or sheet onto the frame. The key is to keep it from being all bunched up. The flatter and neater the base is the better the overall art piece will look. You will want to ensure the cloth is stapled on tightly as sagging will make your art piece look droopy and unprofessional.
I find this is a two person job with something this large so one person can pull it taunt and another can staple.
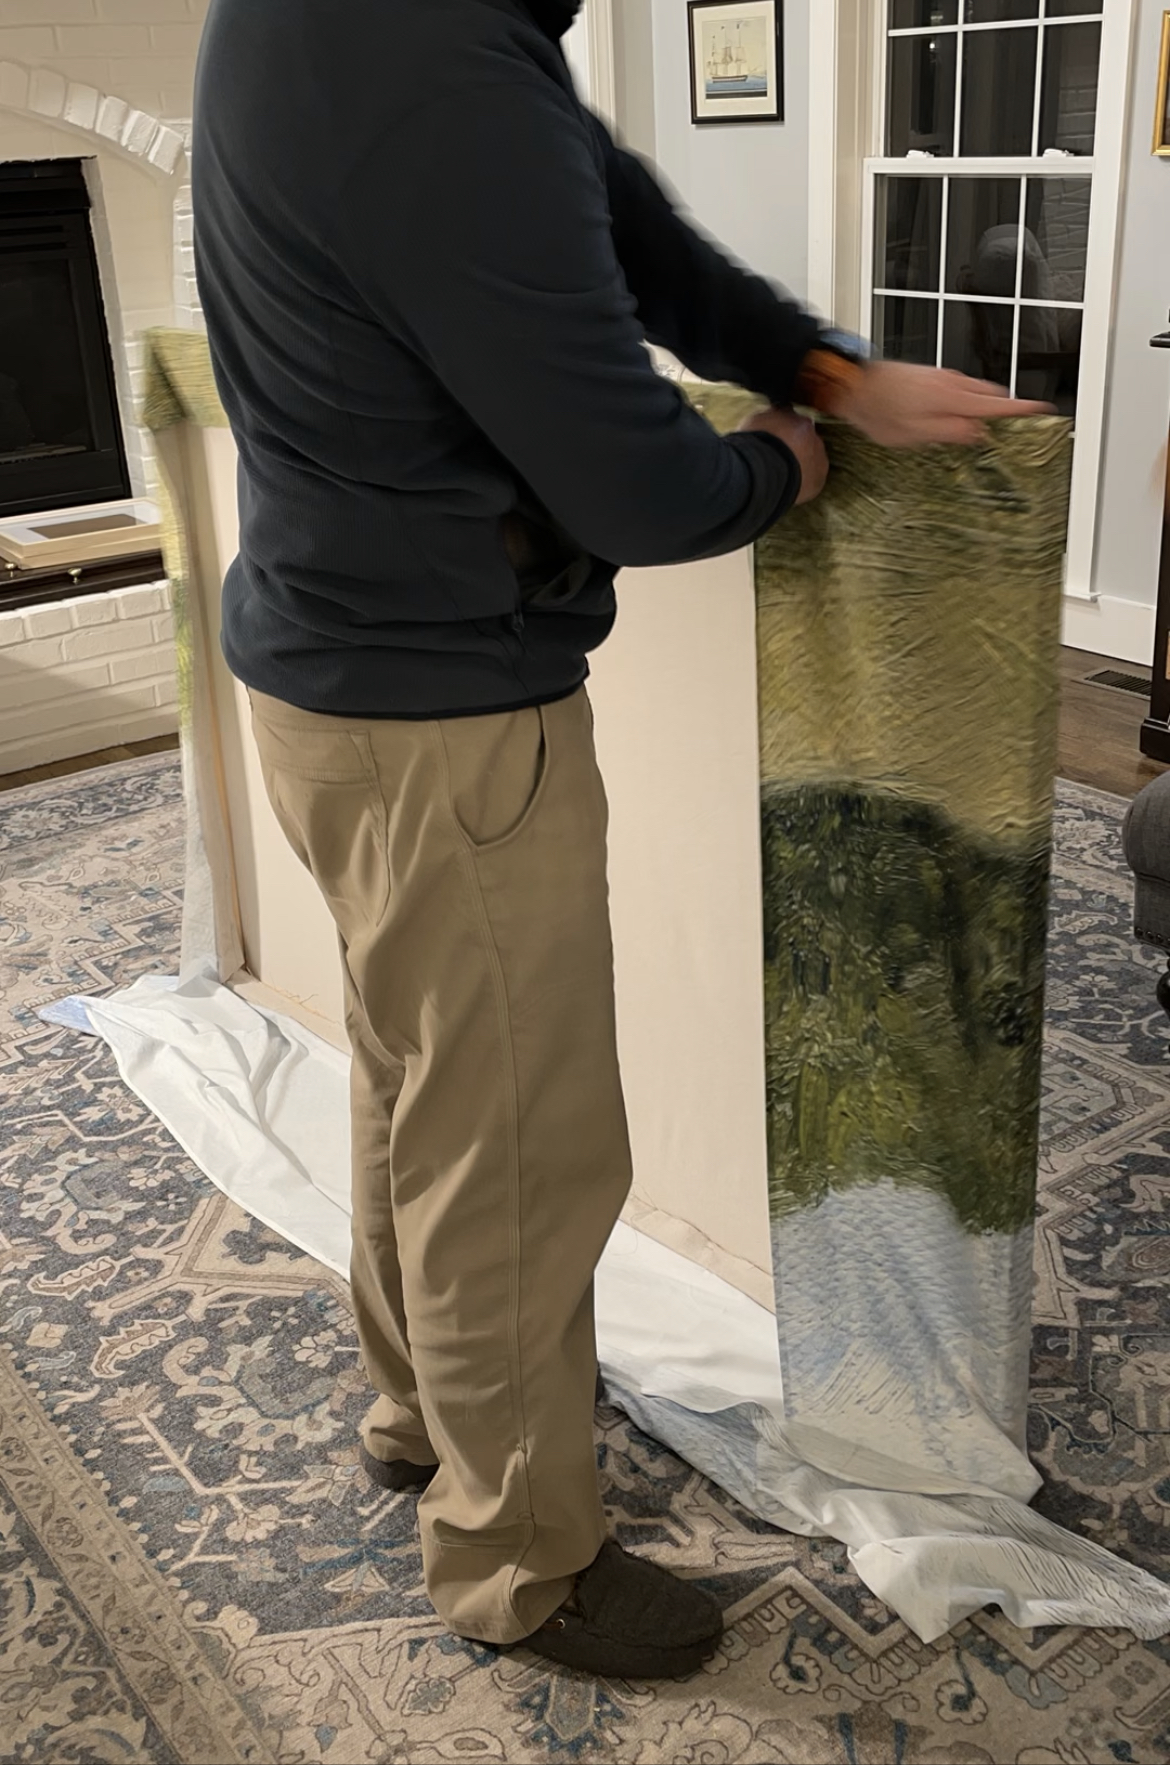
Now it’s time to add the shower curtain. You will follow the same principle as with the drop cloth.
- Cut your shower curtain so it’s closest to the size you need but leave excess so it can easily be stapled to the frame and you have enough to work with. Don’t cut it too short.
- Begin wrapping the top edge of the shower curtain, smoothing the fabric along the board, and staple it along the entire edge.
- Repeat on the bottom edge of the shower curtain while stretching the fabric to eliminate any wrinkles.
- Stretch and staple the fabric at both side edges.
- Fold and staple each of the four corners.
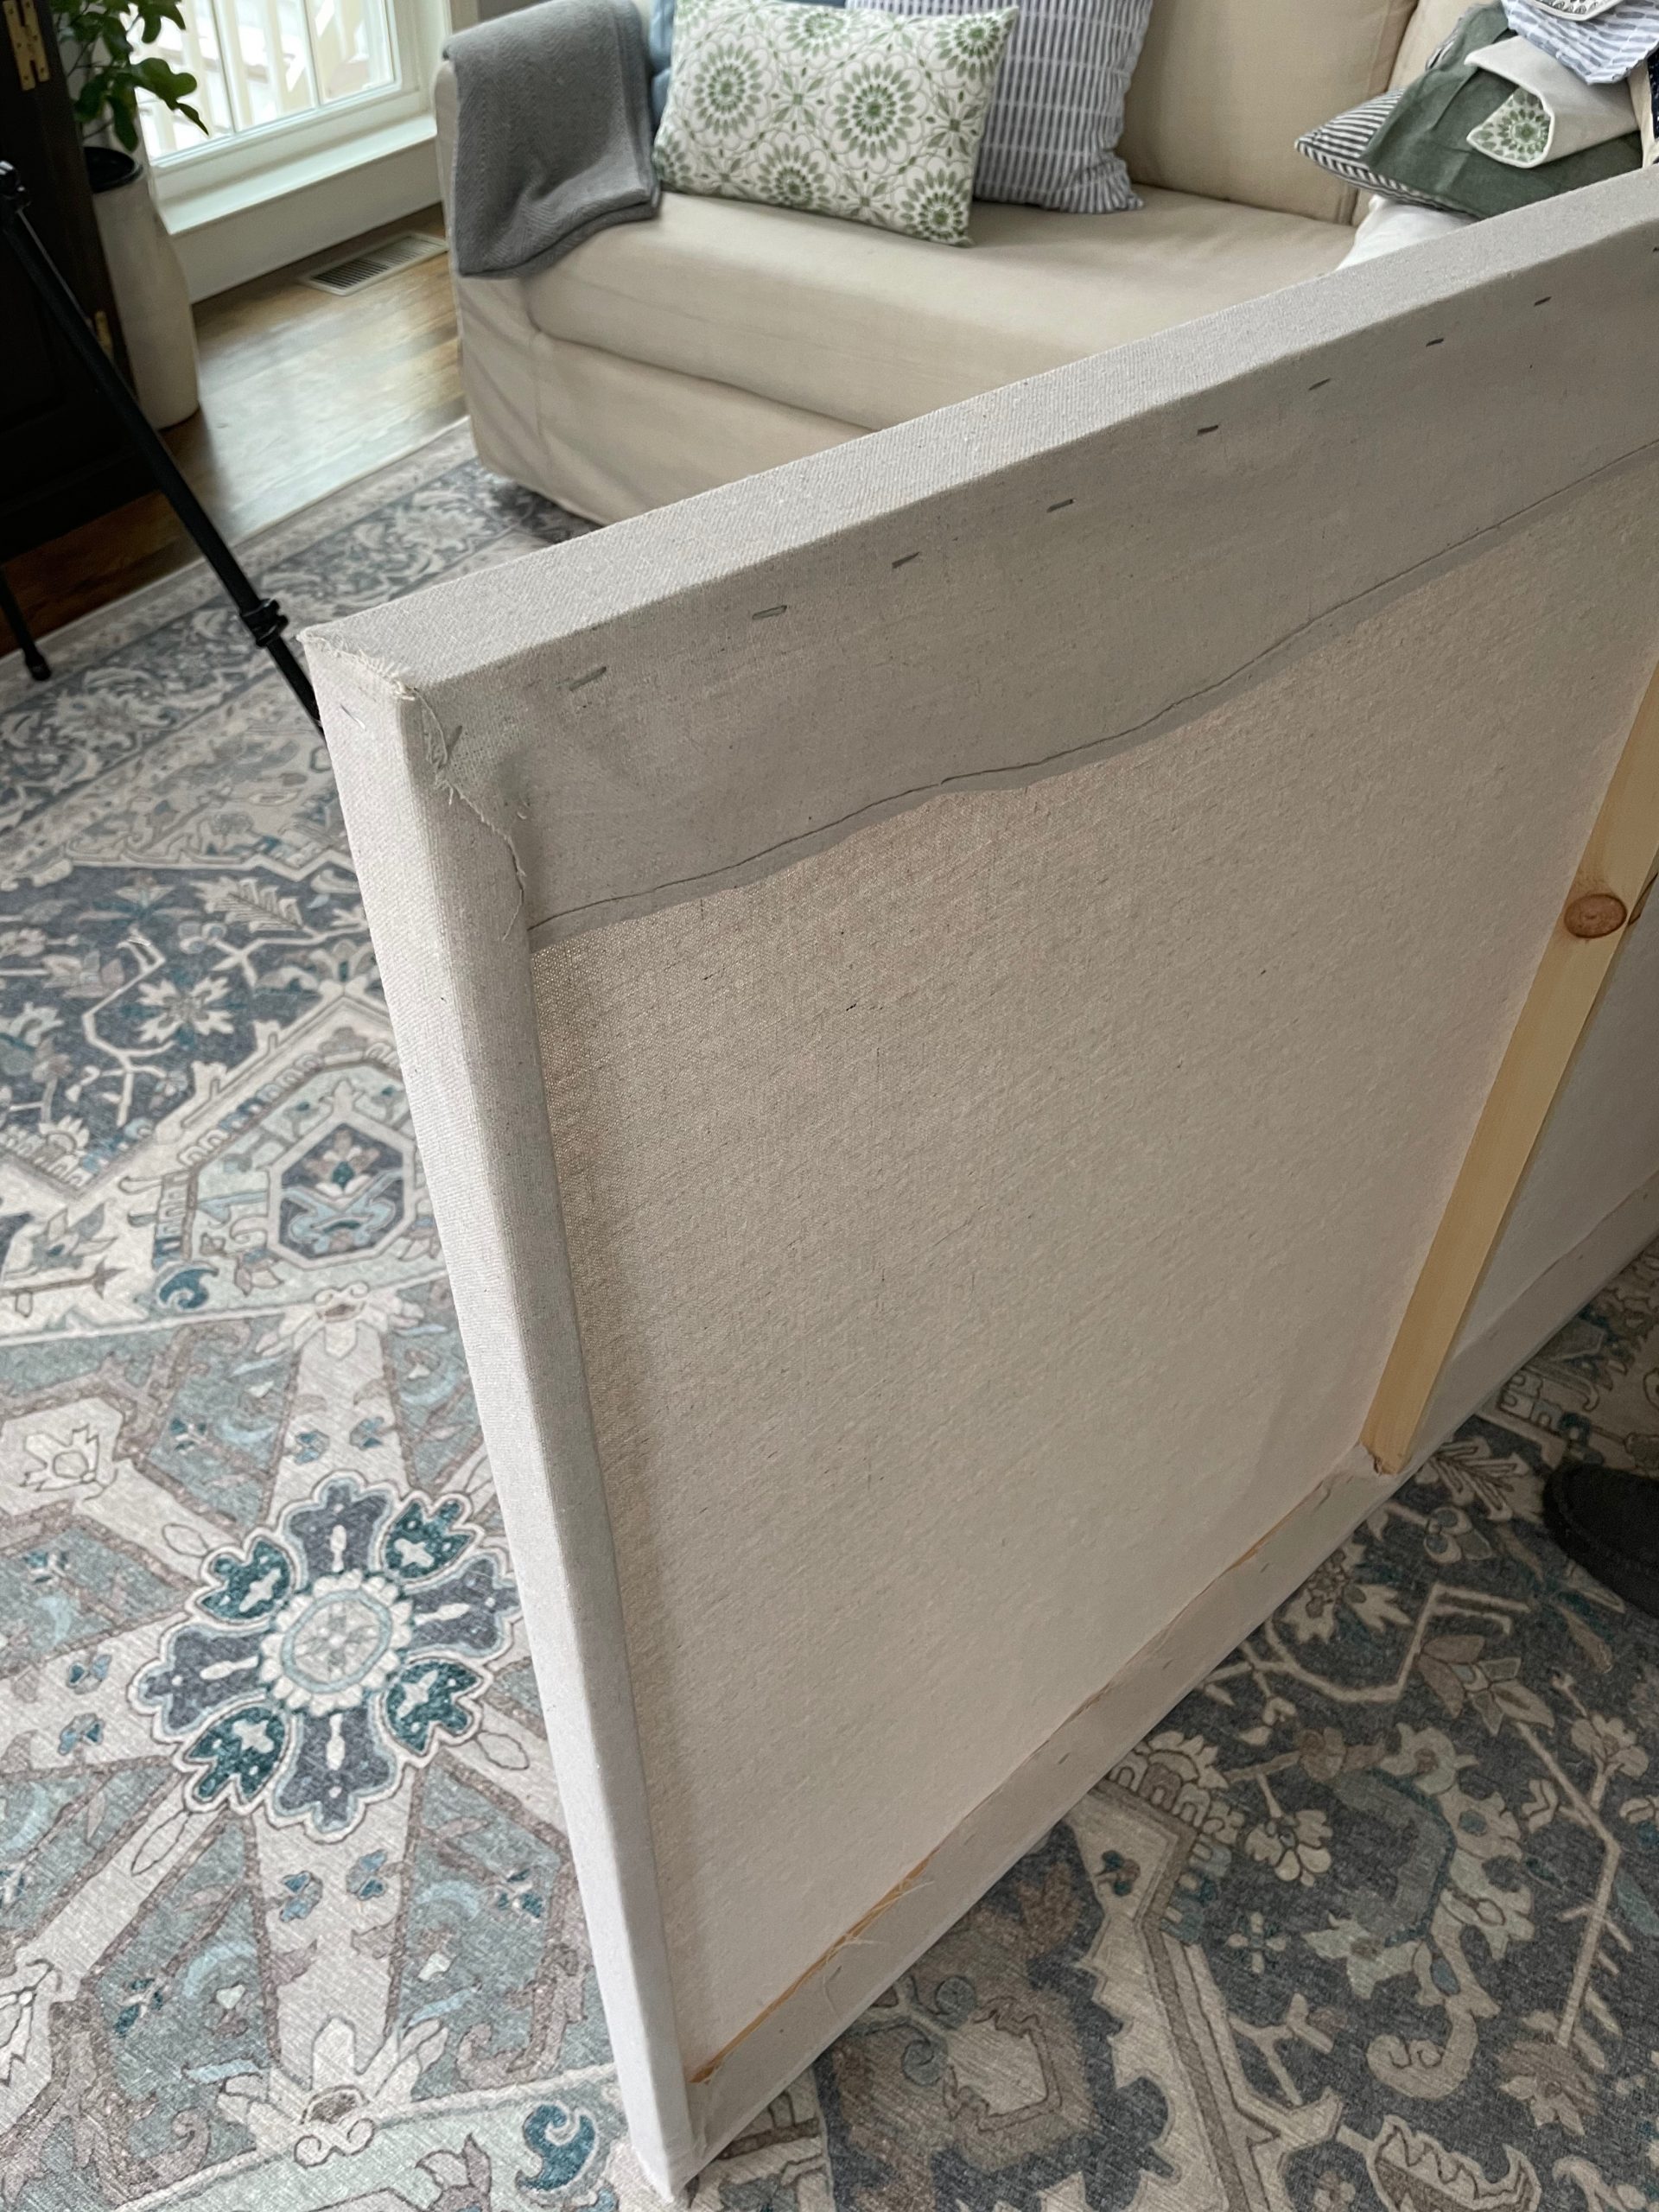
Step 7 – Finish Your Large-Scale Art with a Frame
Adding a frame to the wrapped frame gives this art a finished and store-bought look. I will share two options for framing your piece and you can decide what you prefer.
- Single frame – Using your stained lattice you could just put this around as your frame with the nail gun and finishing nails and it’s done. All framed and ready to hang.
- Floating Frame – Make a look-a-like floating frame. This is an extra step and requires more time and more wood but this is what we did and the steps are below.
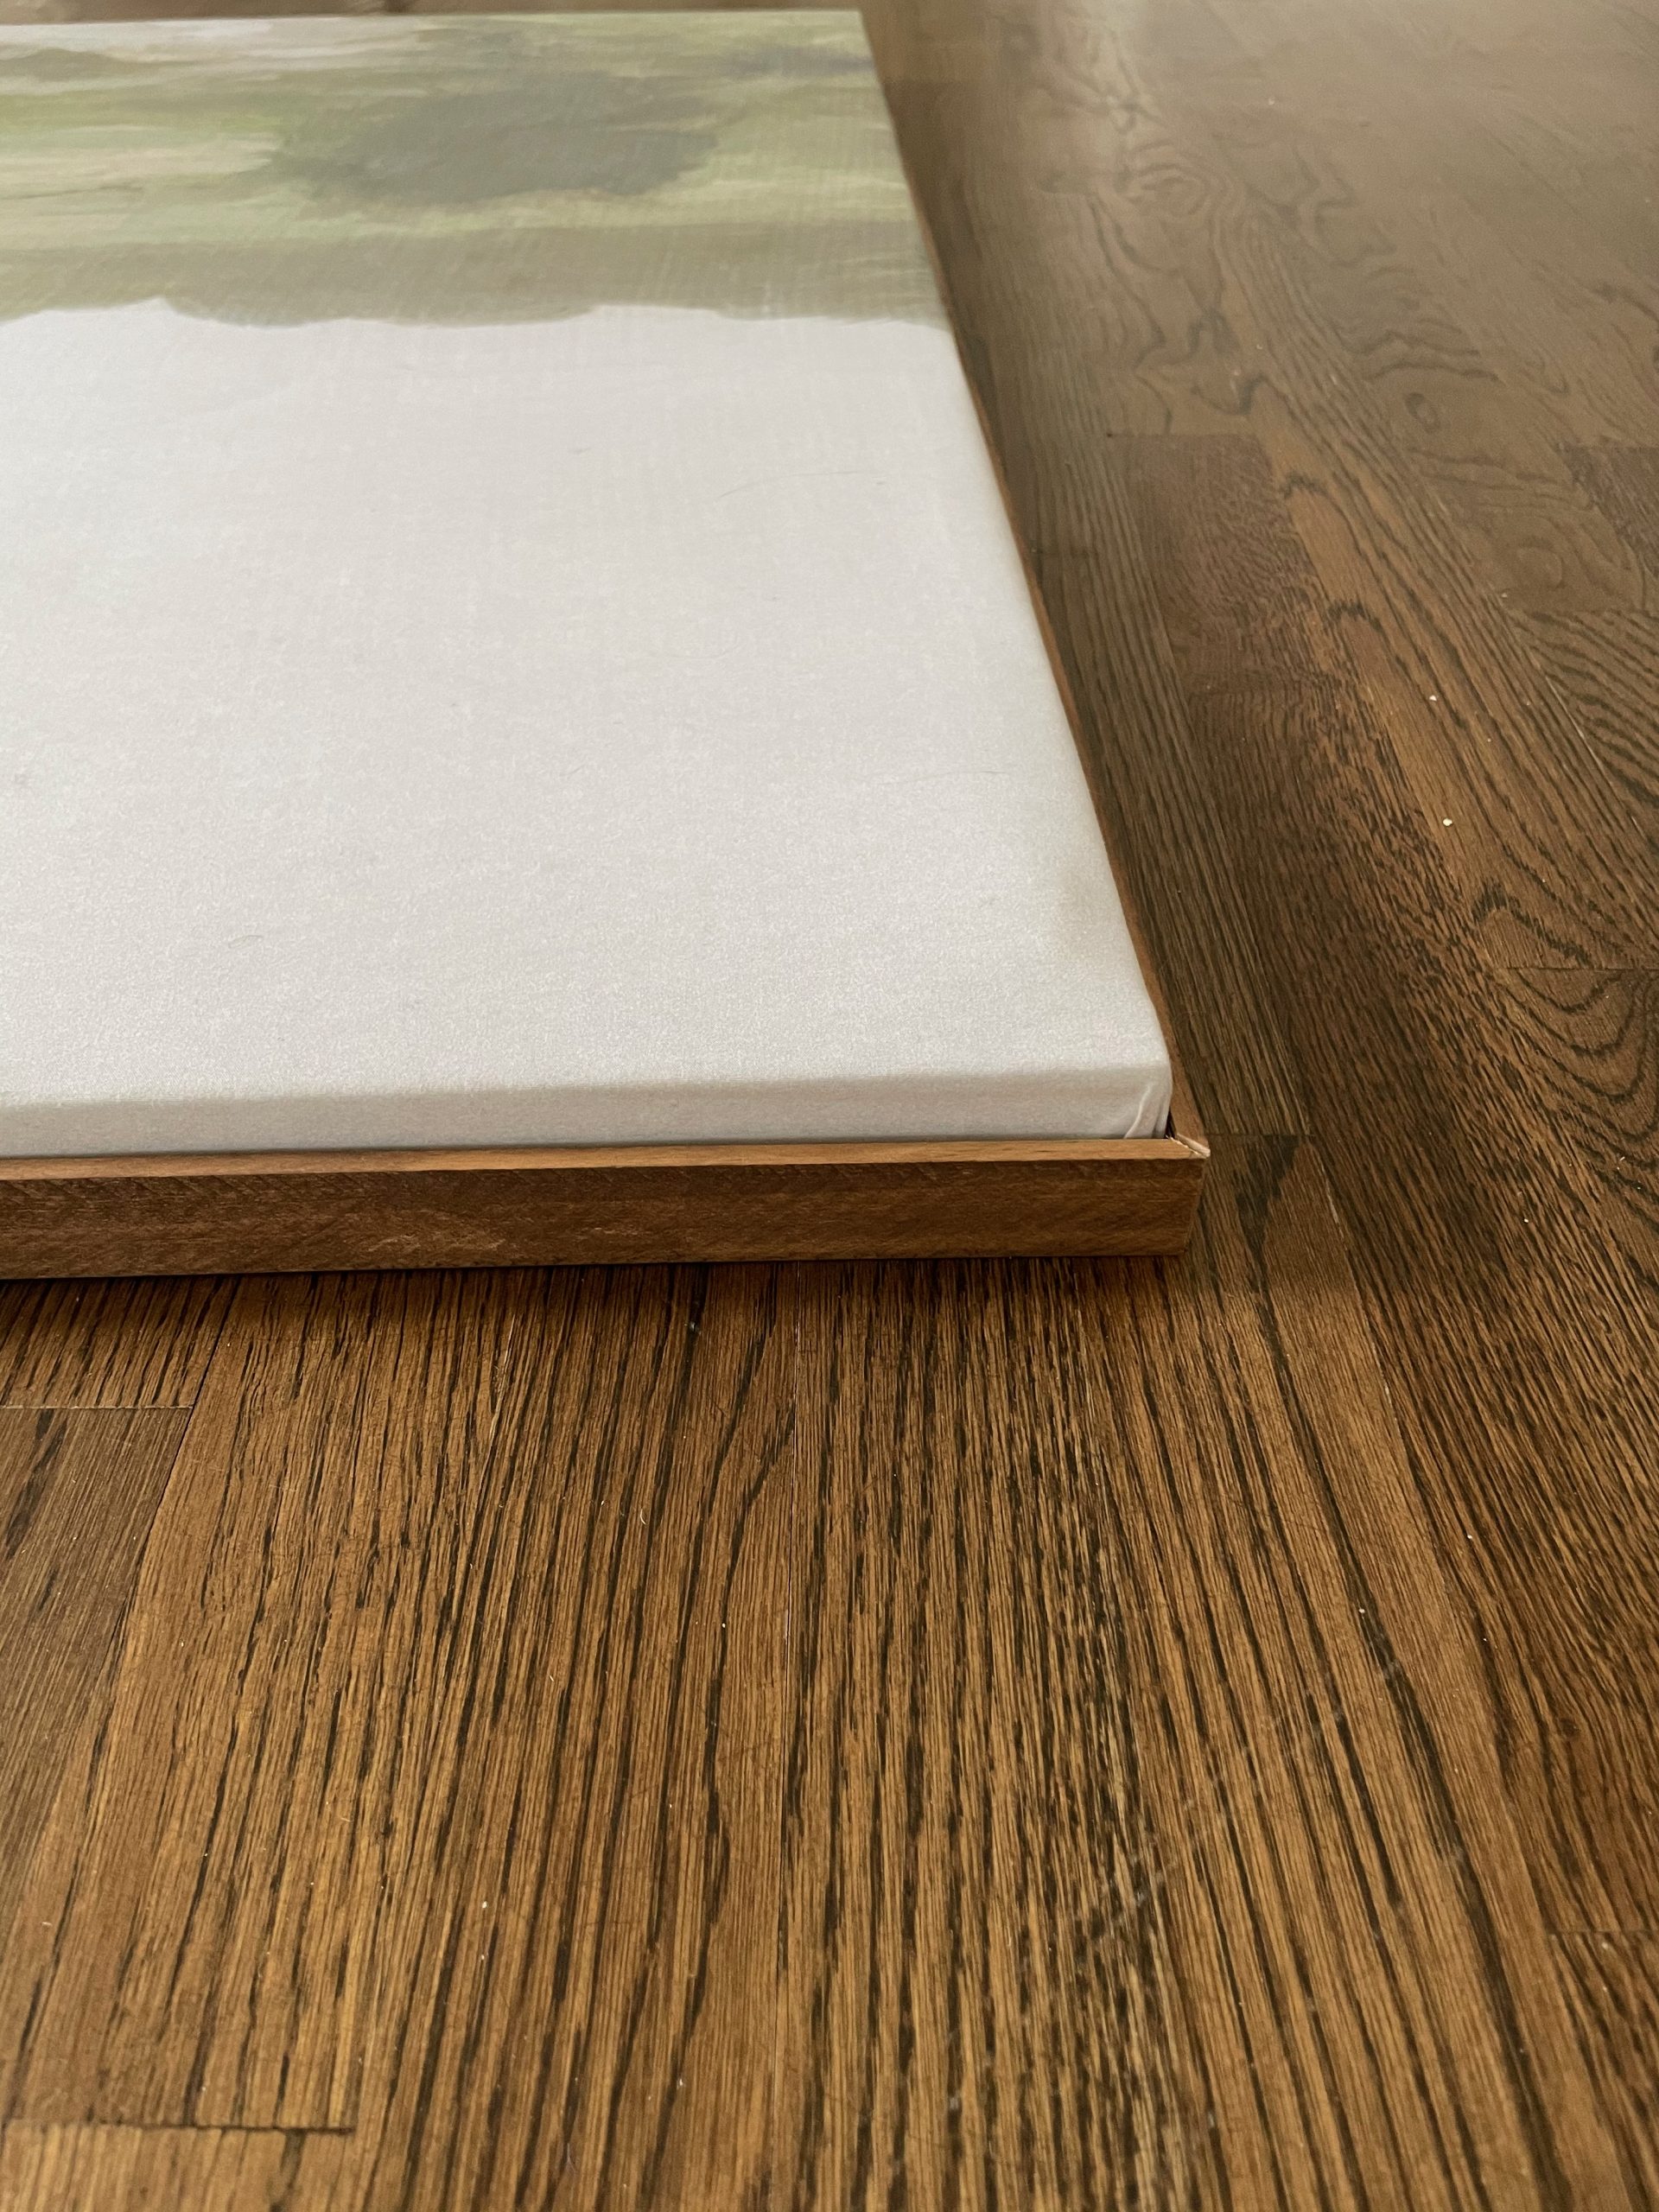
Once again, you will need to cut your lattice and other stained 1×2’s to the correct length for your frame.
Using a nail gun and finishing nails, nail the stained lattice on first.
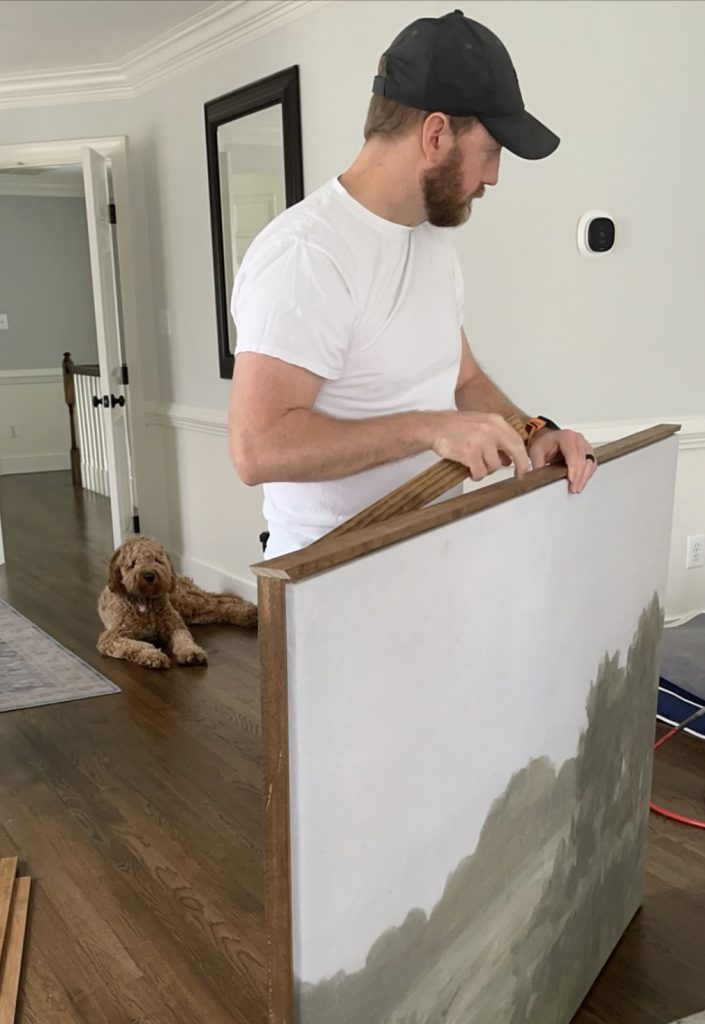
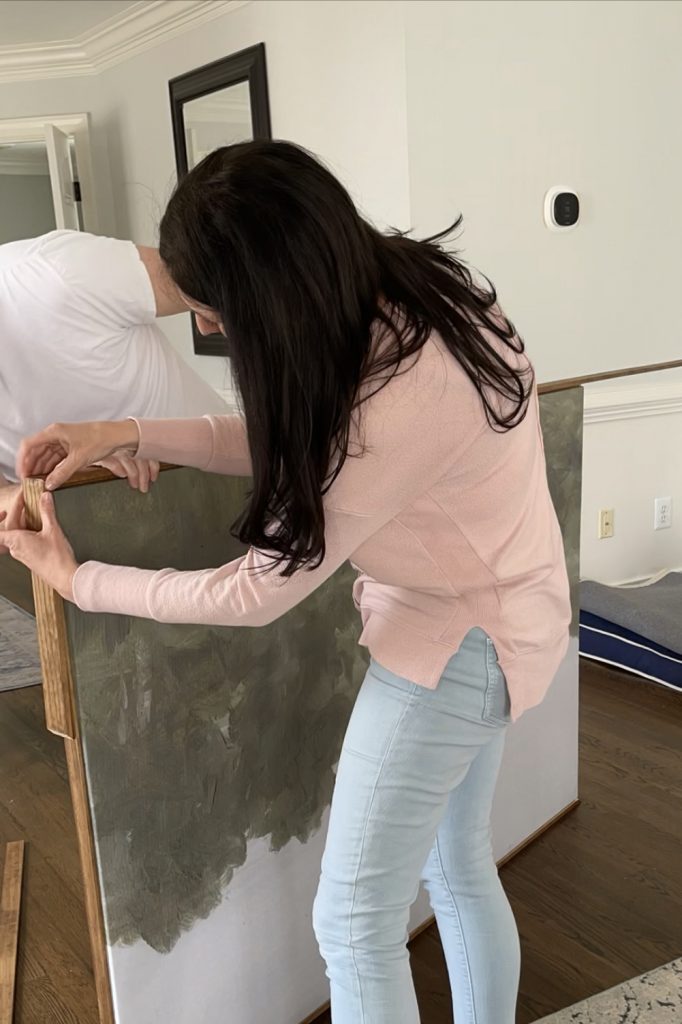
Once the lattice is on then you will nail the stained 1×2’s over the lattice. This creates the look of the floating frame.
This gives a nice finishing touch to your art and doesn’t take a lot longer to accomplish.
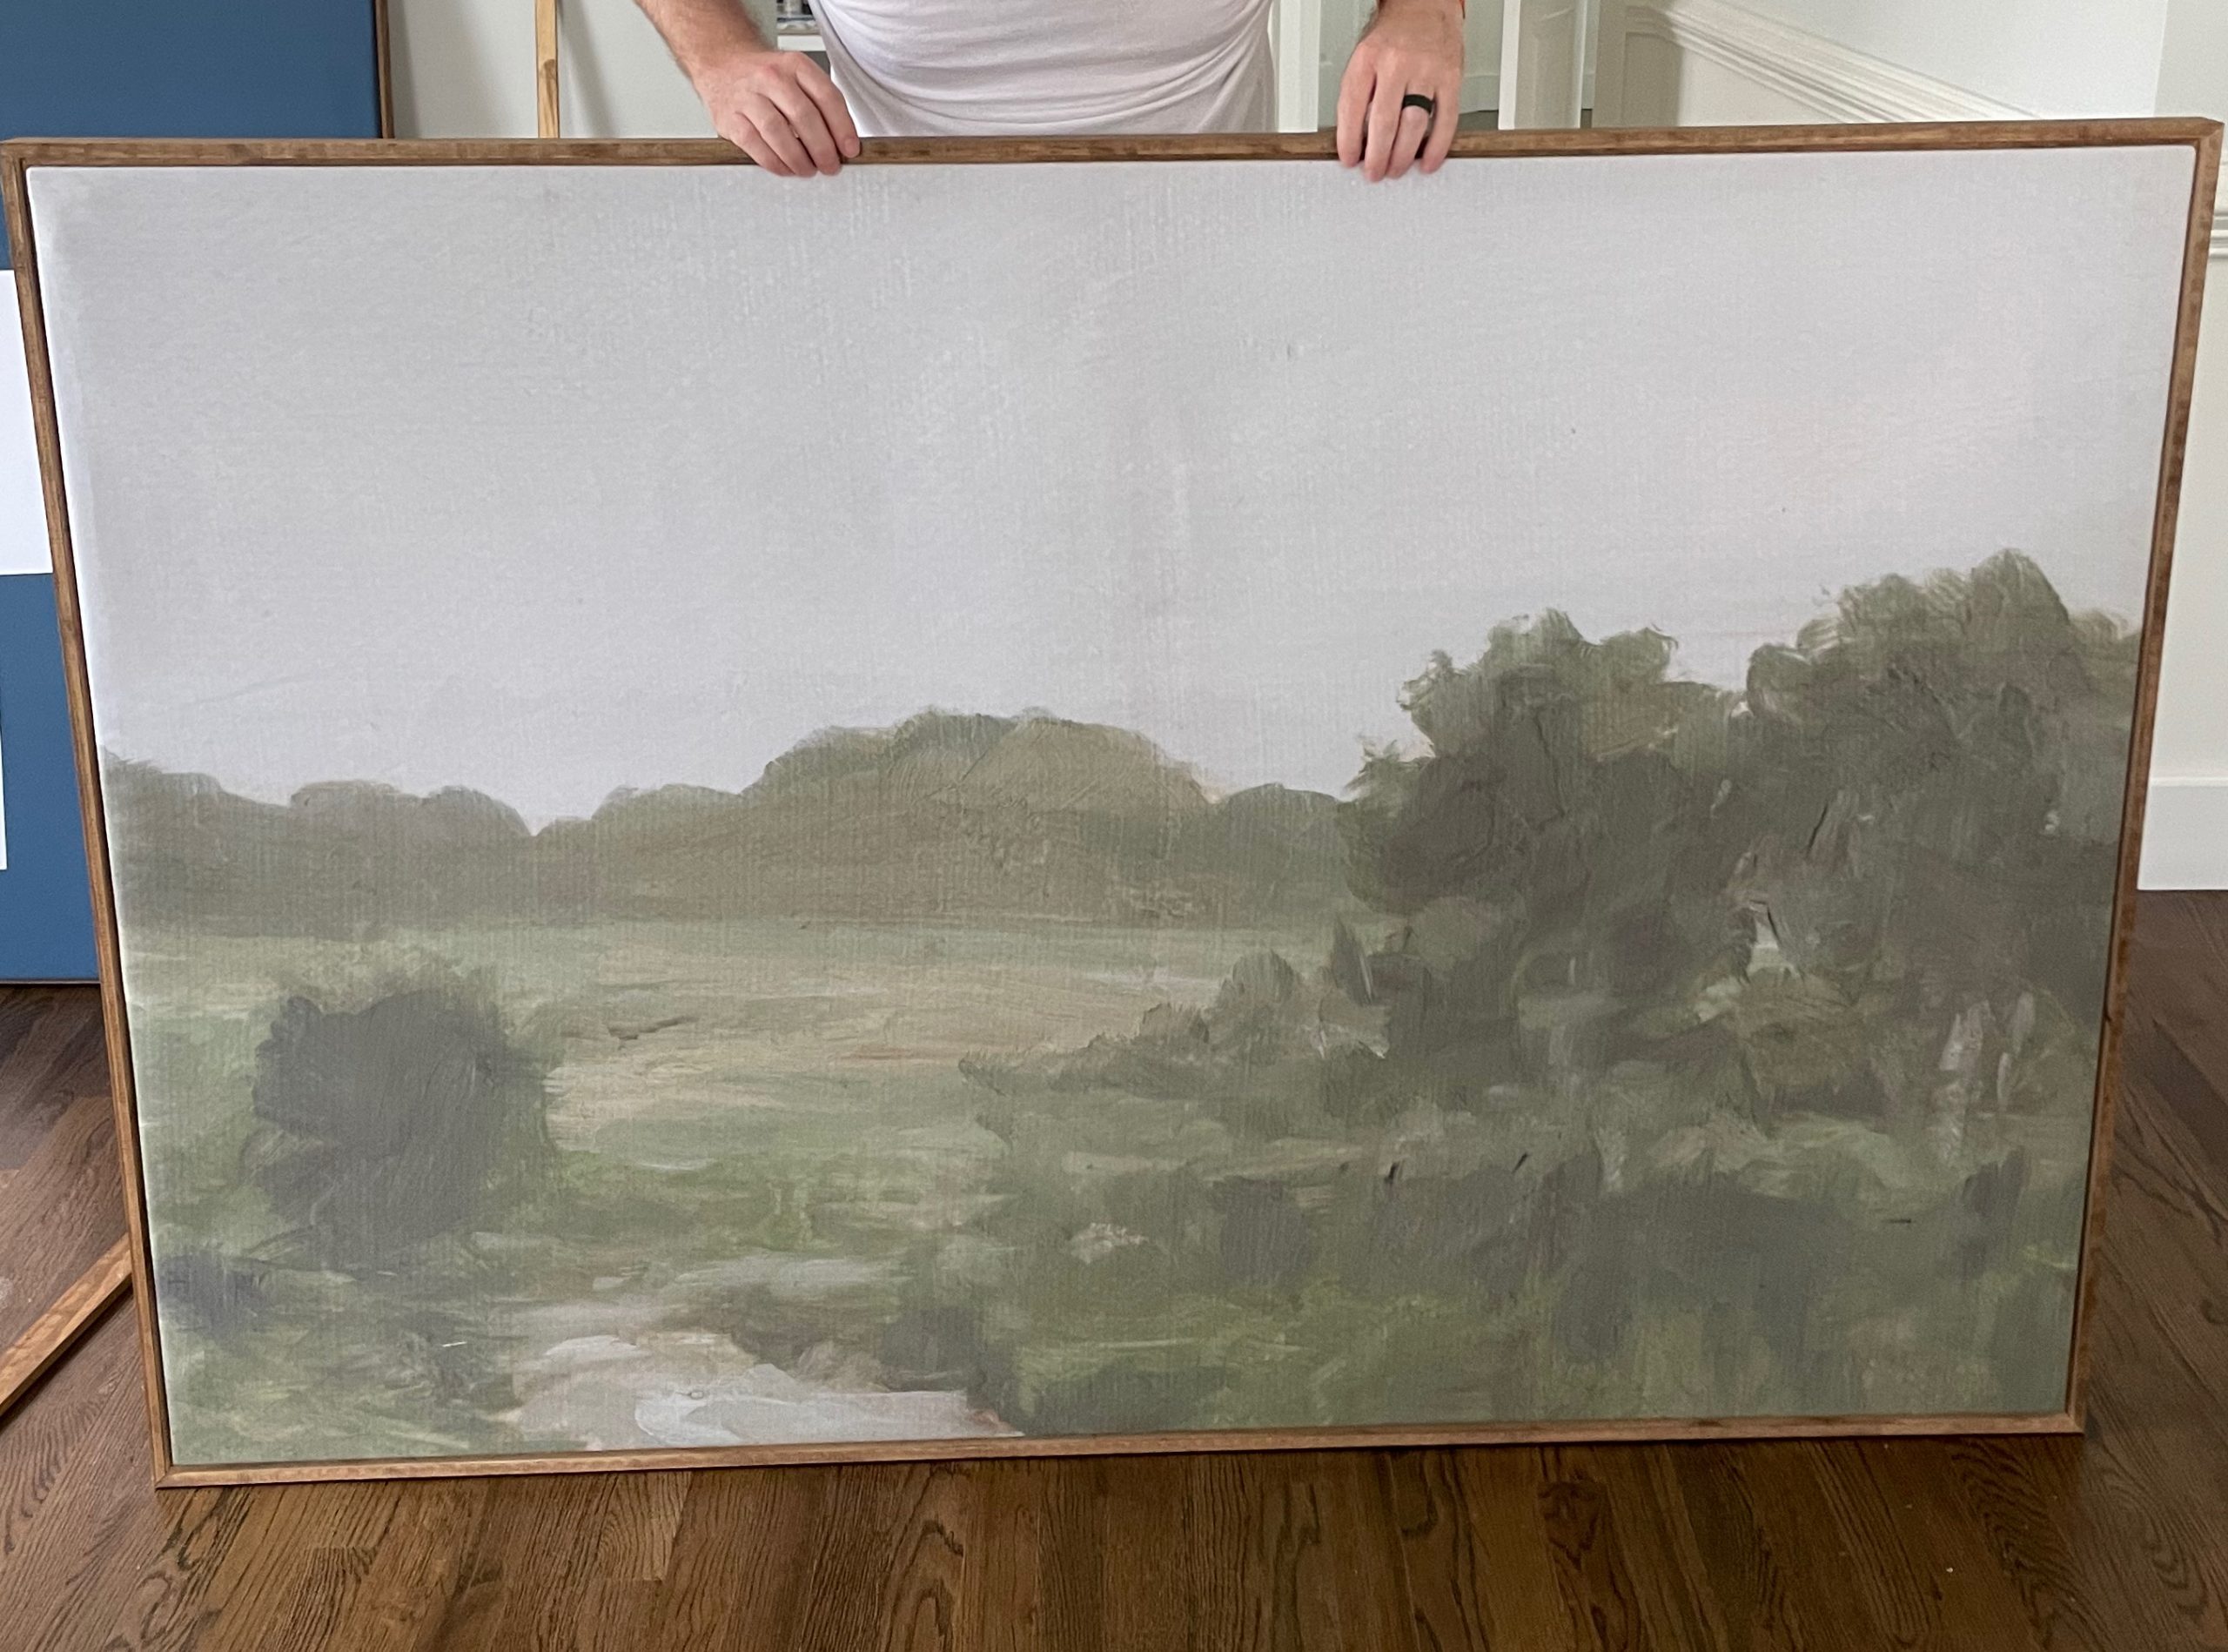
The finished product and it looks so nice. It looks perfect on our family room wall and covers the space without being too busy.
RELATED DIY DECOR POSTS:
DIY Large-Scale Art under $100
Follow for home decor, DIY and to shop: Instagram | Pinterest | LiketoKnowit


Thanks. I have been dreaming of doing this for some time. I may paint onto the dropcloth. Thanks for the pics too.
Painting on the dropcloth souns like a great idea. I have no talent to paint, but I love to see what others can do!
Wow this is so beautiful! I came across a fabric panel I love so now I just needed this info to finish it. Thanks!!
Hi Amy!
I’m so happy to have found your post! Working on a piece right now ????
I do have a question though. The lattice listed is measured as the same dimensions as the outer frame wood. I bought some and I’m at that step now. I’m not sure how your lattice is back further than the outer frame. Did you have to cut it to a shorter width, or was it actually the lattice that measures at 1 5/16th instead of 1 1/2?
Love this idea! I also have to know where your ottoman is from, I’m looking for something similar.