All About Butcher Block Countertop
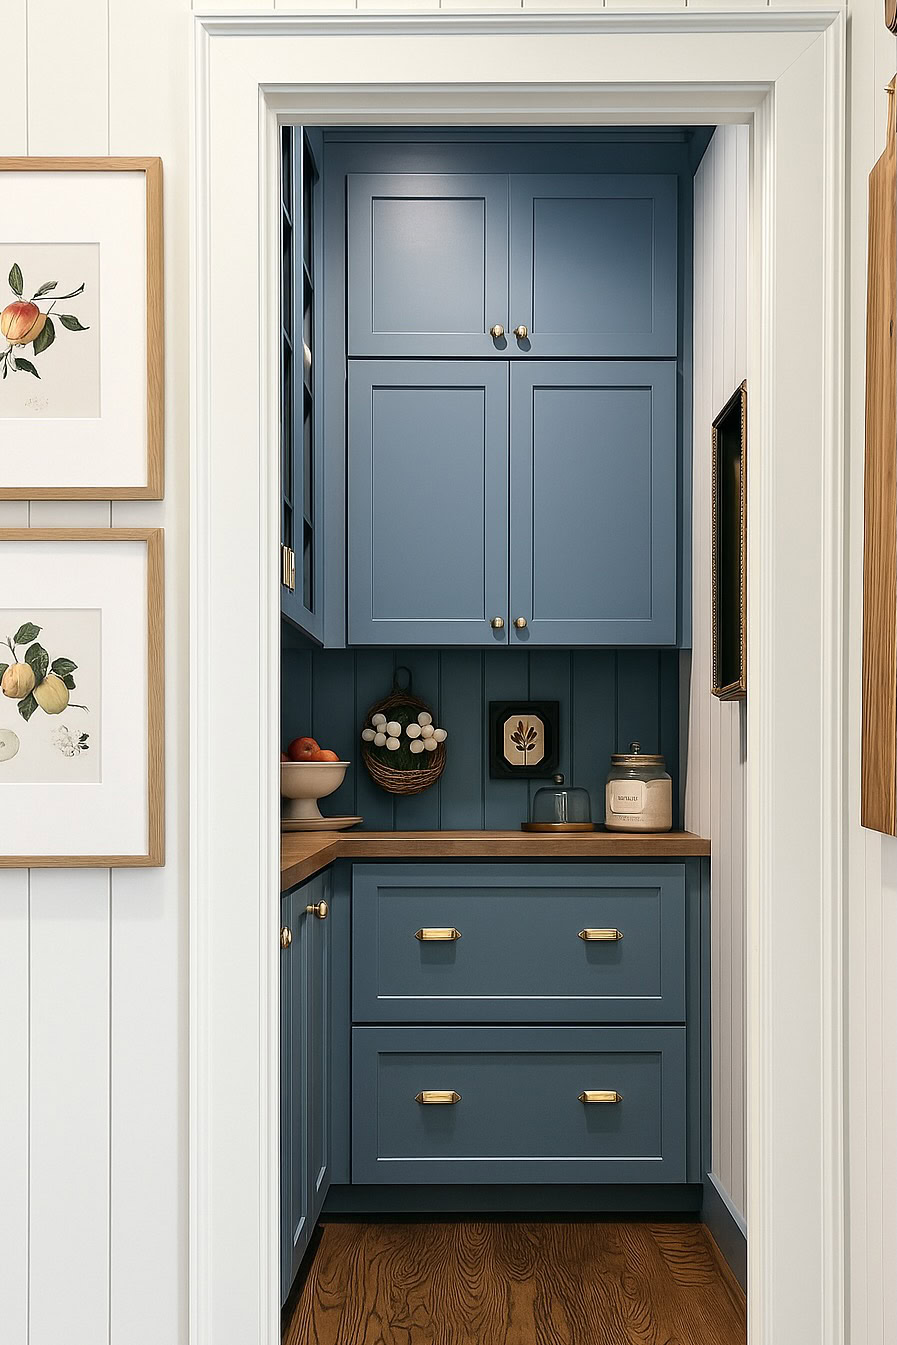
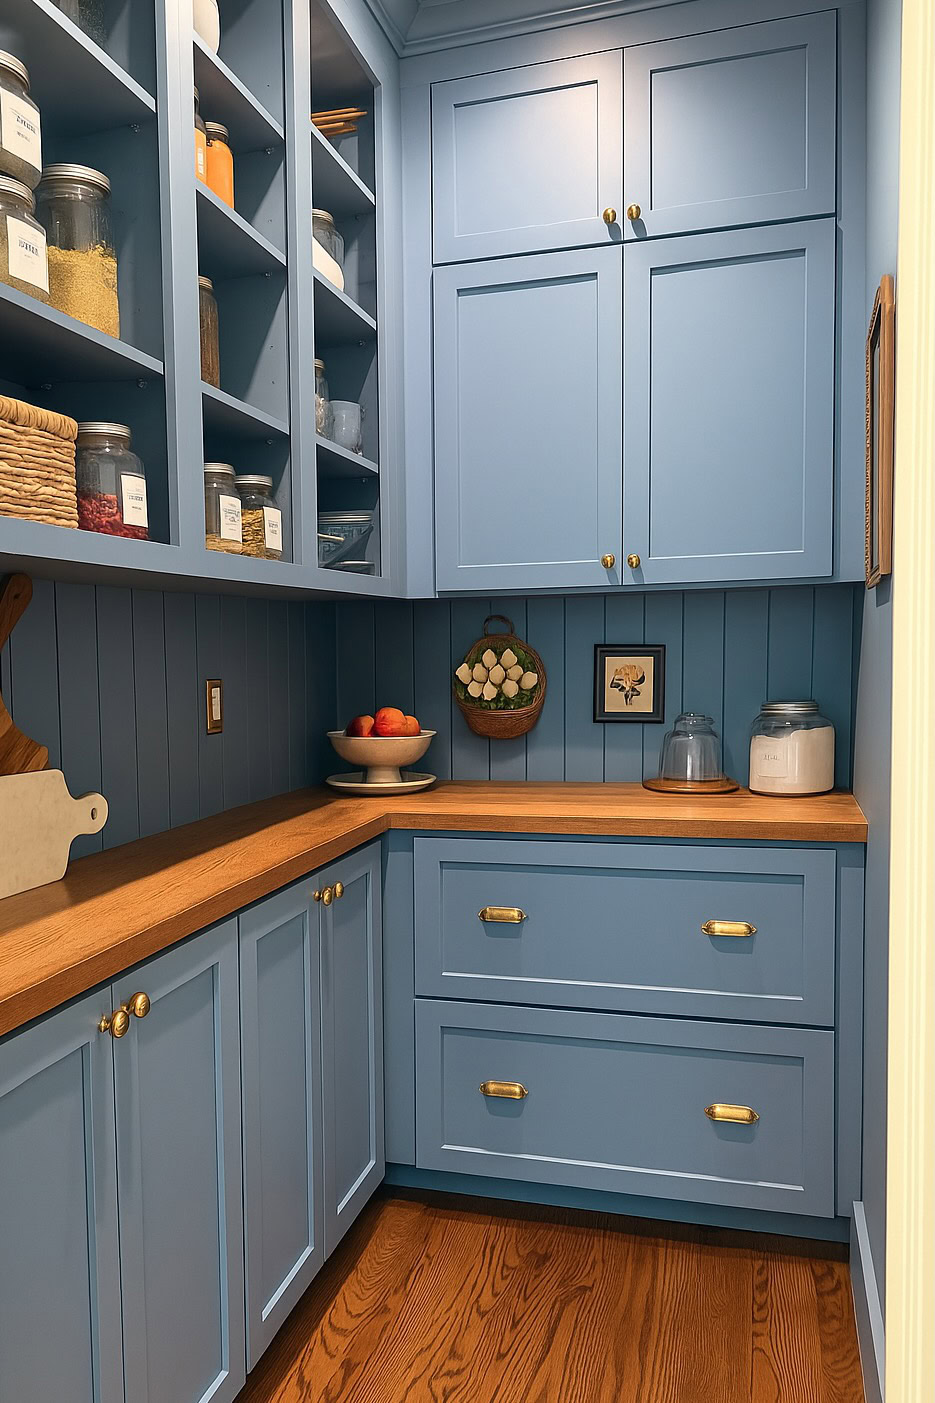
For our pantry remodel, we decided to incorporate butcher block countertop. This simple upgrade makes the entire space feel warm and custom.
When I was designing our pantry, I knew I wanted to add a countertop so the space could serve not just as storage, but as truly a functional workspace. The Allen + Roth butcher block countertop from Lowe’s Home Improvement was our first choice. We have been very happy with the quality, warmth and finish. With its rich wood grain, customizable finish, and versatile design potential, it has been perfect for our space.
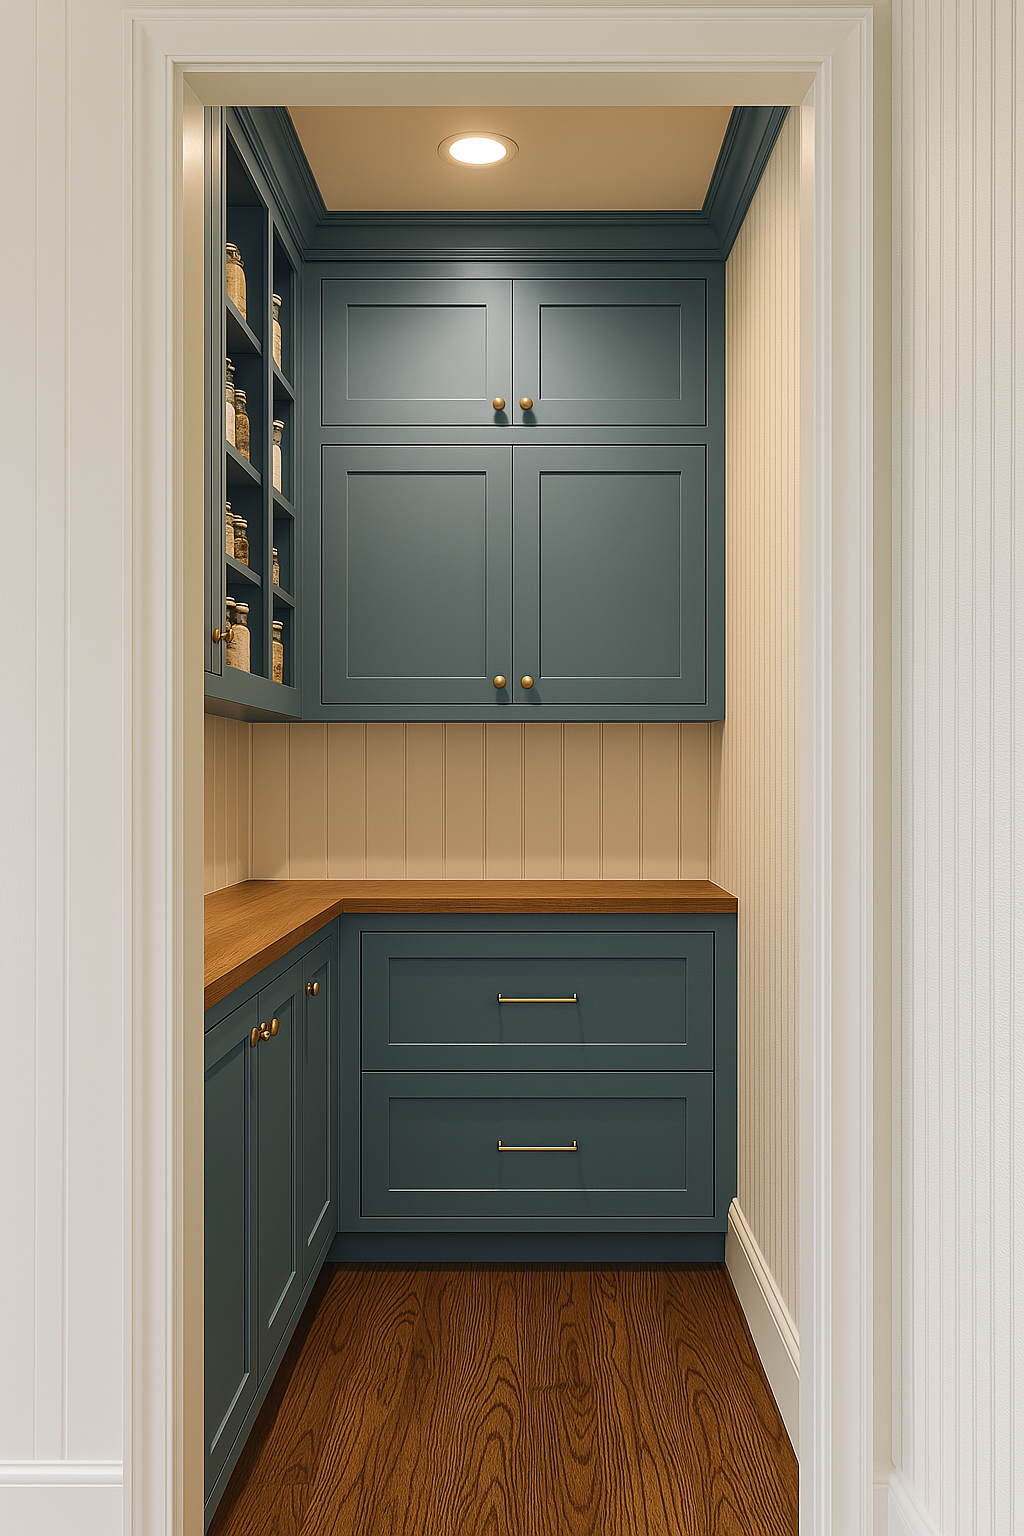
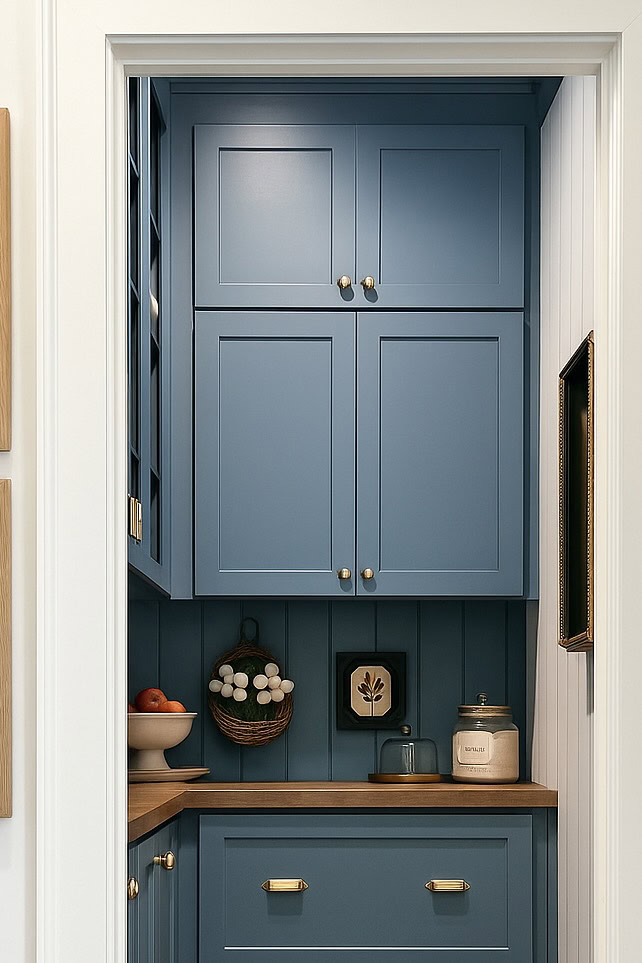
The warm wood tone compliments the blue pantry cabinets perfectly and balances out some of the cool of this warm smoky blue.
Disclosure: This post is sponsored by Lowe’s Home Improvement, but all thoughts and opinions are my own. This blog post contains affiliate links, I may earn commission on any sales from links in this post.
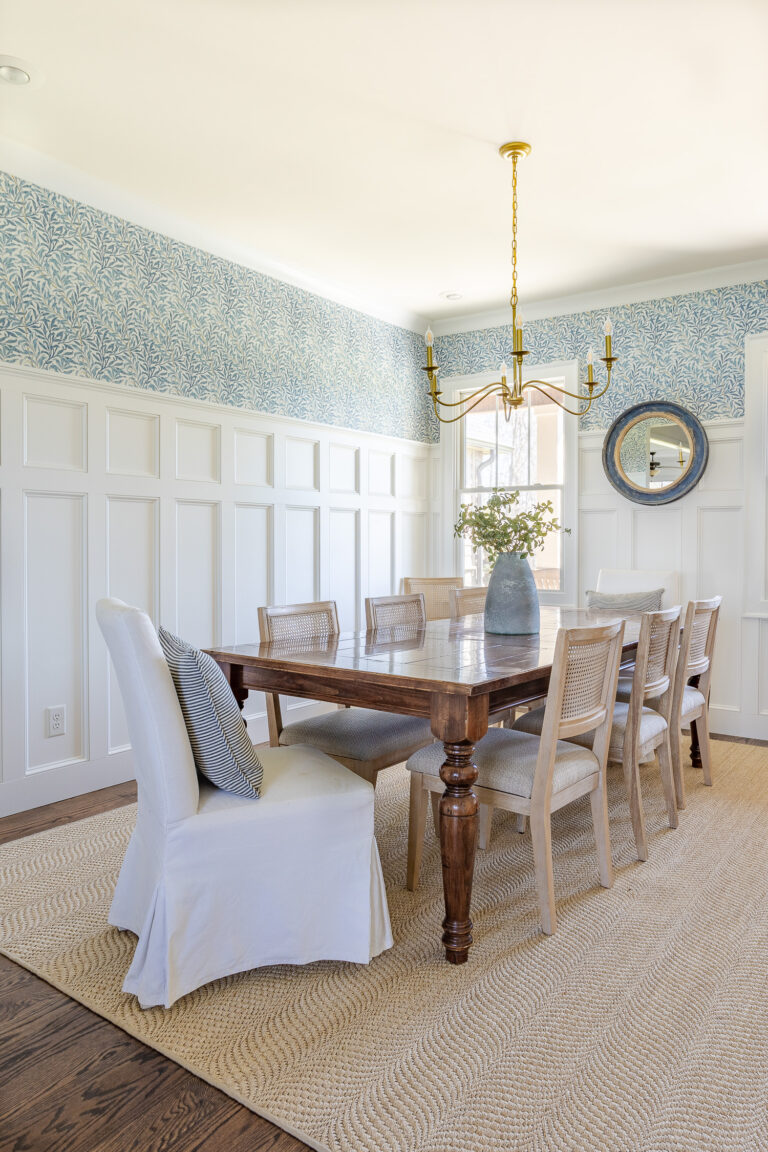
See the entire pantry remodel before and after
What is Butcher-Block Countertop?
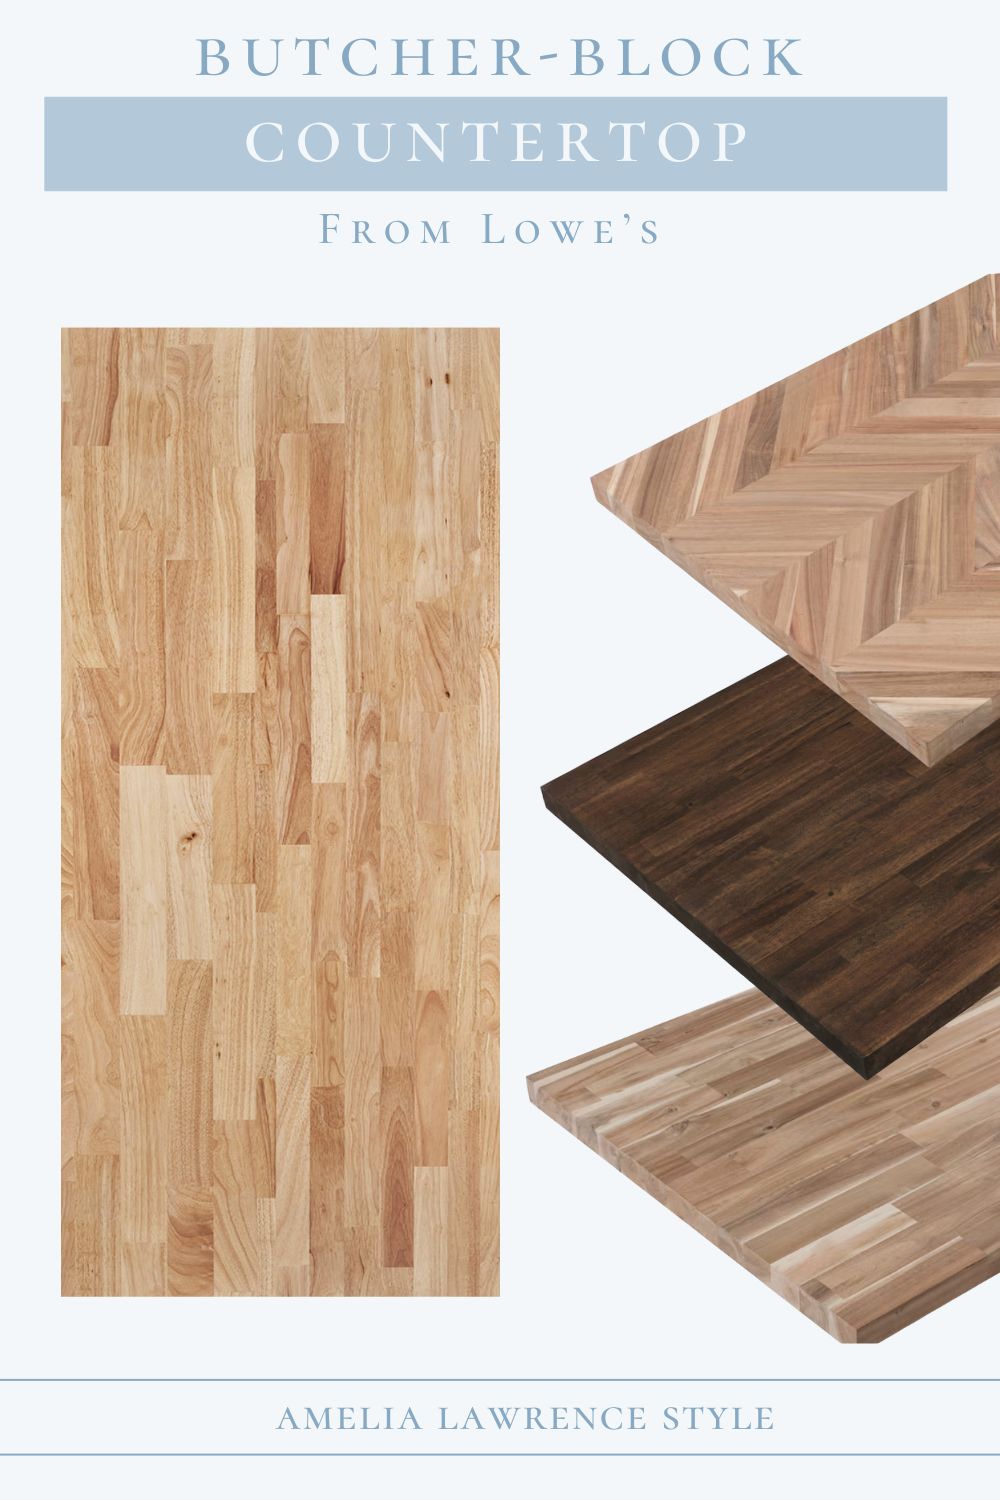
A butcher-block countertop is a solid wood slab made by gluing thick strips of strong hardwoods together. The Allen + Roth wood countertop is made of hardwoods such as Acacia or Hevea (rubberwood) in a finger-joint construction. Due to its natural wood construction, there are variations in color and grain pattern to each piece.
Butcher-block countertop is solid and unfinished and it comes in a variety of sizes to accommodate your needs. It will need to be finished and sealed to protect it from moisture and wear and tear.
Check out these other posts!
Walk-In Pantry Remodel
Front Door Light Size Guide
DIY Wood Pipe Desk
Where to Use Butcher-Block Countertop
Because of its warm nature; butcher-block works well in a lot of spaces. We love it in our pantry but there are so many other areas this can be incorporated. Anywhere you wood like wood to become a feature or part of a feature. You might choose stone as the main countertop and wood for the island for contrast.
Here are some great places to use this type of countertop:
- Kitchens: Overall kitchen countertop and kitchen island
- Breakfast or Coffee Bars: This countertop would add a warmth to areas that are offset from the kitchen too
- Desktop: We built a desk for our son’s room and used a piece of butcher-block
- Pantries: Of course this is where we are using butcher block and we love it
- Laundry Rooms: Butcher block countertop would be great in a laundry room
NOTE: However, there are some considerations with this type of countertop. Because wood is porous and sensitive to moisture it is good to be careful around sinks or other wet areas. With property sealing and care; this type of countertop can be used.

Installing Butcher-Block Countertops
You can hire someone to do the install such as a handyman or even find a contact from your local Lowe’s.
We installed this ourselves as we have all the tools, are decent with DIY projects and since this was a small space it made easy. We purchased one large piece and ultimately made three cuts.
Since we had a standard depth on the back wall we only had to cut off length. The side wall was only 12″ so we had to remove depth and length to fit the space and butt the two pieces together. There is a seam, but it’s not an issue or affects the design at all.
We also had to work around the door frame by notching out the trim but it all worked just fine.

How to Finish Butcher-Block Counters
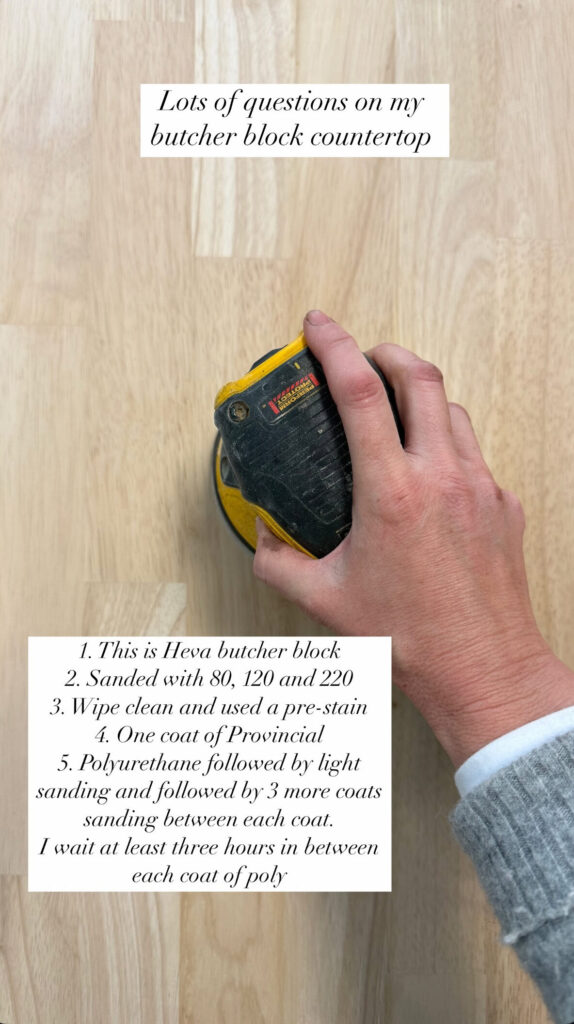
There are different ways you can finish your countertop, but you will need to seal it at minimum to protect the wood. We selected the Hevea Block but you can also chose the Acacia wood too. You would likely finish your countertop the same way with either wood, but for reference; we were working with Hevea.
This is the method I followed to finish our pantry countertop and so far it’s been perfect:
- Pre-installation sanding: light sand with 80, 120 and then 220 (perhaps this was overkill but I was happy I did this.
- Wipe Clean – clean the surface very well to remove all dust and ensure the surface is dry.
- Pre-Stain – I find with certain wood, pre-staining ensures a nice even finish to your stain and reduces blotchiness.
- Apply Stain – Select a stain or even paint of your choice. I used Minwax Provincial stain – I used one coat (you can do more) on both sides and edges of countertop. (skip this step if you want to leave the countertop a natural finish.)
- Seal Surfaces: Allow stain to dry and seal with a Polyurethane. I used an oil based poly for a nice finish
- Sand Again: Finishing the countertop took a few days and I finished in place once installed. I did three coats of poly and lightly sanded (220grit) between each coat.
NOTE: I did initial sanding, staining and one coat of poly before install. Two more coats of poly were applied after the install.

Cost Comparison
With many different countertops to chose from; let’s compare the cost of several options.
Butcher-block countertops typically run $50-$75 sq ft depending on wood species, finish, edges. This is for basic butcher-block however. If you are looking at specific wood countertops made from cherry or walnut for example, the cost will be significantly more. Fancy or routed edges will also increase cost.
With some basic DIY skills and correct tools, you could grab the block yourself, cut and install saving you some money. With our pantry being such a small area; we purchased, stained, sealed and installed ourselves.
Natural stone such as granite or marble can run $60-$200+ per sq ft installed all depending on what you select of course. Engineered quartz will be around $70-$120+ per sq ft installed based on selection.
From a budget standpoint, basic butcher-block countertop can be more affordable especially if you install it.
Countertop Material Comparison
With so many countertop options on the market it’s important you select the right one based on your projects needs, overall design and functionality. I knew I wanted the wood countertop mostly because of the look. That is the look I was going for. I also liked this selection because it was affordable and we could install ourselves.
If you are trying to decide; here is a great break down for you to think about.
Pros of Butcher‐Block:
- Warm natural aesthetic: Wood brings in warmth, organic grain, and can be a cost saving
- Repairability: Scratches, dings and minor damage can often be sanded out and re-finished — unlike many stone surfaces
- Customizable finish: You can stain, oil, or lacquer to match your design palette
- Cost: this type of countertop can be very cost affective
Cons of Butcher-Block:
- Maintenance: Wood requires periodic oiling/sealing but so does granite and marble. Quartz does not
- Durability: Wood is more prone to scratching, denting, water damage, warping if not sealed properly. Stone and quartz are more durable in this area
- Heat/Moisture Resistant: Wood is less tolerant of hot pans or persistent water exposure compared to stone/quartz.
- Cleaning: Wood is porous and if not properly maintained it may harbor bacteria. Quartz and many stones are easier to clean and sanitize
Factors to Consider
Ultimately ask yourself what your overall goal is with you countertop. I’ve learned that nothing in life is indestructible and while one product may be better than another, you have to decide what works best for you and your needs.
I love wood in our pantry because of the warmth, cost savings, and that the pantry does not really have anything wet in there as a rule. It has been easy to keep clean and adds a beauty and warmth to the overall design and functionality.

Sources


Butcher Block Countertop from Lowe’s
Follow along: Instagram | Pinterest | LiketoKnowit