DIY Wood Pipe Desk
Build this easy DIY wood pipe desk! This diy desk is simple to make and with just a few tools and supplies you can build this desk in no time!
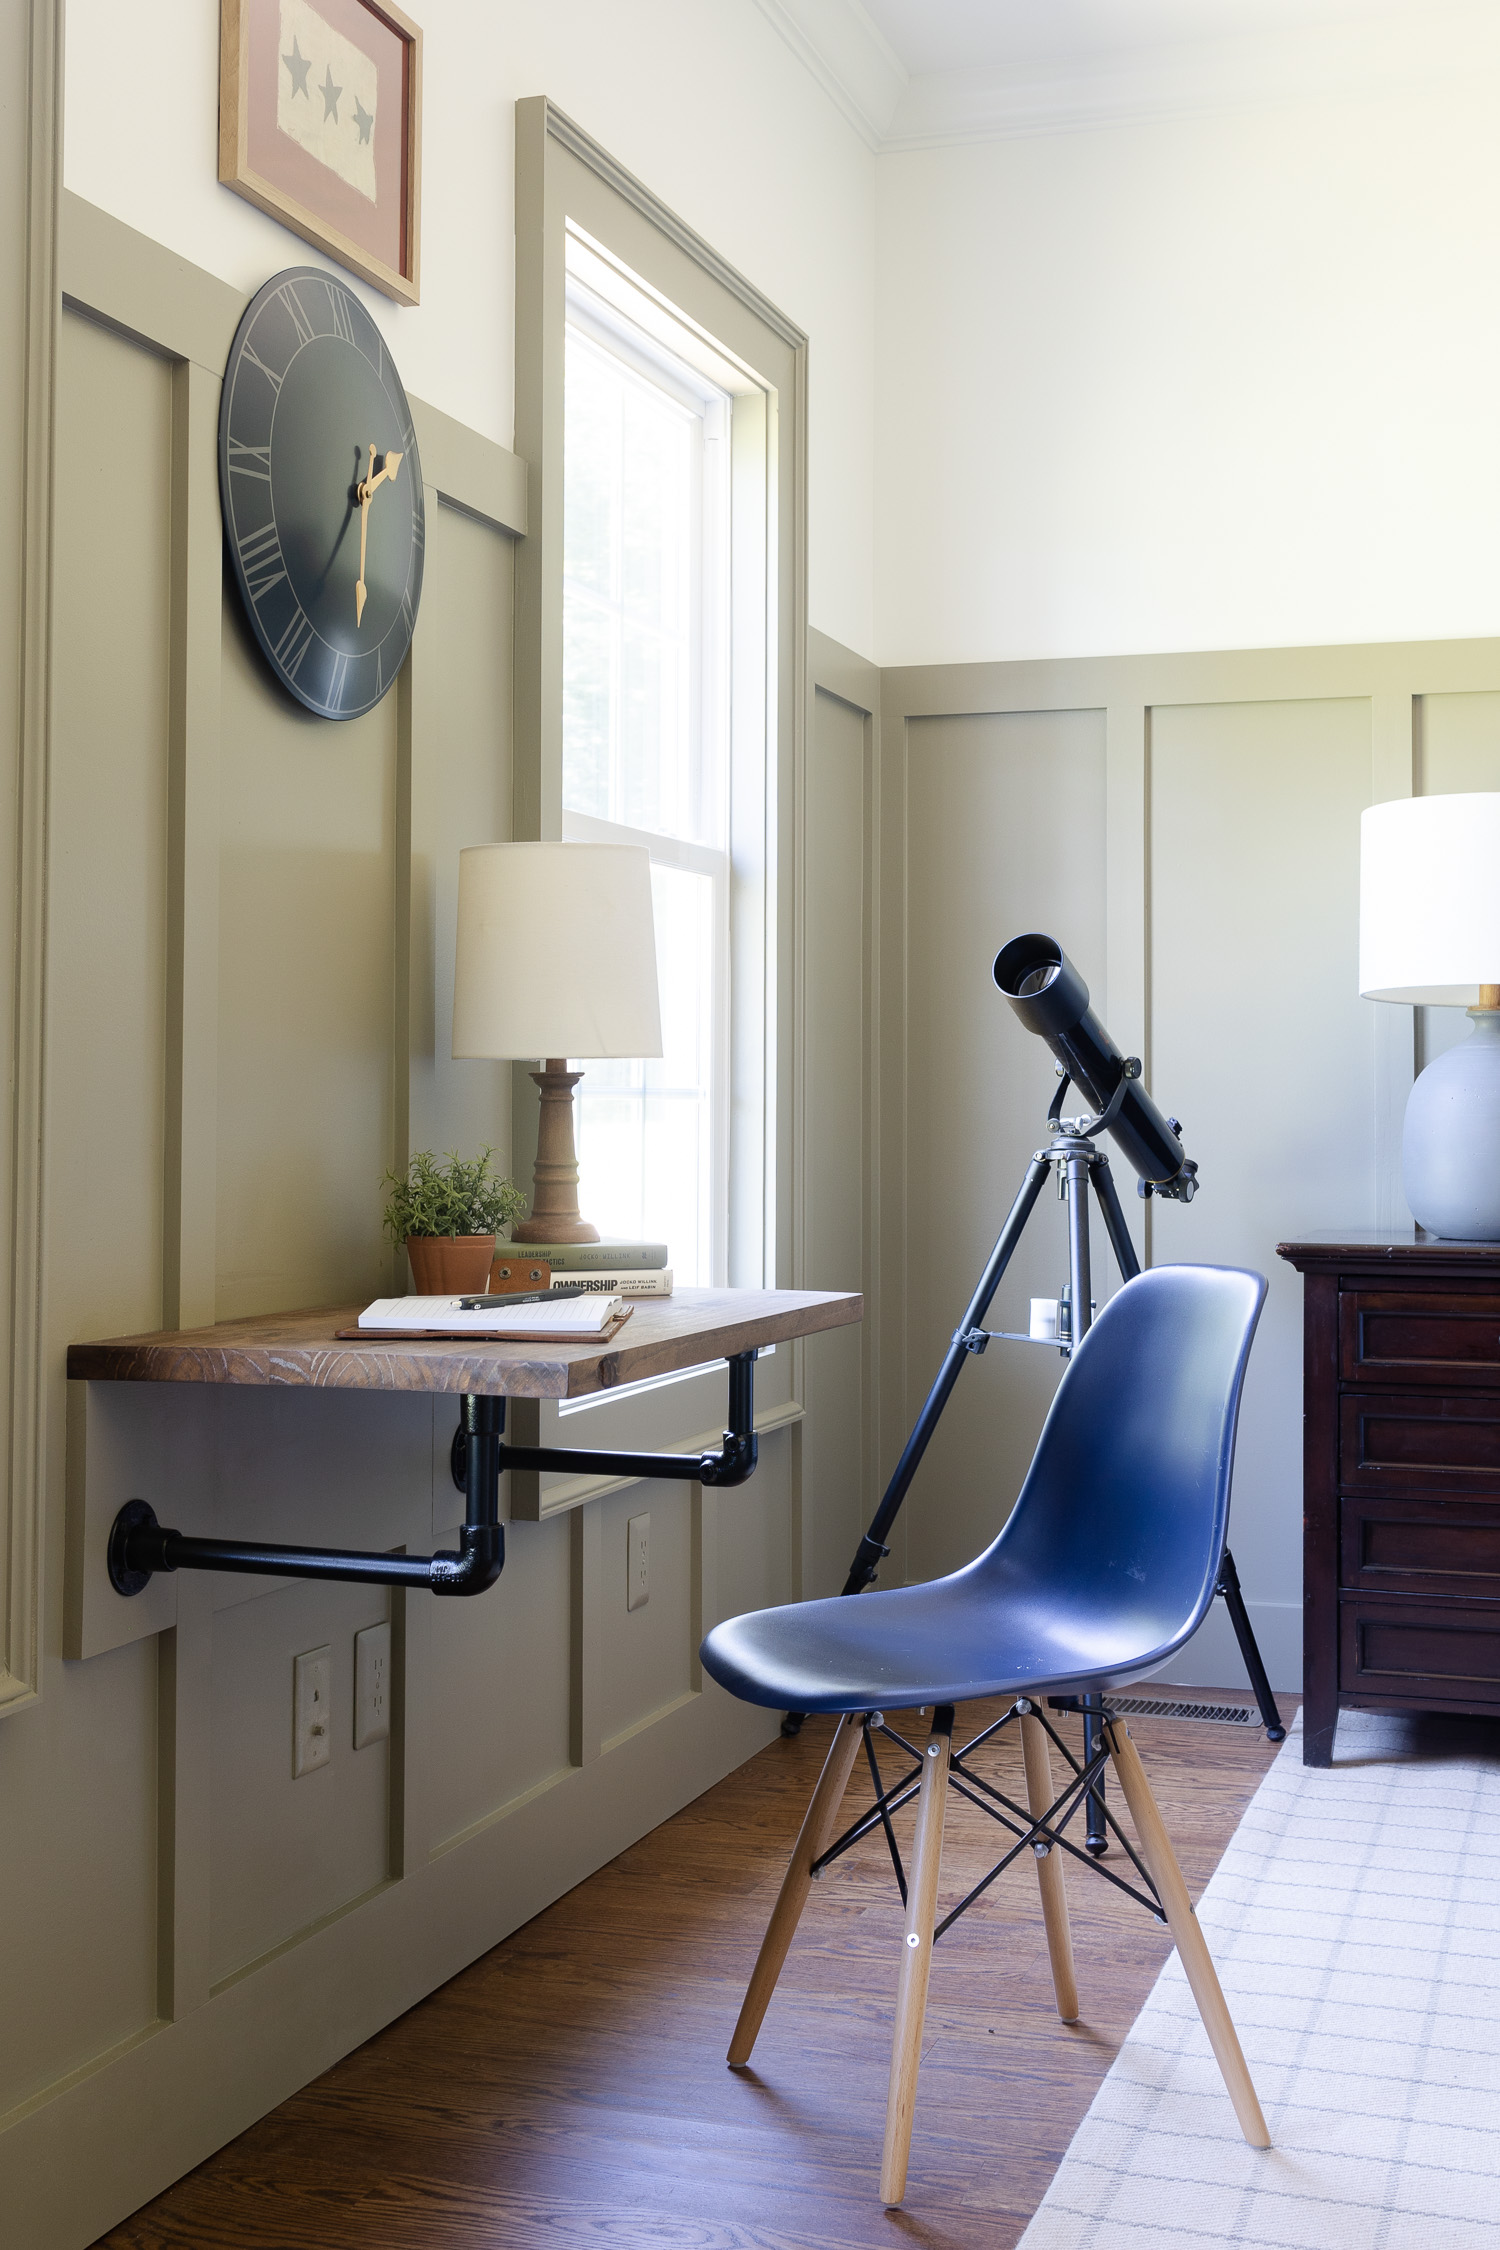
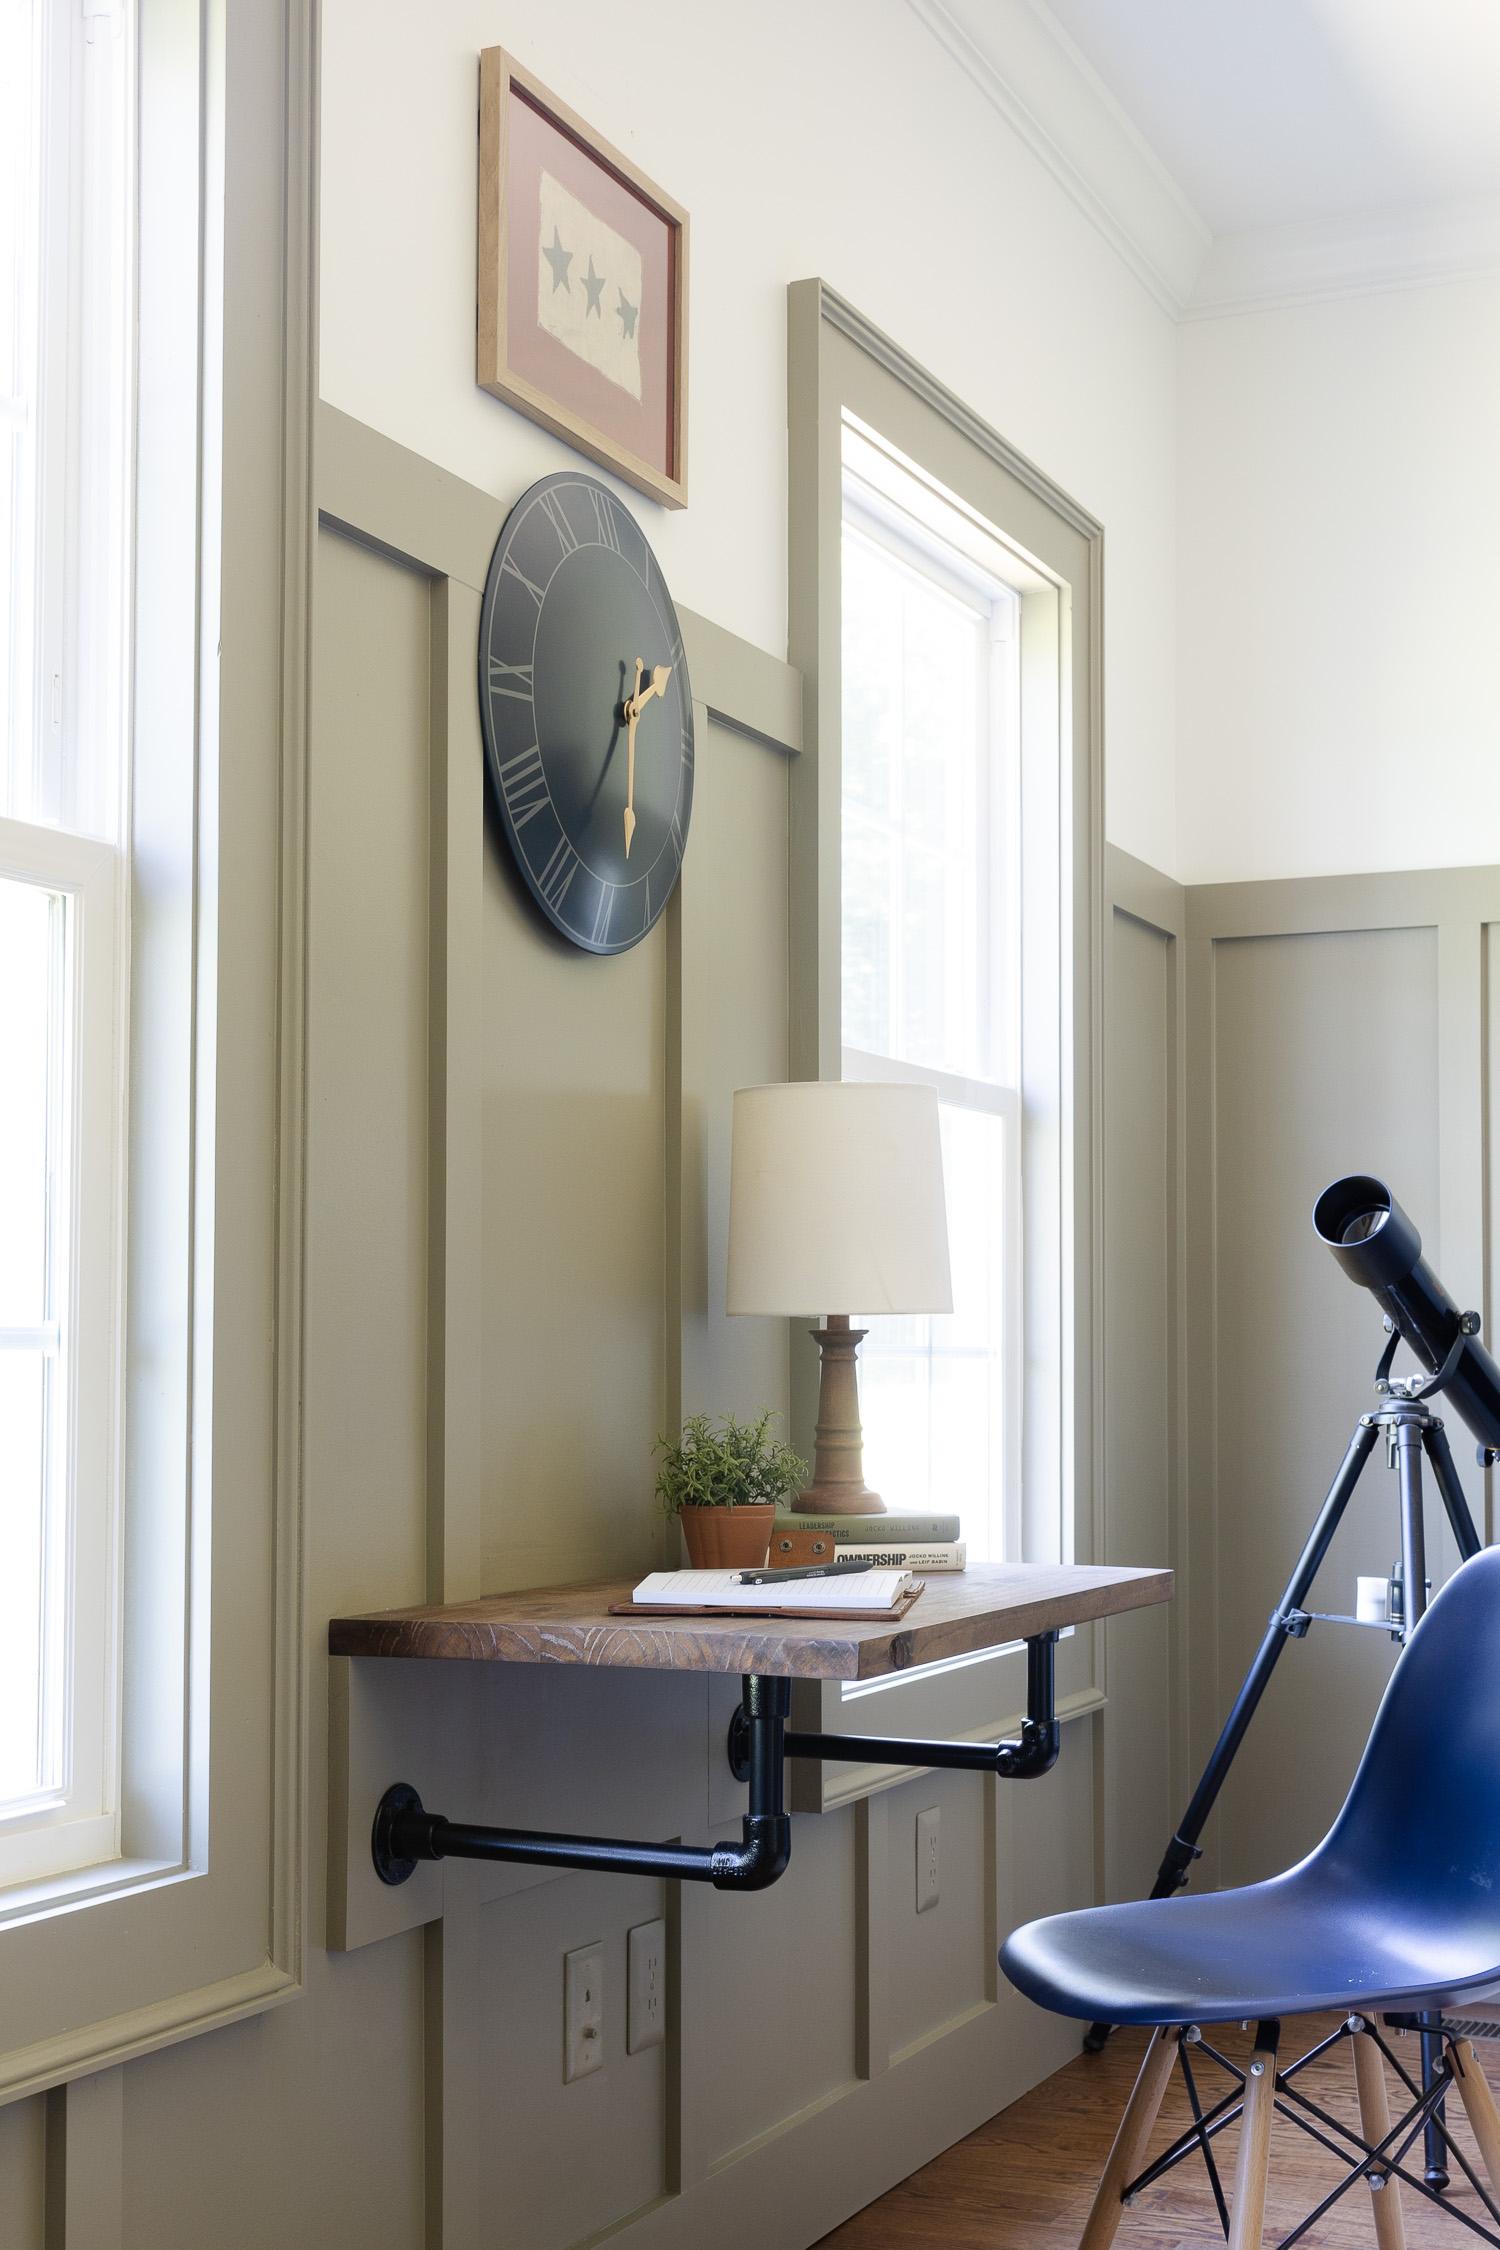
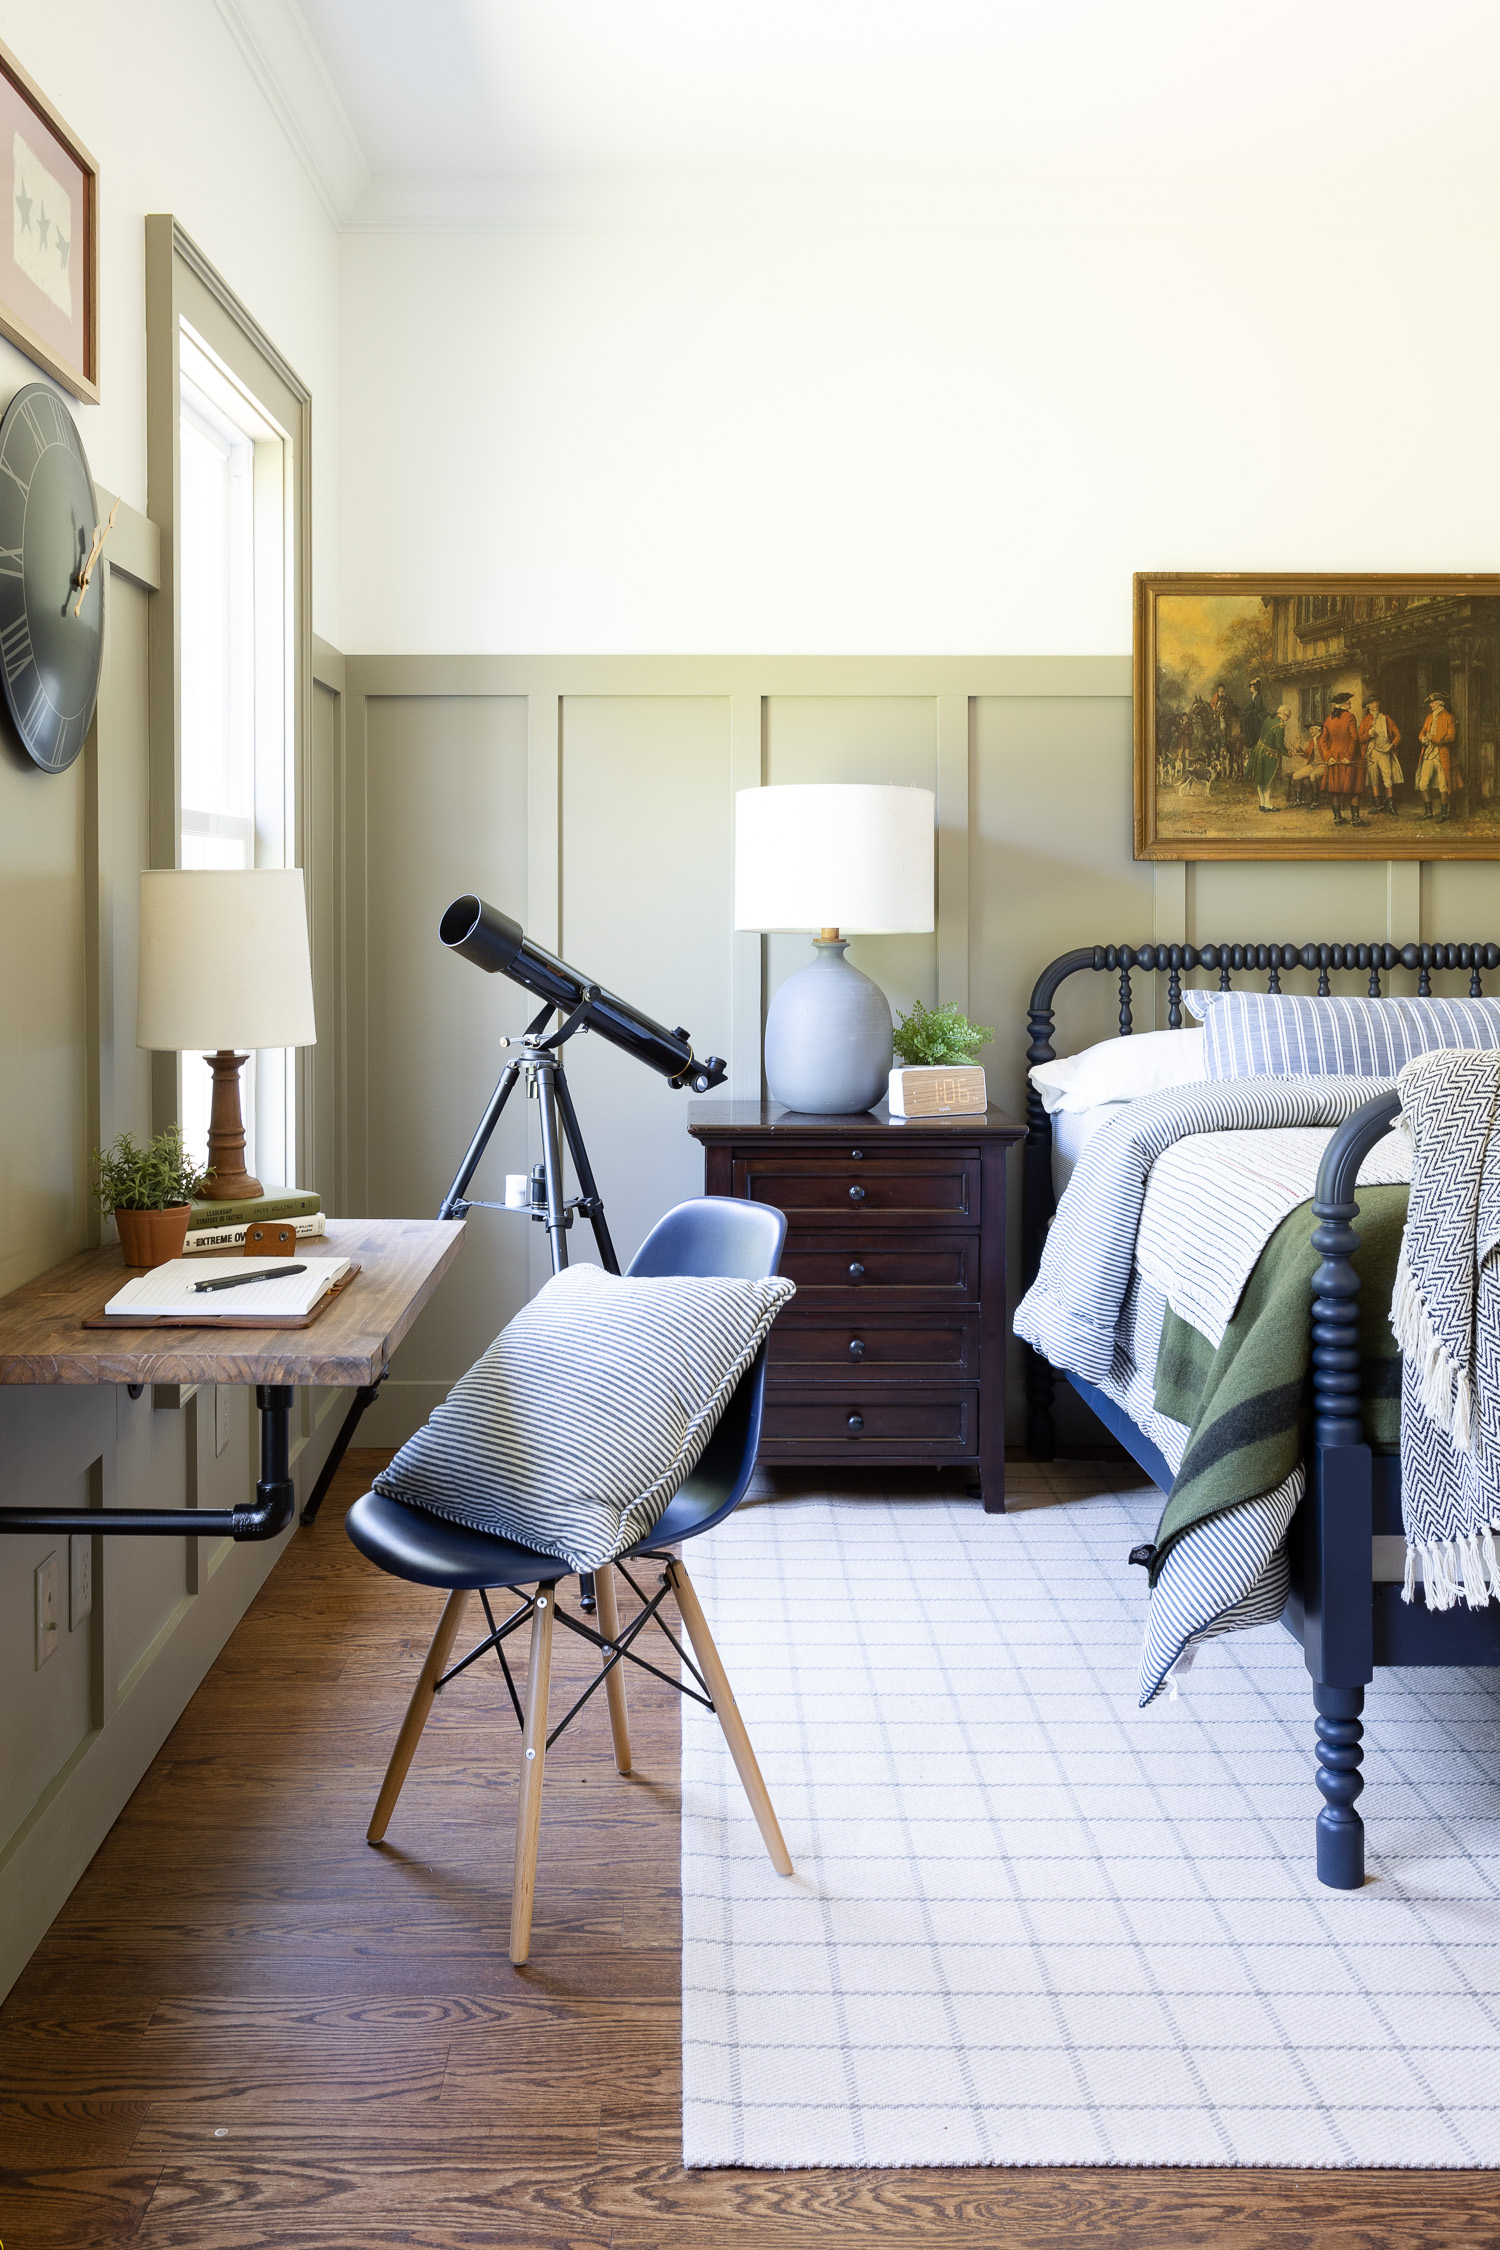
After the bedroom addition was complete, and we added board and batten to the room, we wanted to add a desk to the space for our son. He wanted and needed a little desk for homework and computer work. The room is not very large, but big enough for what he needs. A full bathroom, step in closet and space for his furniture. It was way more than I had as a teenage.
Disclosure: This post may contain affiliate links. As an Amazon Associate, I earn from qualifying purchases at no additional cost to you.

In between the two windows there was enough space for a small desk and by DIY-ing it we could get exactly what we wanted and needed. Finding a piece to fit exactly in the space wasn’t likely, but building it ourselves ended up being perfect!
Tools Needed for Building a DIY Wood Pipe Desk
Tools needed for this easy DIY wood pipe desk! This diy wood pipe desk is simple to make and with just a few tools and supplies you can build this desk in no time! The tools and supplies for this diy desk are minimal. If you don’t have a table or miter saw Lowes will usually make a few cuts for you. If you have your exact measurements, have the wood cut and it’s one less thing you will need to do.
- Drill and bits
- Orbital Sander or sanding block to sand by hand
- Cordless Screw Driver
- Level
- Miter Saw
Supplies Needed for Building a DIY Wood Pipe Desk
The supplies for this are really minimal and we found them all at Lowes. Lowes already sells these great structural steel pipe fittings to build all sorts of things. These pipes were perfect for this diy wood desk.
Supplies:
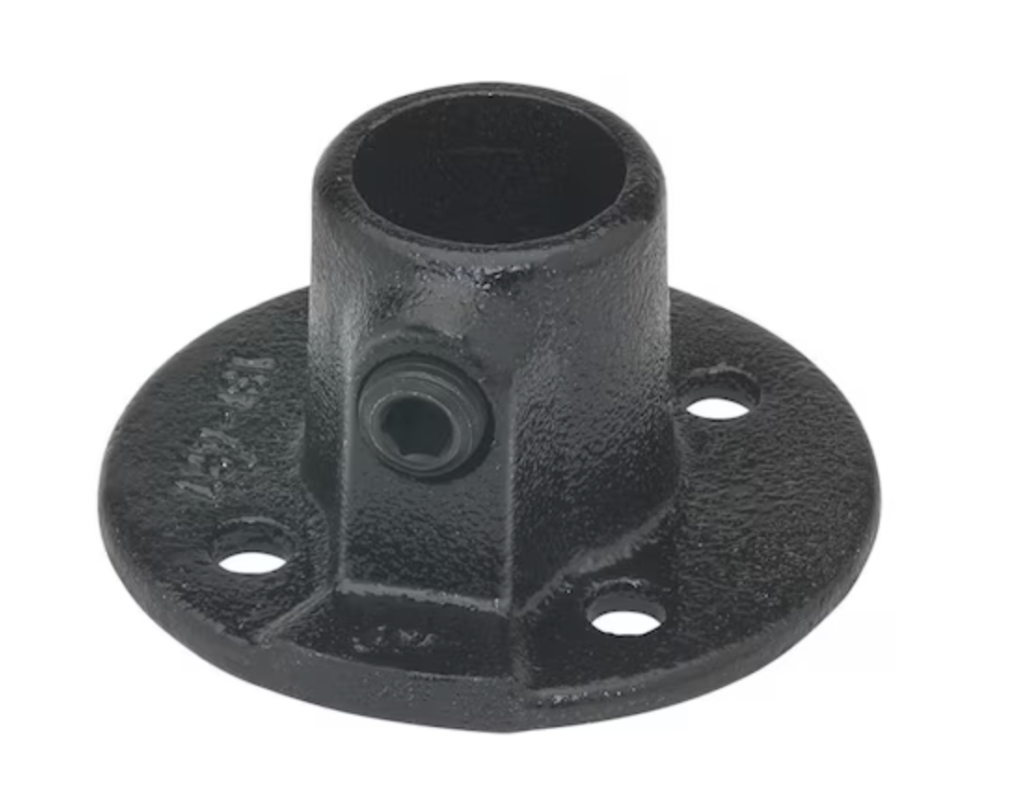
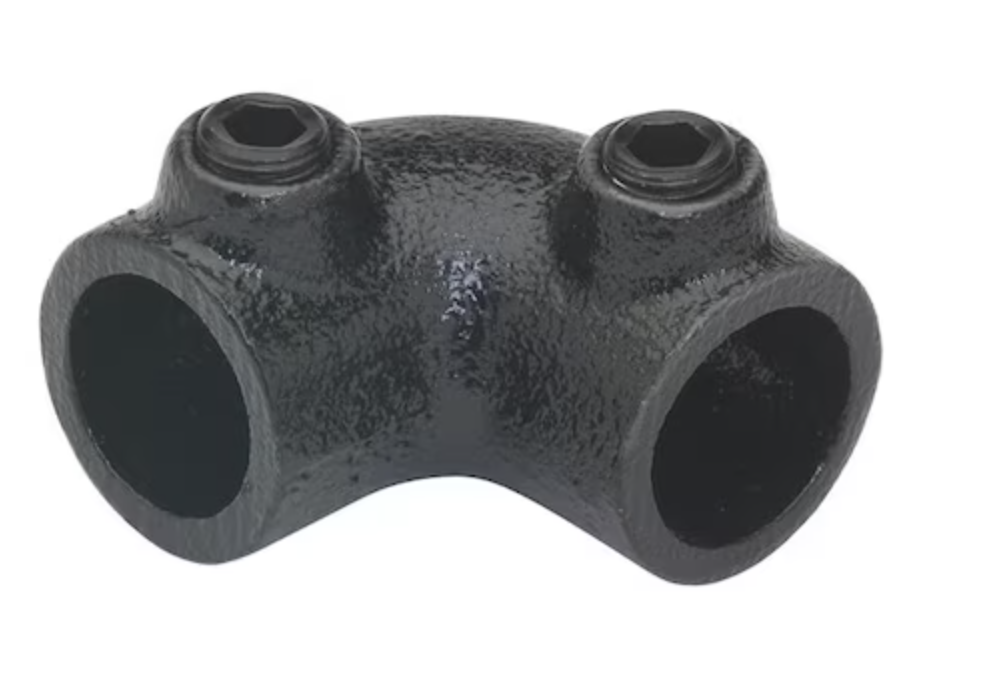
- Two 90 degree steel pipe elbows
- Four 3/4″ steel pipe flanges
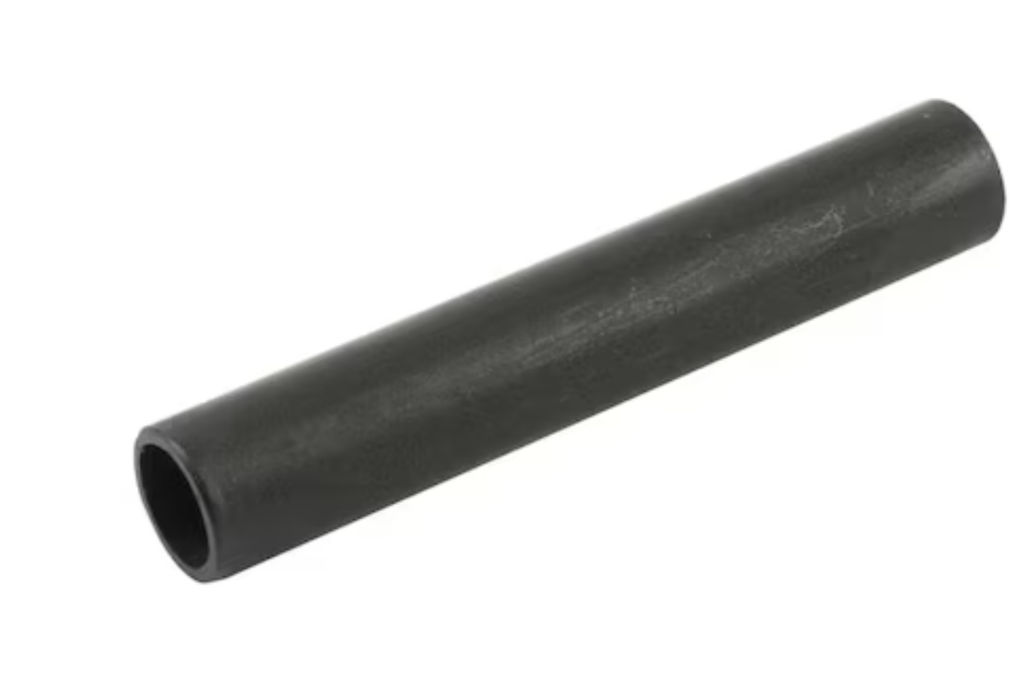
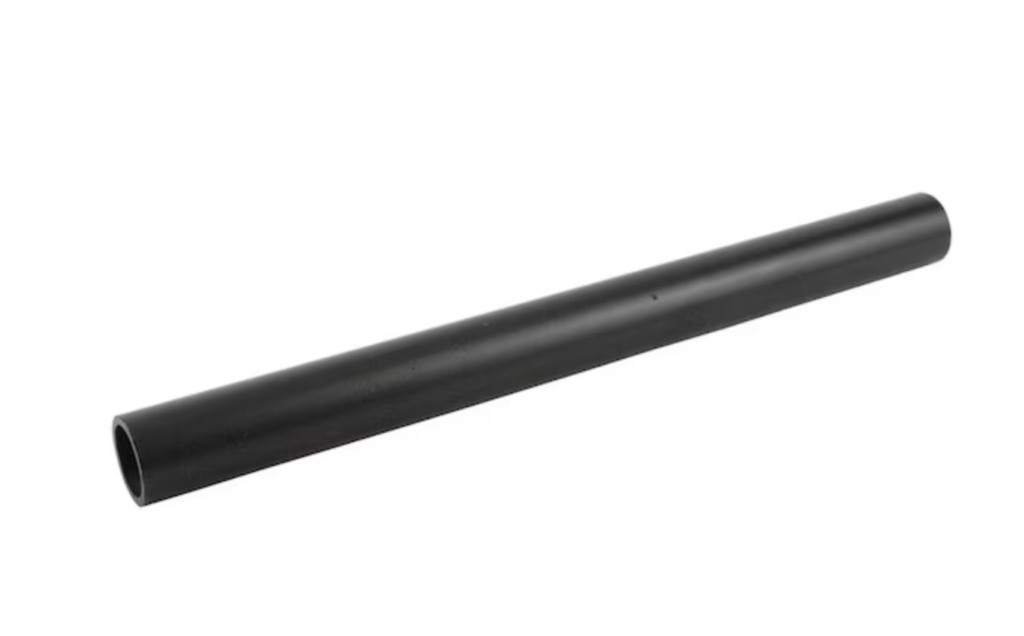
- Two 3/4 x 12″ structural steel pipes
- Two 3/4 x 6″ structural steel pipes
- 1×10′ board
- 24″ x 48″ Bookcase Shelving
- Trim Screws
- Toggle Bolt (optional)
- Lag Bolts
- 3/16″ Toggle Bolts
- Wood Filler
- Provincial Wood Stain (optional)
- Wipe on Poly (optional)
I cannot find a link to these boards, but they are down the lumber aisle at Lowes. This is what they look like.

Check Out These Other Posts!
Easy DIY Coffee Table
Feminine Home Office Design + Desk & Chair Ideas
Masculine Home Office Ideas
Standard Desk Size Dimensions
Typically, a desk should be around the height of 28 – 30 inches for teenagers to adults. A children’s desk might be shorter. The standard length of a desk is about 60 inches long. They typically can be found in lengths from 60 inches to 72 inches and the minimum width for any desk type should be 25 inches.
Rules and standards are meant to be broken or more or less, do what meets your needs.
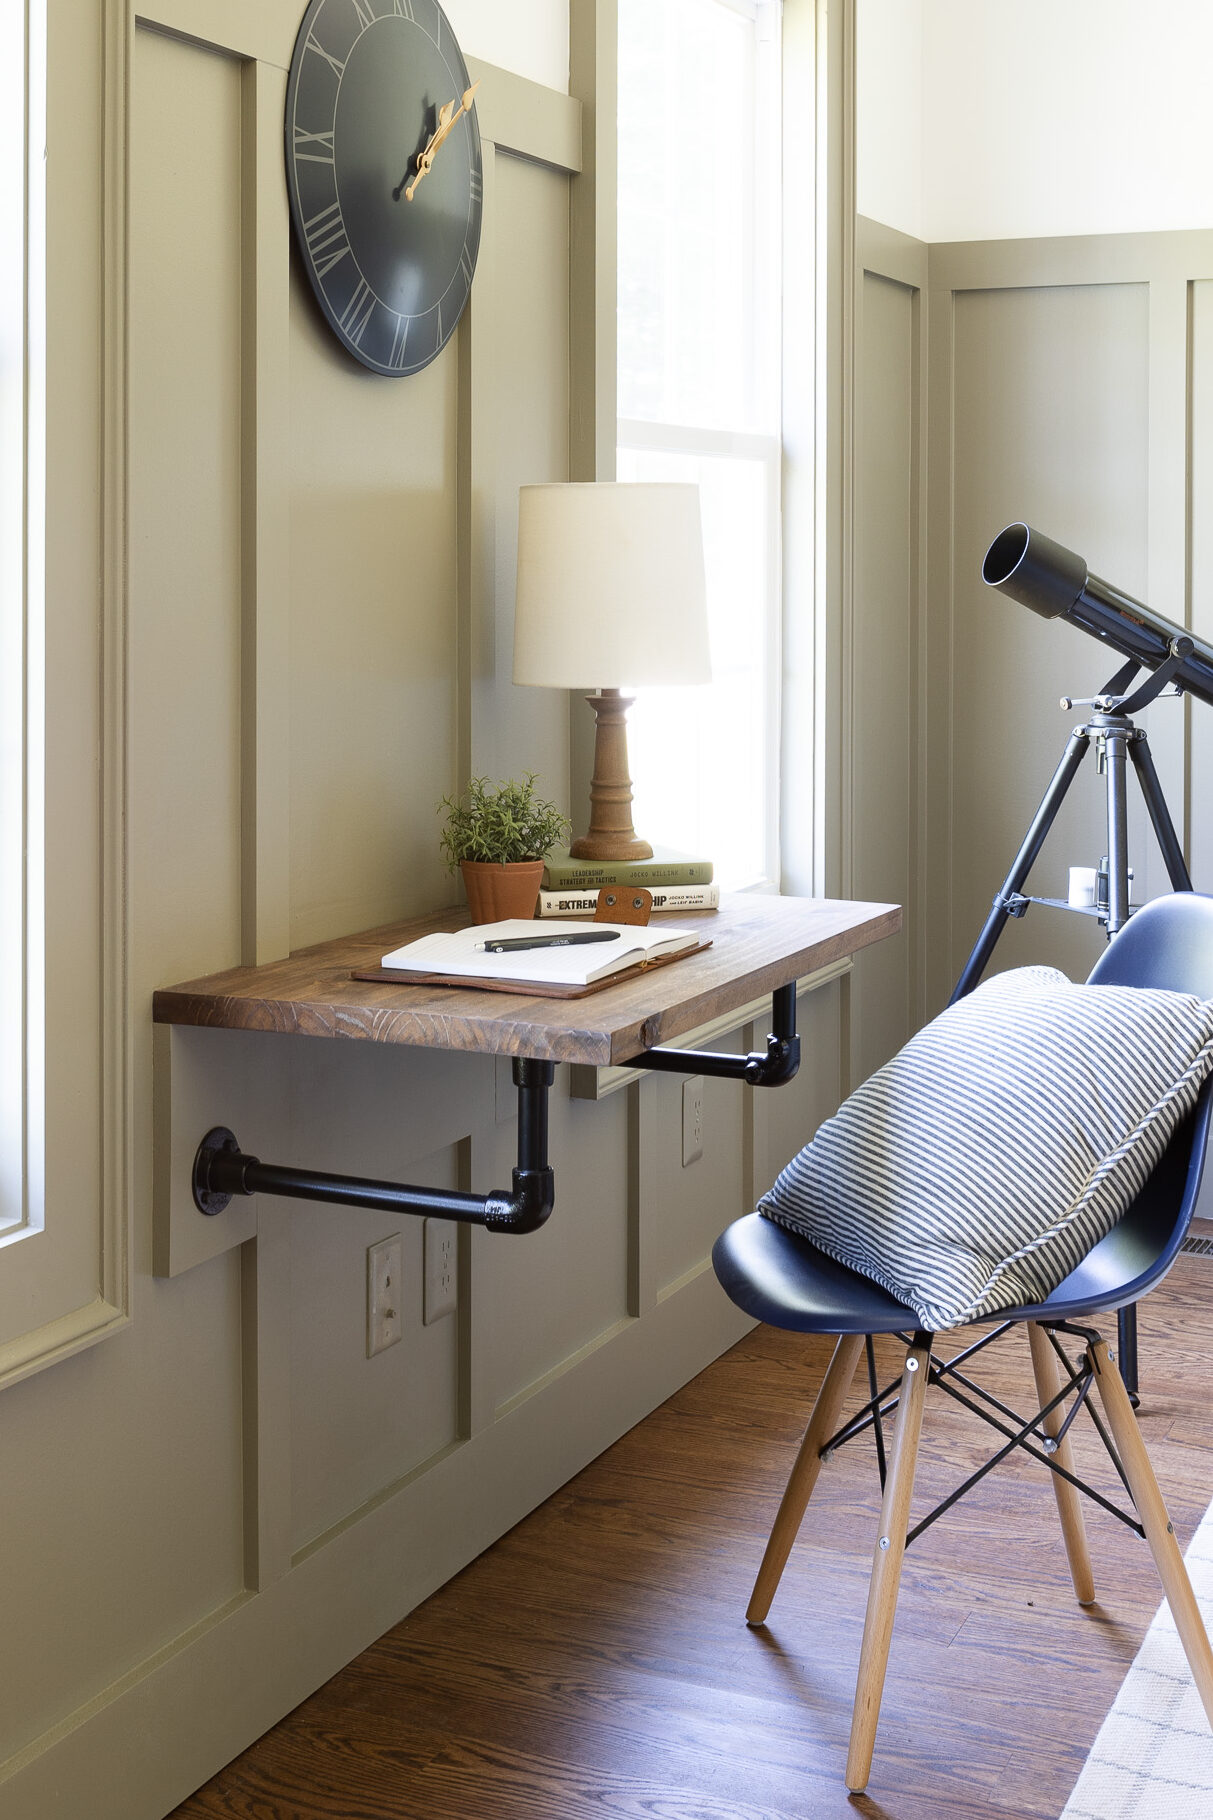
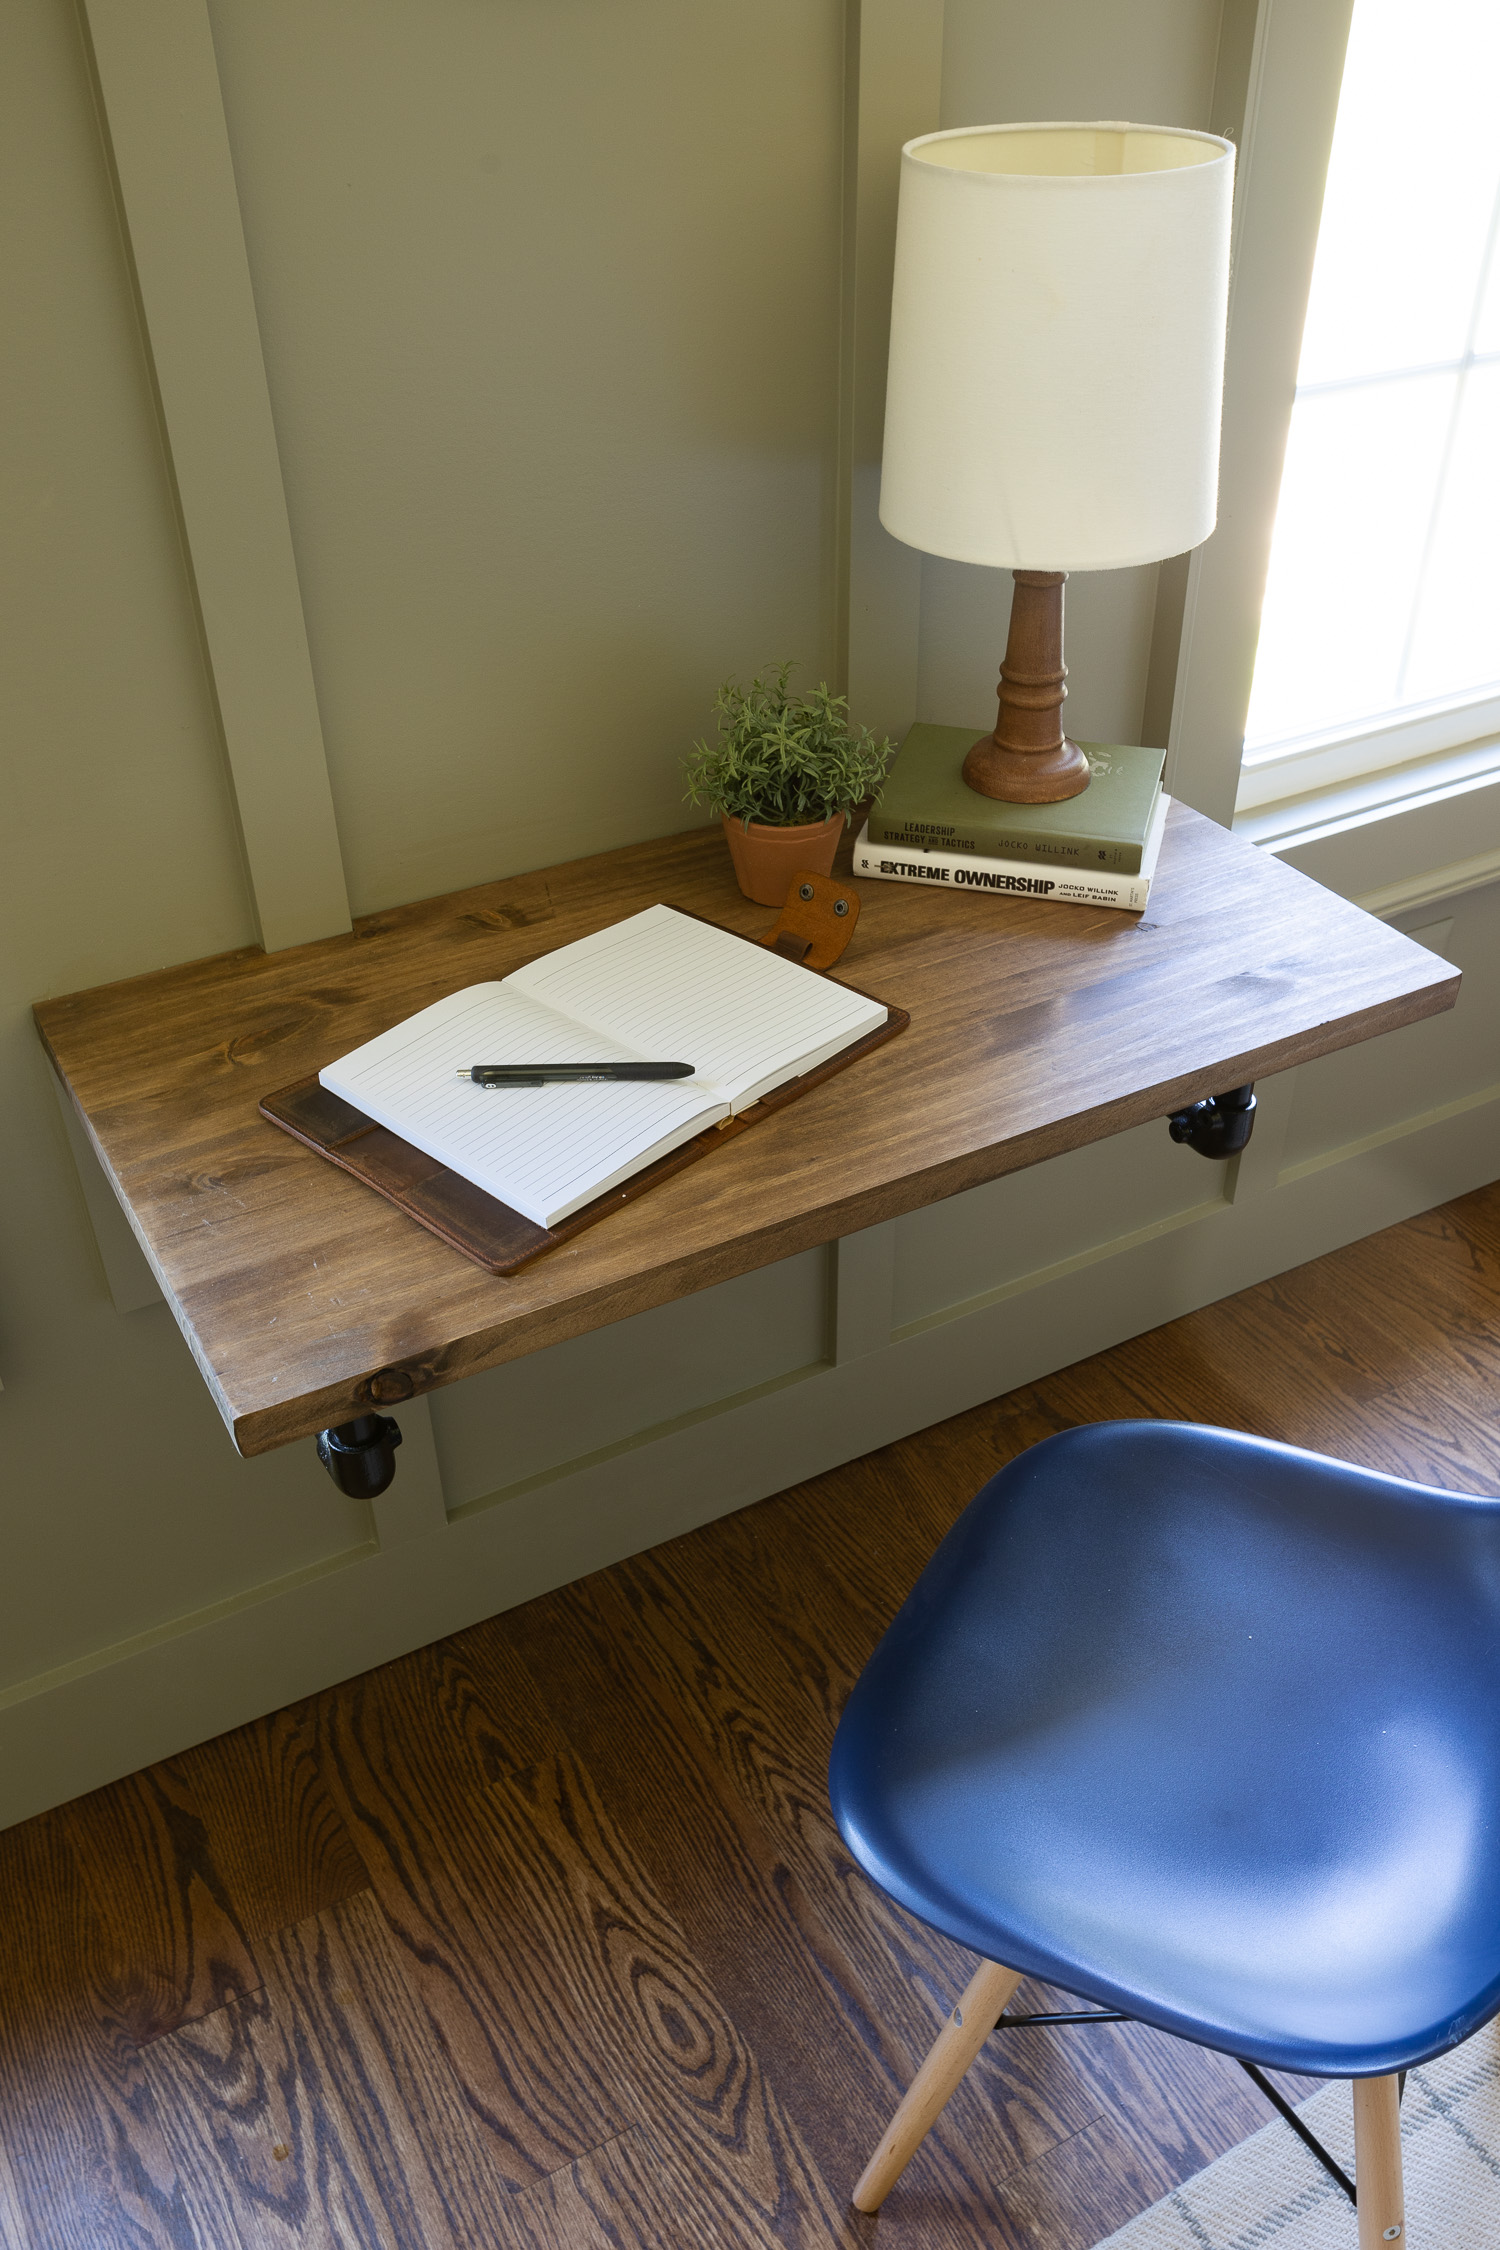
Our desk is 41″ long by 18″ wide and 30″ in height. We would have made the desk wider, but the room is not super large, our son will be heading to college in a couple of years and he just needs something to hold a small laptop for writing papers etc. For what it is; it meets his needs and he has been grateful to have it in his room. The joy of DIY is that you can create something that works for you and your needs!
How to Build a Wooden DIY Desk
Once you have gathered all your supplies and figured out your dimensions, it’s time to build. If you have already cut your wood then you are ready to get going.
The great thing about DIY is that you can customize the size anyway you need. It truly is a custom desk.
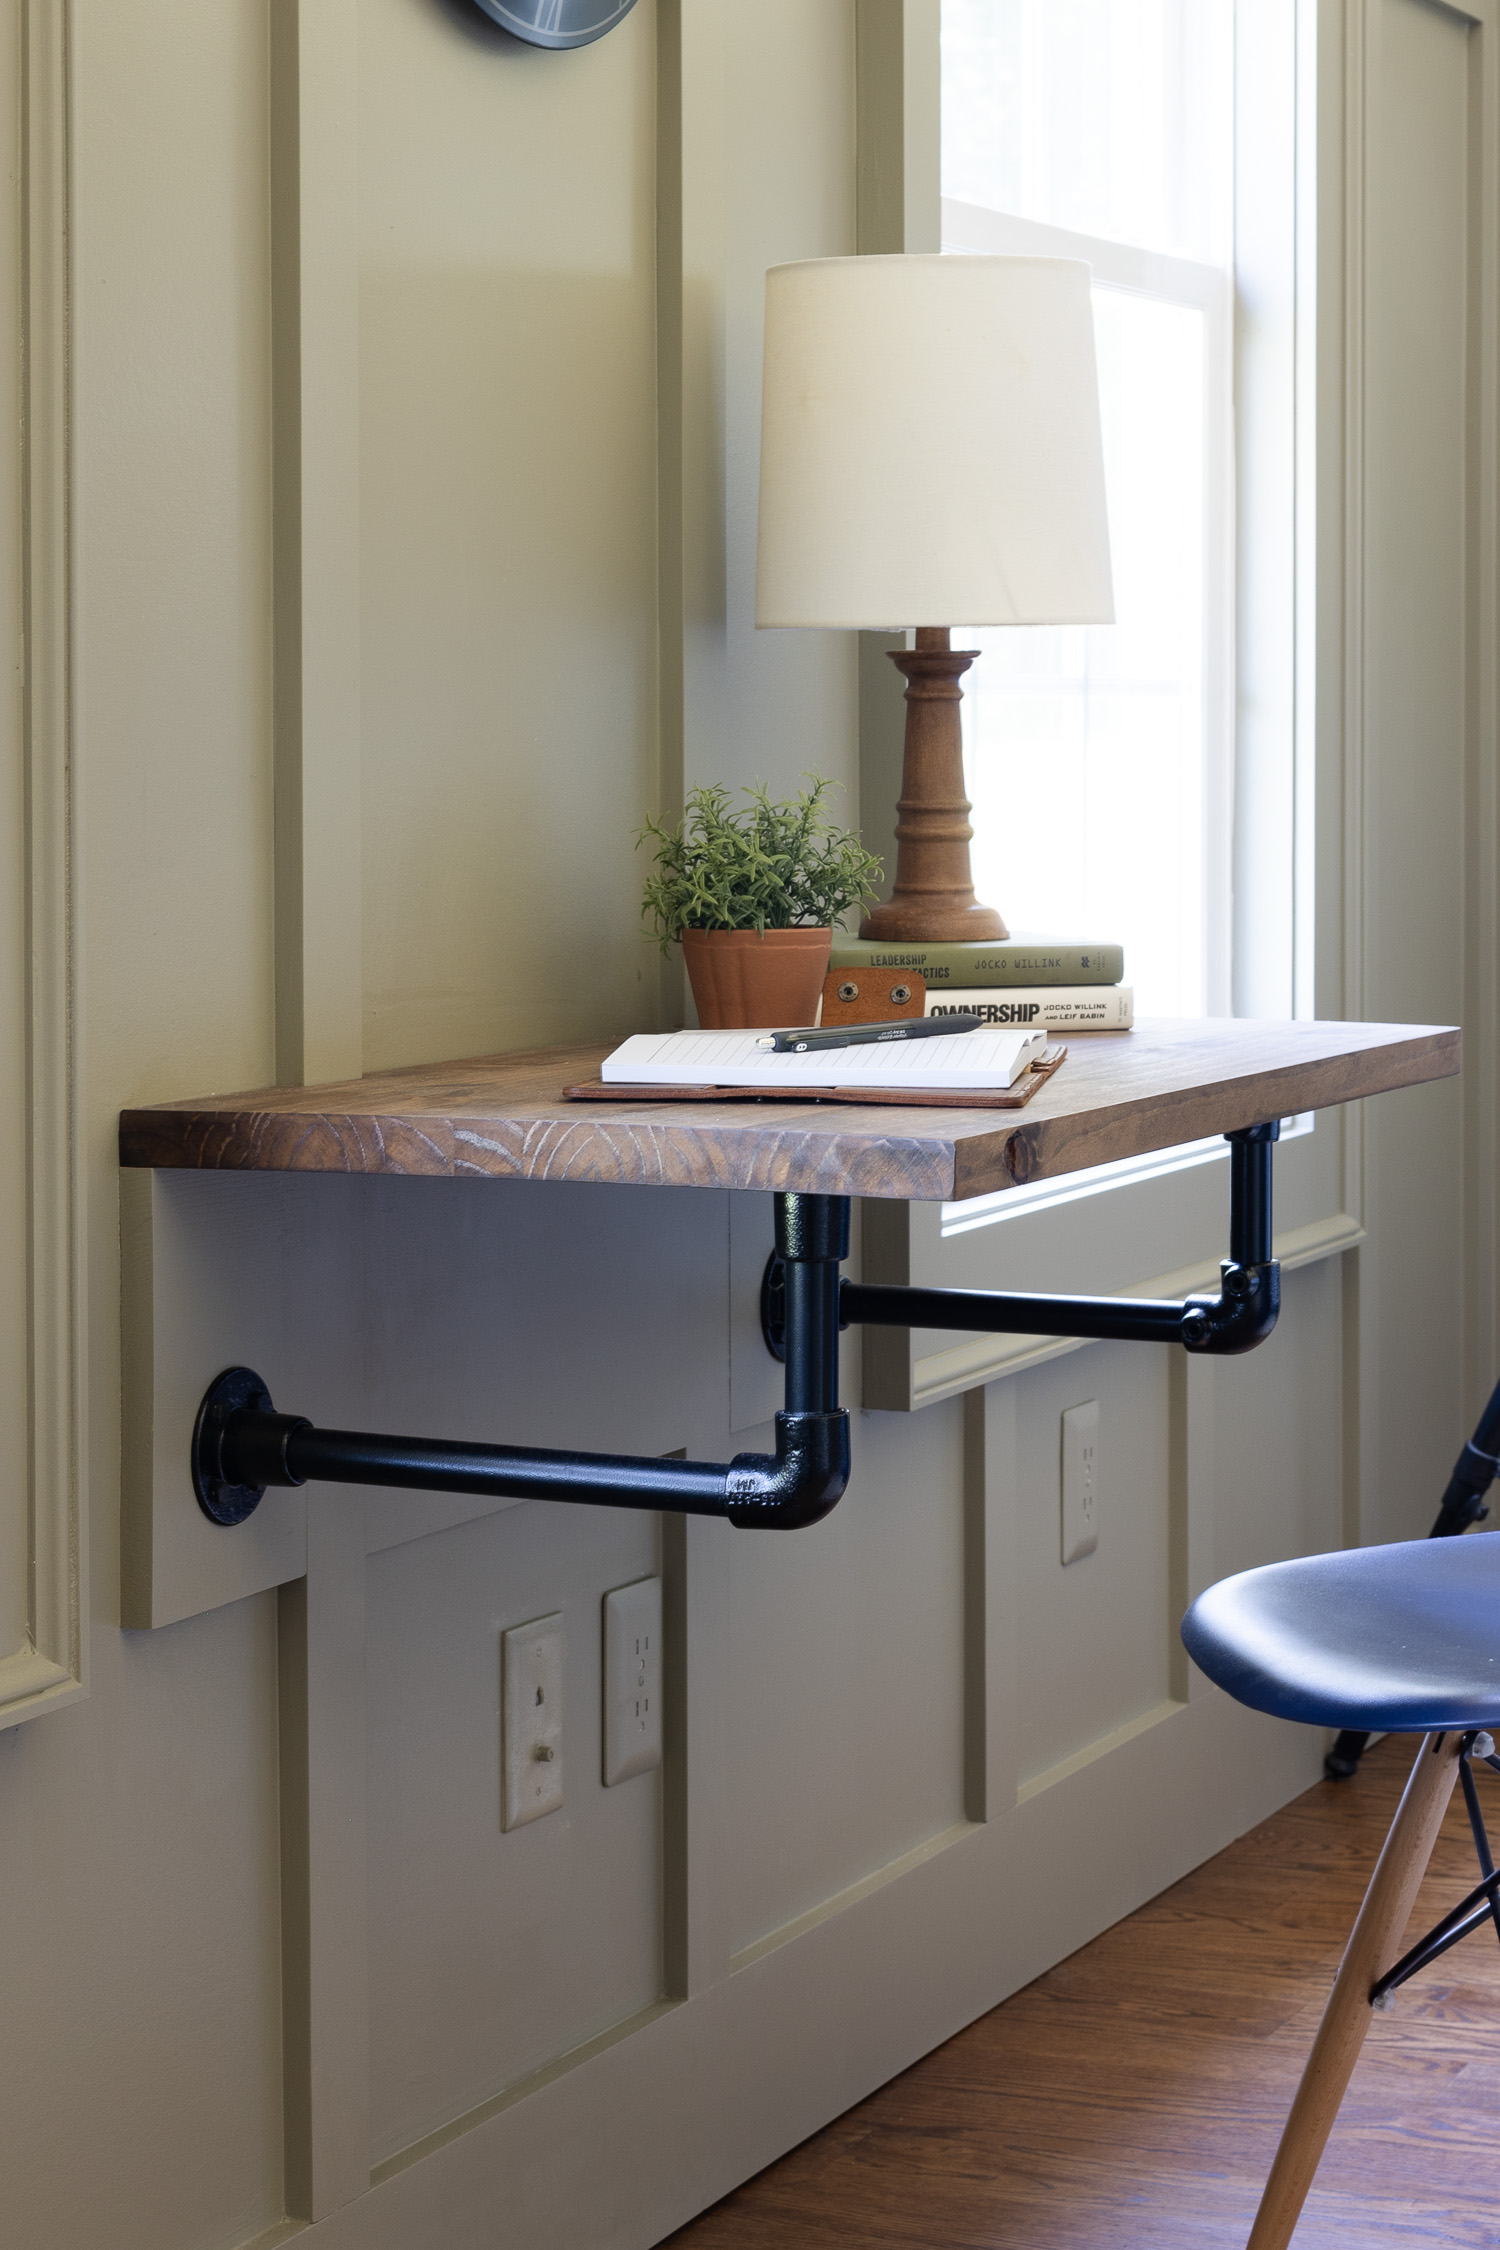
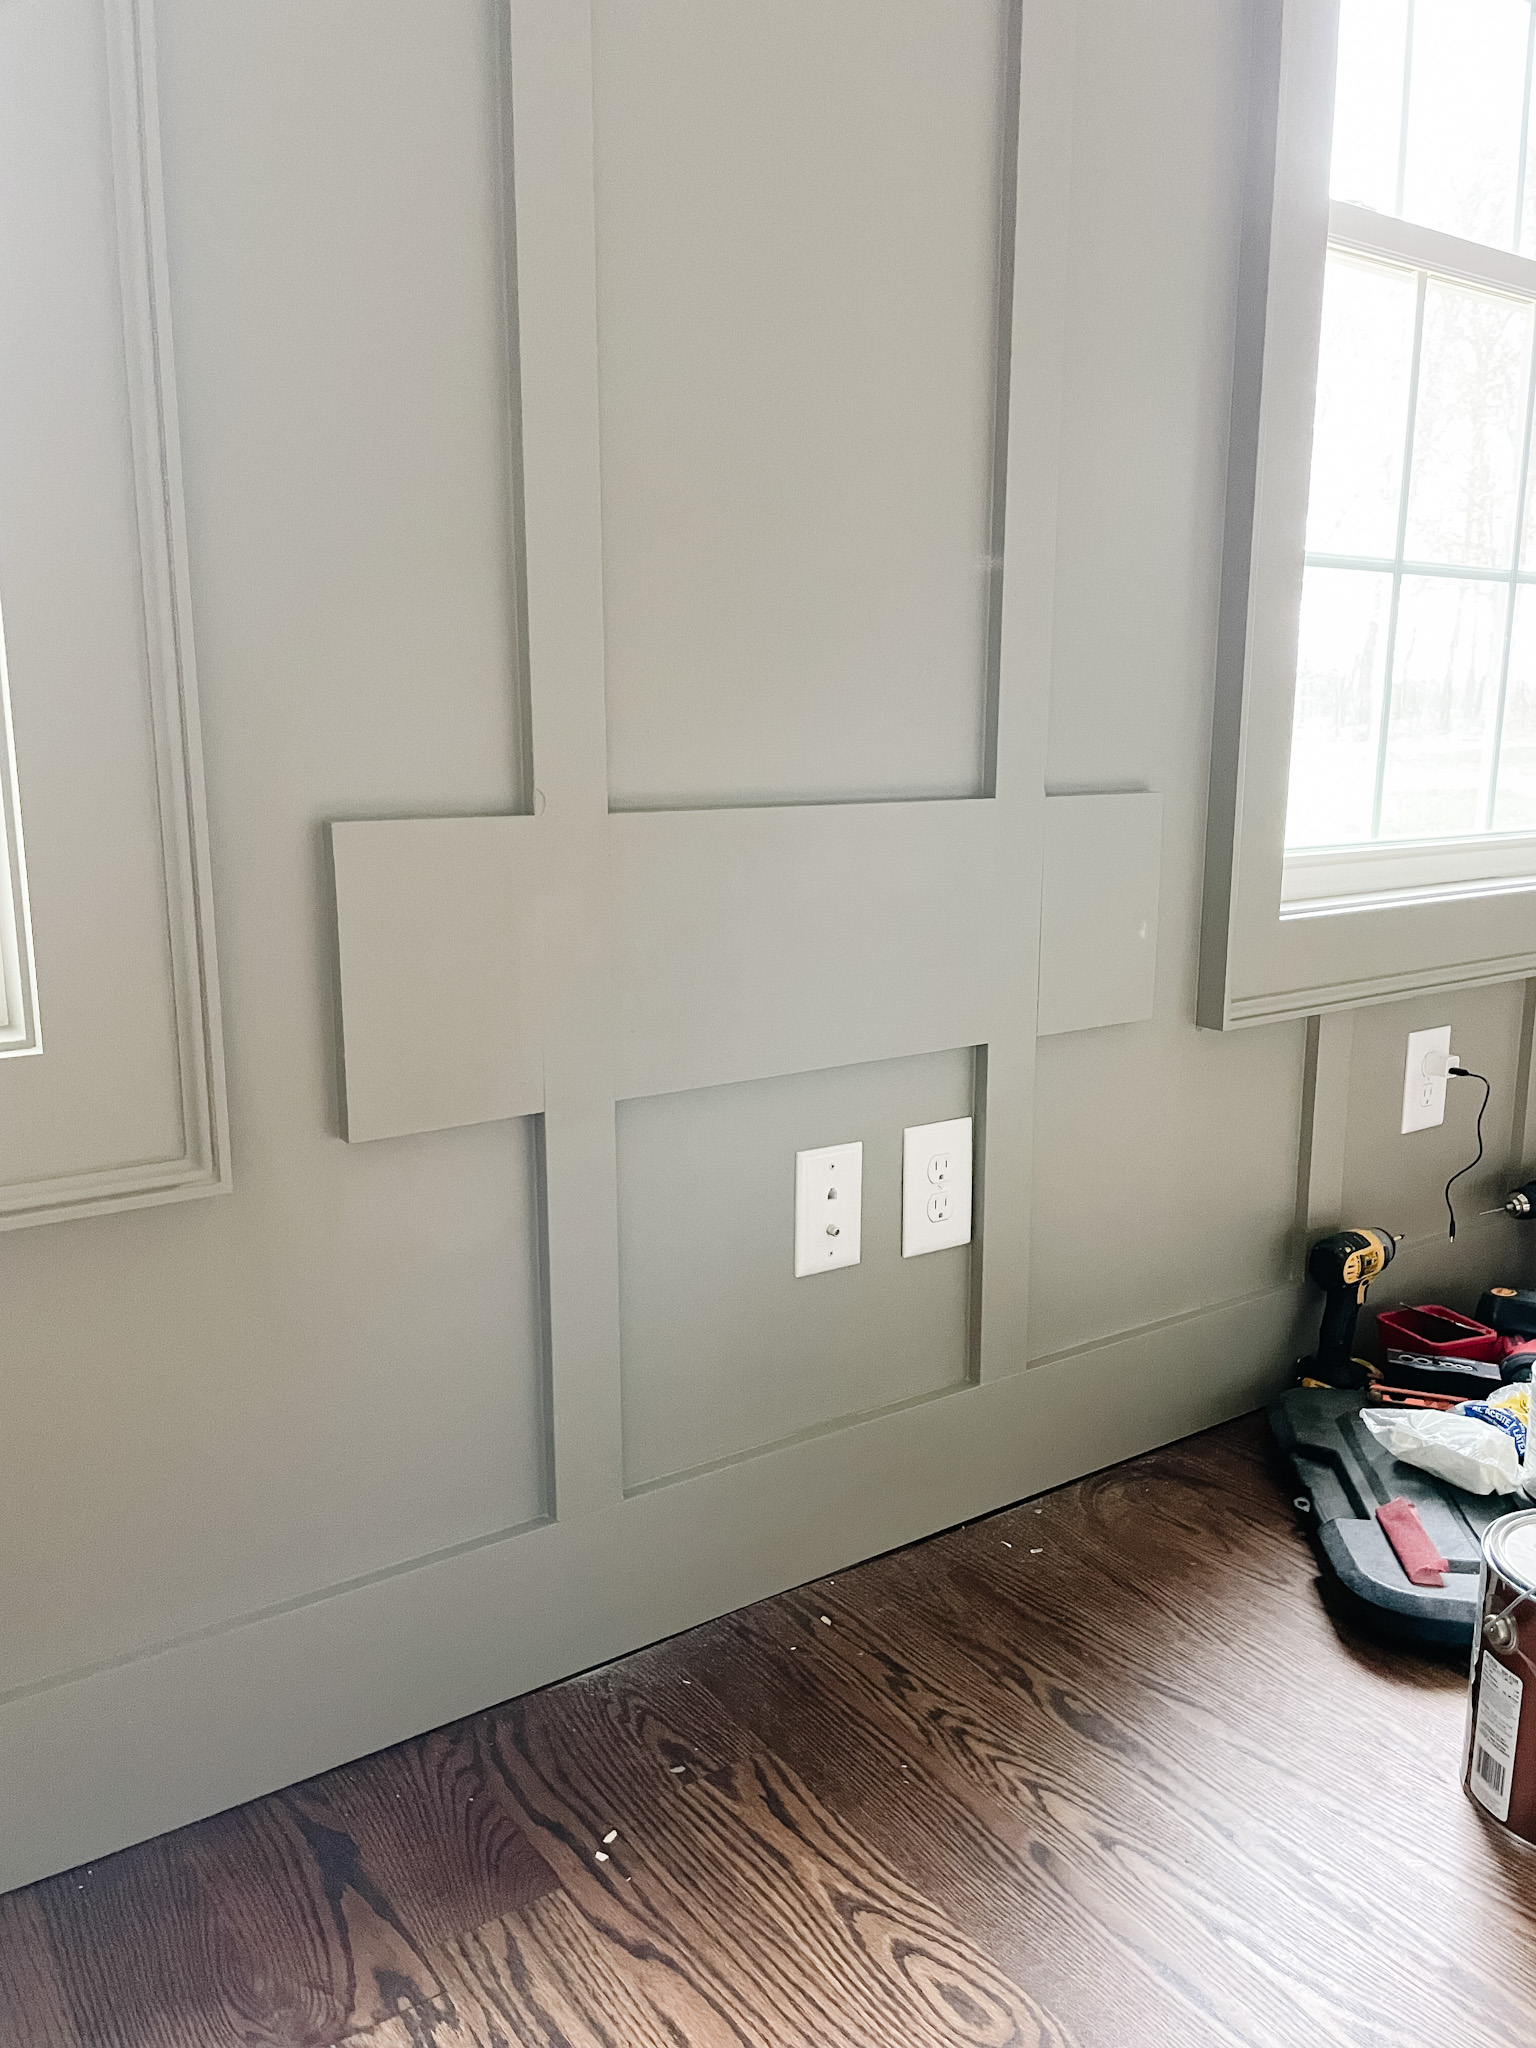
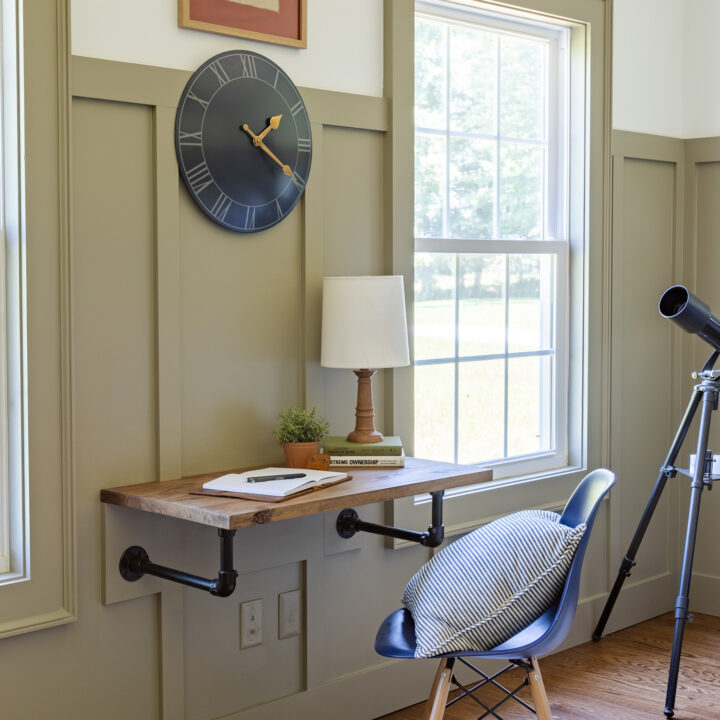
We needed out our desktop to be 41″ wide to leave room between the window frames. I didn’t want the desk to go all the way across for aesthetic purposes. Since we didn’t have studs that were evenly spaced for the pipe flanges to attach to, we added a support board to the wall so we had enough support for the desk top. This also gave us something extra to attach the flange and pipes to. You might not want or need to do this.
1. Cut down your board(s)
Even though we had the tools to cut down our desktop board; I was already in Lowes and just had them do it for me. I had them cut the length to 41″ x 18″ so that was one less step I had to complete when I got home.
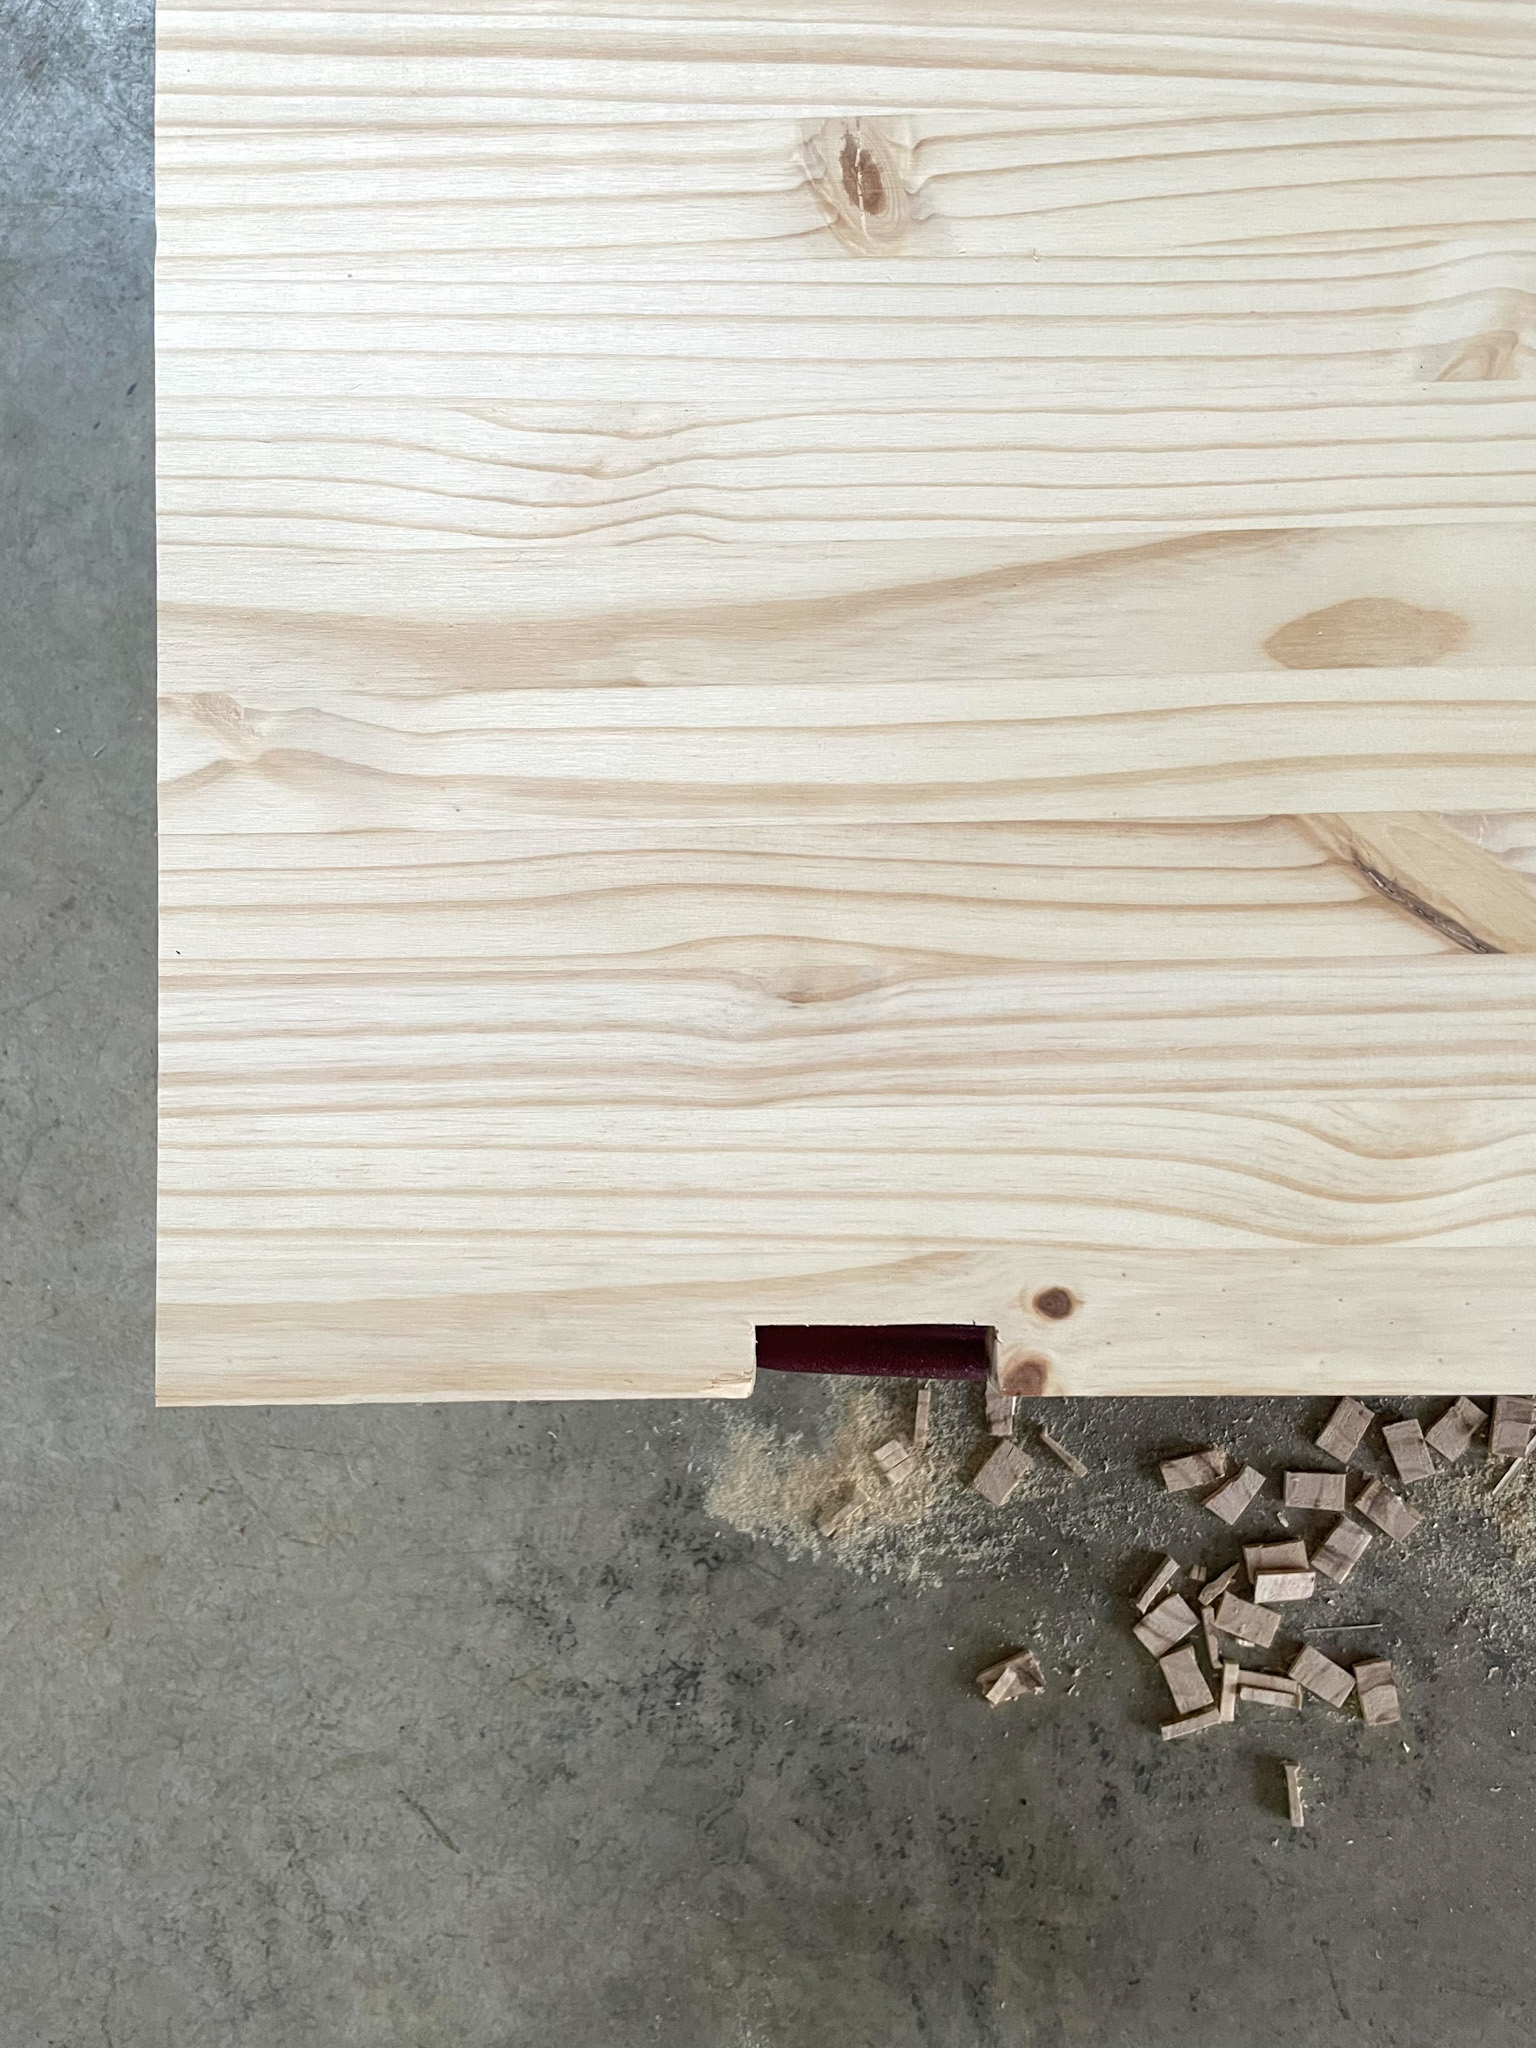
We also used a 1×8 underneath the desktop for extra support of the top and for the pipe flanges to have something to anchor into. This we cut down at home since we already had the lumber there. Due to the board and batten; we had to notch the desk top to fit around the boards on the walls.
We used bookshelf shelving boards because it gave us the depth and thickness we needed. I can’t find a link to it on the Lowe’s Website but it is in the store in the lumber aisle; just look.
(NOTE: Some of these photos aren’t the greatest because they were taken while building or taken from videos, but I feel they are clear enough and better than no photos at all)
2. Pre-Finish Your Desktop
I recommend sanding and staining your desktop before you install it. It is easier to stain your wood and do any little touch ups once it is installed. Trying to sand and stain your board after you have installed it won’t be quite as simple once the pipes and flanges are attached to the bottom.

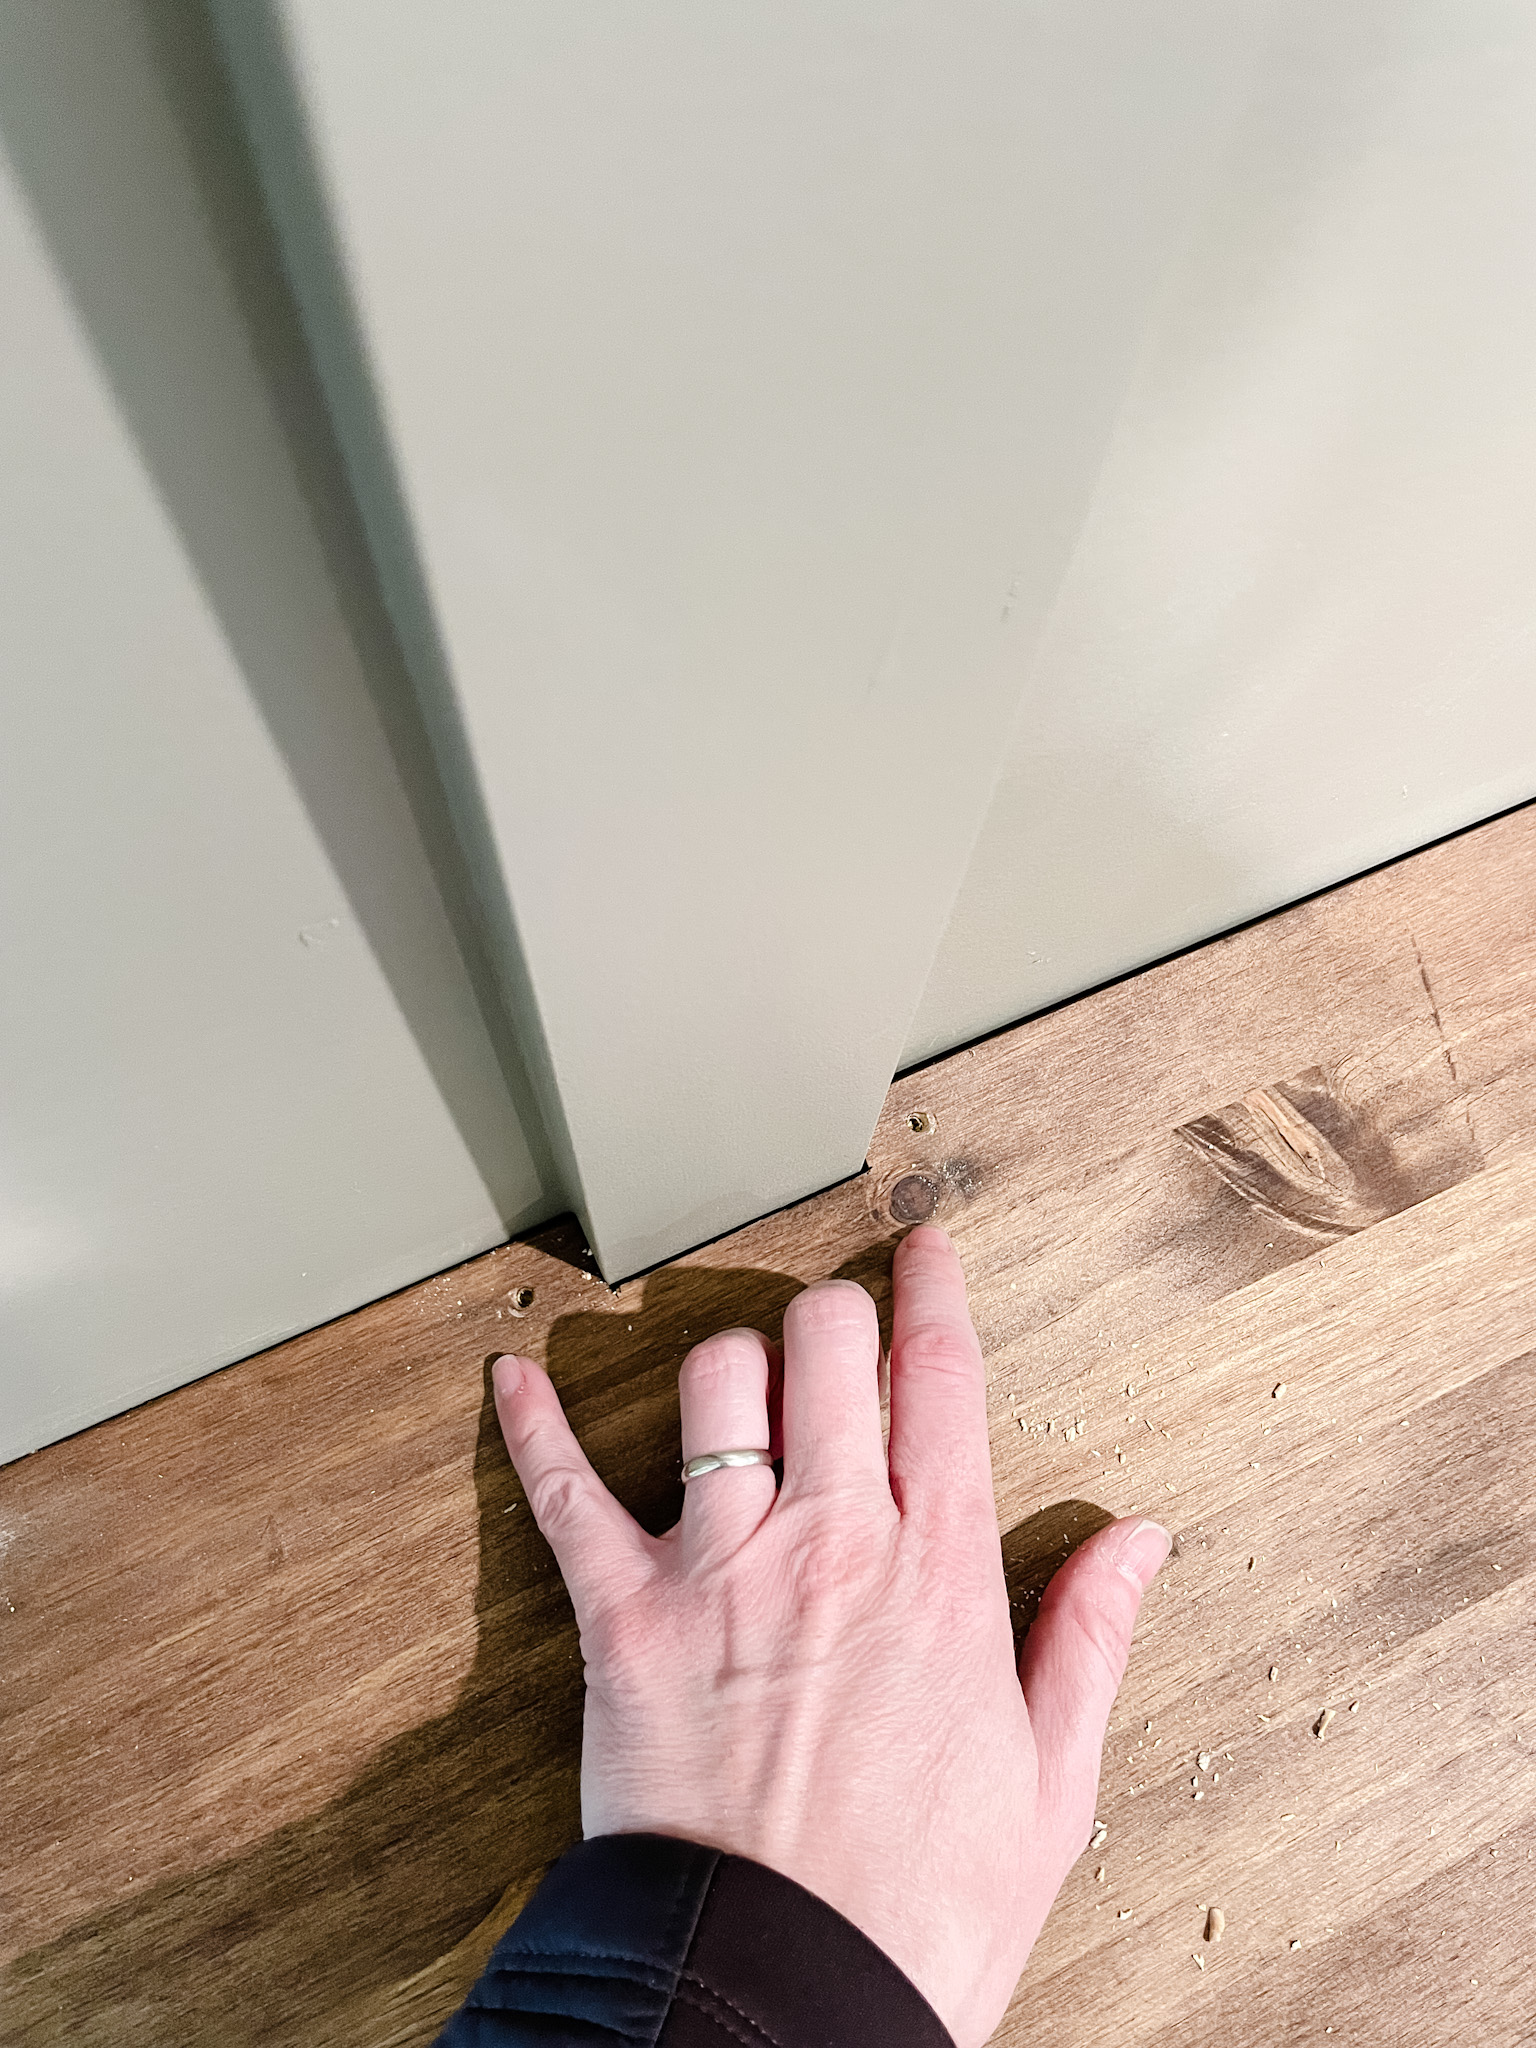
3. Add Wooden Support Board to Wall (this is optional)
This is something we chose to do because we didn’t have direct studs to attach the flange and pipe to. When we had the room built we asked the framers to add a wooden board running horizontal between the two windows at a certain height. This did not happen. If it were there we wouldn’t have needed the board on the wall. However, it looks fine and shows you what you might need to do in a space that already has drywall up and your flange attachment doesn’t line up with any and all studs in the wall.
We caulked and painted the board to blend into the wall. This wall act as an additional support for the desktop.

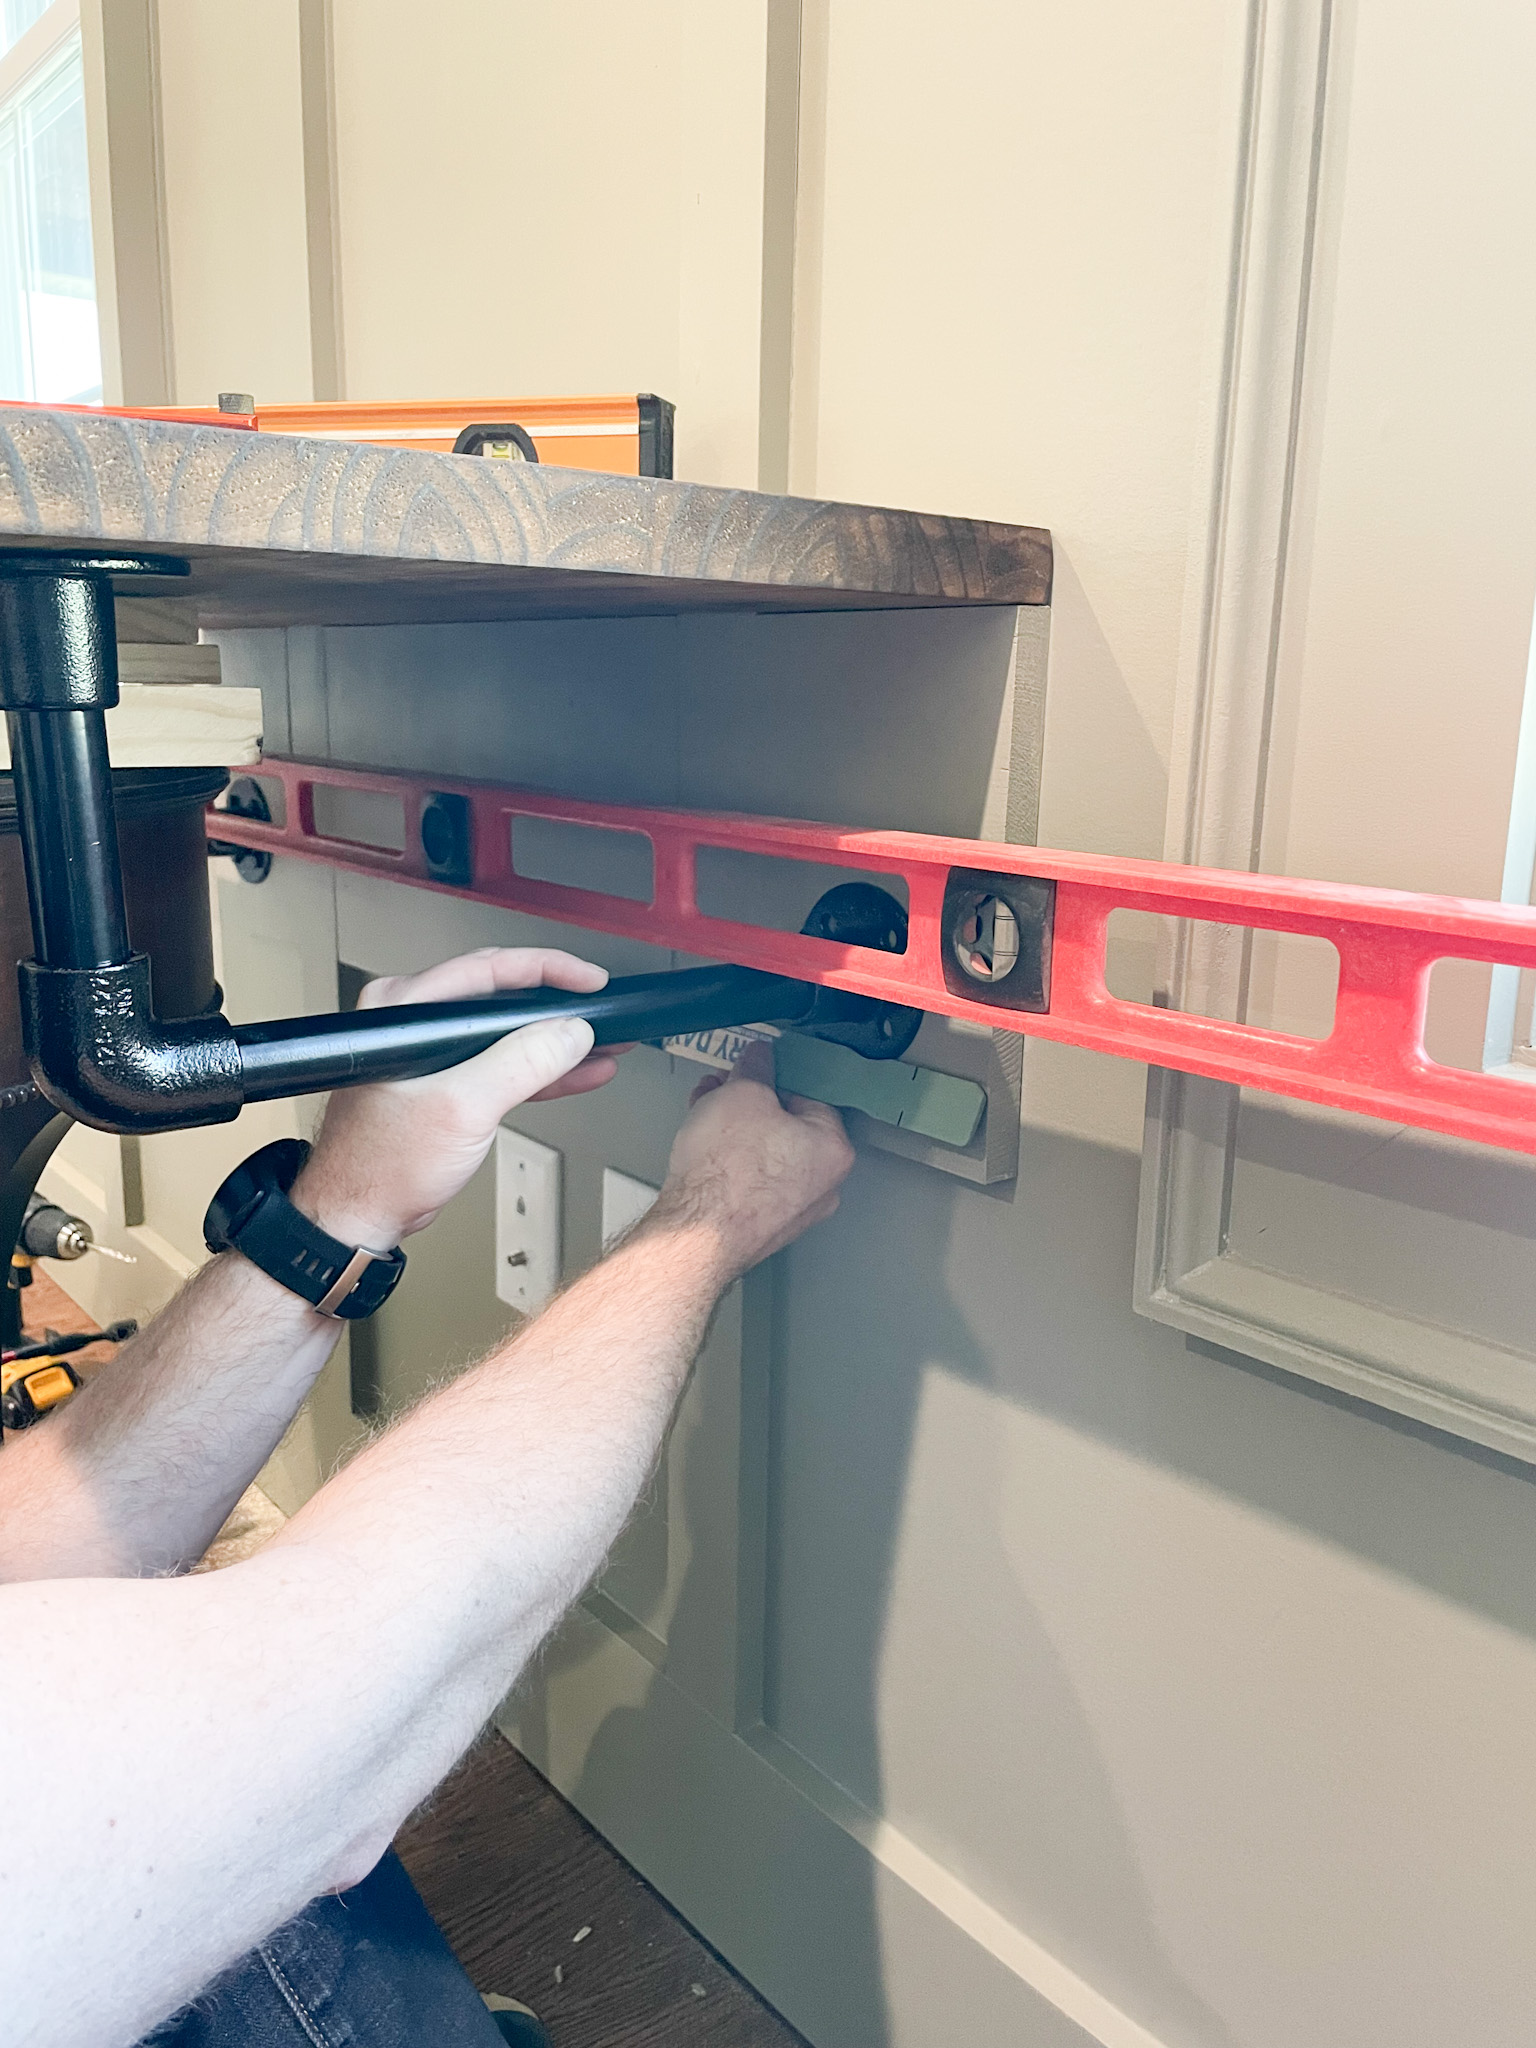
4. Determine Where to Line Up Your Pipes
You will need to determine placement of the flanges that attach to the pipes which are the arms of the desk. Prop the desktop up on a table in the place it will sit. Get it nice and level. Position the pipe and flanges where they will attach to the wall. Using a level to ensure your placement is perfect and mark your bolt placement with a pencil.
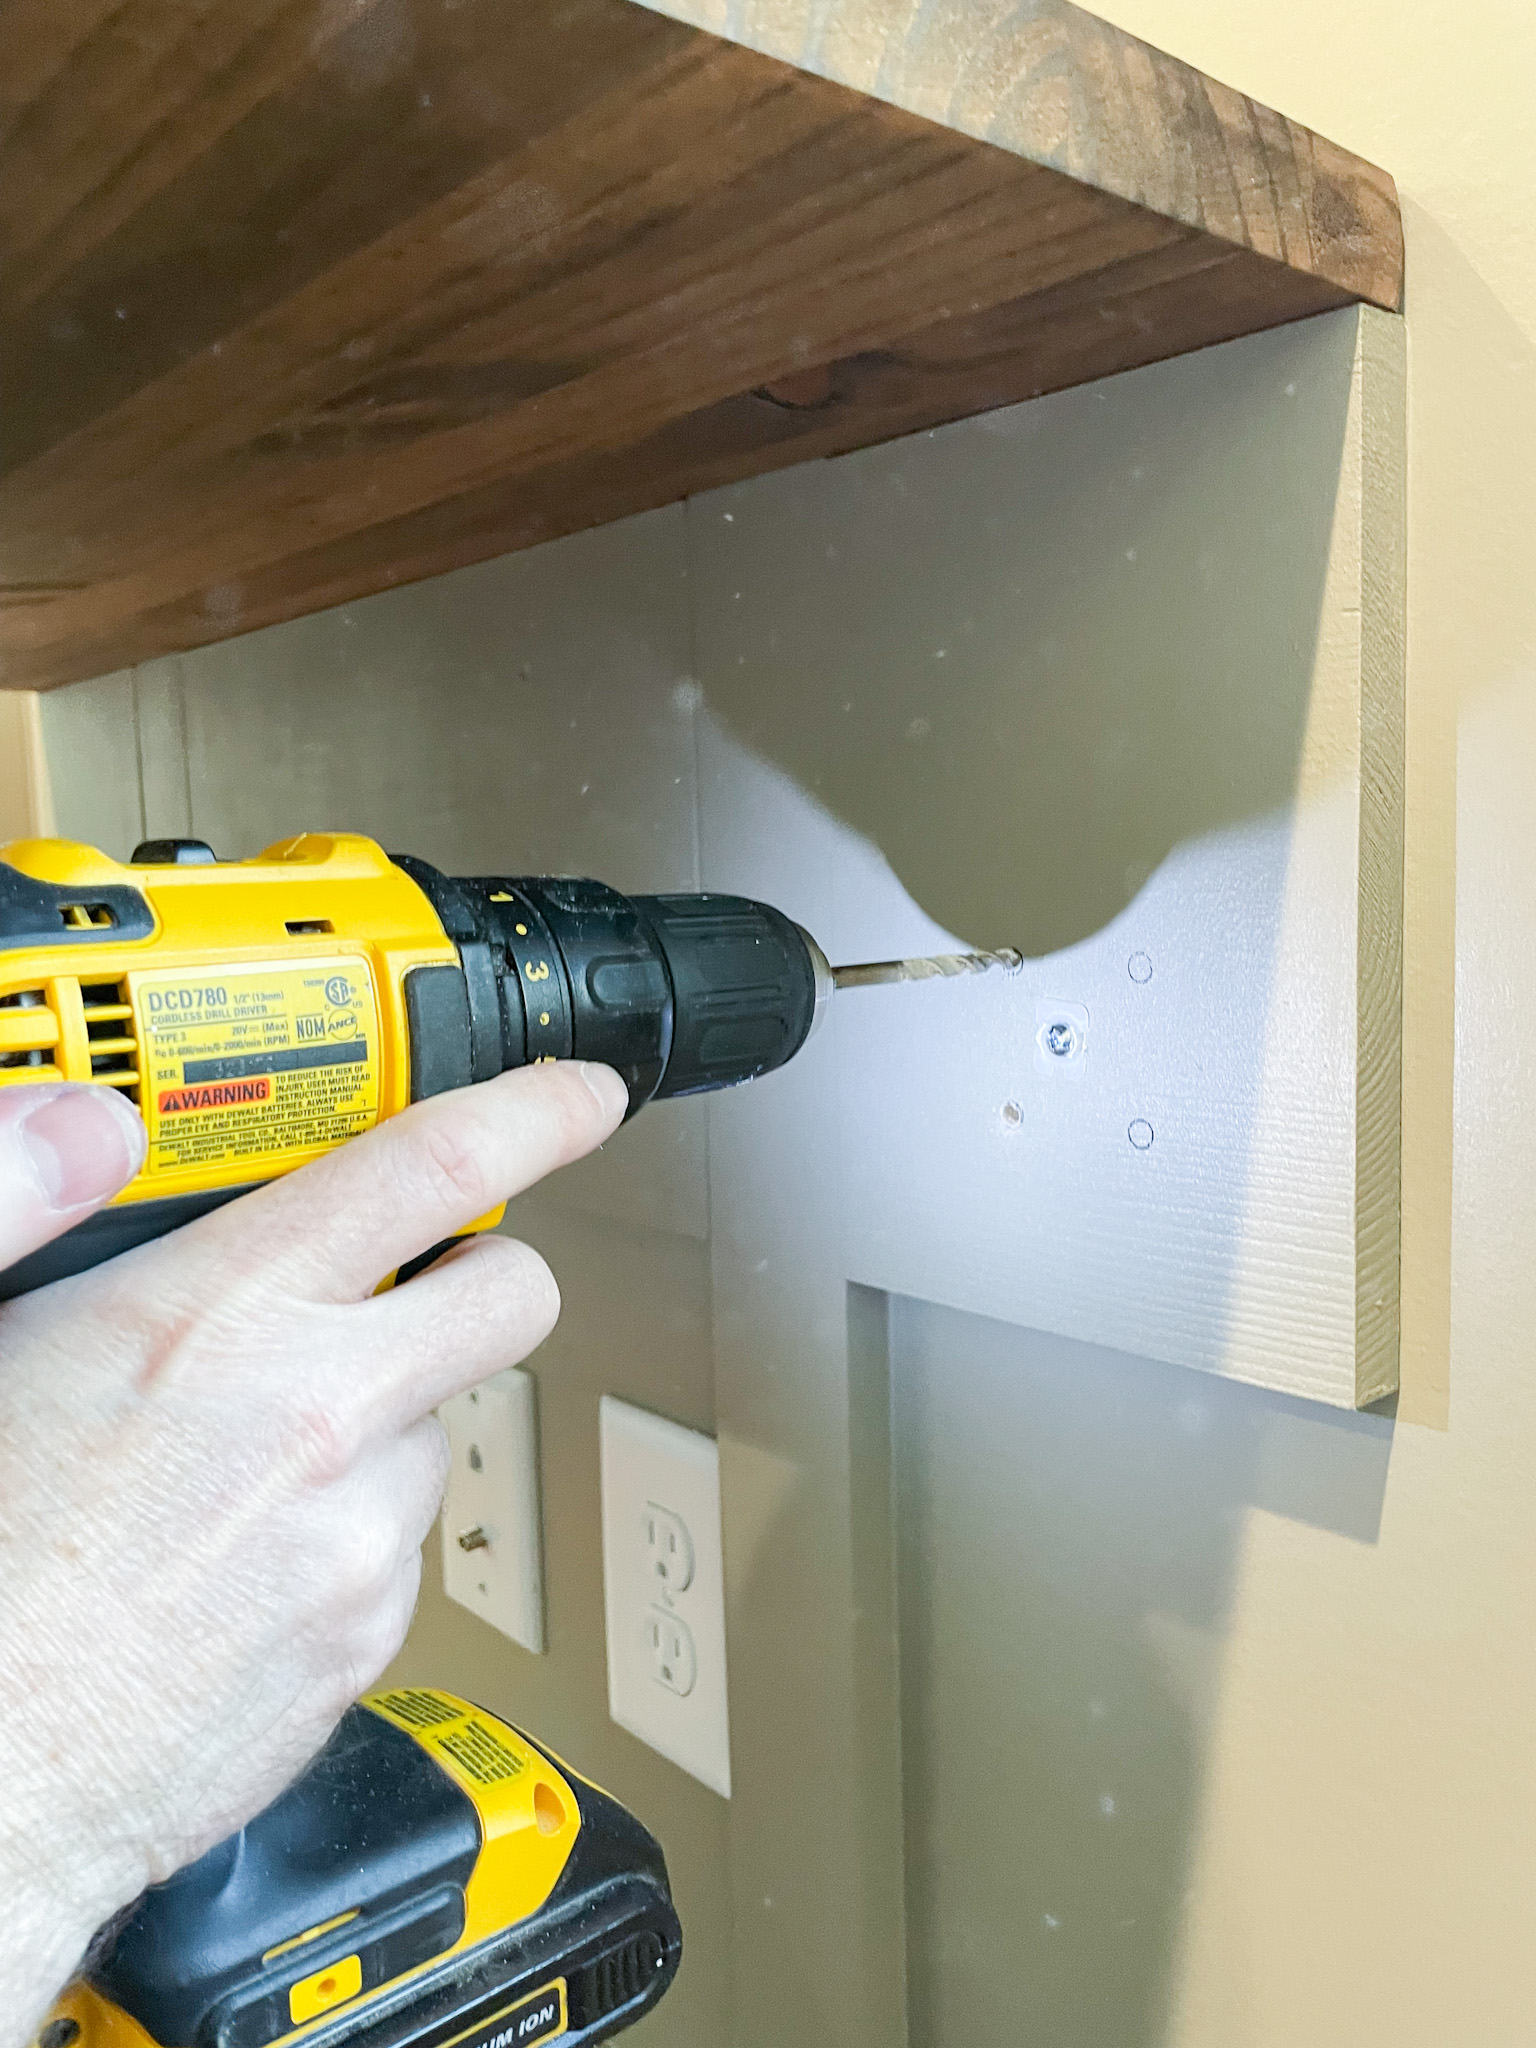
4. Pre-Drill for the Bolts
Now that you have marked your bolts you wan to pre-drill. We also used a toggle bolt into the wood board on the center of where the flanges will go as well as the bolts. We attached that first.

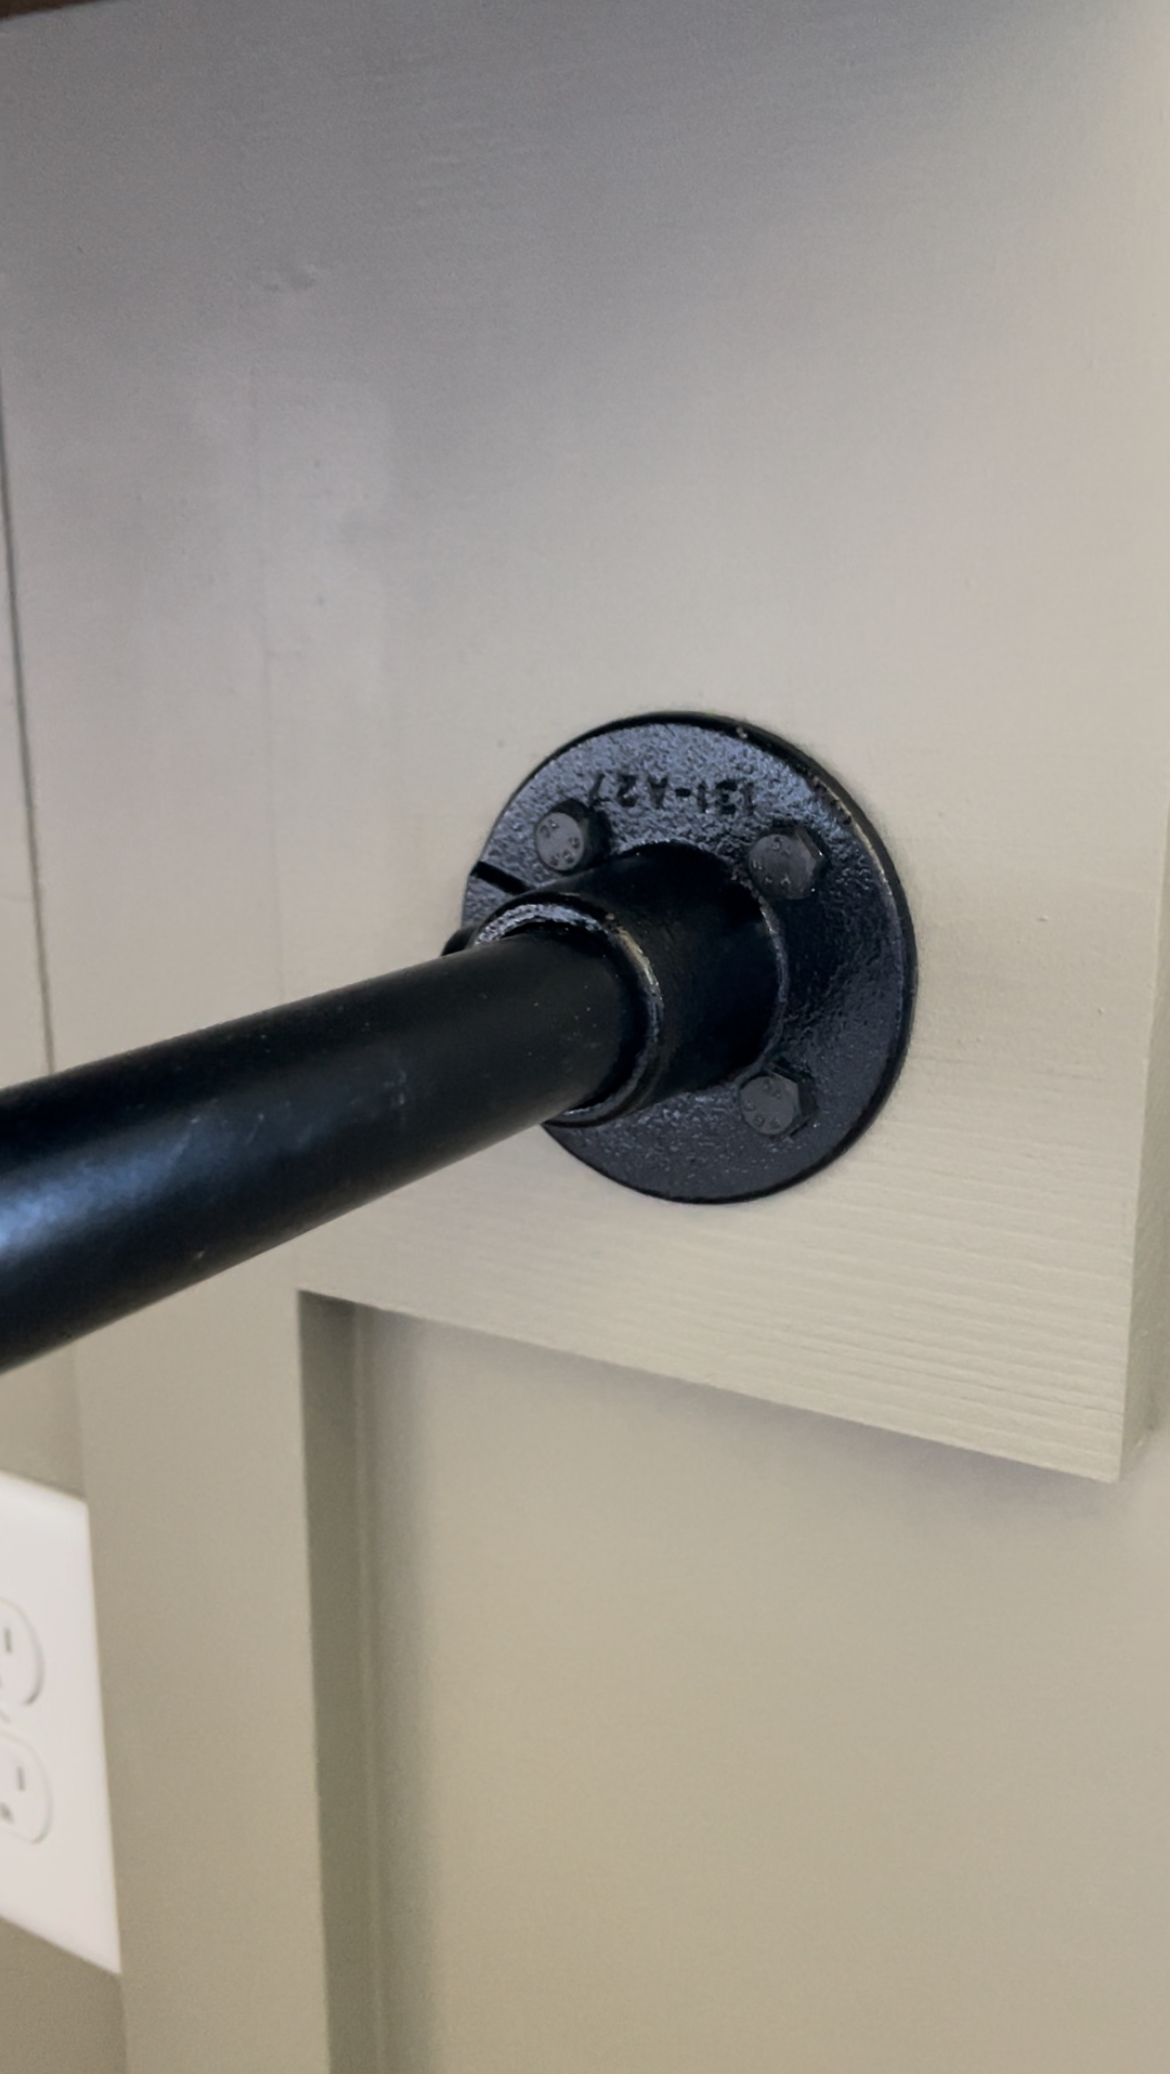
5. Attach the Flanges and Pipes
I love these pieces from Lowes; they just fit together perfectly and are ready for use. You will need two pipes of desired length, a flange and one elbow to build the arms or support of your desktop. Place your flange and your pipe together and bolt them to the wall or extra piece of wood like we did. If you do not have studs where you are connecting the pipe flange; you will need additional support. Do not screw these directly into drywall – they will not stay.
Attach the flanges and pipes to the bottom of the desktop and the wall that creates the support for the desk.
We used Two 90 degree steel pipe elbows, Four 3/4″ steel pipe flanges, Two 3/4 x 12″ structural steel pipes and Two 3/4 x 6″ structural steel pipes. The size of your desktop will determine how long your longest pipe needs to be.

Amazon Storefront
Follow my Amazon Storefront to find more looks for less and all our finds!
TIPS!
•Determine your desktop size before you purchase your longest pipe
• Sand and stain your desktop before attaching it to the pipe and walls

6. Attach the Desktop to the Support Board
We used two brass screws on each side of the desktop to attach to the support board beneath. We filled with a little wood filler, sanded and touched up the stain.

7. Finish DIY Wood Pipe Desk with Poly
I used a wipe on poly in a matte finish just to give it some protection, but this is optional. You could also do a brush on poly in a more shiny finish if you prefer; choice is always yours.
How Much Did Building this DIY Wood Pipe Desk Cost?
The goal was to stay under $100 for this DIY build. With the pipes, flanges, wood, bolts, stain, and toggle bolts we spent around $80. The stain, caulk, paint, support board and wood filler we already had on hand and all the tools.
Frequently Asked Questions
DIY Wood Pipe Desk
So, what do you think? I love the look of the pipe with the wood giving it an industrial look. The room has a vintage feel to it, but the desk adds a new dimension to the space that I love.
Does our son do his homework here? That is really the question and YES…YES he does! Which makes us so happy that he actually uses it during the school year.

Follow for home decor, DIY and to shop: Instagram | Pinterest | LiketoKnowit
DIY Wood Pipe Desk
Build this easy DIY wood pipe desk! This diy desk is simple to make and with just a few tools and supplies you can build this desk in no time!
Materials
- Two 90 degree steel pipe elbows
- Four 3/4" steel pipe flanges
- Two 3/4 x 12" structural steel pipes
- Two 3/4 x 6" structural steel pipes
- 1x10' board
- 24″ x 48″ Bookcase Shelving
- Trim Screws
- Toggle Bolt (optional)
- Lag Bolts
- 3/16" Toggle Bolts
- Wood Filler
- Provincial Wood Stain (optional)
- Wipe on Poly (optional)
Tools
- Drill and bits
- Orbital Sander or sanding block to sand by hand
- Cordless Screw Driver
- Level
- Miter Saw
Instructions
- Cut down your boards
- Pre-finish your desktop
- Add Wooden Support Board to Wall (this is optional)
- Determine Where to Line Up Your Pipes
- Pre-Drill for the Bolts
- Attach the Flanges and Pipes
- Attach the Desktop to the Support Board
- Finish DIY Wood Pipe Desk with Poly